
Brand Presets
Overview
A brand preset is a saved logo and colour scheme that dashboards follow instead of copy. Set your client's branding up once, apply it to as many dashboards as you like, and when the branding changes, edit the preset — every dashboard following it picks up the change.
One preset can be the default, which every new dashboard gets automatically, so a fresh dashboard is already on-brand before you add a single widget.
Creating a Brand Preset
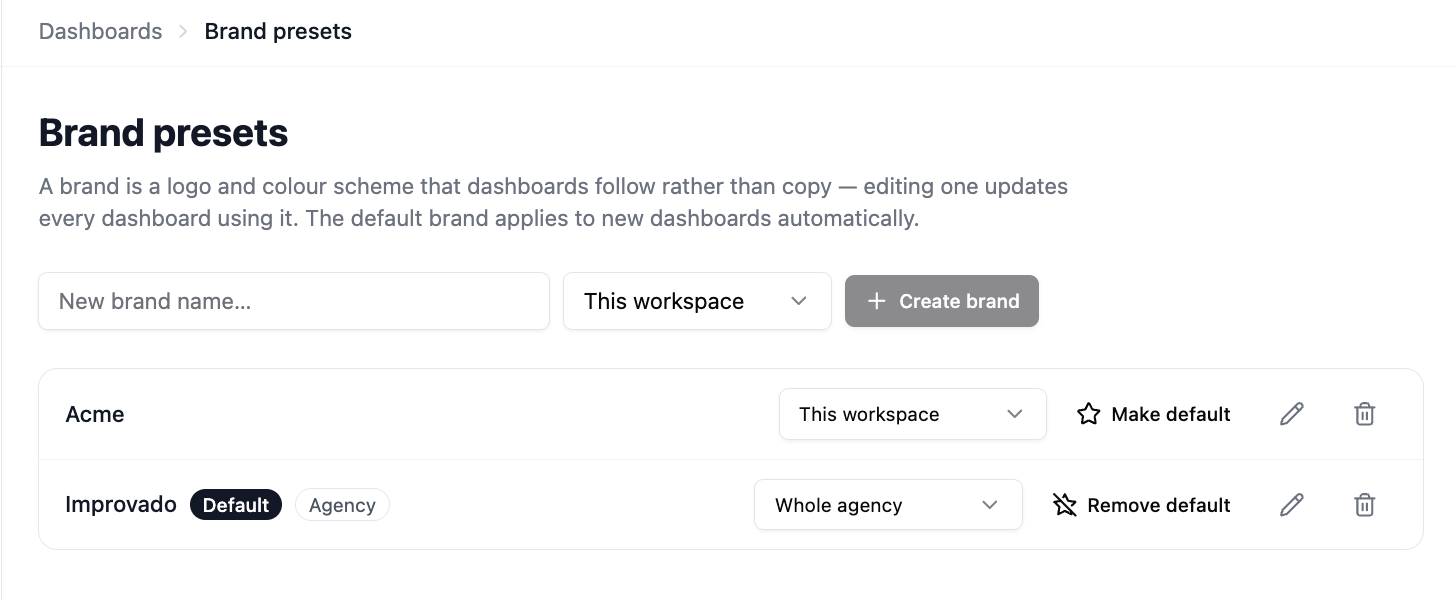
Open Dashboards and click Brand presets in the toolbar.
Type a name — usually the client or the brand it represents — choose where it applies, and click Create brand.
The brand opens on a preview dashboard with the Brand appearance panel on the right. Set the logo, colours, chart palette, table and KPI styling — the preview repaints as you go, so you see what the branding will look like on a real dashboard.
Click Save brand. Cancel discards everything since your last save.
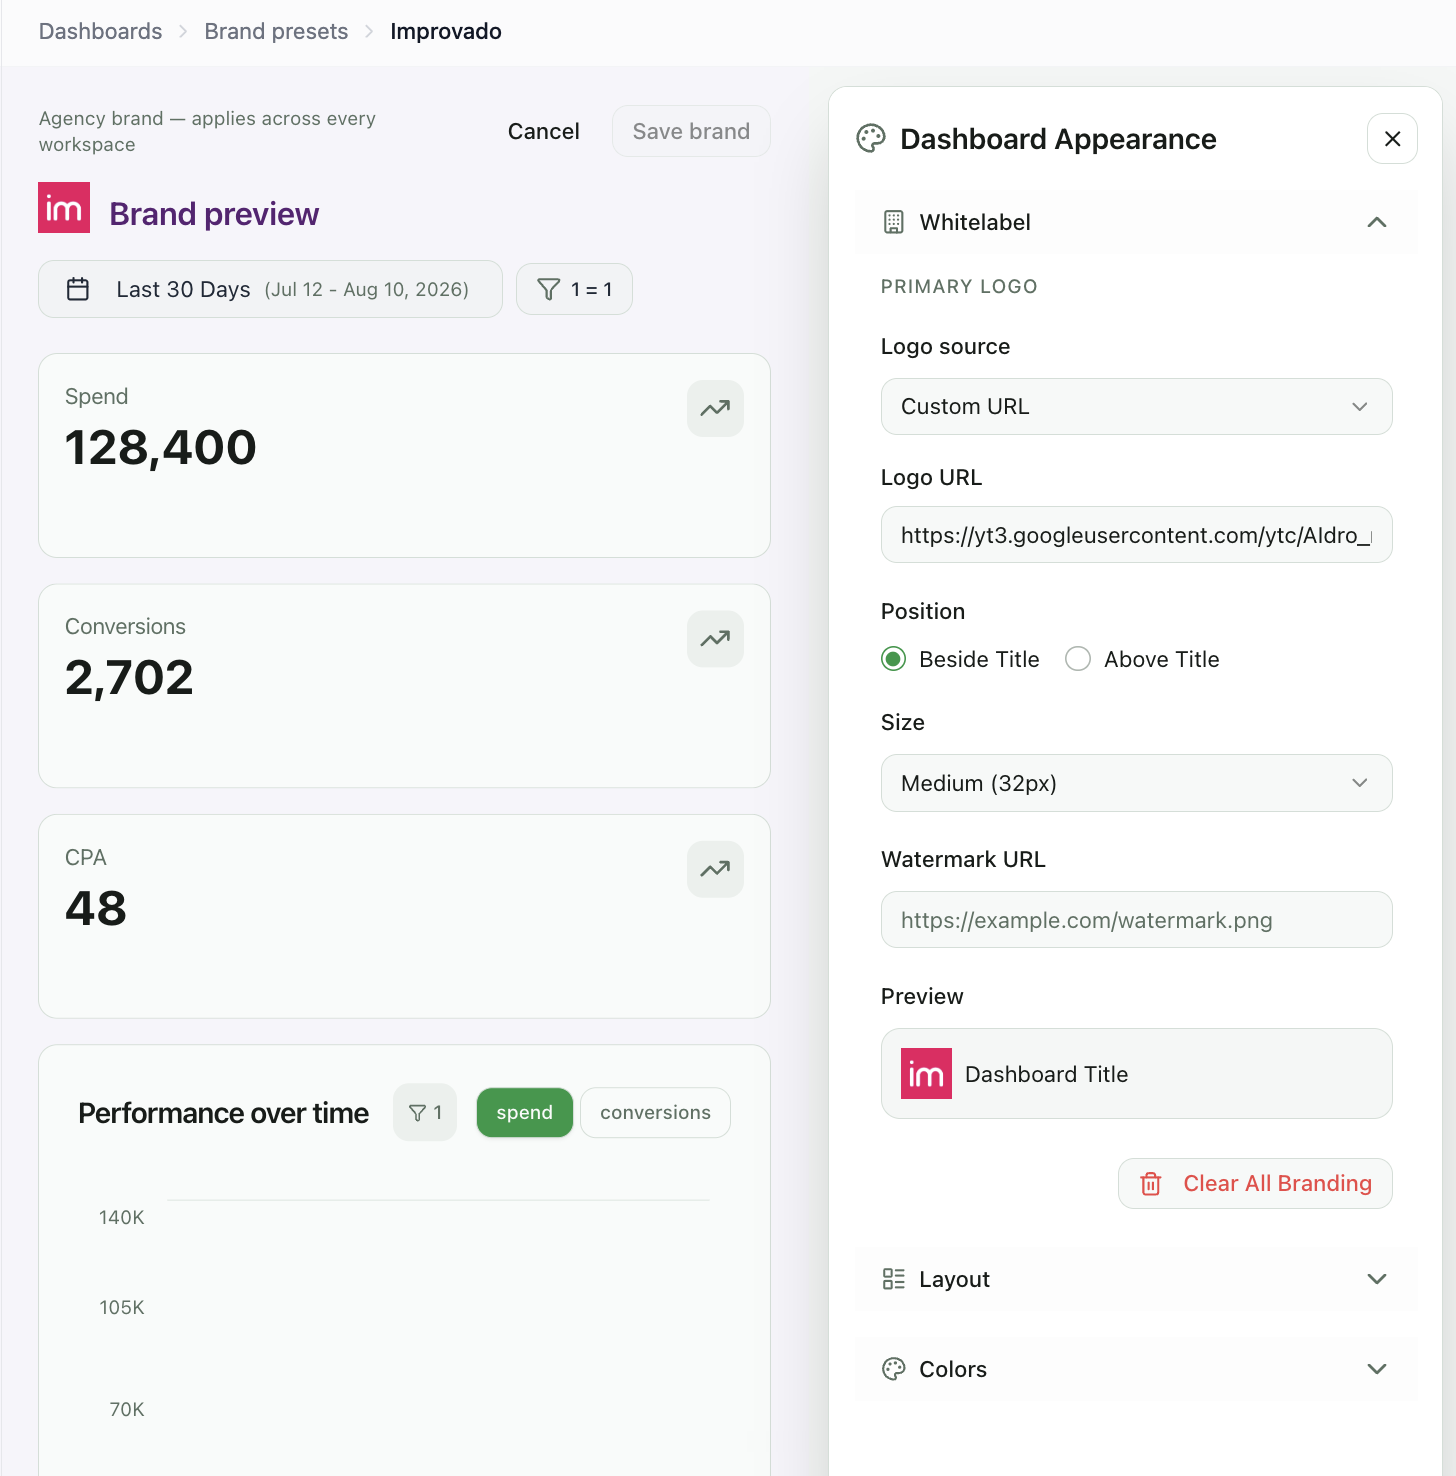
Note: The preview uses sample numbers, not your data. It exists to show the branding, so it looks the same in every workspace.
Where a Brand Applies
Each preset lives at one of two levels, set by the dropdown next to it:
- This workspace — available on dashboards in the current workspace only.
- Whole agency — available in every workspace of your agency. Useful for your own agency branding, or for a client who spans several workspaces.
The Brand presets page shows both: the presets belonging to the current workspace, plus every agency-wide one. Agency-wide presets carry an Agency label.
Note: Only an admin who can manage users can create an agency-wide preset or move one between levels — a change there reaches every workspace in the agency. Everyone else sees the level, but cannot change it.
Setting the Default
Click Make default on a preset to have new dashboards start with it. Remove default takes it back off.
A workspace can have its own default while the agency has one too. When both exist, the workspace default wins, and the agency one is labelled Agency default so it is clear which branding new dashboards actually get.
If no default is set, new dashboards use the standard Improvado look.
Applying a Brand to an Existing Dashboard
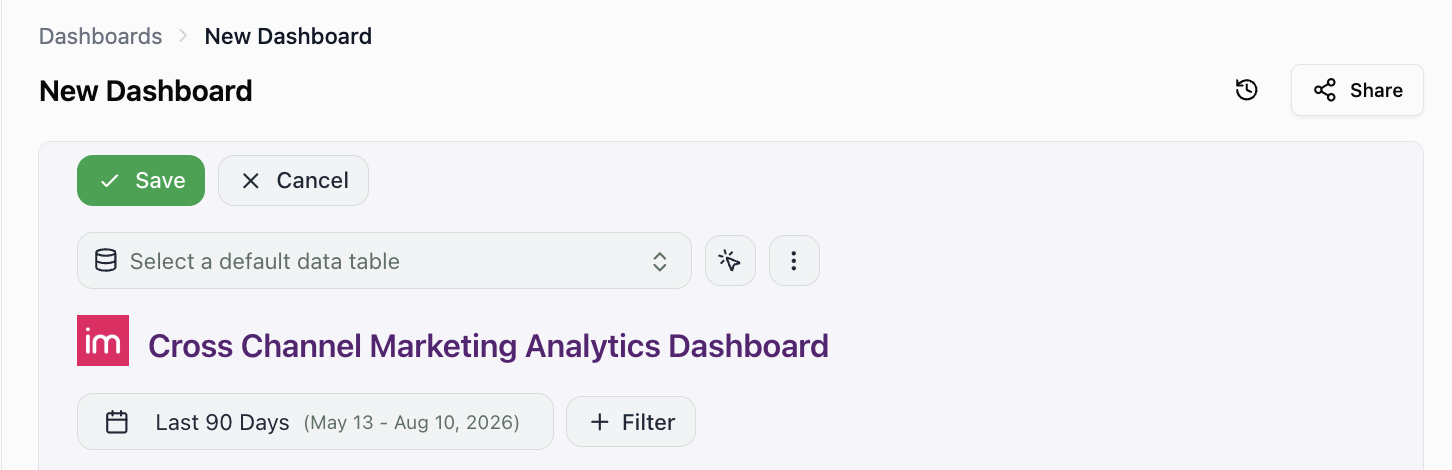
Open the dashboard and enter Edit mode.
Open the More menu (⋮) and select Customize.
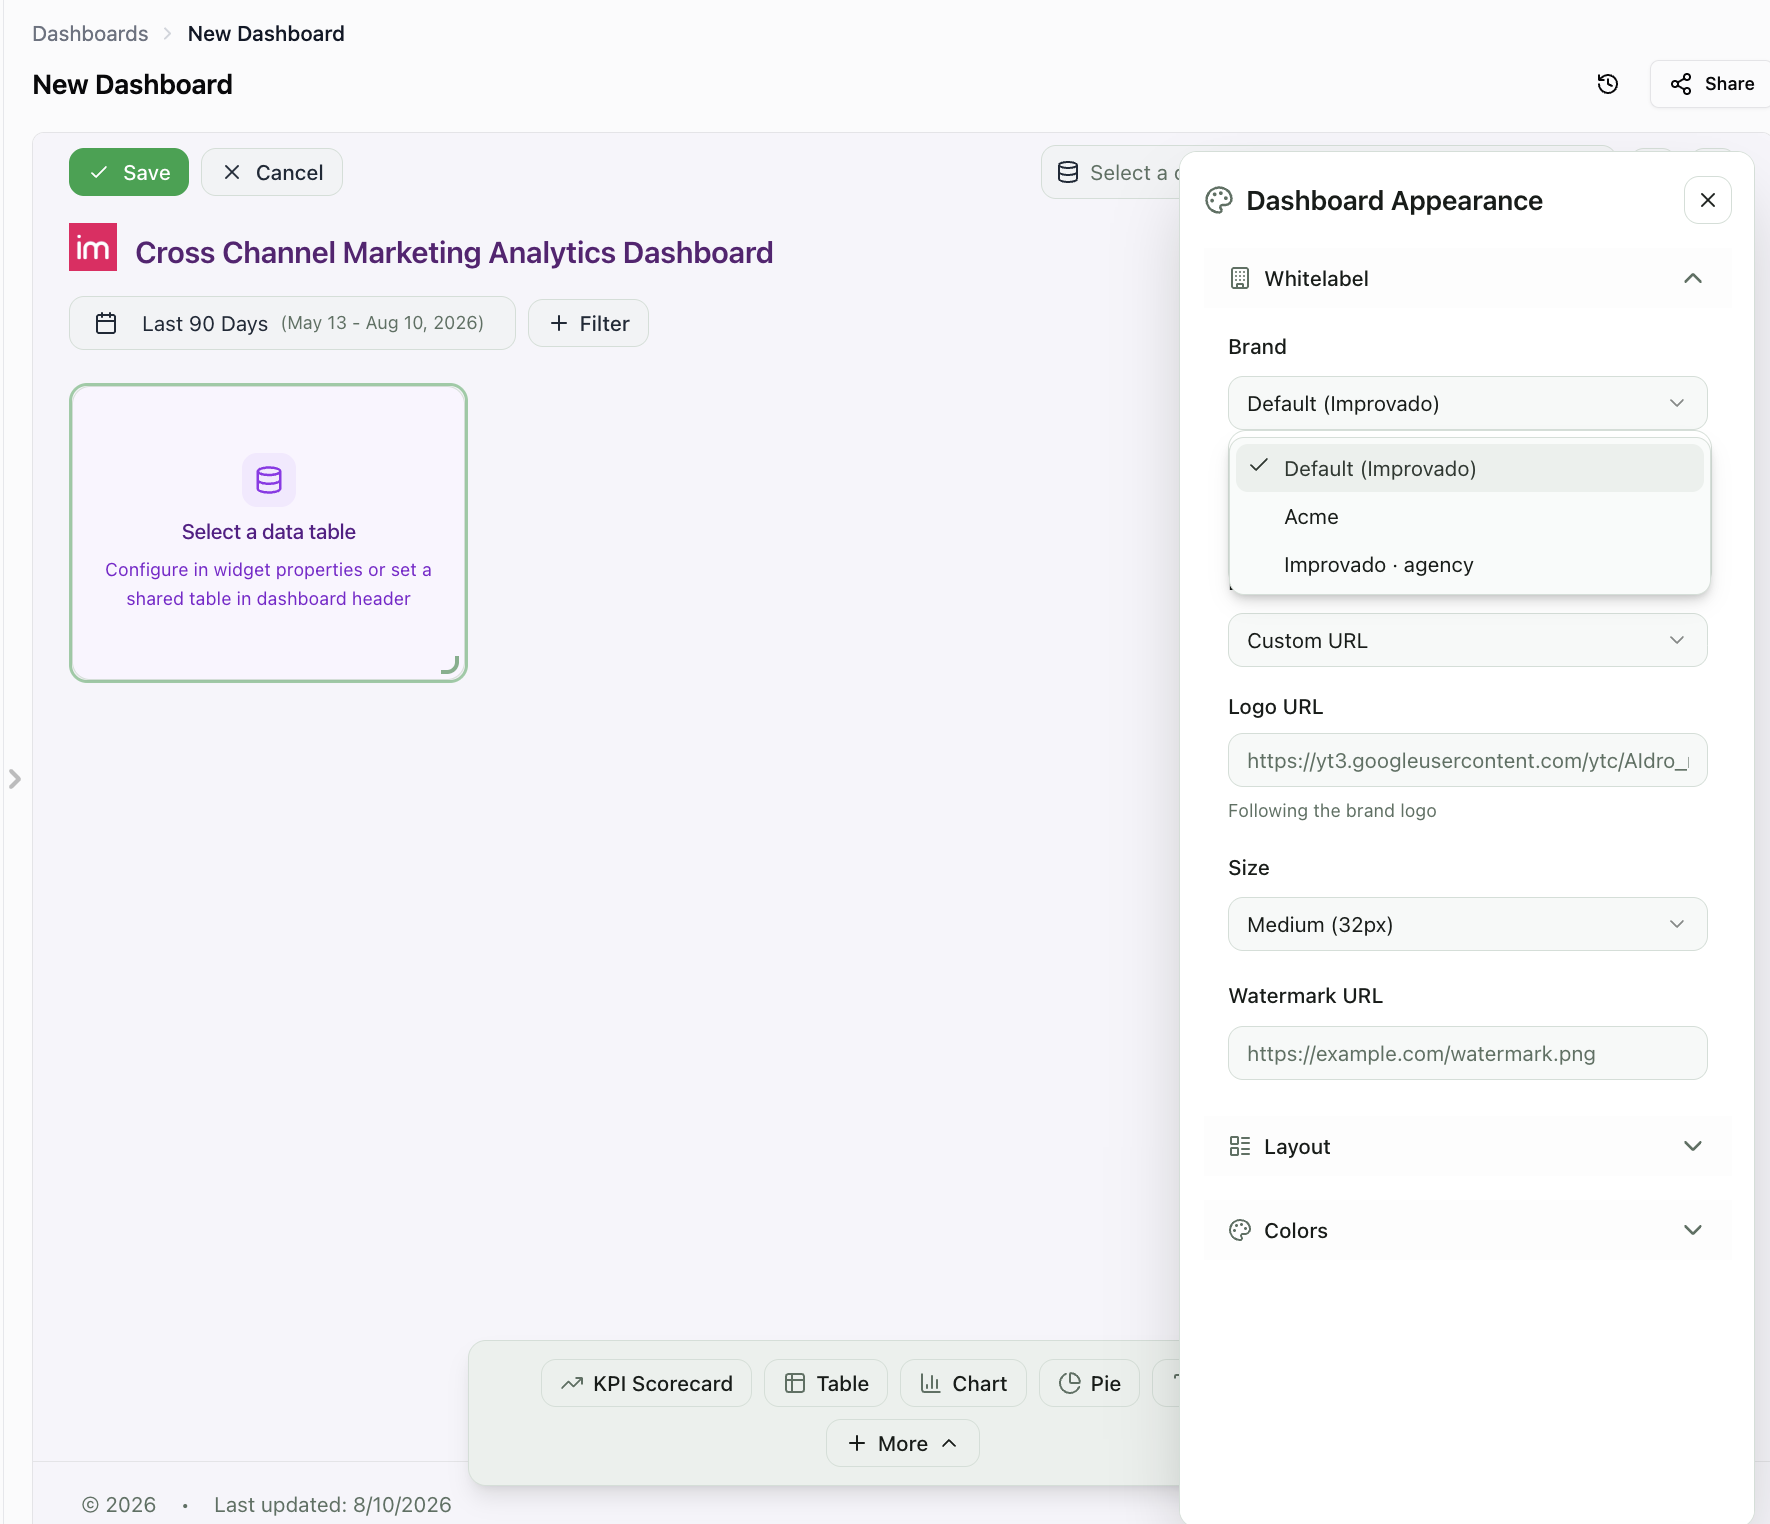
In the Whitelabel section, pick a preset from the Brand dropdown.
Save the dashboard.
Overriding the Brand on One Dashboard
Following a brand does not lock the dashboard down. Every appearance setting stays editable, and anything you change applies to that dashboard alone — the rest keeps following the preset.
Anything you leave alone keeps following the preset, so it updates whenever the brand does. The logo makes this explicit: leave Logo URL empty and the field reads Following the brand logo, showing the preset's logo. Fill it in and a Reset to brand link appears — clicking it clears the field and hands the logo back to the preset.
Note: To go back to the brand's value, clear the field or use Reset to brand — do not retype the brand's value by hand. A value you type is pinned to that dashboard and will not update the next time the brand changes.
Editing and Deleting a Preset
Click the pencil icon on a preset to reopen the editor. Saving re-brands every dashboard that follows it — there is no per-dashboard confirmation, so treat a shared preset as shared.
The bin icon deletes a preset after a confirmation. Dashboards that were following it fall back to the default brand; nothing about their layout or data changes.
Related
Appearance & Branding — the full list of settings a brand preset can carry.
Was this article helpful?
Thanks for the feedback!
Questions? The Improvado team is always happy to help. Send us an email, contact your Customer Success Manager, or raise a request in the Improvado Service Desk.