
Destinations
How to add a new destination
Click the Add a new destination button on the top right corner of the Destinations page.
If the button is not clickable, it means that you've reached your limit of destinations amount. To increase the limit, please contact your Customer Success Manager.
Step 1. Select a destination
This tile menu shows all the data warehouses that you can use for data loading.
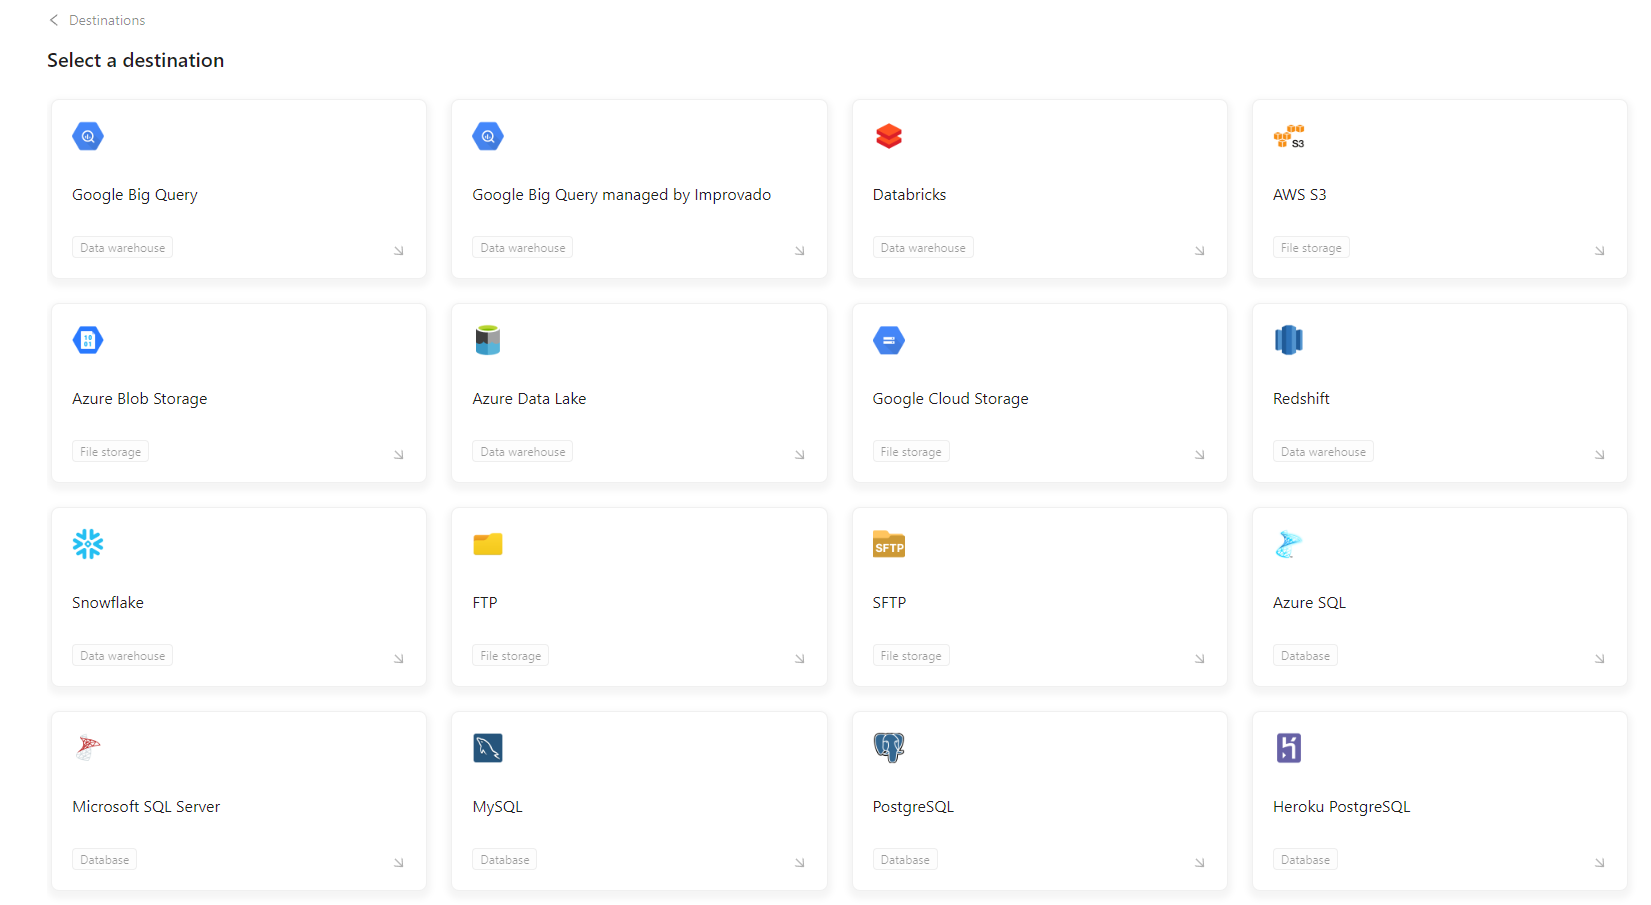
Сhoose the destination for which you want to set up the connection.
Step 2. Set up the connection
Here you will need to fill in a set of fields, which depends on the selected destination.
You can check the Setup Guides for all the available destinations here.
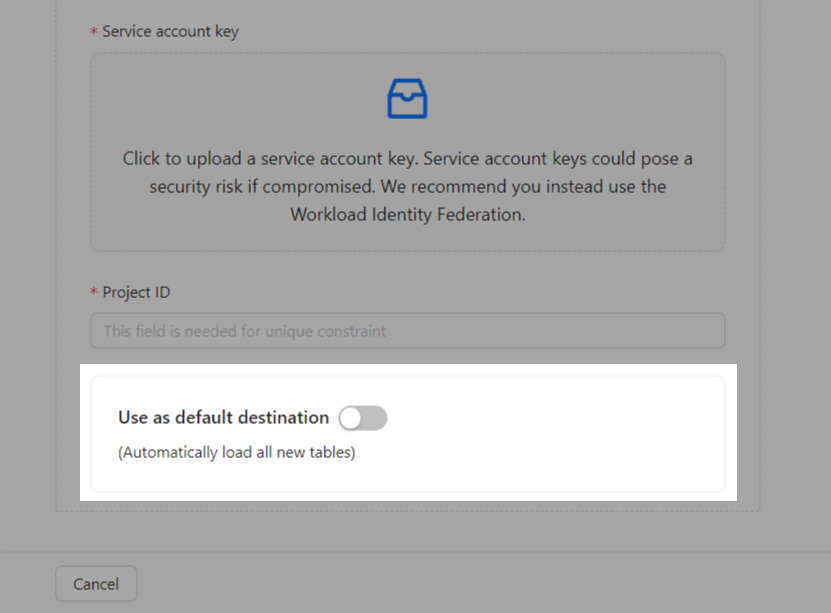
Set Destination as default
You can set configured Destination as default right from the connection page. If enabled, Load orders for each new Data table will be created automatically.
New data tables created through extracts or transformations are automatically loaded into the destination but with varying delays. Generally, it takes about 5 minutes for the table to appear in the Data Explorer. Data loading typically begins an additional 15–20 minutes afterward.
This option is also available for existing Destinations on the Automation tab.
Product models are excluded from load order creation when automatic data loading to the default destination is active.
Click the Continue button to complete the setup process and go back to the Destinations page. It will become clickable only after filling in all the fields.
On the Destinations page you will see the following:
- Success message on the top right corner of the screen which means that the credentials have been saved successfully

- Created destination connection at the top of the Connected destinations list.
Setup Guides
-
AWS S3 Destination
Learn how to connect AWS S3
-
Azure Blob Storage
Learn how to connect Azure Blob Storage
-
Azure Data Lake
Learn how to connect Azure Data Lake
-
Azure SQL Destination
Learn how to connect Azure SQL
-
ClickHouse
Learn how to connect ClickHouse
-
Connecting SFTP hosted in Azure Blob Storage to Improvado
Learn how to connect SFTP hosted in Azure Blob Storage to Improvado
-
Databricks Destination
Learn how to connect Databricks
-
FTP Destination
Learn how to connect FTP
-
Google BigQuery Destination
Learn how you can connect Google BigQuery Data Warehouse to Improvado
-
Google BigQuery managed by Improvado
Learn how to connect Google BigQuery managed by Improvado
-
Google Cloud Storage Destination
Learn how to connect Google Cloud Storage
-
Google Drive
Learn how to setup Google Drive Destination
-
Heroku PostgreSQL
Improvado can load your data into a Heroku PostgreSQL database
-
Microsoft Fabric
Learn how to connect Microsoft Fabric.
-
Microsoft SQL Server
Learn how to connect Microsoft SQL Server
-
MySQL Destination
Learn how to connect MySQL
-
PostgreSQL Destination
PostgreSQL and SQL access setup
-
Redshift Destination
Learn how to connect Redshift
-
SAP HANA
Learn how to connect SAP HANA
-
SFTP Destination
Learn how to connect SFTP
-
Snowflake Destination
Learn how to connect Snowflake
Was this page helpful?
Thanks for the feedback!
Questions? The Improvado team is always happy to help. Send us an email, contact your Customer Success Manager, or raise a request in the Improvado Service Desk.