Google Cloud Storage Destination
Note: This article covers the Google Cloud Storage Destination setup process. It doesn’t cover the DataPrep setup for GCS.
You can learn how to extract data from Google Cloud Storage data source here.
Description
Google Cloud Storage is a highly available and durable object storage service offered by Google Cloud Platform, designed to store and access large, unstructured data sets with high reliability, scalability, and performance.
Setup guide
Follow our setup guide to connect Google Cloud Storage to Improvado.
Generate a Service Account Key JSON file
In order to use Service Account Key authentication, first, you need to generate a JSON file via Google Cloud Console using official documentation or an interactive step-by-step guide provided by Google.
Alternatively, you can follow the instructions below:
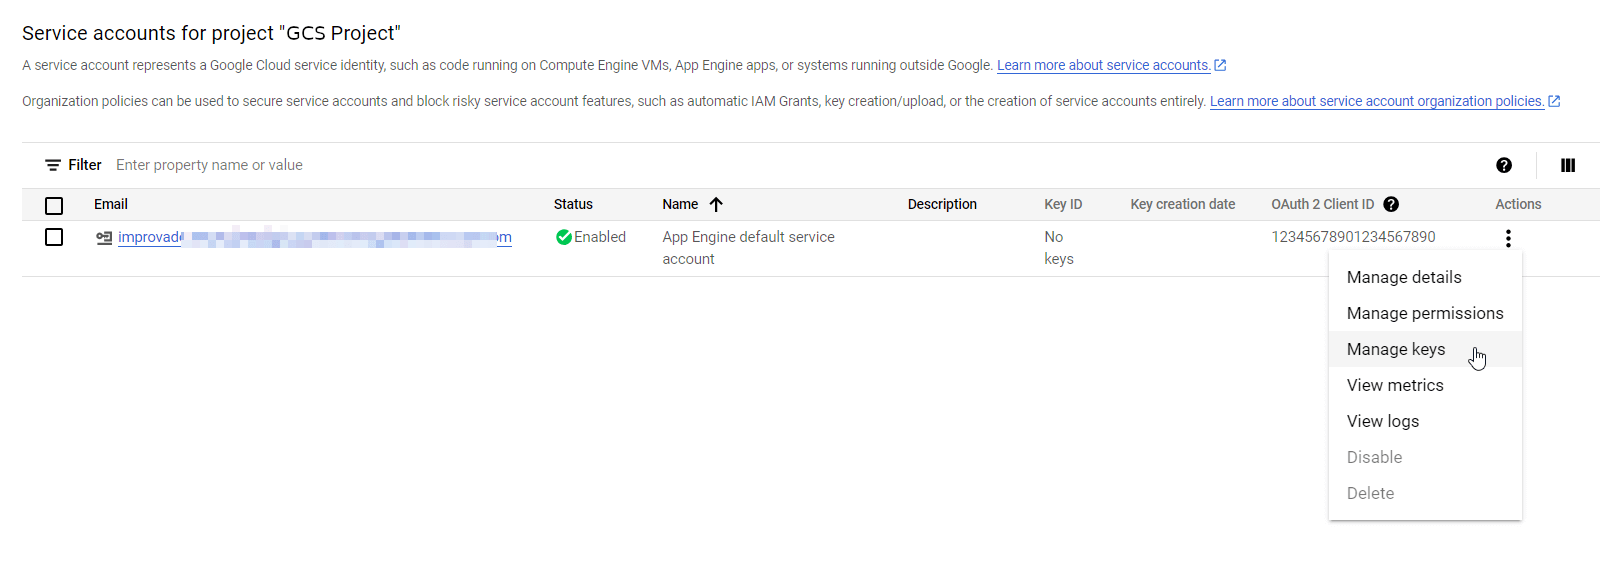
- In Google Cloud Console, go to IAM & Admin → Service Accounts.

- Click on the Actions button for your Service account and select Manage keys.
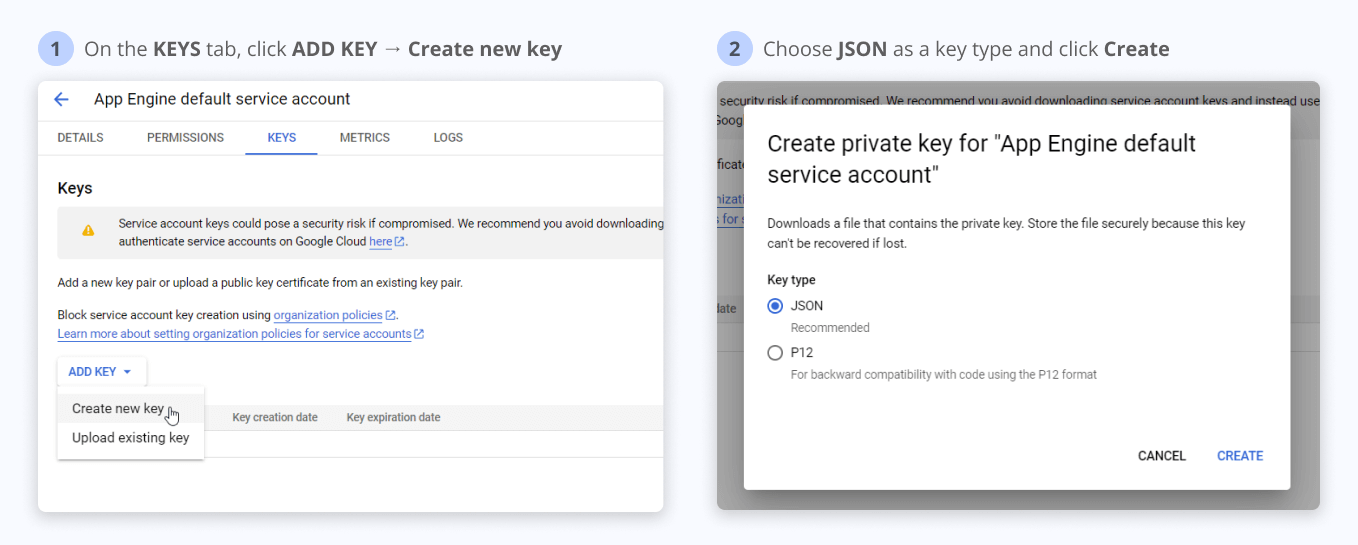
- In the KEYS tab section, click ADD KEY → Create new key. Choose JSON as a key type and click Create.
- In the downloaded JSON file, copy your Project ID.
How to connect
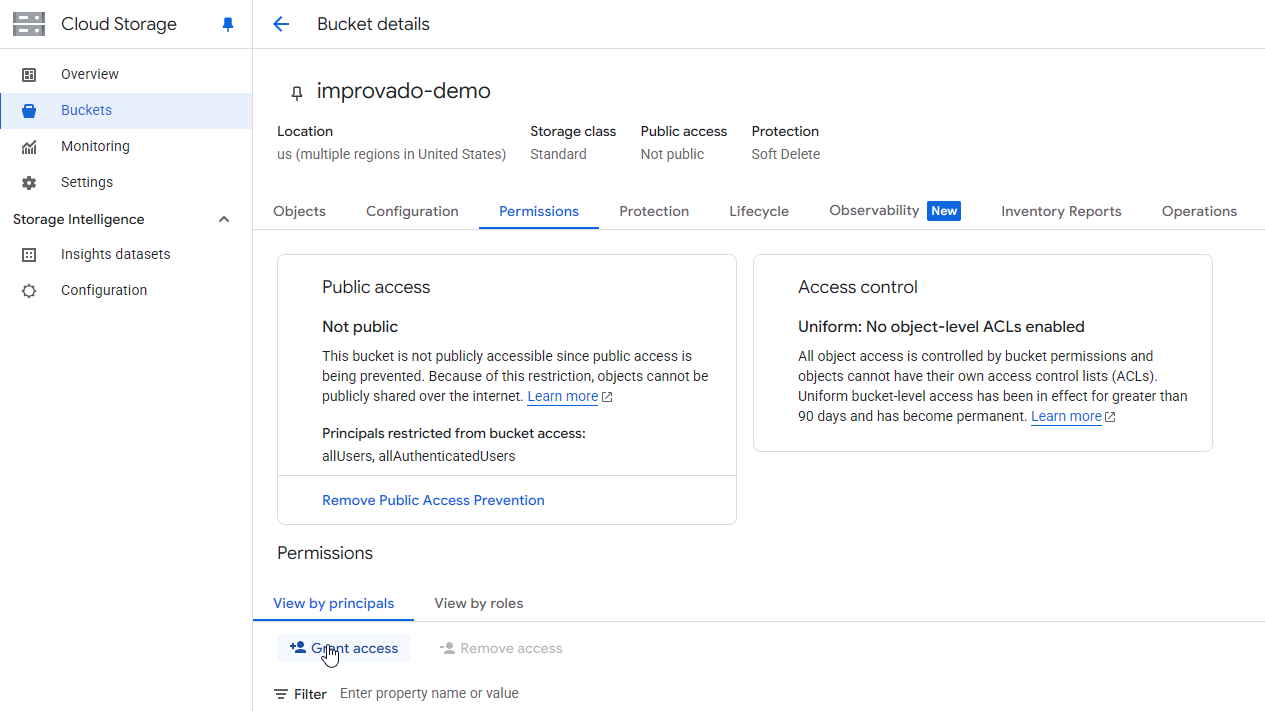
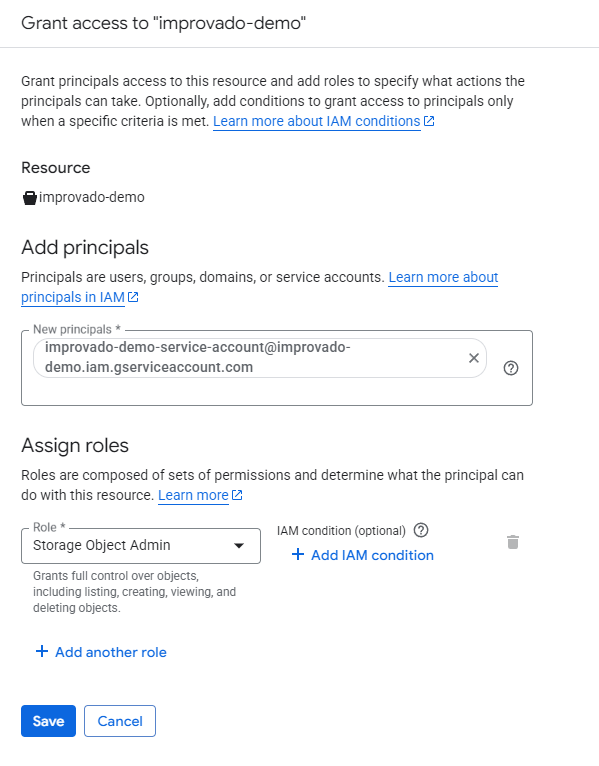
You need to share access for your Google Cloud Storage bucket to Improvado Google Service account: improvado-gcs-loader@green-post-223109.iam.gserviceaccount.com with a role at GCS bucket: Storage Object Admin.
Learn more here.
Complete configuration
On the Google Cloud Storage connection page, fill in the following fields:
- Enter a name for your Destination connection in the Title.
- Enter the Bucket Name.
- Enter the Filename.
- Select the necessary File Format option from the dropdown.
- Select the necessary Separator option from the dropdown.
- Select the necessary GCS Region option from the dropdown.
- Select the necessary Partition by option from the dropdown.
- Select the necessary Encryption option from the dropdown.
- (Optional) Enter the Root Name.
This field supports letters and numbers only, max 64 characters (no special characters or dynamic values).
- Select the necessary Use static IP option from the dropdown.
- Select Workload Identity Federation as the Authentication type (recommended).
- Upload your Service account key JSON file to the Service account key.
- Enter the Project ID.
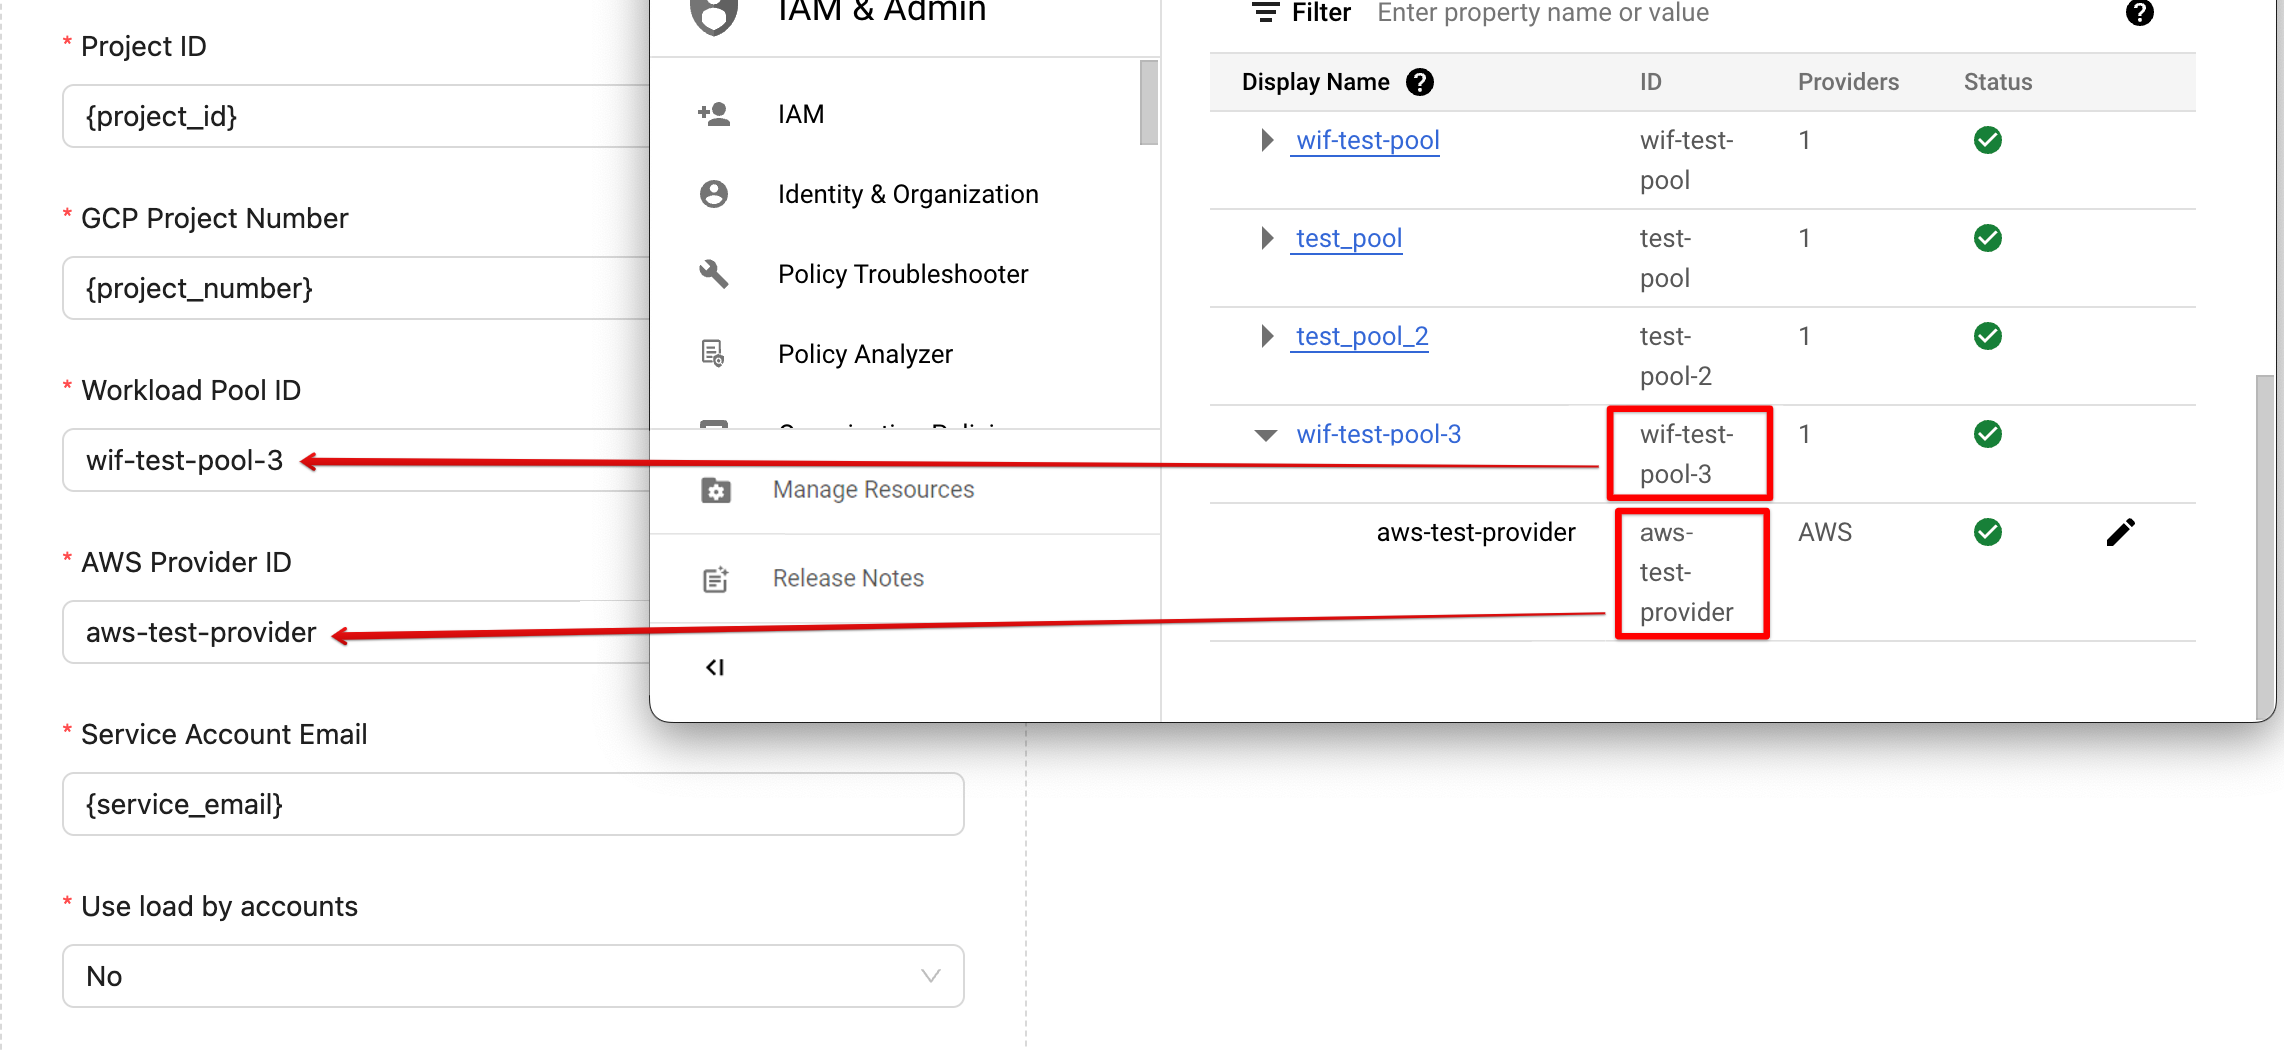
- (Workload Identity Federation only) Enter the GCP Project Number.
- (Workload Identity Federation only) Enter the Workload Pool ID.
- (Workload Identity Federation only) Enter the AWS Provider ID.
- (Workload Identity Federation only) Enter the Service Account Email.
- Select the necessary Use load by accounts option from dropdown.
- Select the necessary Use binary strings option from the dropdown.
Secondary Authentication Option (Workload Identity Federation)
Note: We recommend using the Service Account Key as an authentication method.
With identity federation, you can use Identity and Access Management (IAM) to grant external identities IAM roles, including the ability to impersonate service accounts. This approach eliminates the maintenance and security burden associated with service account keys.
Learn more about Identity Federation here: Workload identity federation | IAM Documentation | Google Cloud.
- Setup a Workload pool and Provider for your Google Cloud project.
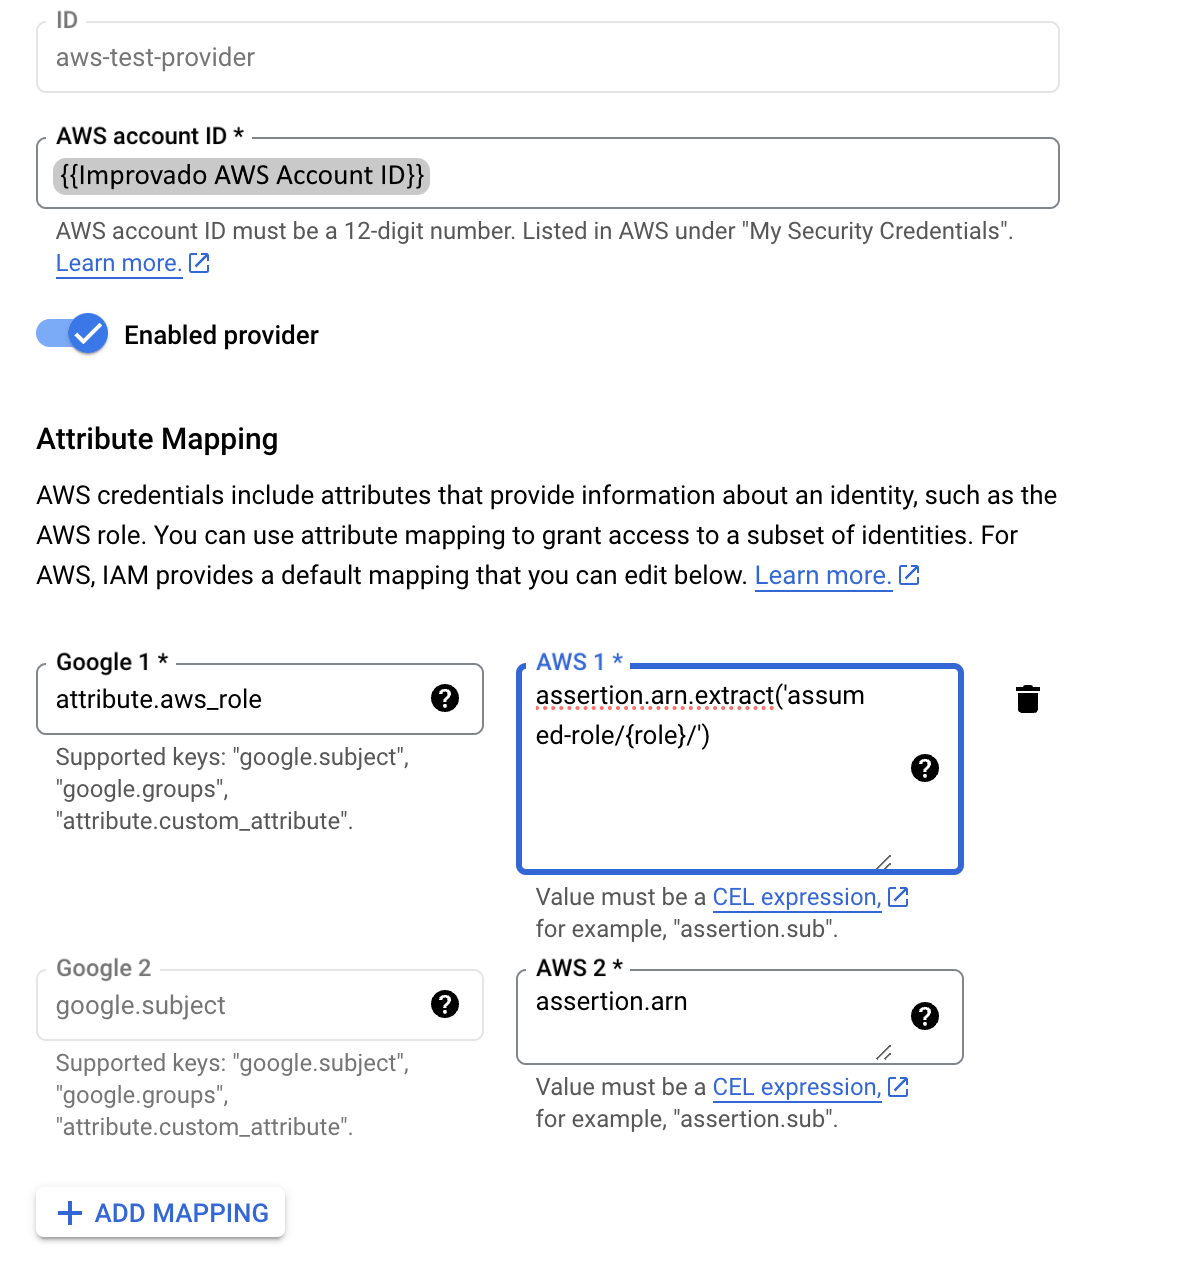
- Specify the Improvado AWS account ID that you can find on Improvado UI:

- Paste Improvado AWS Account ID and configure Attribute mapping:
- Set
attribute.aws_role attributevalue toassertion.arn.extract('assumed-role/{role}/').
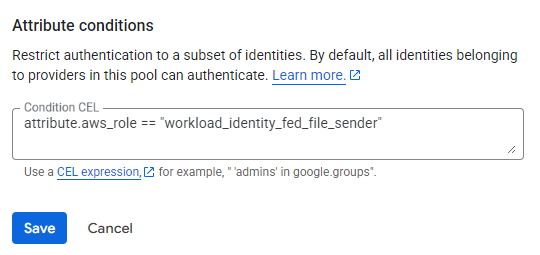
- Add a condition to allow only one AWS IAM role which is called:
workload_identity_fed_file_sender. - Set the Condition CEL to
attribute.aws_role == "workload_identity_fed_file_sender".
- On the Workpool details page, click the Grant access button.
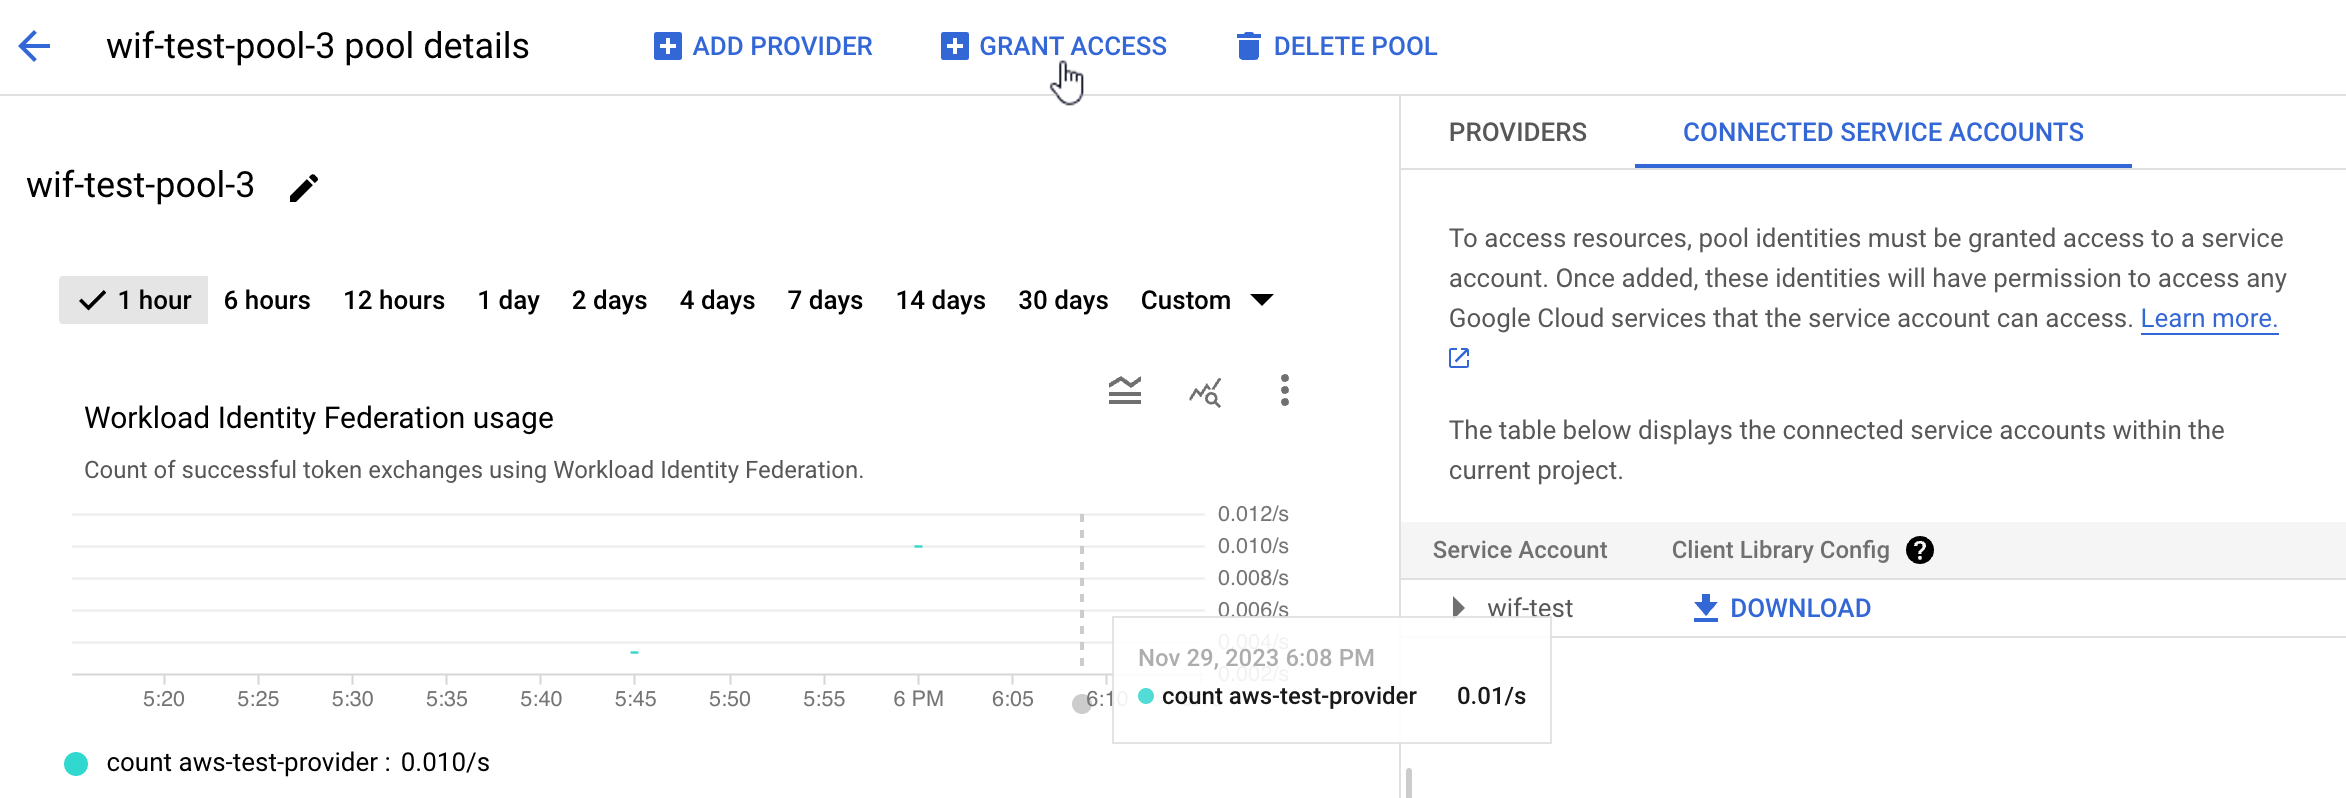
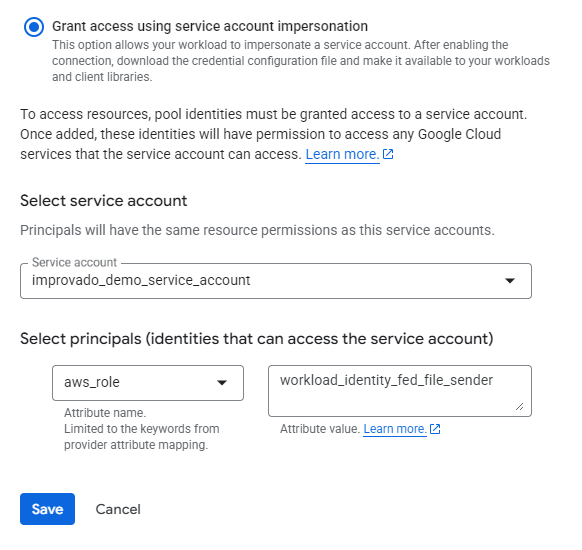
- Select principals (identities that can access the service account):
- Set
aws_role attributevalue toworkload_identity_fed_file_sender.
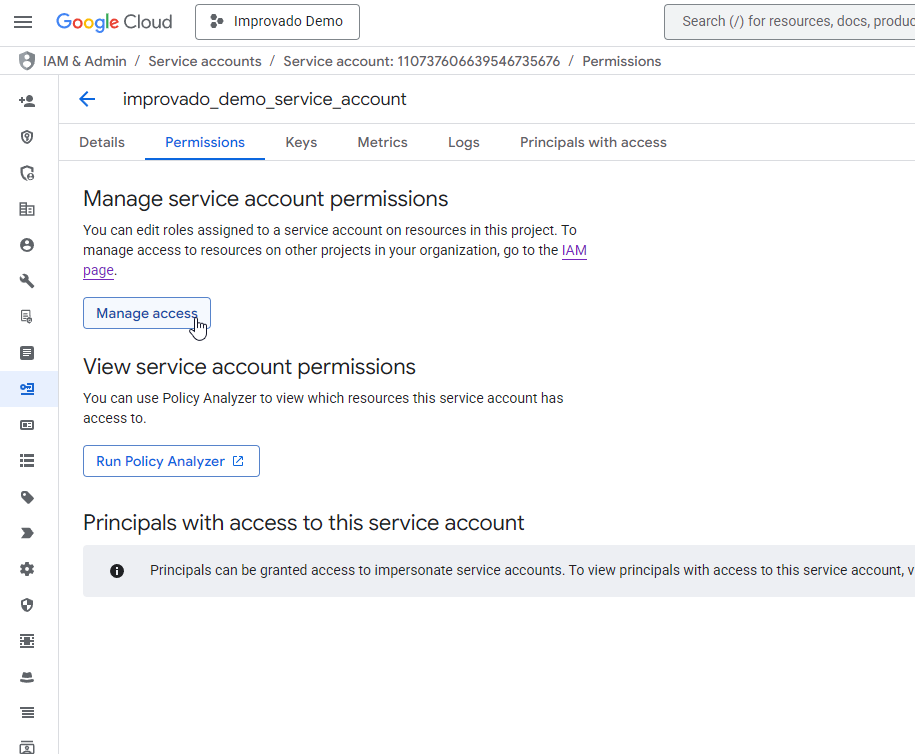
- Make sure that your service account has atleast Service Account Admin role:
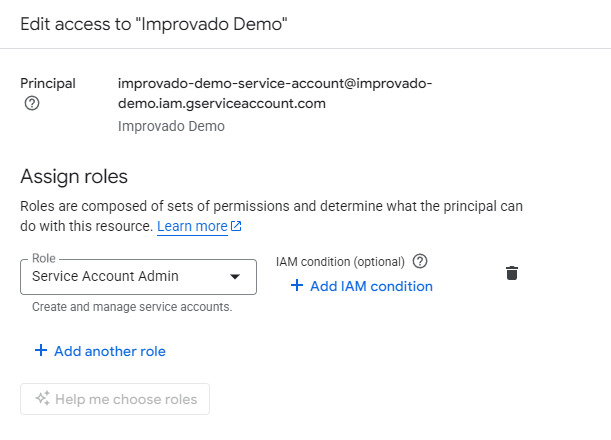
- Assign Storage Object Admin role to the service account for bucket access:
- In Complete configuration, enter your Workload Pool ID and AWS Provider ID to the corresponding fields in the Improvado UI.
Was this article helpful?
Thanks for the feedback!