Updated on
Feb 23, 2026
Note: This article covers the Google Cloud Storage Destination setup process. It doesn’t cover the DataPrep setup for GCS.
You can learn how to extract data from Google Cloud Storage data source here.
Google Cloud Storage is a highly available and durable object storage service offered by Google Cloud Platform, designed to store and access large, unstructured data sets with high reliability, scalability, and performance.
Follow our setup guide to connect Google Cloud Storage to Improvado.
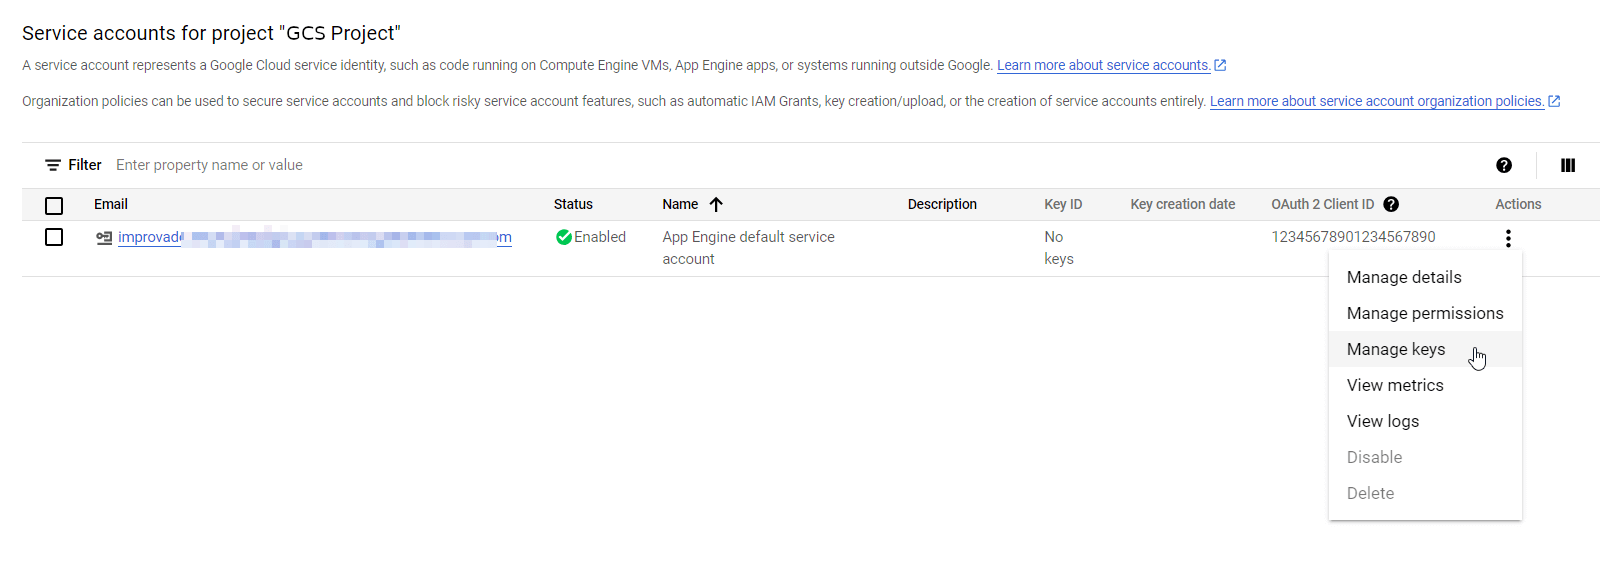
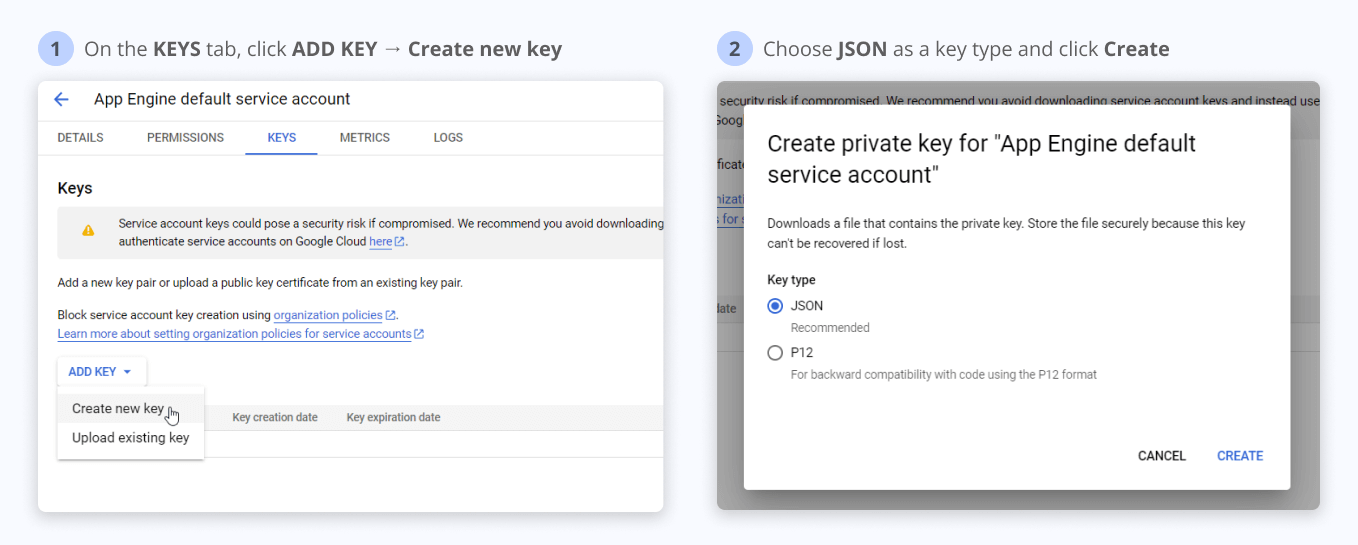
In order to use Service Account Key authentication, first, you need to generate a JSON file via Google Cloud Console using official documentation or an interactive step-by-step guide provided by Google.
Alternatively, you can follow the instructions below:

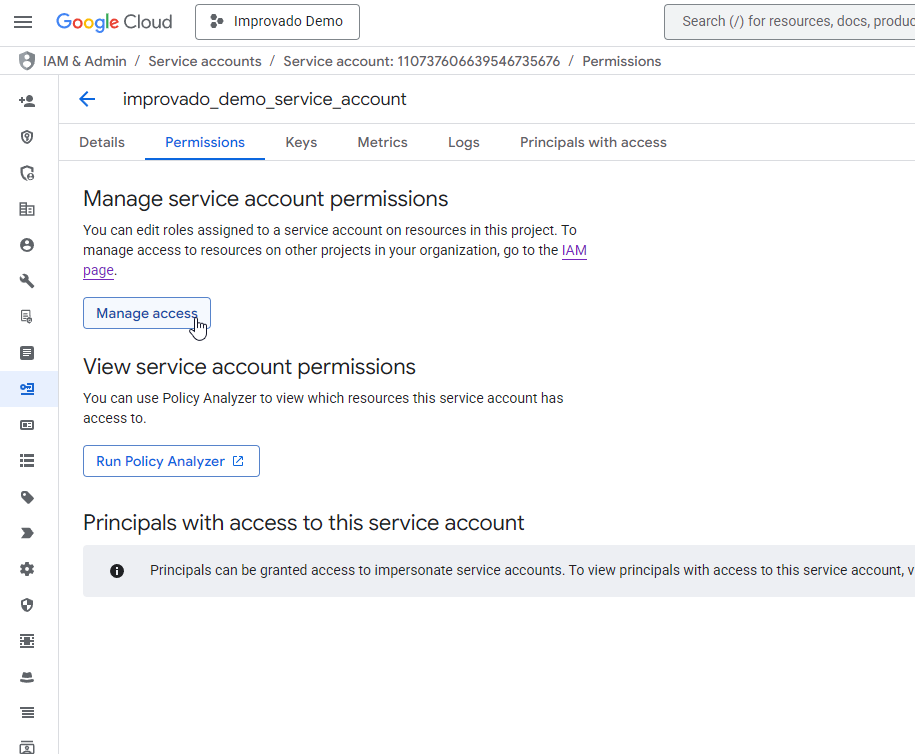
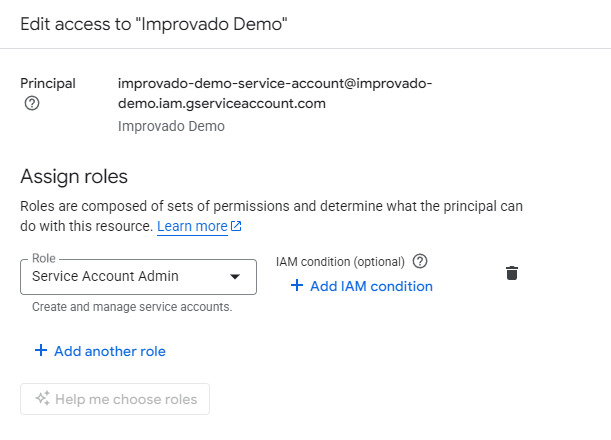
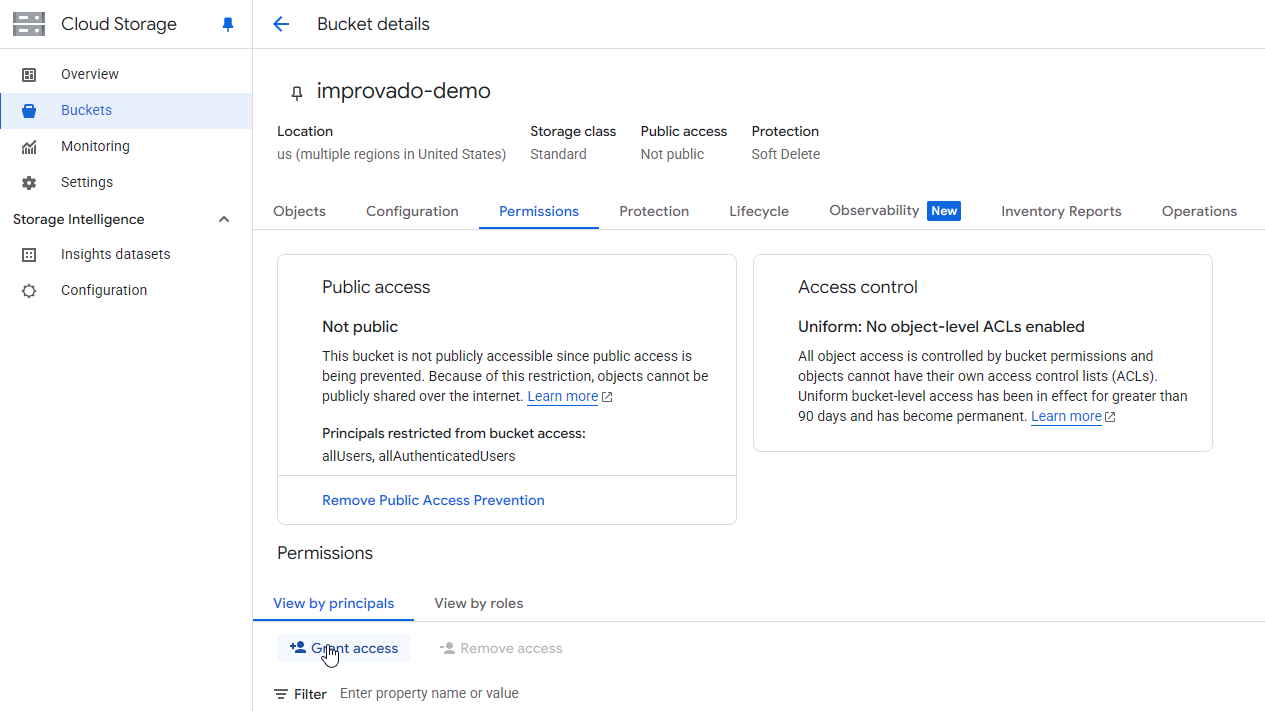
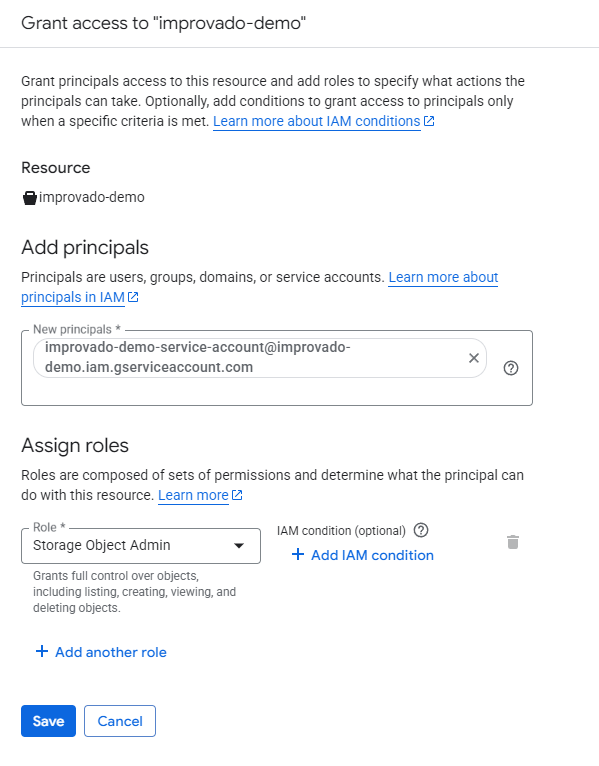
You need to share access for your Google Cloud Storage bucket to Improvado Google Service account: improvado-gcs-loader@green-post-223109.iam.gserviceaccount.com with a role at GCS bucket: Storage Object Admin.
Learn more here.
On the Google Cloud Storage connection page, fill in the following fields:
{%dropdown-body name="bucket-name"%}
Preferred bucket for GCS uploading.
Bucket Name can only contain letters, numbers, dots, and underscores and must start and end with a letter or number.
Bucket Name length must be between 3 and 222 characters.
{%dropdown-end%}
{%dropdown-body name="filename"%}
Possible parameters:
```{{workspace_id}}-{{workspace_title}}-{{data_source}}-{{report_type}}-{{data_table_title}}-{{filename}}-{{dataclass}}-{{YYYY}}-{{MM}}-{{DD}}-{{H}}-{{M}}-{{S}}-{{chunk_id}}```
{%docs-informer warning title="Important"%}
{{YYYY}}/{{MM}}/{{DD}} partitioning is based on a date field in the exported data. If the dataset does not contain an actual date field (for example, no “date” column/field), these partition values cannot be derived and date-based partitioning will not work as expected. In that case, use {{YYYY_today}}/{{MM_today}}/{{DD_today}} to partition by the export run date instead.
{%docs-informer-end%}
{%docs-informer info%}
{{YYYY}}/{{MM}}/{{DD}} refer to the record’s date-based partition values (if applicable), while {{YYYY_today}}/{{MM_today}}/{{DD_today}} always use today’s date.
{%docs-informer-end%}
{%dropdown-end%}
{%dropdown-body name="file-format"%}
Possible formats:
{%dropdown-end%}
{%dropdown-body name="separator"%}
Possible delimiters that can separate data in your file:
{%dropdown-end%}
{%dropdown-body name="partition-by"%}
Possible ways of splitting data:
{%dropdown-end%}
{%dropdown-body name="encryption"%}
Possible options:
{%dropdown-end%}
{%docs-informer info%}
This field supports letters and numbers only, max 64 characters (no special characters or dynamic values).
{%docs-informer-end%}
{%dropdown-body name="use-static-ip"%}
Select Yes for Use static IP option if you allow Improvado to connect your database by the static IPs mentioned on the Destination connection page.
Select No if you have permitted access to your database from any IP. In this case, Improvado will connect your database using dynamic IPs not listed on the Destination connection page.
{%dropdown-end%}
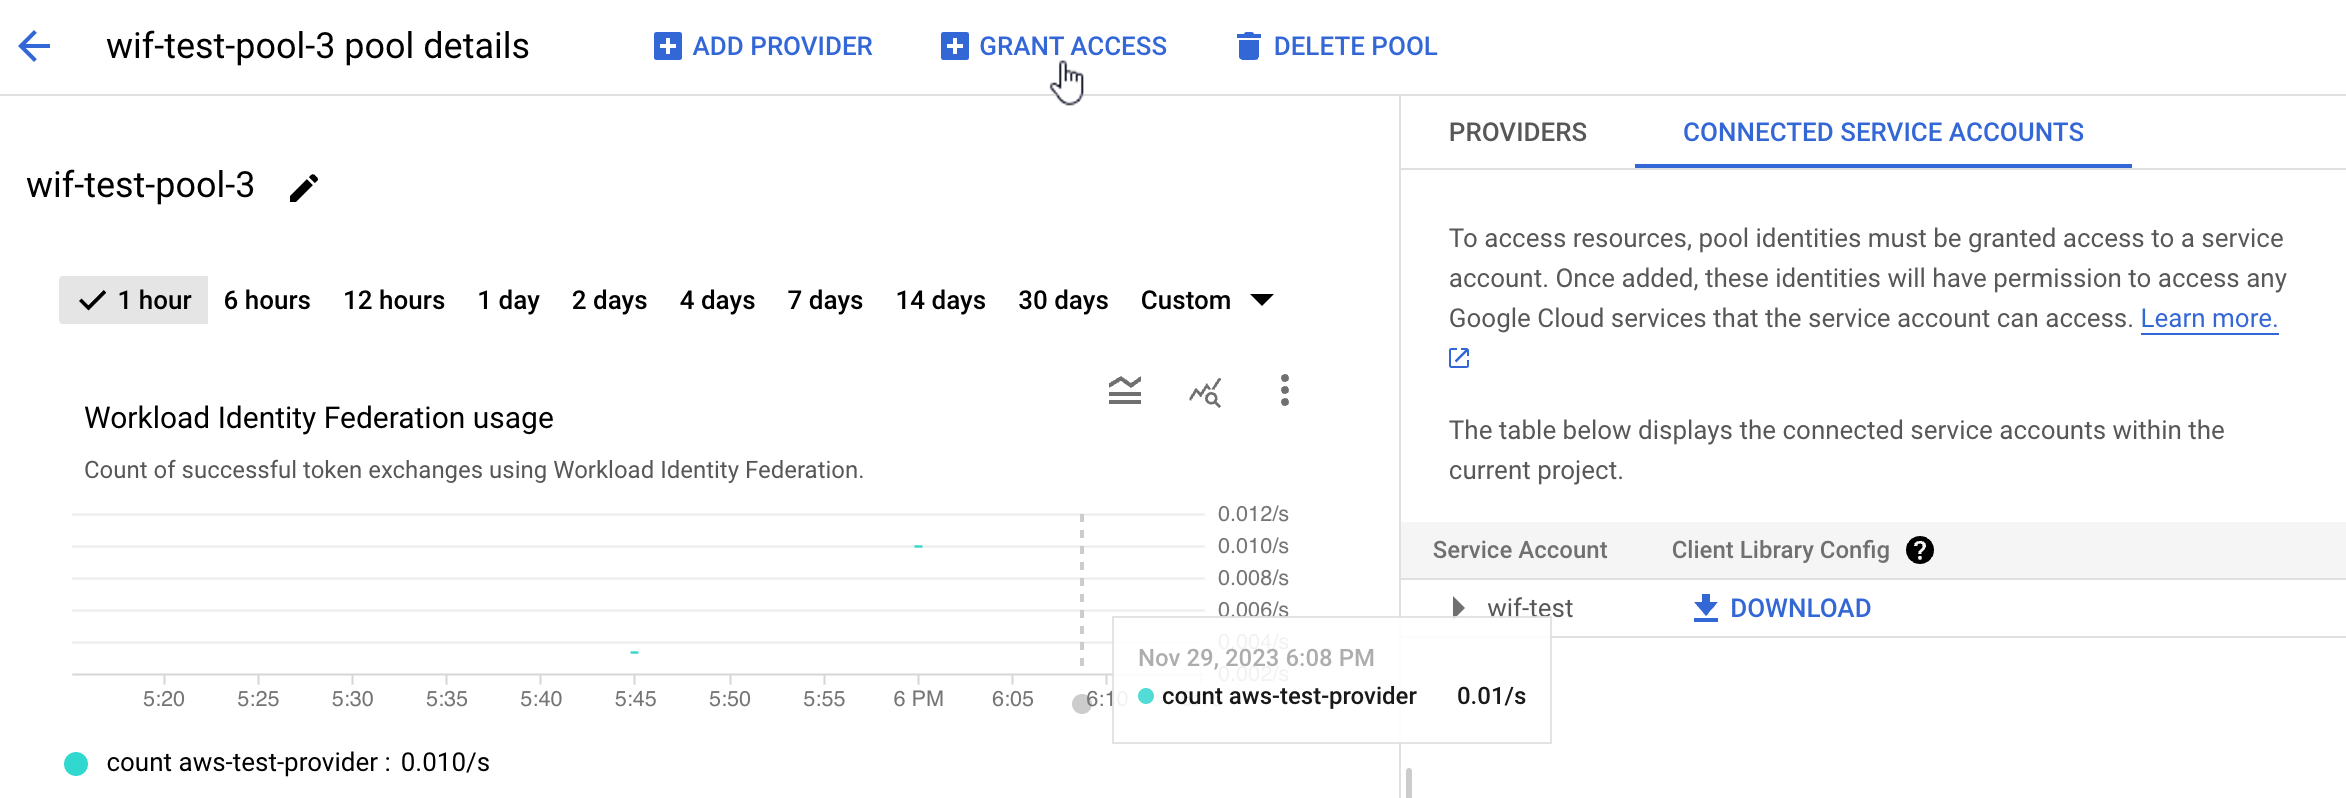
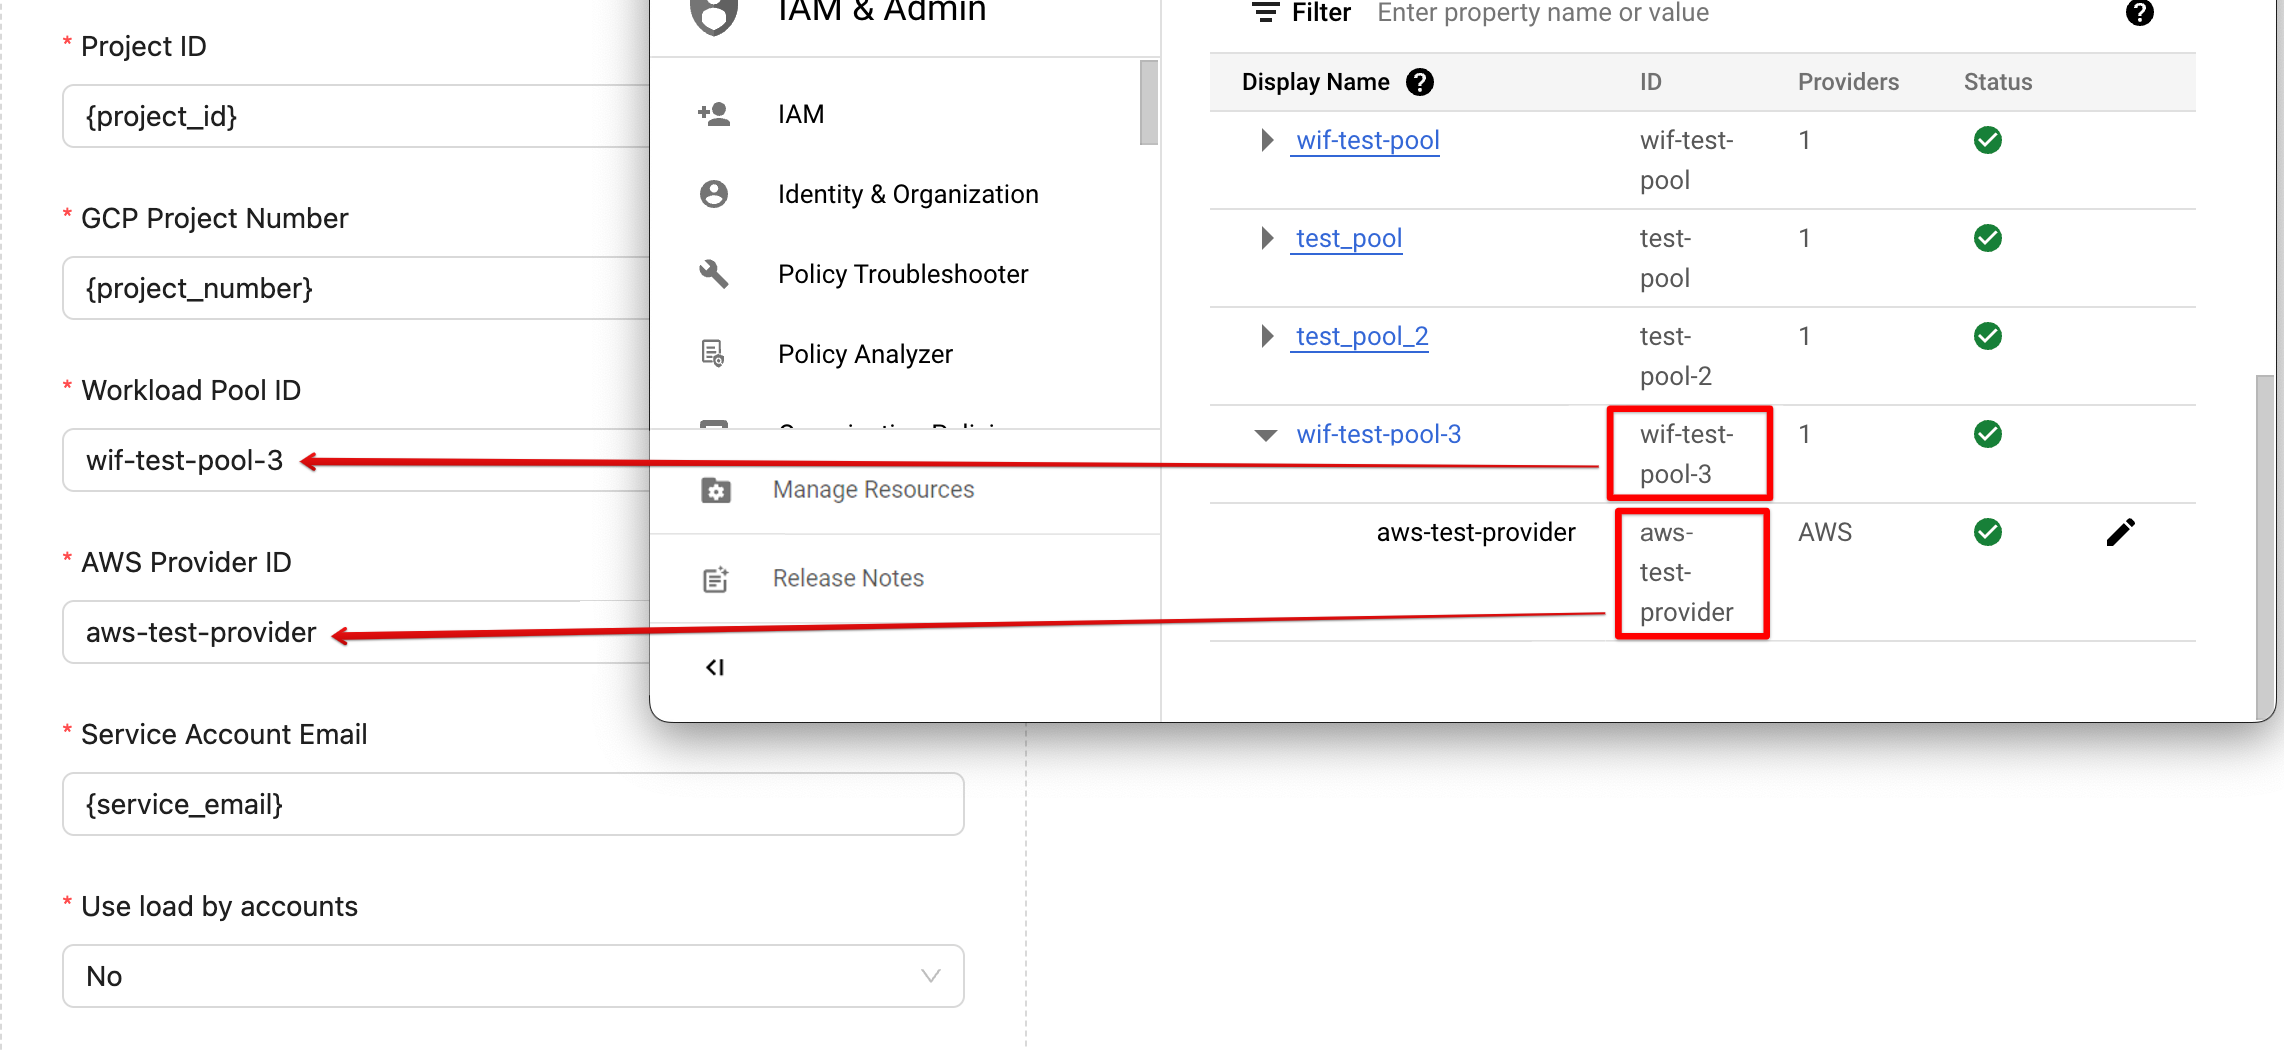
{%dropdown-body name="workload-pool-id"%}
Pool IDs are used as identifiers in IAM.
{%dropdown-end%}
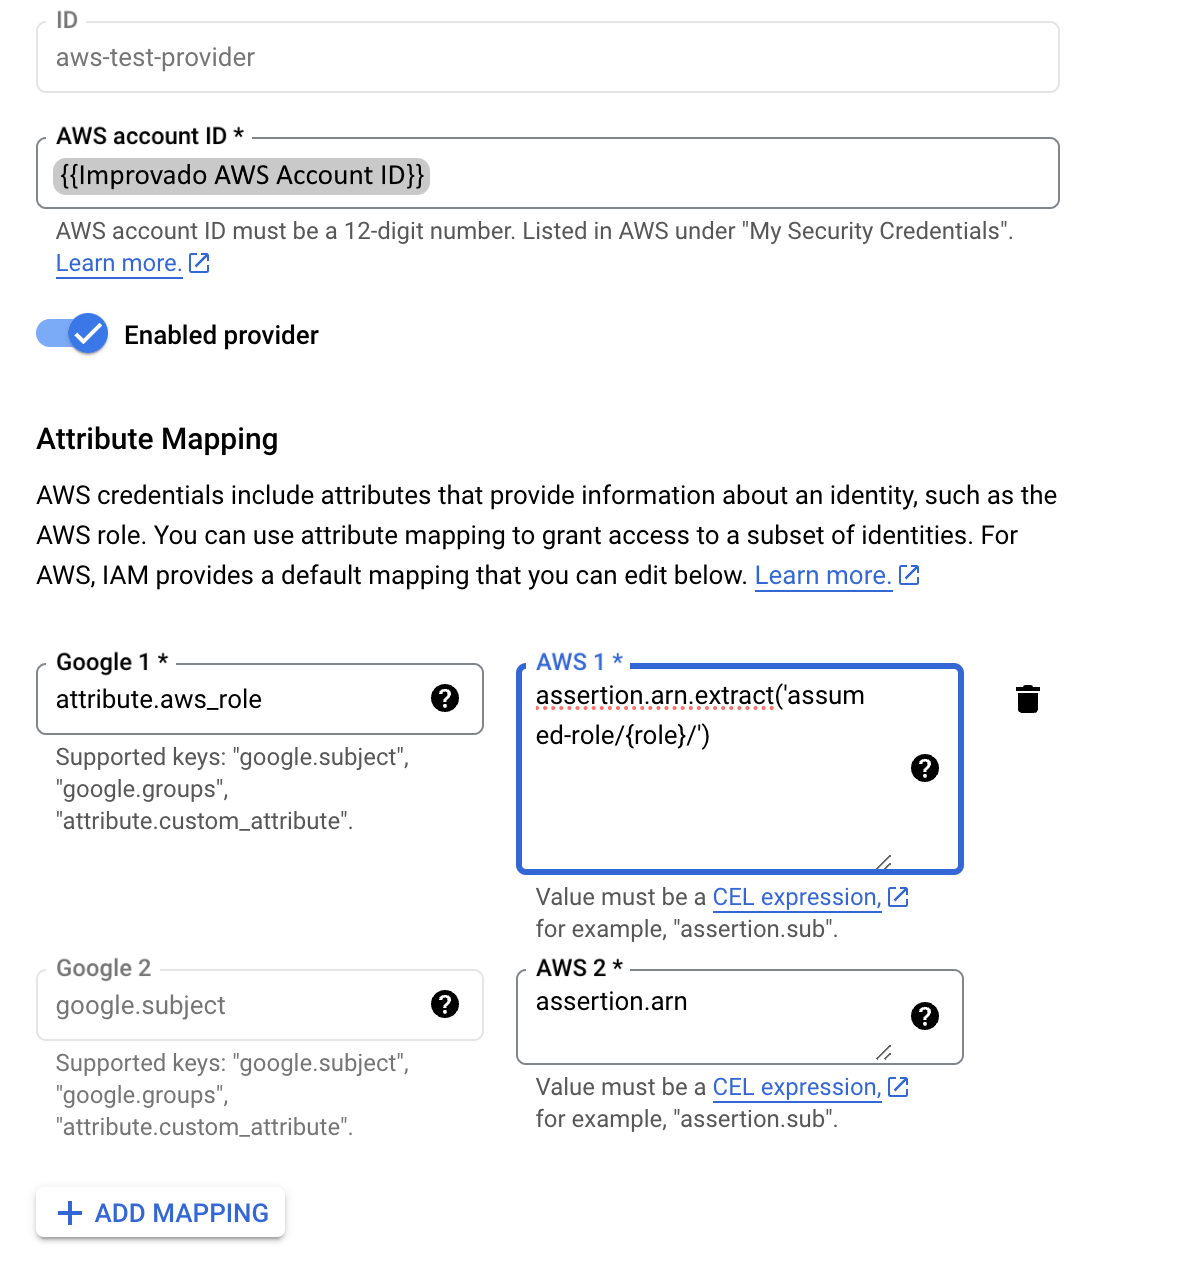
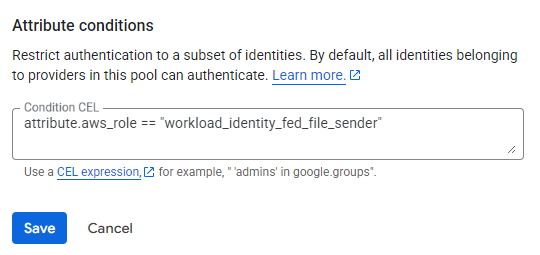
{%dropdown-body name="aws-provider-id"%}
Providers manage and verify identities.
{%dropdown-end%}
{%dropdown-body name="aws-provider-id"%}
A service account is identified by its email address, which is unique to the account.
{%dropdown-end%}
{%dropdown-body name="use-binary-strings"%}
The "Use binary strings" determines whether string fields are encoded in binary format when loading data.
Recommended setting: "No" (default).
{%dropdown-end%}
Note: We recommend using the Service Account Key as an authentication method.
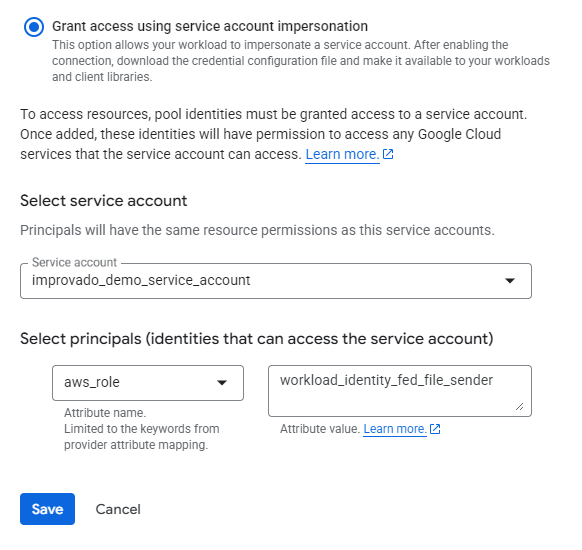
With identity federation, you can use Identity and Access Management (IAM) to grant external identities IAM roles, including the ability to impersonate service accounts. This approach eliminates the maintenance and security burden associated with service account keys.
Learn more about Identity Federation here: Workload identity federation | IAM Documentation | Google Cloud.

Improvado team is always happy to help with any other questions you might have! Send us an email.
Contact your Customer Success Manager or raise a request in Improvado Service Desk.


.png)