Google Cloud Storage Data source
Note: This article covers Google Cloud Storage Data source setup process. You can learn how to load data to Google Cloud Storage Destination here.
How to set up Google Cloud Storage integration
- On the Data sources page, click on the Google Cloud Storage tile. You can find it using the search field or just open the Flat Data category.
- Authorize your Google Cloud Storage account via OAuth.
Before authorization, please, ensure you are signed in to the account you want to extract data from.
How to extract data from Google Cloud Storage
Step 1. Import page
- Click to select a file from your computer, or drag and drop your file to this area
Note
- Supported file formats: csv, tsv, txt, xls, xlsx, avro, parquet, zip, gzip
- Maximum size: 10 GB
- A file must begin with column headers starting in column A. If additional information is provided before — it is necessary, use the Header rows to skip field to skip a certain number of rows to import data correctly.
- Specify the character encoding of the uploaded file (e.g., UTF-8, ISO-8859-1, UTF-16) in the File Encoding field. If not set, UTF-8 will be used by default. Incorrect encoding may cause errors when reading the file or result in improperly parsed data.
- After picking the file a processing bar will show the upload progress.
You can click on the “trash bin” icon to cancel the uploading process of a file - After your file has been uploaded and checked for security, let’s move to the settings.
- Click on the Continue button.
Step 2. Match page
- Enter the data table name or leave it as is.
- In the Project ID field, enter the unique identifier for your Google Cloud Storage project. Learn how to locate it here.
- Enter the bucket name where your data is stored.
- In the Folder path (optional) field, enter the full directory path where the system should search for files.
- In the File mask (optional) field, specify a regex pattern to filter filenames or types.
- Configure your Extraction scheduling. Allows you to set how often your data is extracted to Improvado storage.
- Select the fields you need to import. By default, all fields are selected.
- Check the type. Each field in a data table can be assigned a text, number, or date type.
- The date field is a unique date-key in the database and should be singular. Also, you have the flexibility to choose from a wide range of date formats for this field.
- If you have field with numeric values that you don't want to include in your calculations, change the type from Number to Text.
Note
You can learn more about how to work with dates in Flat Data here.
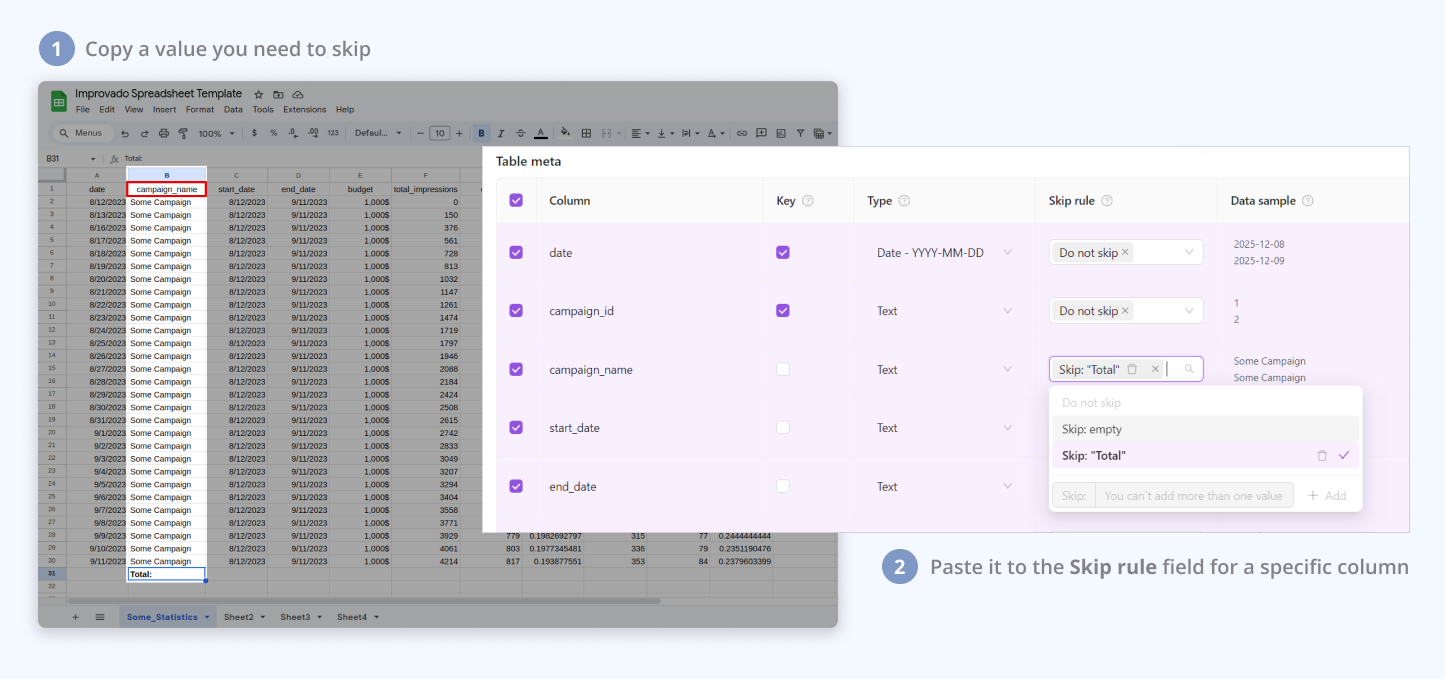
- The skip rule allows you to exclude empty rows and rows with specific values in a selected field
- Default to 'Do Not Skip': Ensures all data is initially included.
- Multi-Select Options: Combine 'Skip: empty' and 'Skip: value' for targeted exclusions. Selecting 'Do Not Skip' disables other skip options.
- Custom Rule addition: Add one custom rule; the form is disabled afterward to maintain focus
- Custom Rule deletion: Hover over and click on the red-highlighted basket icon next to the rule to exclude it.
Usage Note: the component is designed for straightforward value-based selections and does not support complex expressions like '<10'.
- Choose Write strategy that will be used when extracting data from your files and uploading it into Improvado Storage. Learn more.
- Set the Data table name which will be used for loading data to your destination.

- Click on the Import N Fields button to continue.
Step 3. Preview page
- Check the Data Structure Preview.
In this step, you see the first row of data that will be extracted after you click the Continue button.
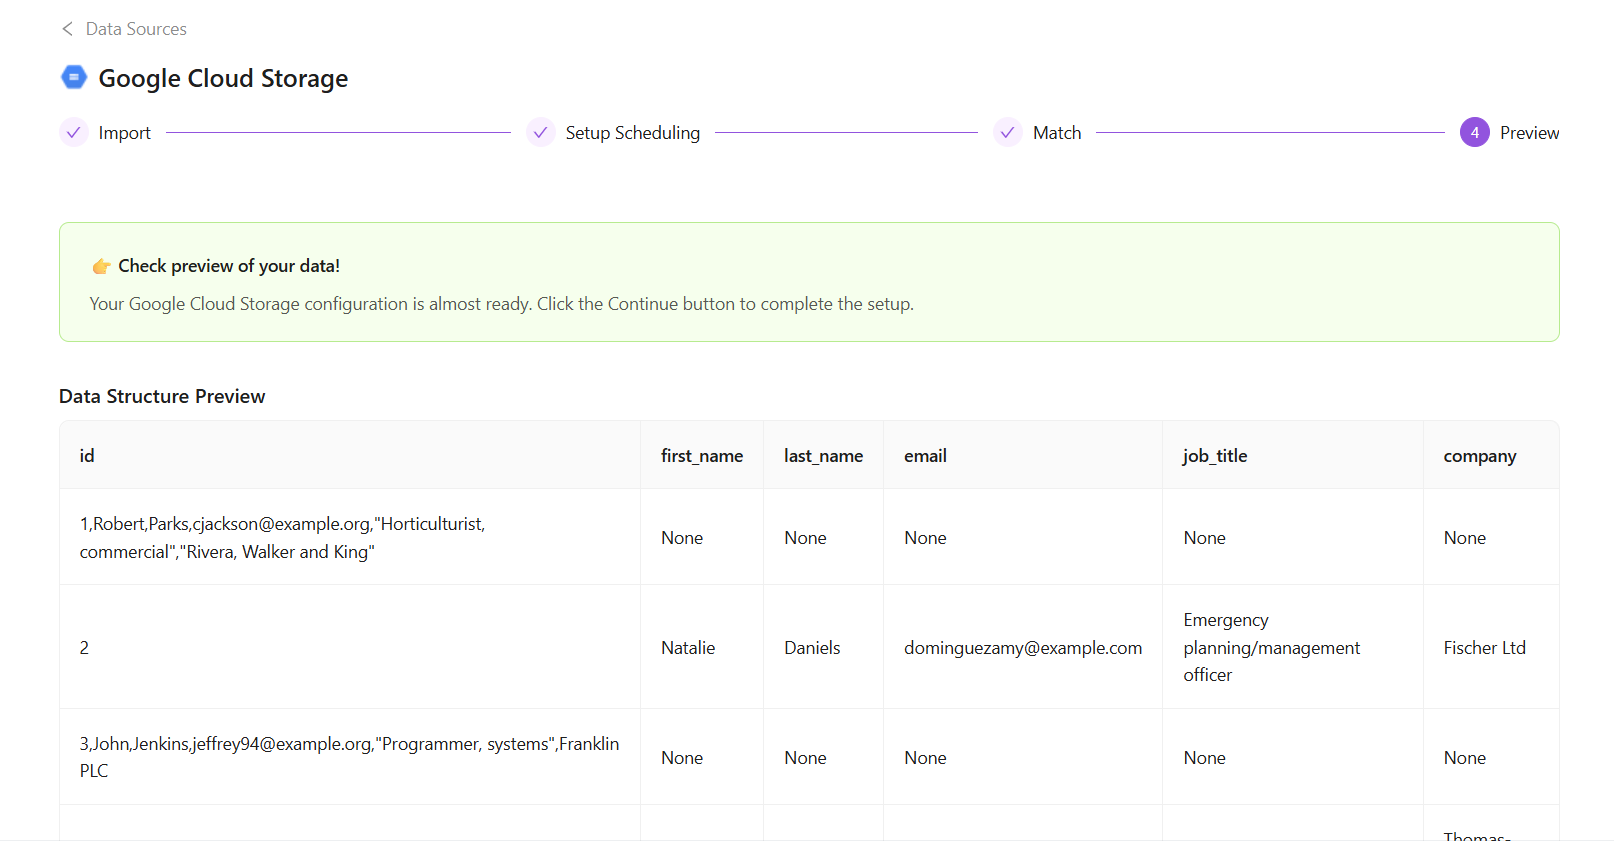
- Click the Continue button to confirm settings and proceed with data extraction.
Order Details page
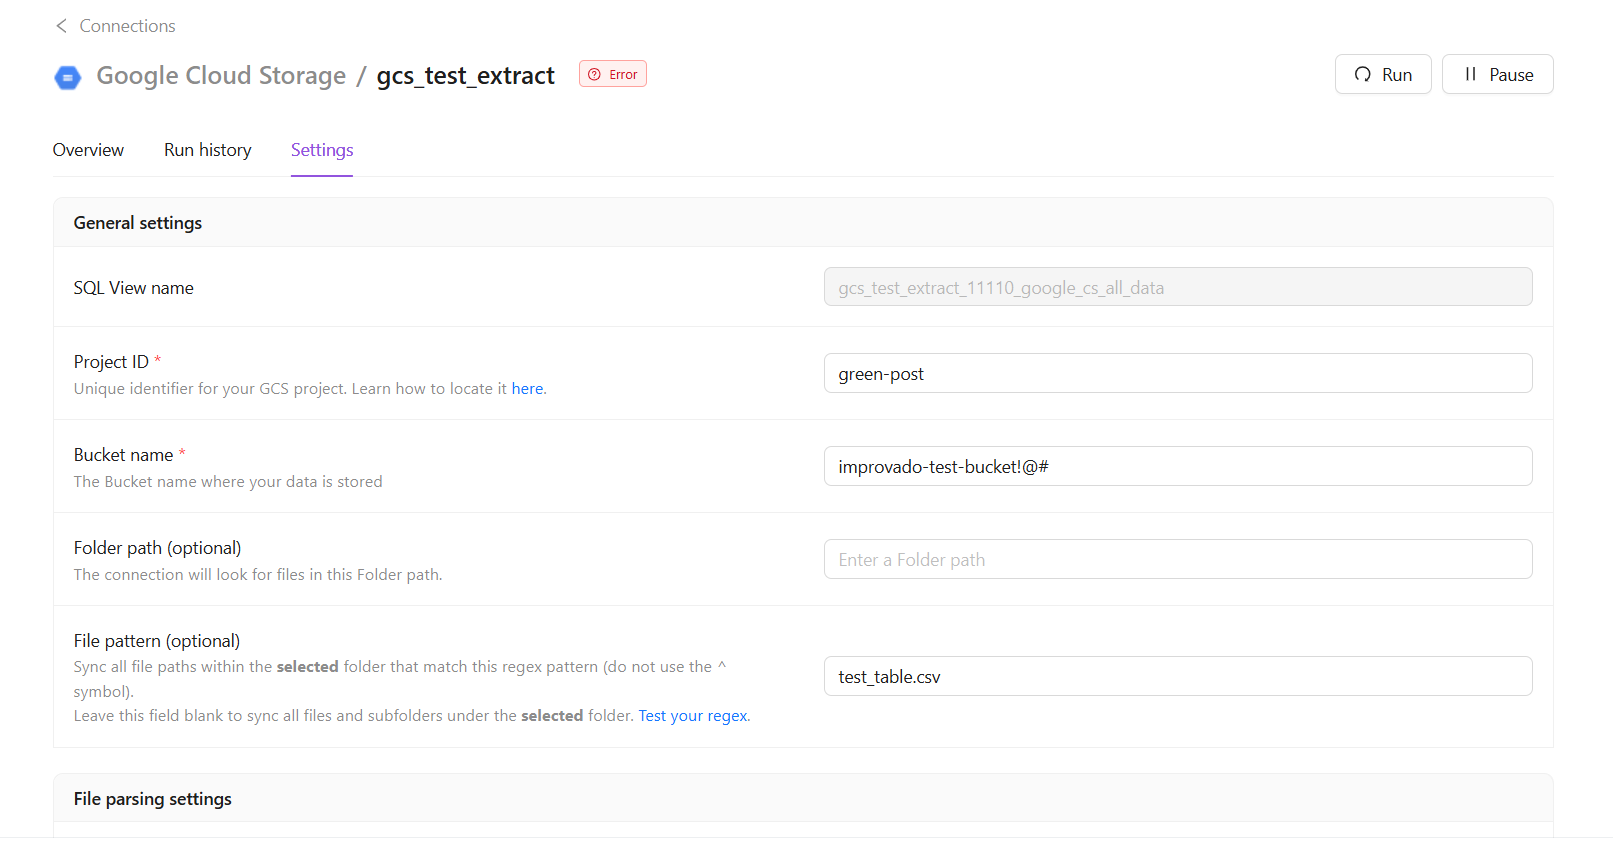
Settings tab
Here you can copy your SQL View name, Project ID, Bucket name, Folder path, File mask and scheduling settings for your data extraction.
Was this article helpful?
Thanks for the feedback!