Google BigQuery Destination
Note: This article covers the process of loading data to Google BigQuery Destination. You can learn how to extract data from Google BigQuery here.
Description
BigQuery is Google's serverless, highly scalable enterprise data warehouse designed for your data analysts. Improvado can load all data gathered from dozens of available data sources to this storage.
Setup guide
Follow our setup guide to connect Google BigQuery to Improvado.
Generate a Service Account Key JSON file
In order to use Service Account Key authentication, first, you need to generate a JSON file via Google Cloud Console using official documentation or an interactive step-by-step guide provided by Google. Alternatively, you can follow the instructions below.
- In Google Cloud Console, go to IAM & Admin → Service Accounts.
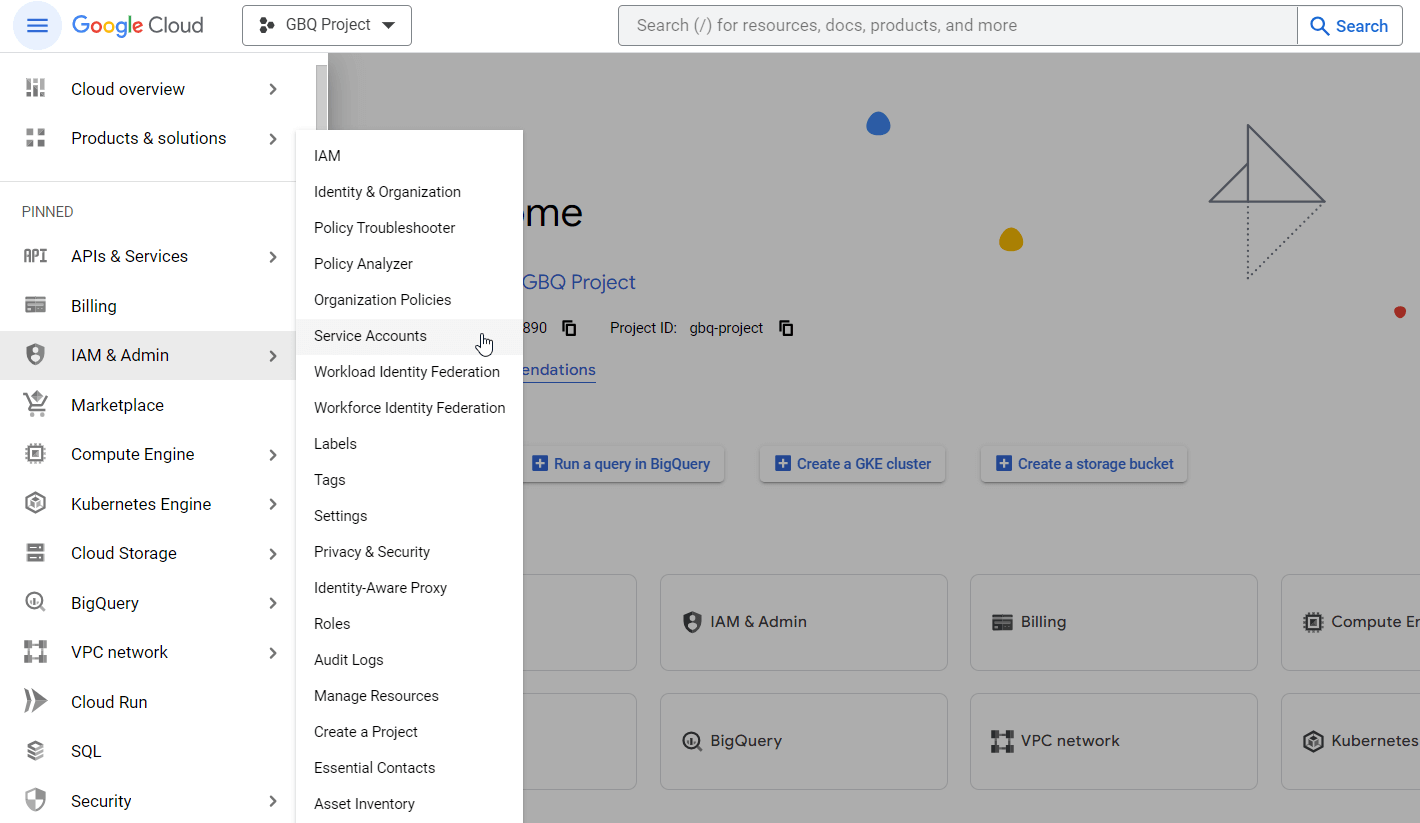
- Click on the Actions button for your Service account and select Manage keys.
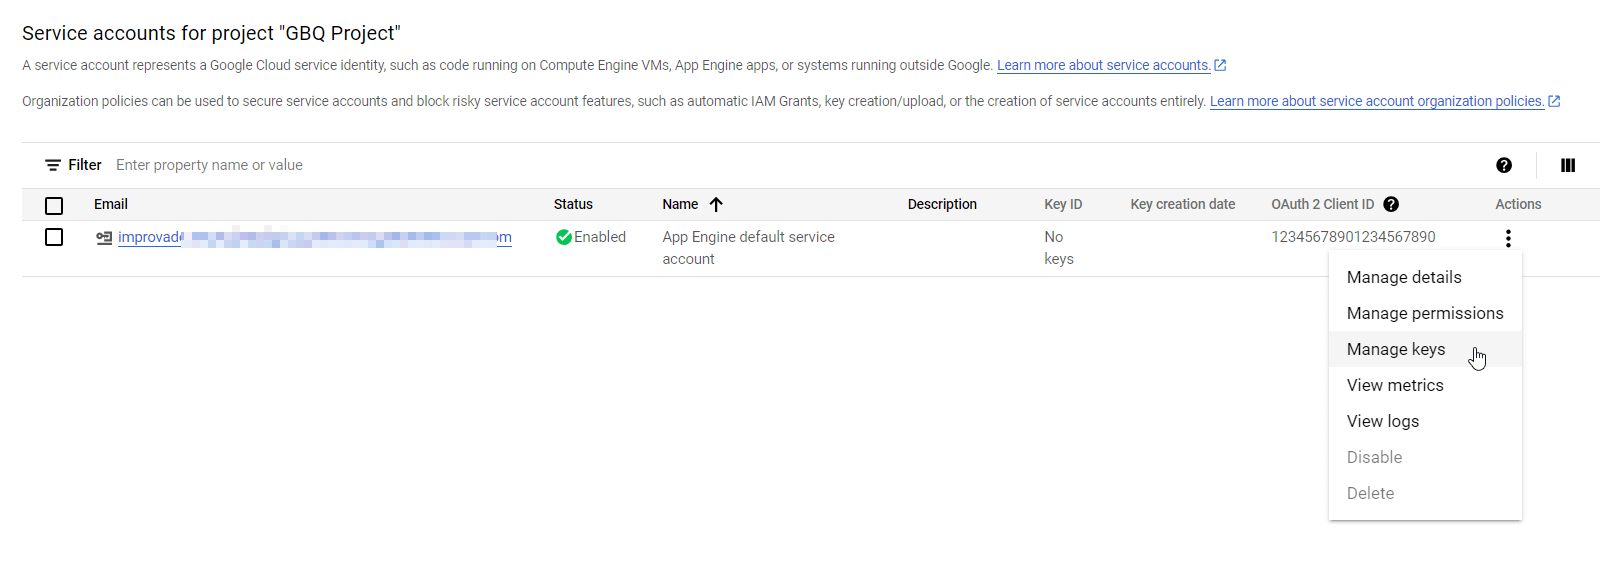
- Create a new JSON Private key in the KEYS tab.
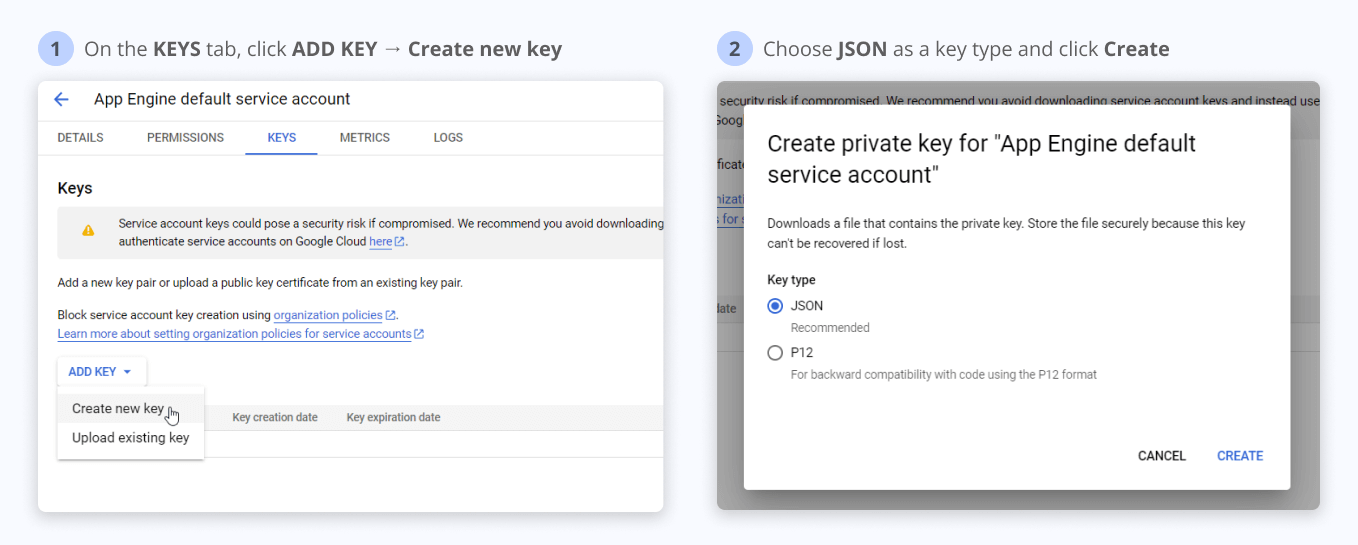
Note: Clicking Create downloads a service account key file. After you download the key file, you cannot download it again.
- In the downloaded JSON file, copy your Project ID.
Learn more about Workload Identity Federation configuration here.
Roles and permissions
Don't forget to set up the jobUser & dataEditor/dataOwner roles given to the Service account or a custom role with needed permissions. A detailed list of required permissions should look as follows:
Complete configuration
On the Google BigQuery connection page, fill in the following fields:
- Enter a name for your Destination connection in the Title.
- Select Service Account Key as the Authentication type (recommended).
- Unless you have specific security requirements, it is recommended to use Improvado-owned bucket as the Transitional GCS bucket. Google Cloud Storage bucket must belong to the same Google Cloud Platform project.
- Enter the Transitional GCS Bucket Name.
- Enter the Dataset Name.
- Select the neccesary Use static IP option from the dropdown.
- Upload your Service account key JSON file to the Service account key.
- Enter your GCP project ID as Project ID.
- Select the necessary Use binary strings option from the dropdown.
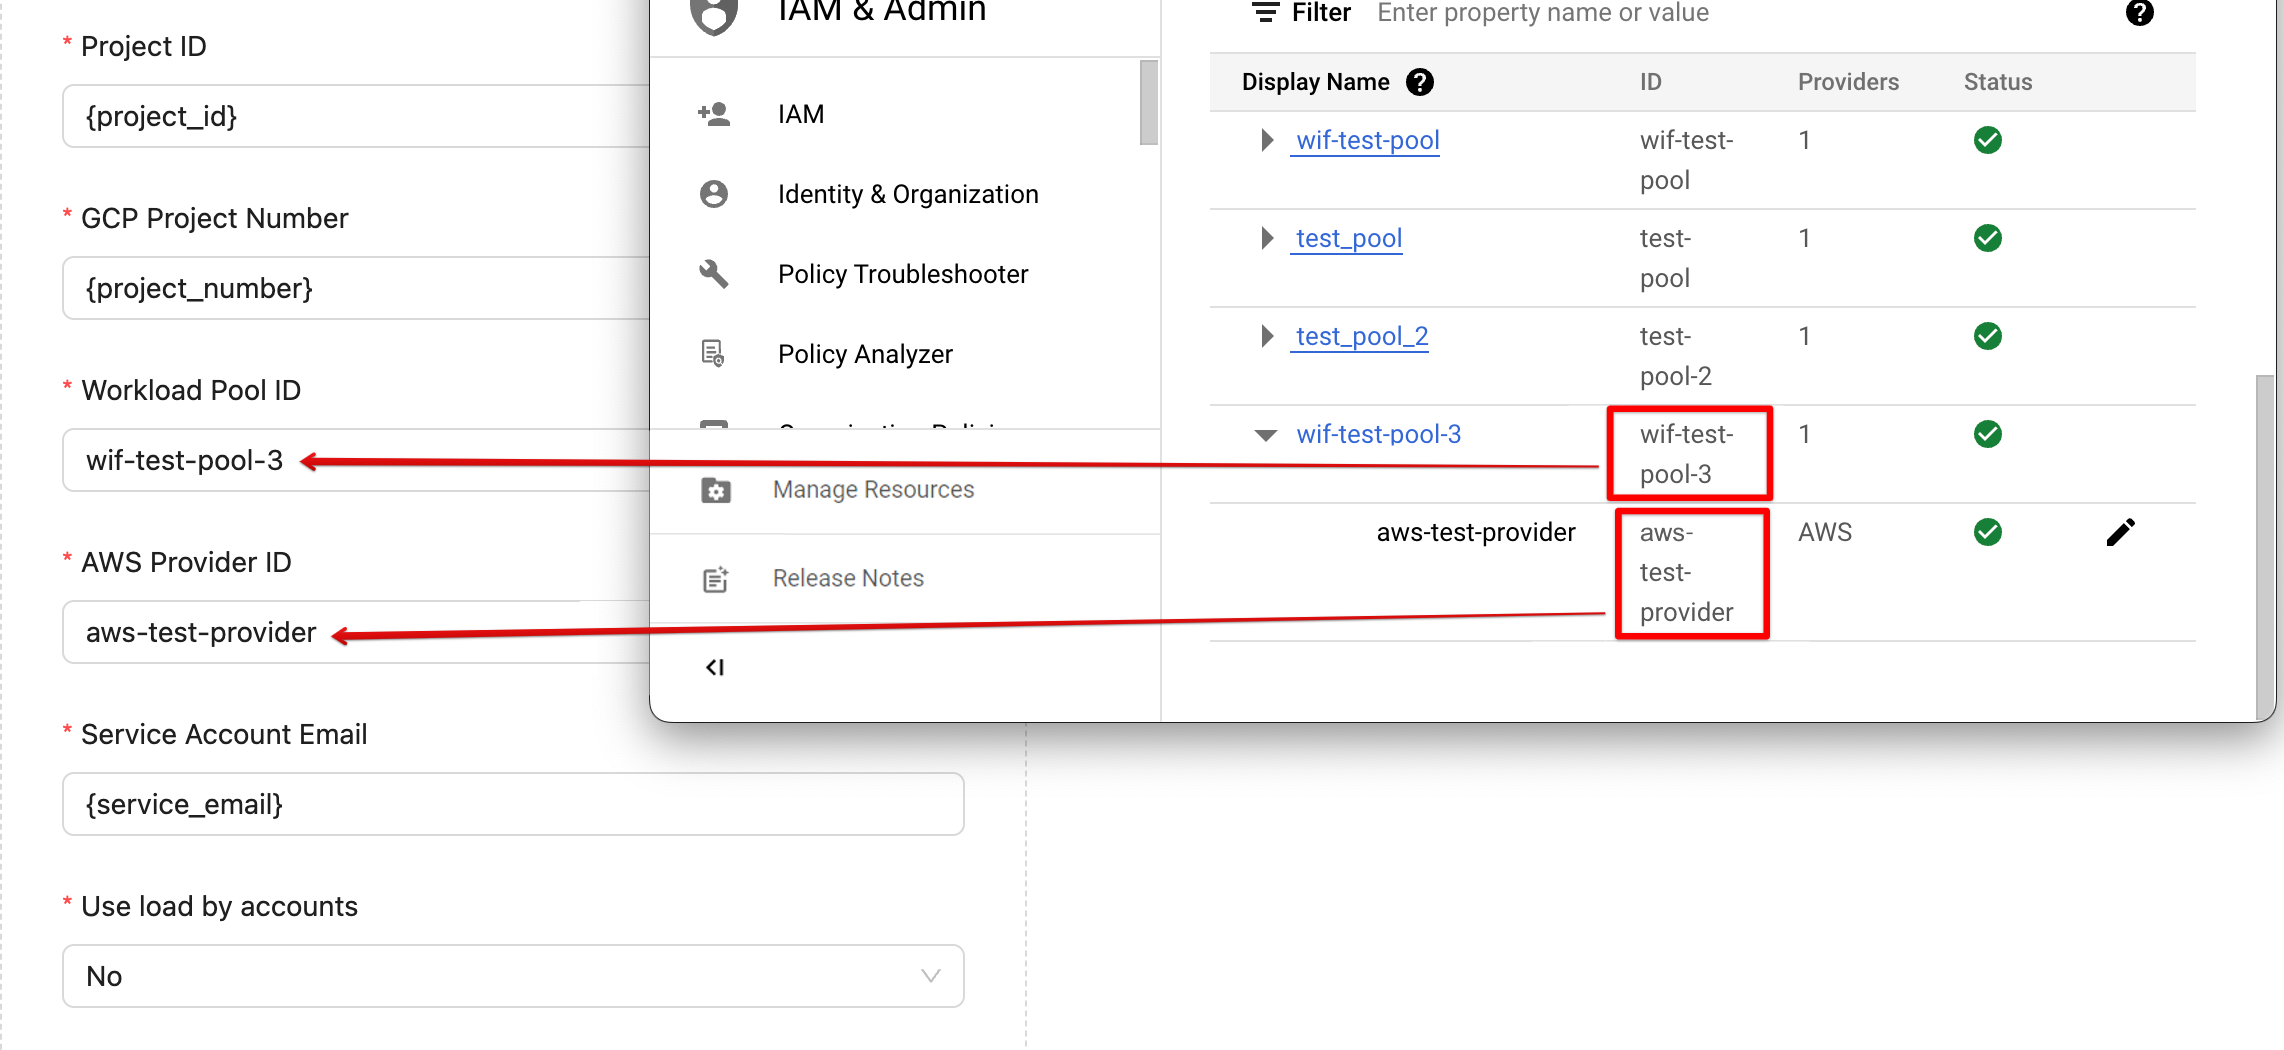
- (Workload Identity Federation only) Enter the GBQ Project Number. You can find it in Google Cloud Developers Console → Cloud Overview → Dashboards.
- (Workload Identity Federation only) Enter the Workload Pool ID. Pool IDs are used as identifiers in IAM.
- (Workload Identity Federation only) Enter the AWS Provider ID. Providers manage and verify identities.
- (Workload Identity Federation only) Enter the Service Account Email. A service account is identified by its email address, which is unique to the account.
Secondary Authentication Option (Workload Identity Federation)
Note: We recommend using the Service Account Key as an authentication method.
With Identity Federation, you can use Identity and Access Management (IAM) to grant external identities IAM roles, including the ability to impersonate service accounts. This approach eliminates the maintenance and security burden associated with service account keys.
- Set up a Workload pool and Provider for your Google Cloud project.
- Copy the Improvado AWS Account ID that you can find on the Destination connection page.
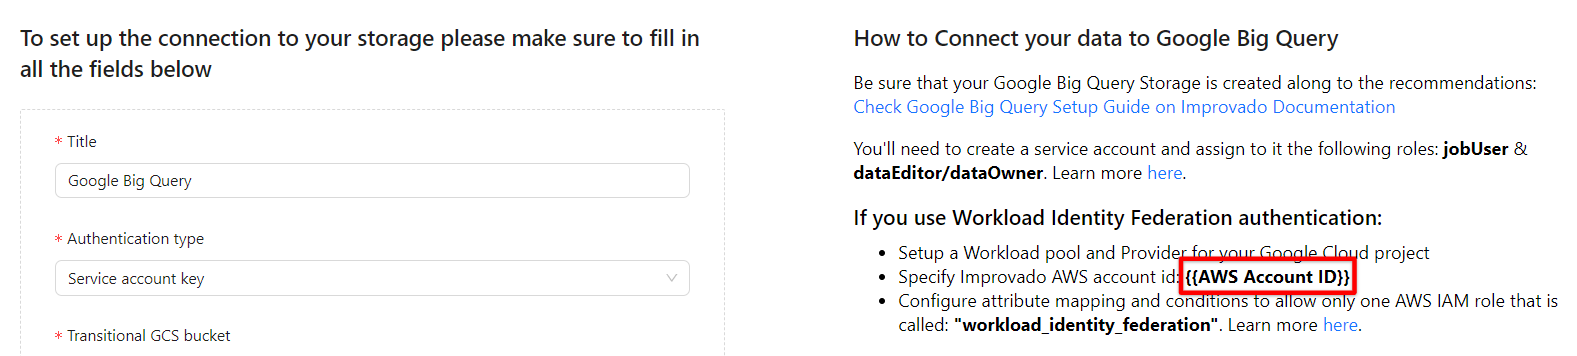
- Paste Improvado AWS Account ID and configure Attribute mapping:
- Set
attribute.aws_roleattribute value toassertion.arn.extract('assumed-role/{role}/').
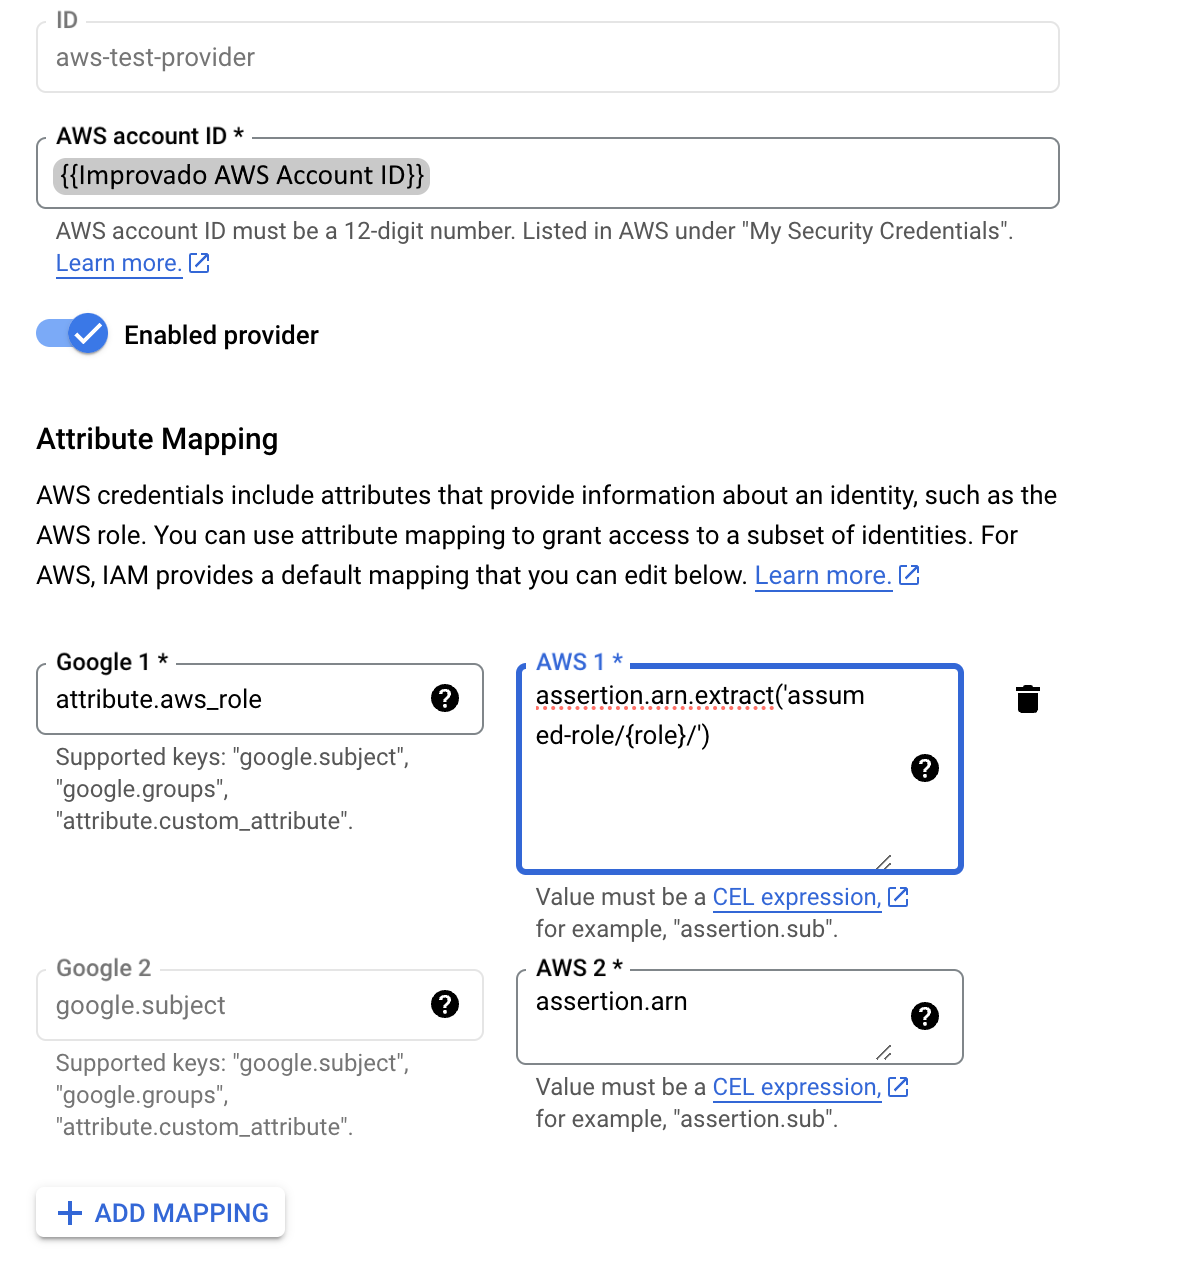
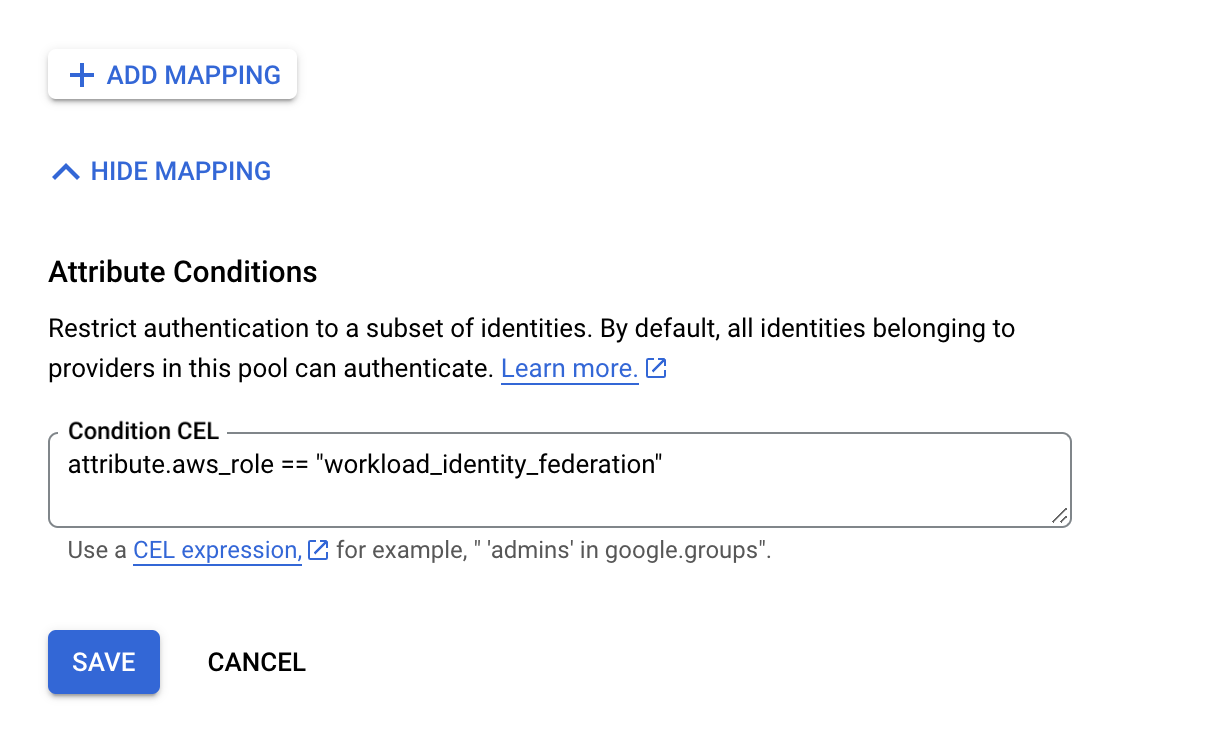
- Add a condition to allow only one AWS IAM role which is called:
workload_identity_federation. - Set the Condition CEL to
attribute.aws_role == "workload_identity_federation".
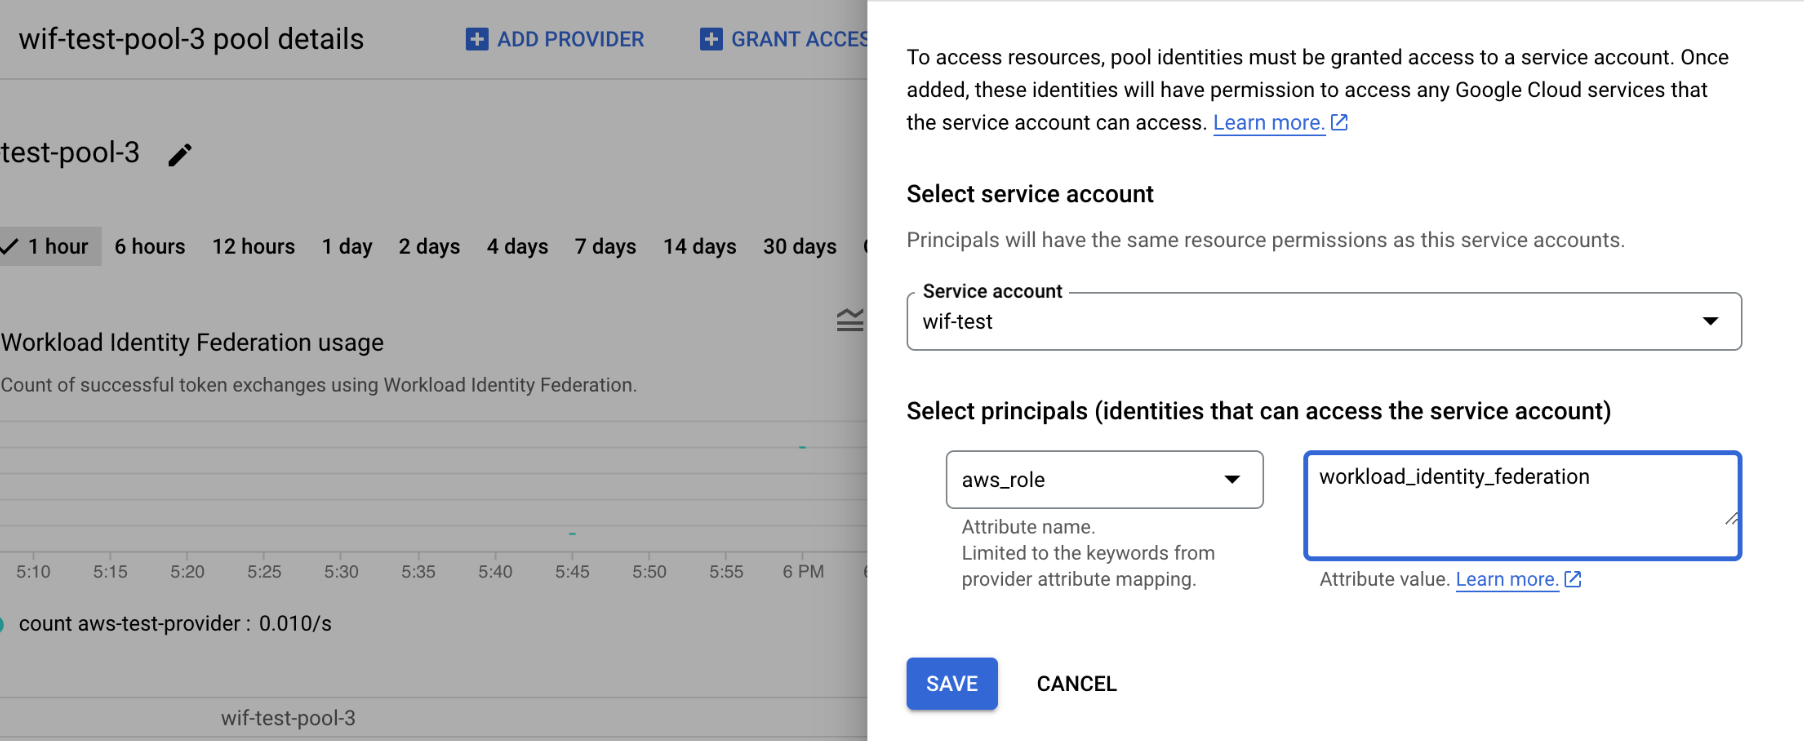
- On the Workpool details page, click the Grant access button.

- Select principals (identities that can access the service account):
- Set
aws_roleattribute value toworkload_identity_federation.
- In Complete configuration, enter your Workload Pool ID and AWS Provider ID to the corresponding fields in the Improvado UI.
Learn more about Workload Identity Federation configuration here.
Data formats and breakdowns
Improvado stores data GBQ in "sharding" format in tables named like TABLE_NAME_YYYYMMDD. Typically we break the data down by platform, account, dimension, and month, but there are some alternatives. We can implement a day-by-day division if you need it.
Additional options
If you want to have your accounts divided into groups and load those groups into different datasets (and even different GBQ accounts), we can handle this. Don't hesitate to reach our support for additional details.
Clustering keys
When creating a new load order to a Google BigQuery destination, you can select up to 4 clustering keys per table. BigQuery co-locates rows that share the same values in these fields, which makes queries that filter on the clustering keys faster and cheaper.
How to set clustering keys
- In Destinations → your GBQ destination → New load, pick the data tables you want to load and continue to step 2.
- In the Clustering column next to each table, click the cell and pick up to 4 fields.
- The order you pick fields in matters — BigQuery filters by the first key, then the second, and so on. Metrics are not selectable; clustering only makes sense for dimensions, date keys, and properties.
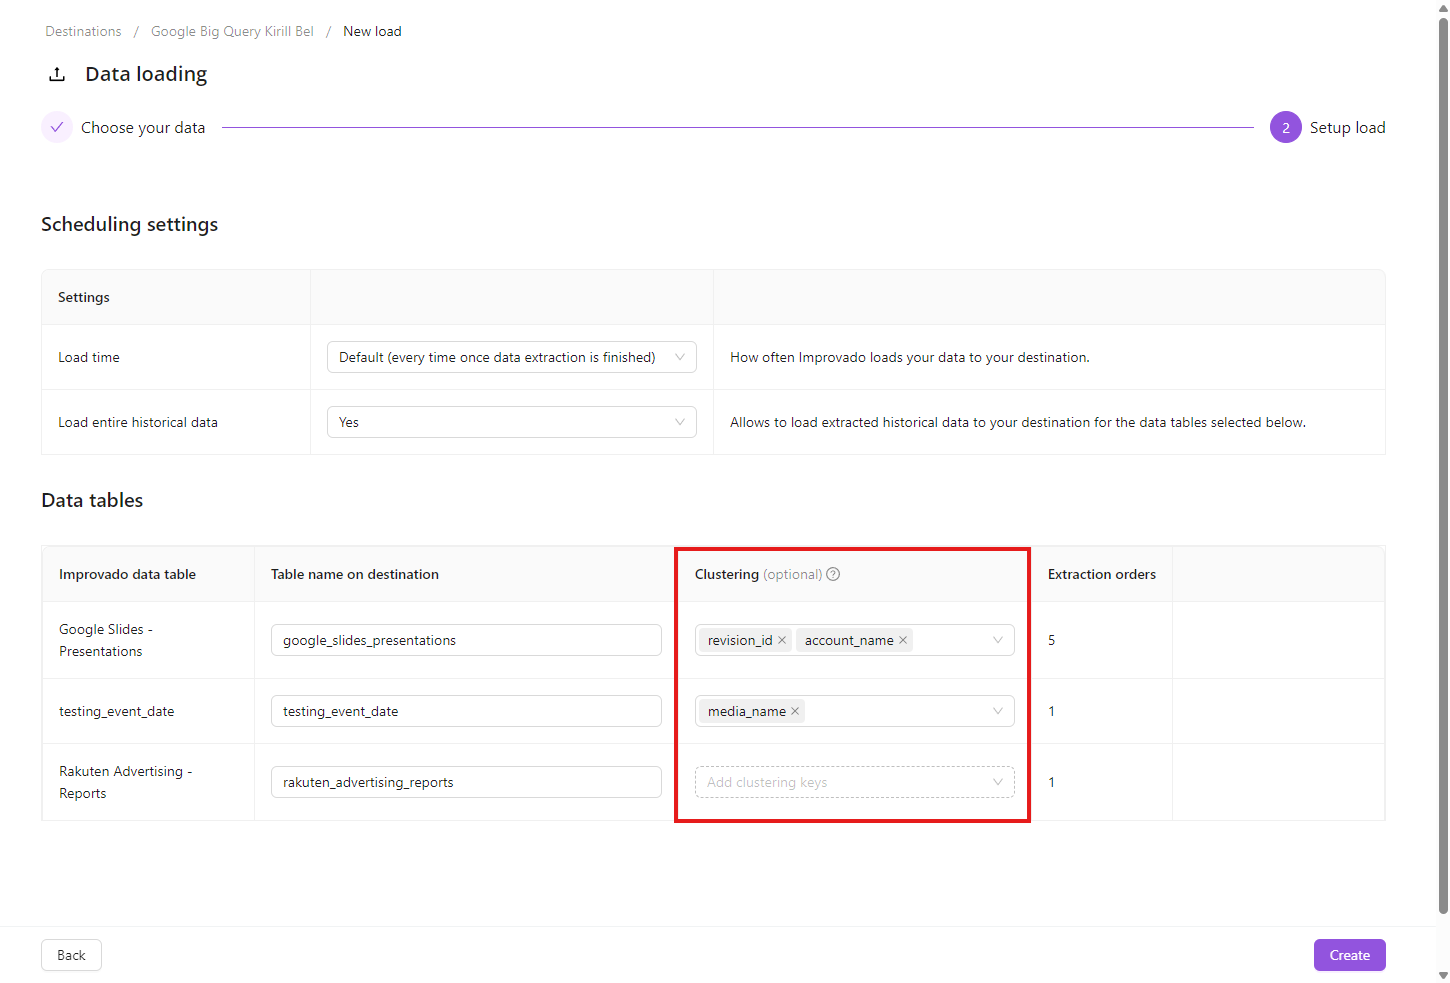
Changing or removing clustering keys
Clustering keys are fixed once a load order is created. To change them, recreate the load order.
Leaving the Clustering field empty creates the destination table without clustering.
Was this article helpful?
Thanks for the feedback!