Cross-Channel Wizard
How to build transformation using Wizard Flow?
Wizard is a step-by-step approach to creating a data model from existing recipes.
The main difference between the wizard and the traditional notebook approach is that we’ve separated the transformation layer into a distinct flow:
- All your recipes will be stored within My Recipes with easy navigation through the created models.
- The wizard automatically creates and updates the data model after each save.
- We added an enhanced flow for previewing and quickly debugging changes.
Navigation
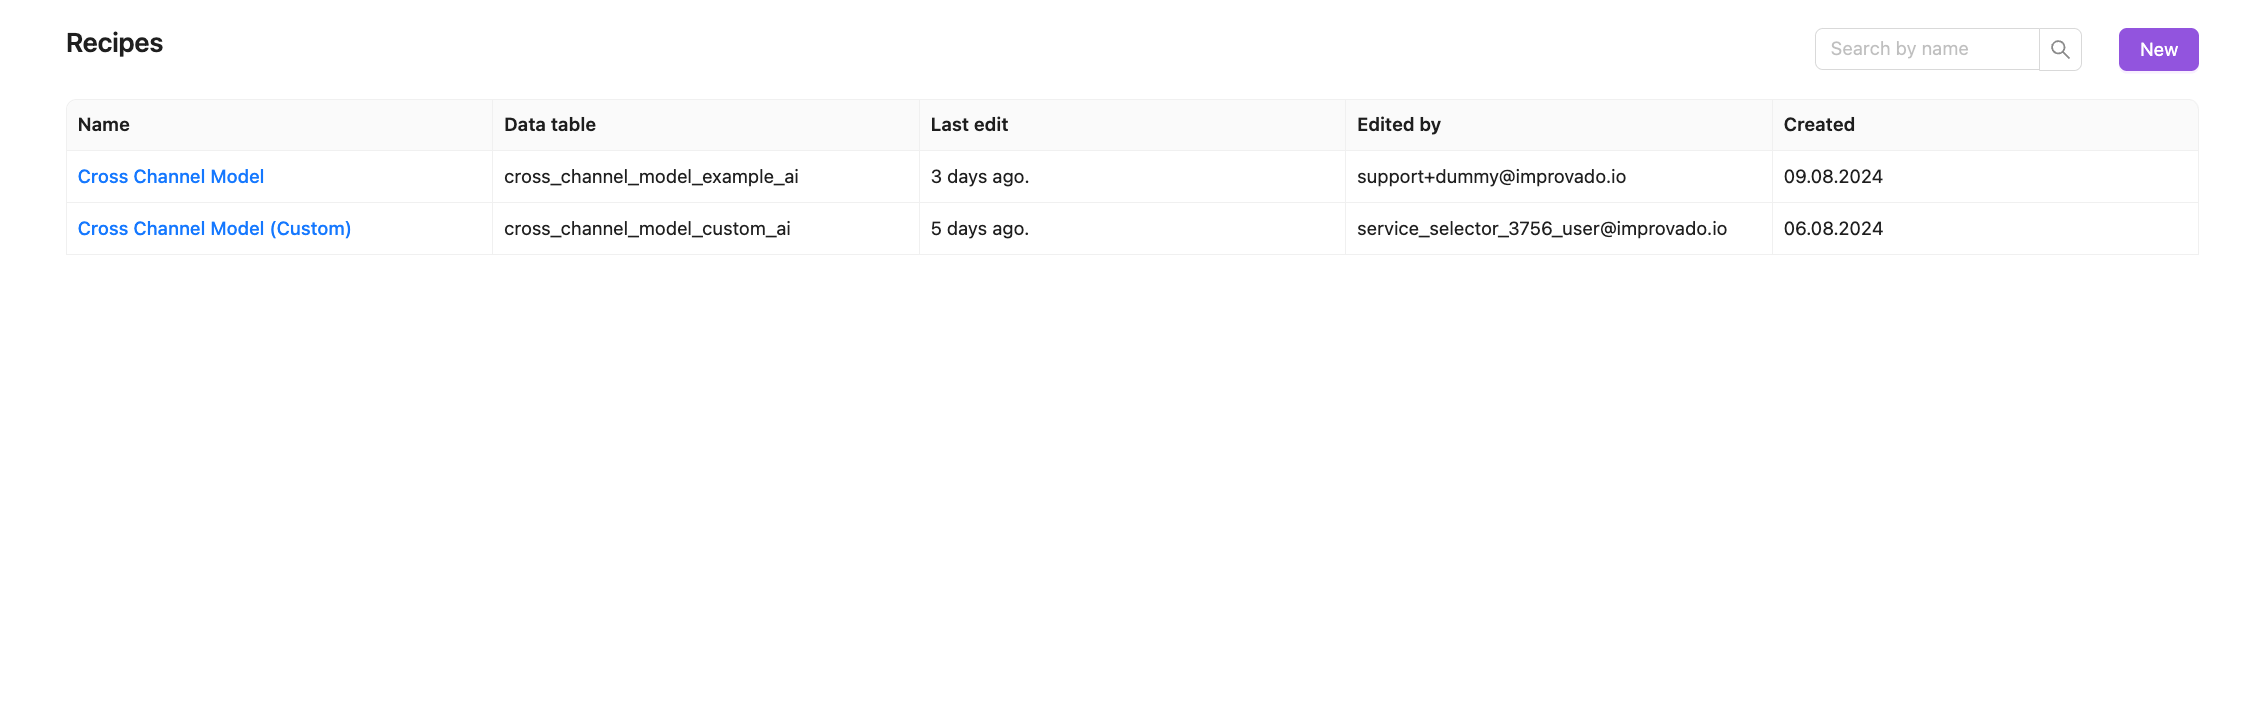
We’ve moved all transformation recipes to a separate tab, making it convenient to edit, collaborate, search, and modify them.
Creating the Data Model
In the first step, you name your model and the corresponding table.
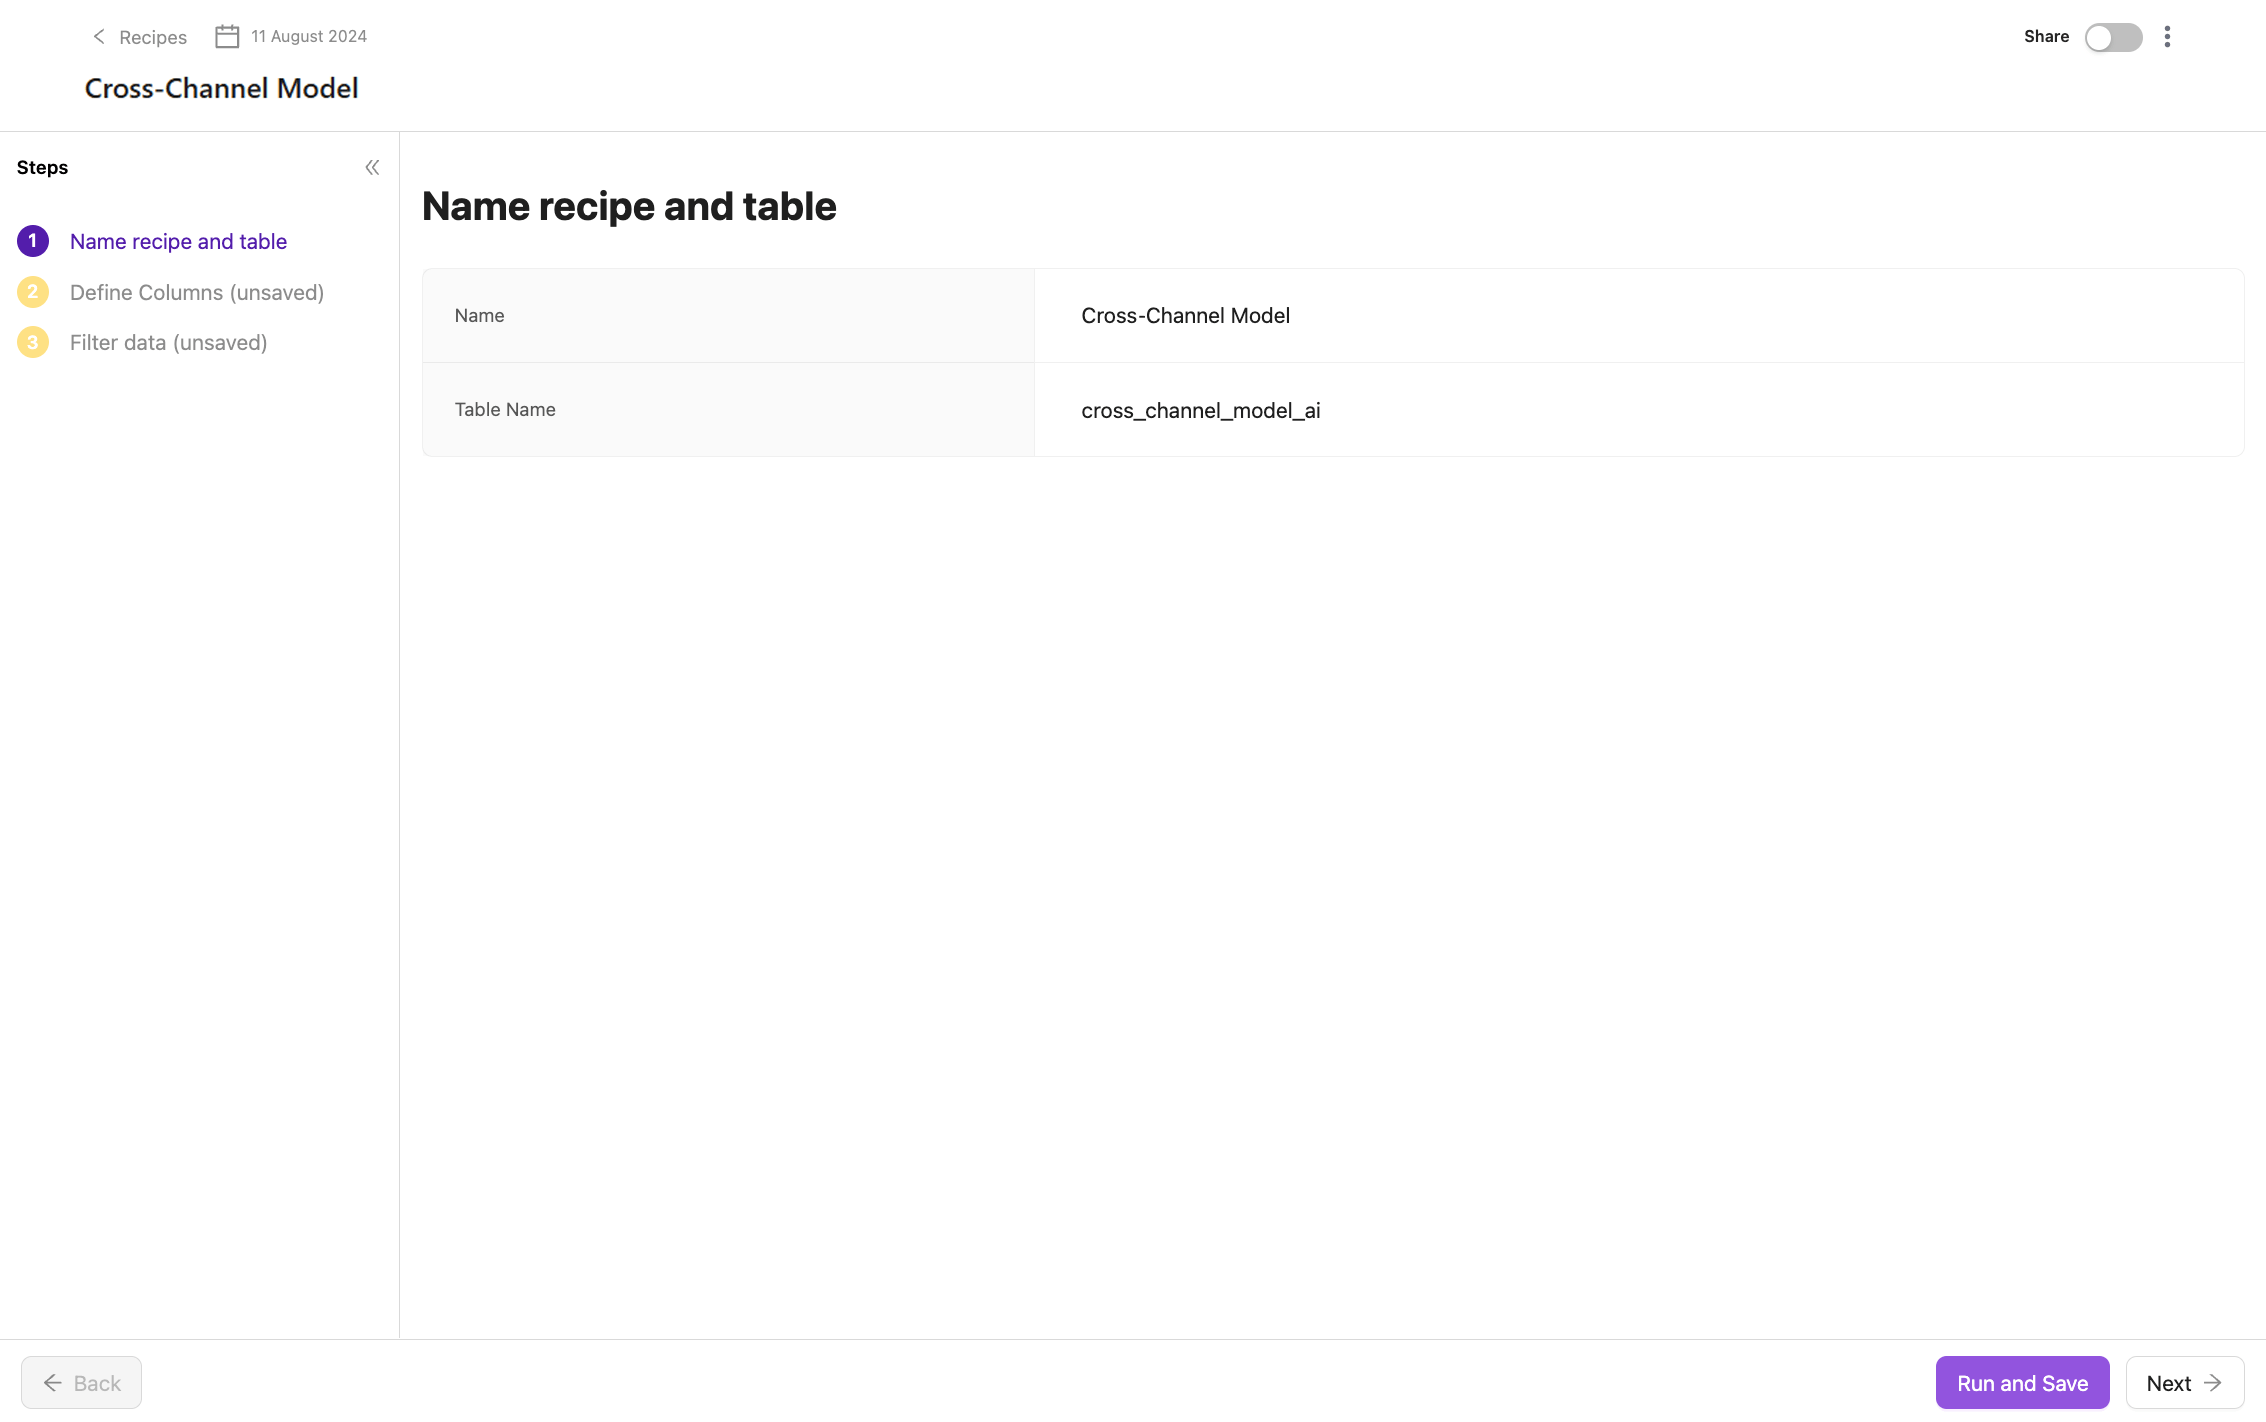
Any changes you make at each step of the wizard will be automatically applied to the data model you named in the first step when you click Run and Save.
Applying Changes
A significant improvement we’ve made is in how changes and debugging are handled.
Previously, when using notebooks, any changes to the data model took 30 to 90 seconds to reflect. We’ve reduced this time to a maximum of 5 seconds. Now, any modifications—whether through custom formulas, adding new elements, or applying filters—will be almost instantaneous, allowing you to experiment with transformations far more efficiently.
As mentioned earlier, we’ve introduced several key features to simplify the process of applying changes:
- Preview
- Custom Formulas
- Filters
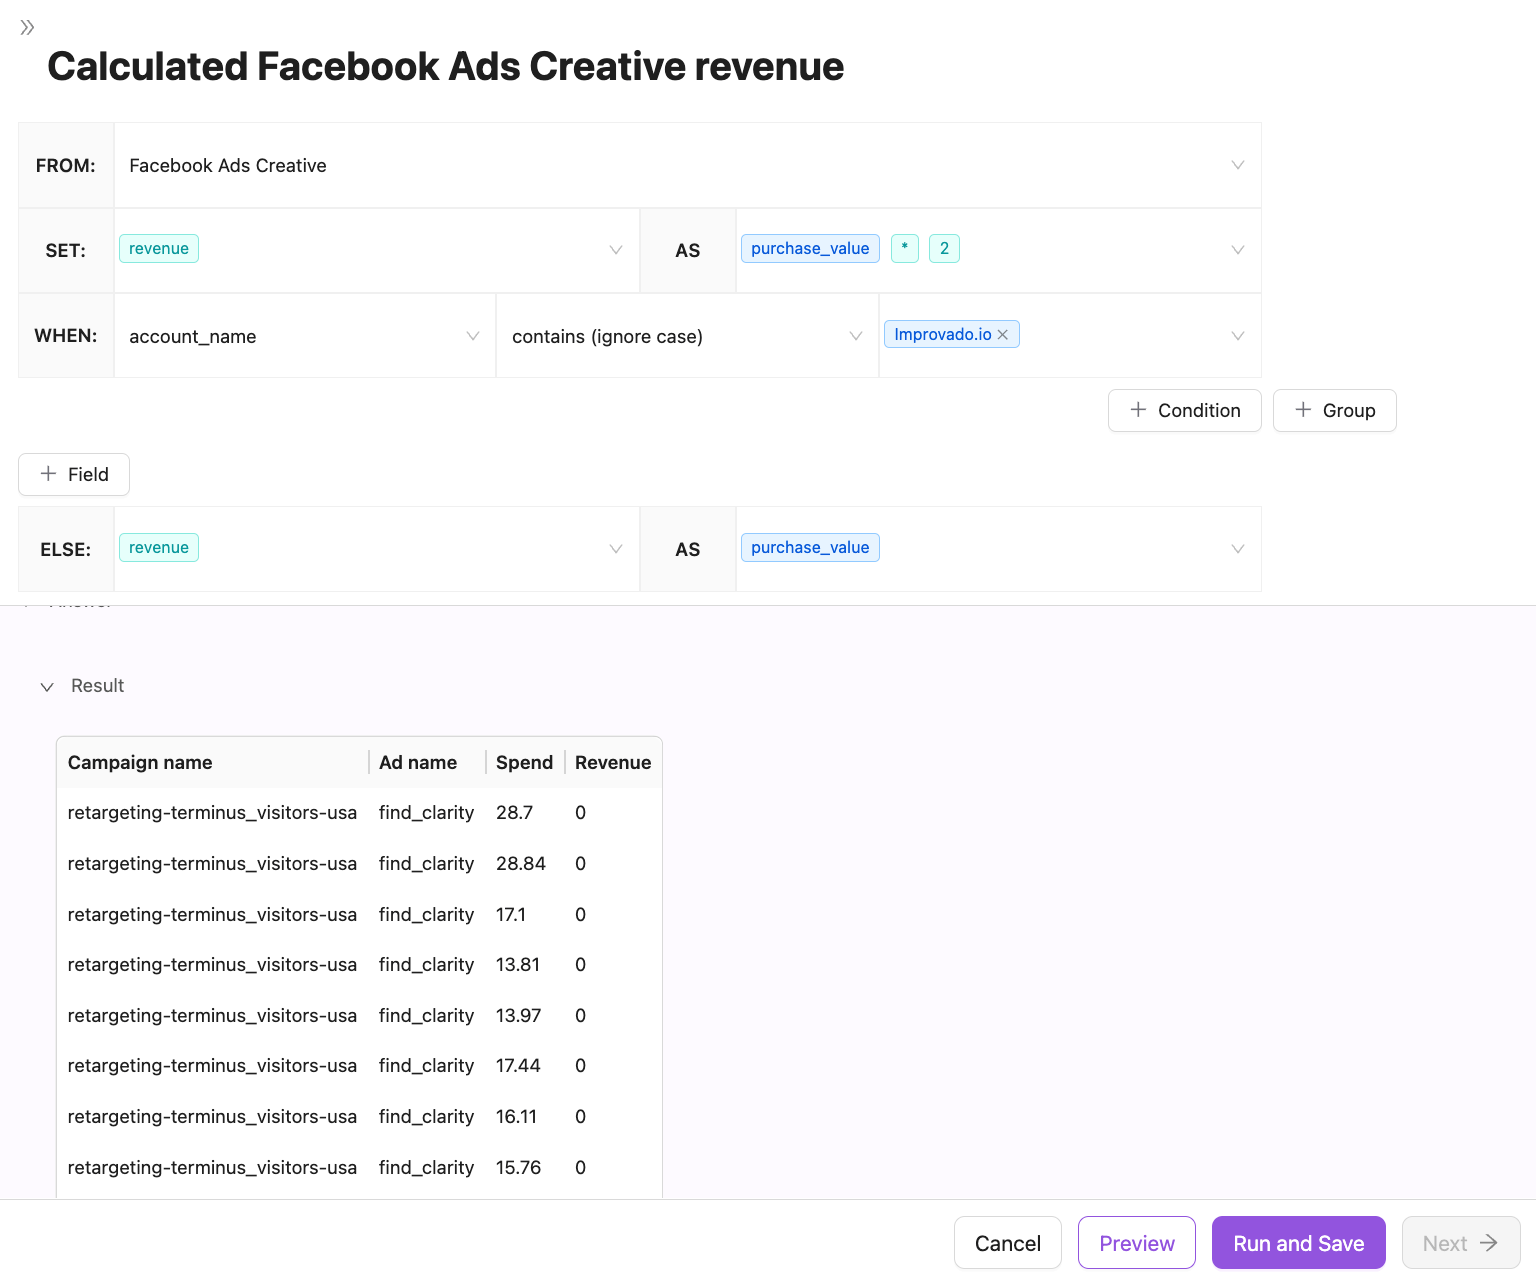
Preview
At each step of the wizard, you’ll have two main buttons: Run and Save and Preview. Run and Save saves the model, while Preview shows the model without saving it.
The primary purpose of Preview is to provide a simple way to assess the results of your changes before deciding to apply them and update the model.
Custom Formula
Custom Formula offers a convenient flow for applying transformations to specific fields within the model or to an individual field within a table.
To better understand, let’s look at an example for both use cases.
Applying to a field within a table
Suppose you calculate revenue differently for various accounts within the Facebook table.
To do this in our flow requires just a few clicks.
- Locate the revenue field in the Facebook table within our mapping.
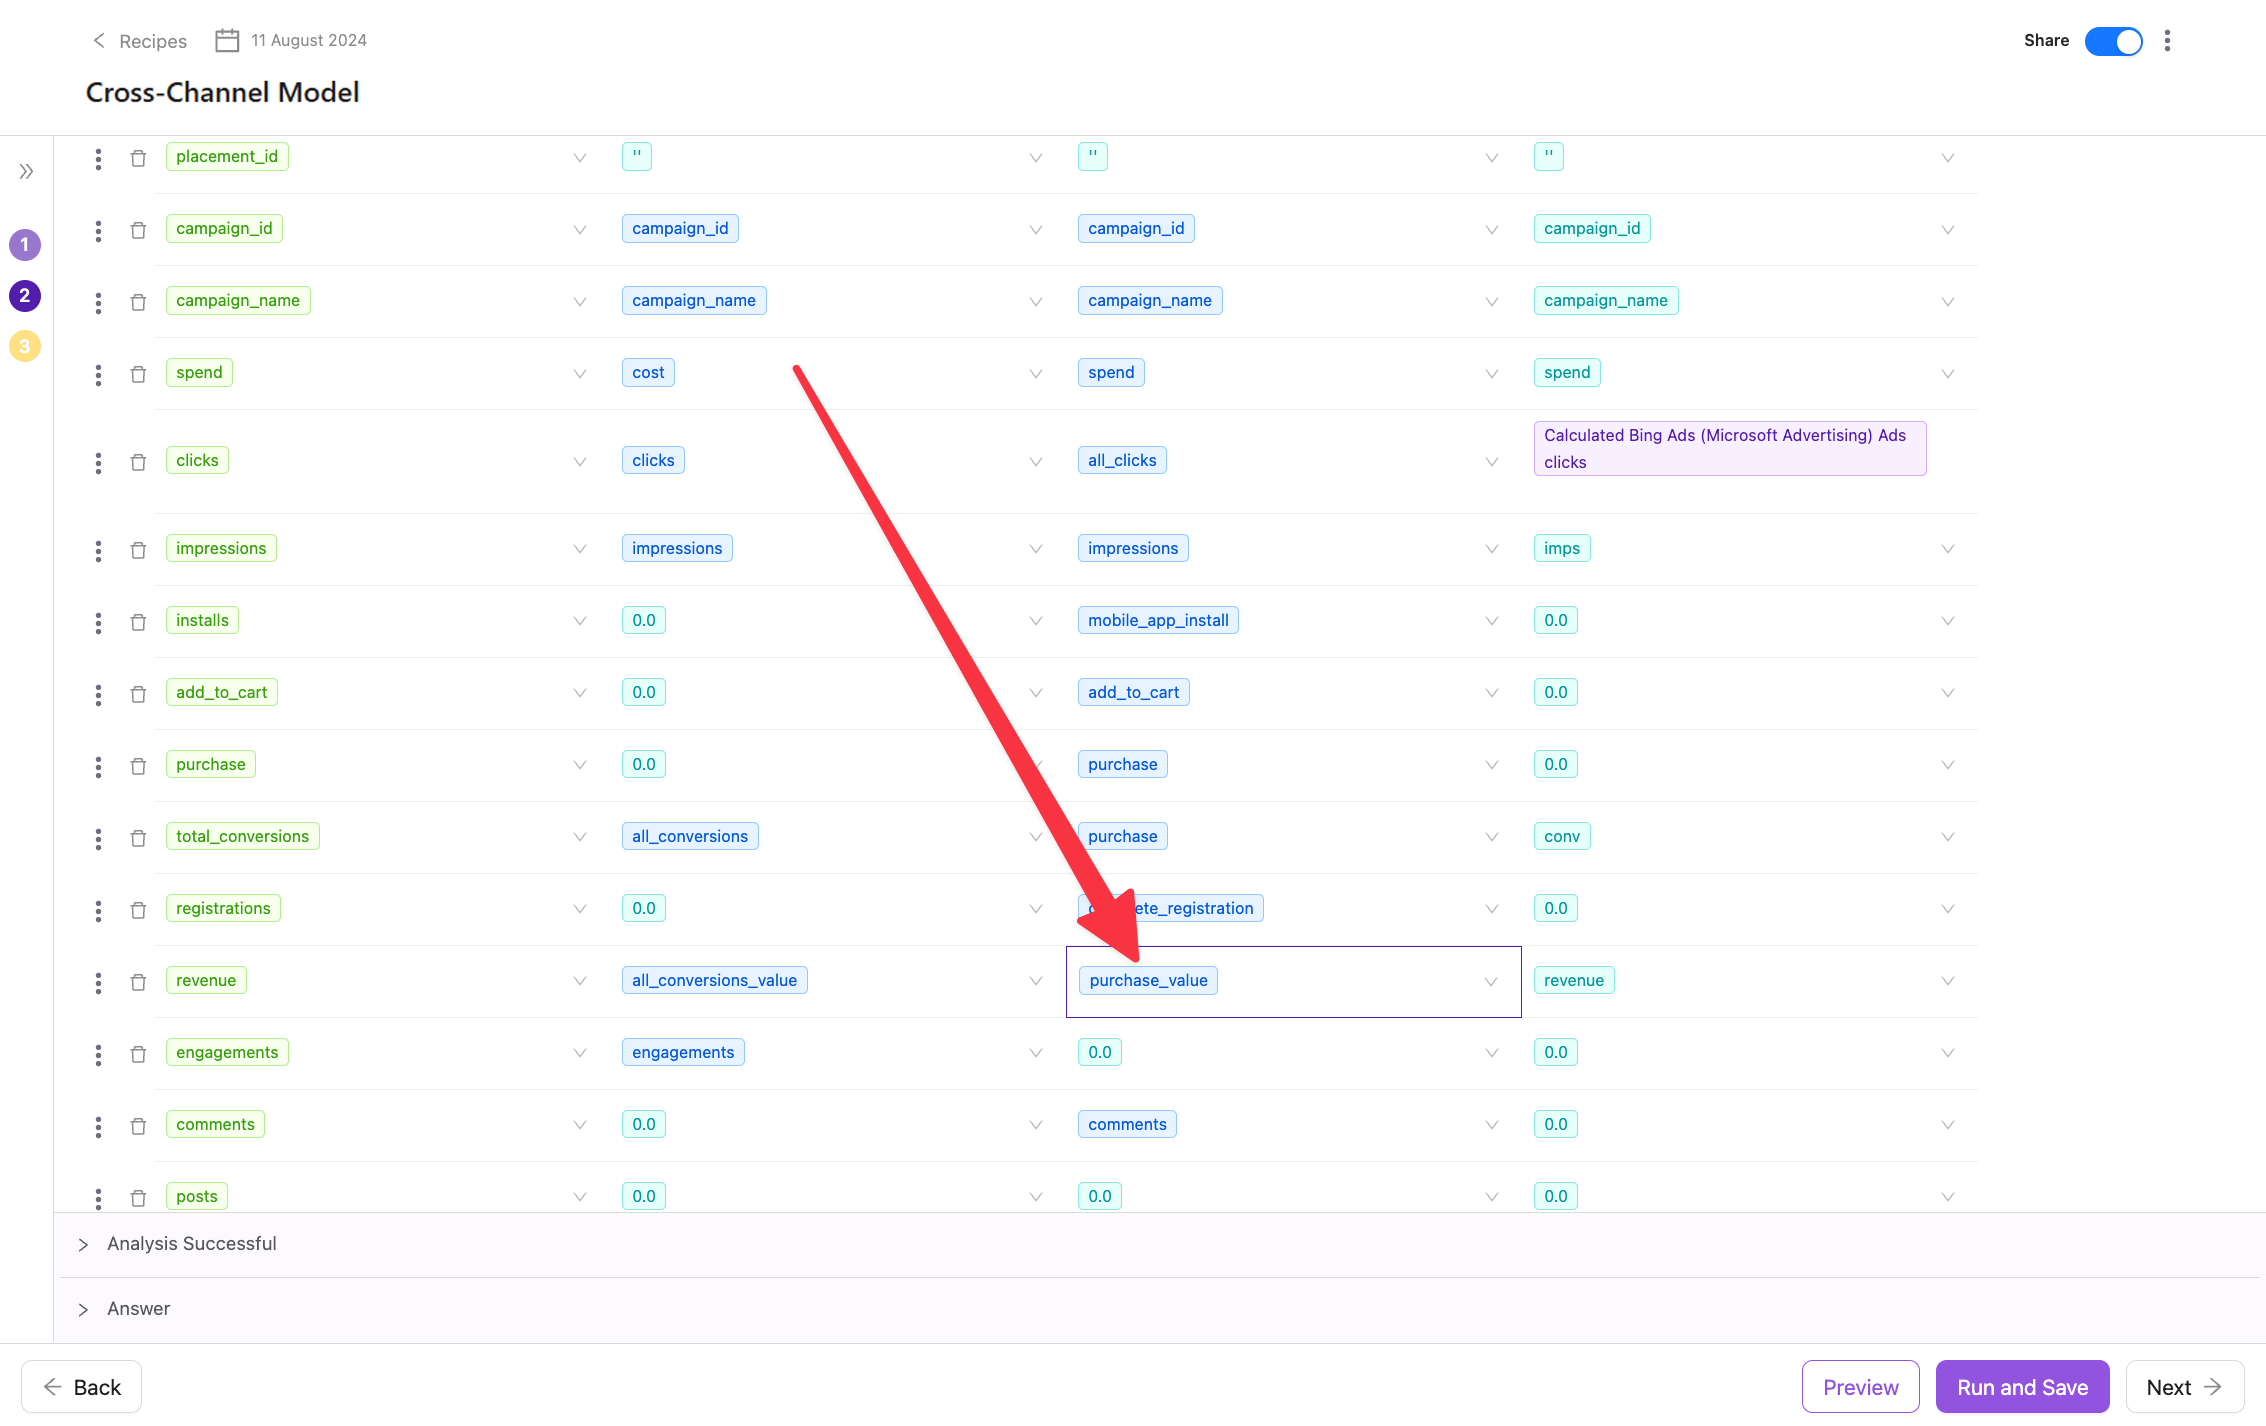
- Open the custom formula window.
- Use the no-code builder to write the formula.
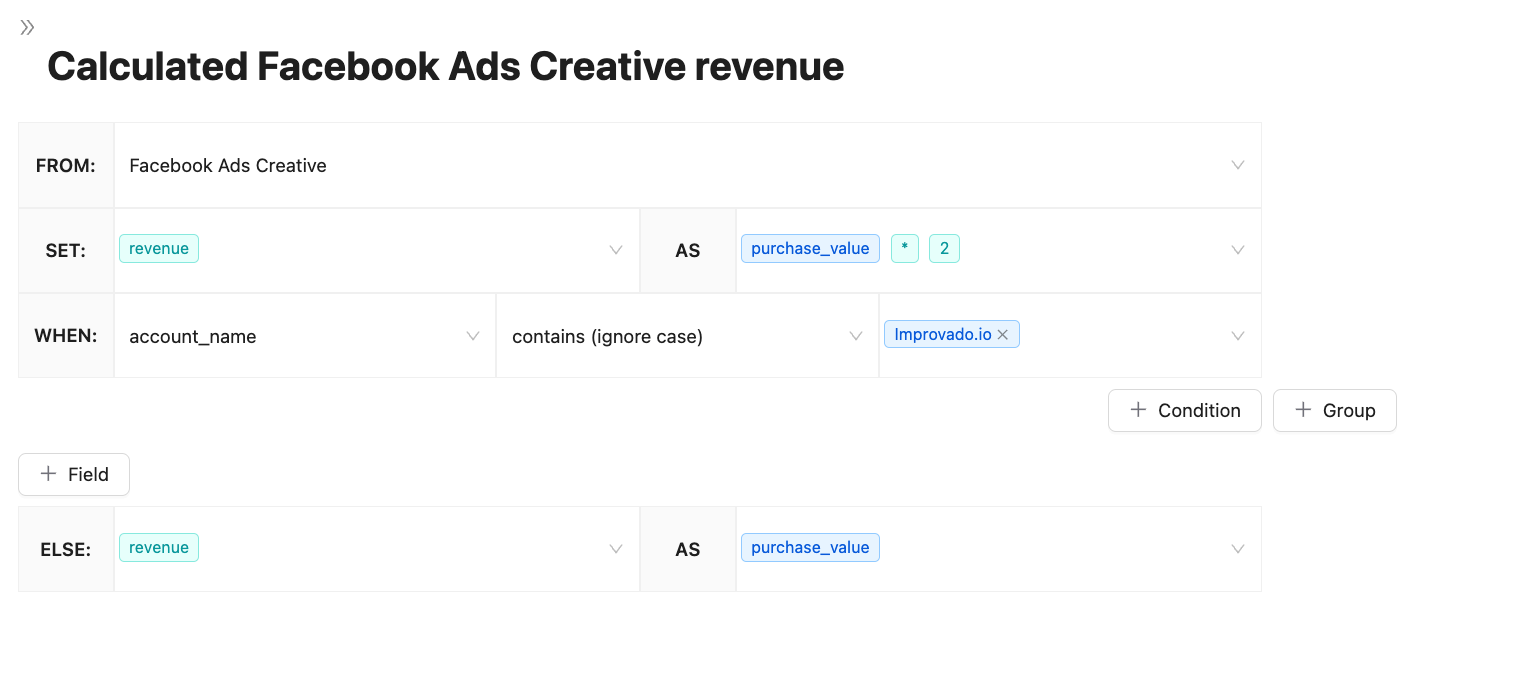
- Preview to ensure everything works as expected.
- Click Run and Save to apply the changes.
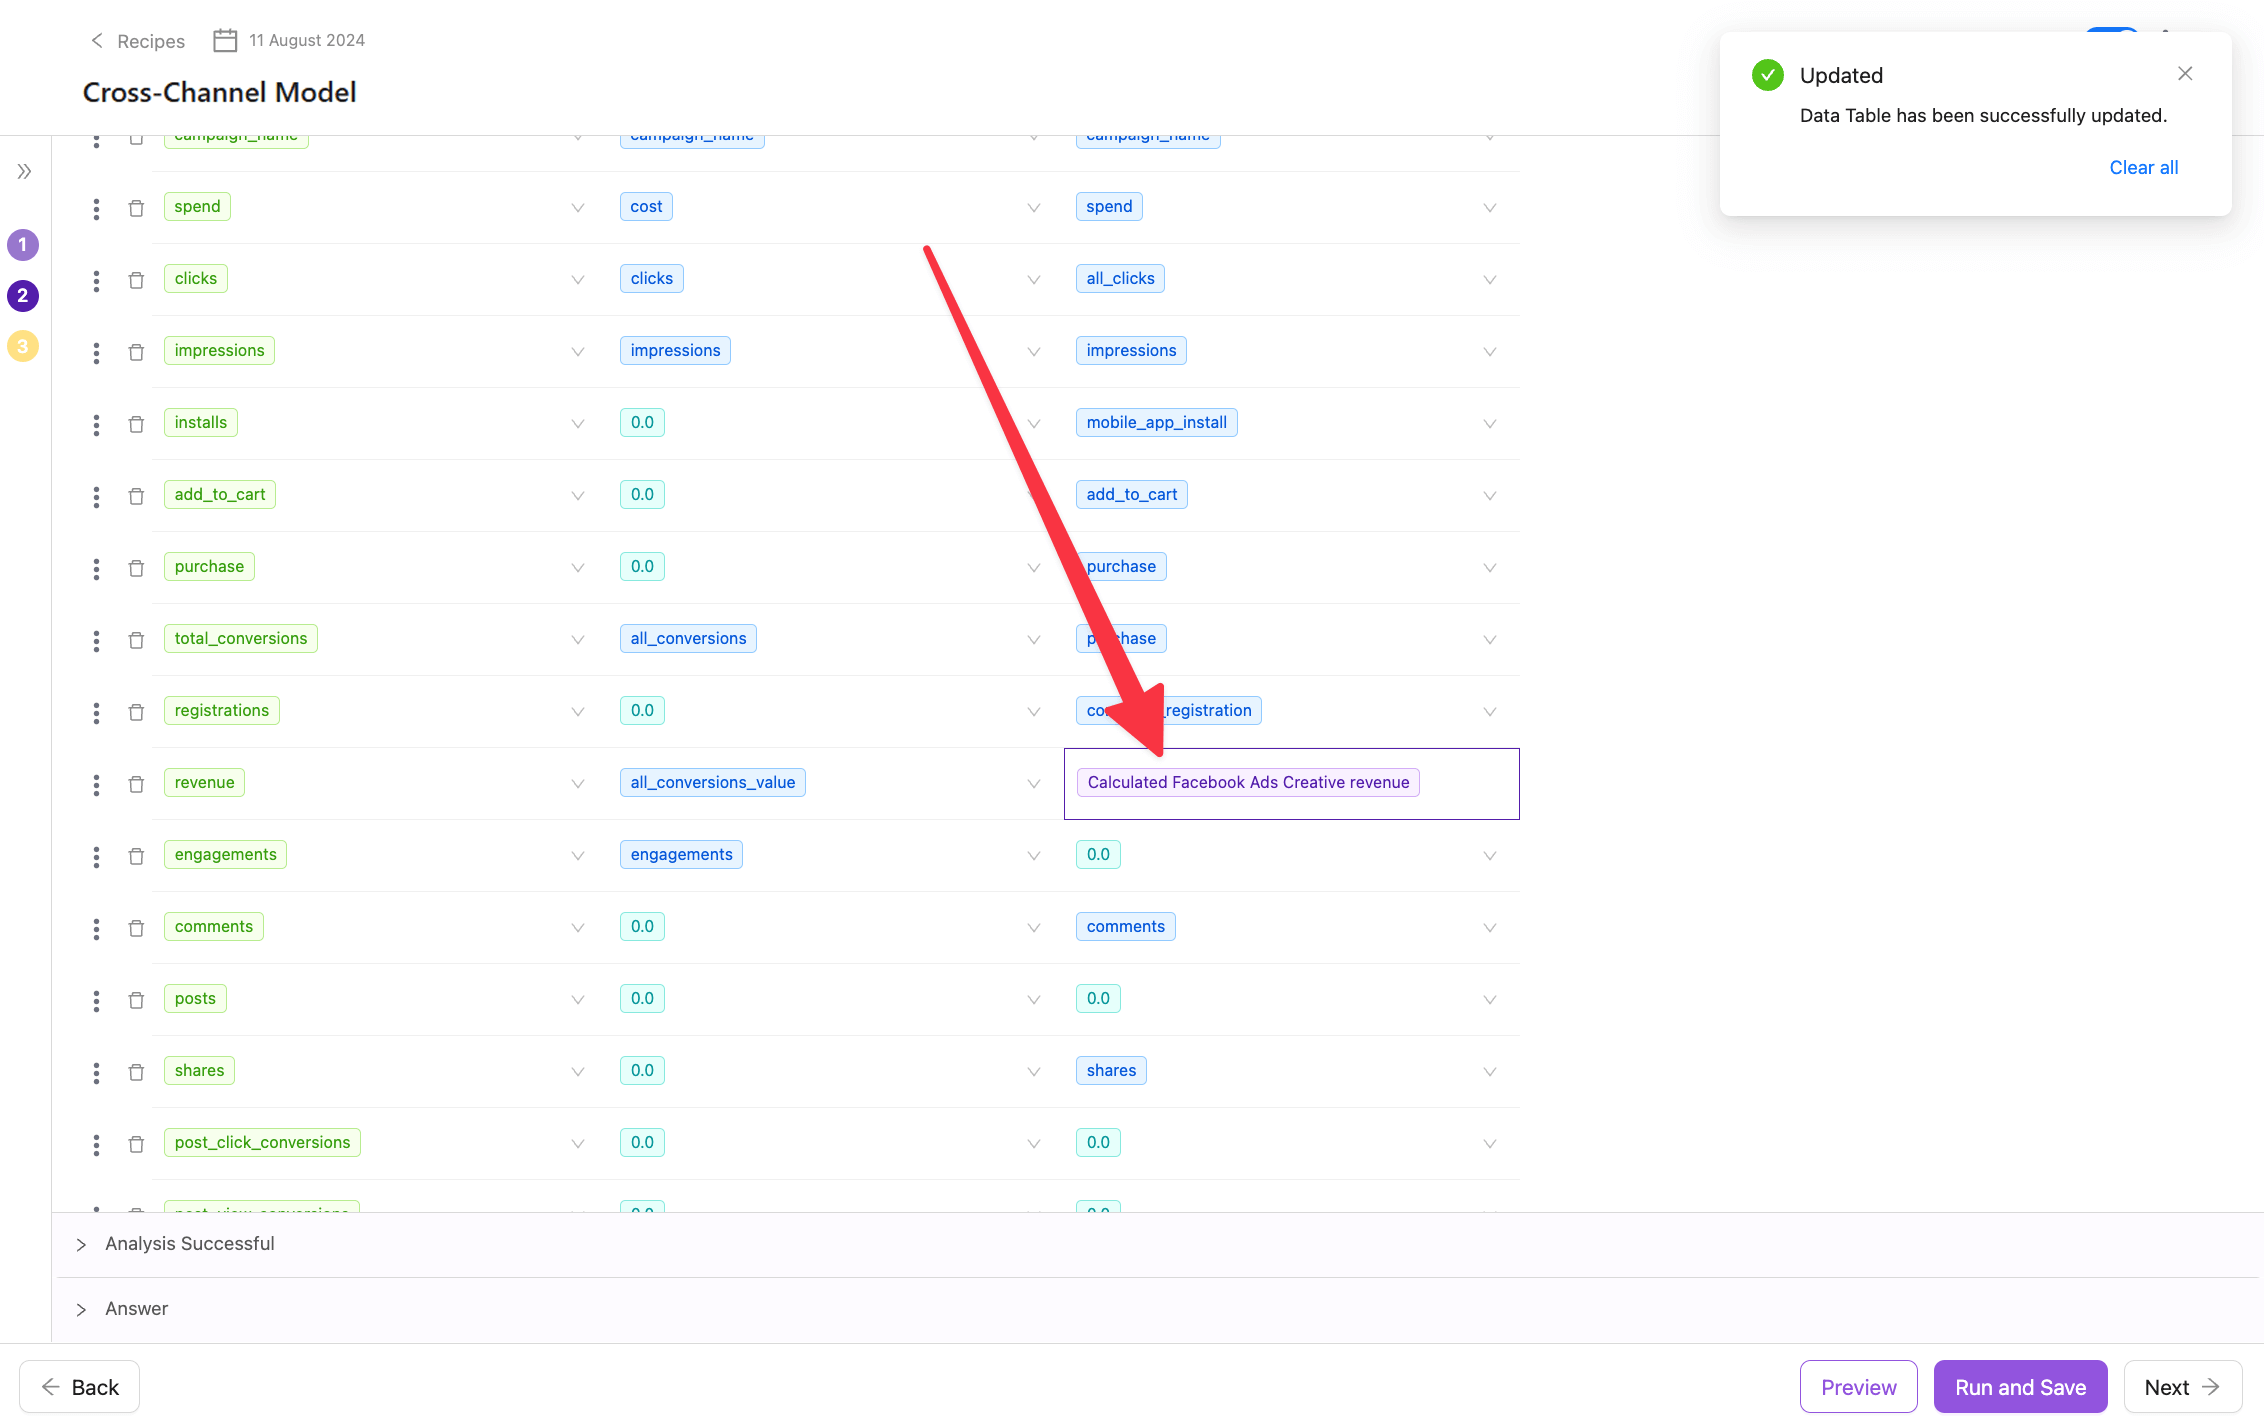
Your transformation is successfully applied!
Preview to whole model
Now we can do the same at the entire model level!
Filters
This step-by-step flow allows us to isolate significant elements into individual steps, enabling you to debug easily and quickly apply and validate changes.
For example, applying filters is just as simple as using formulas.
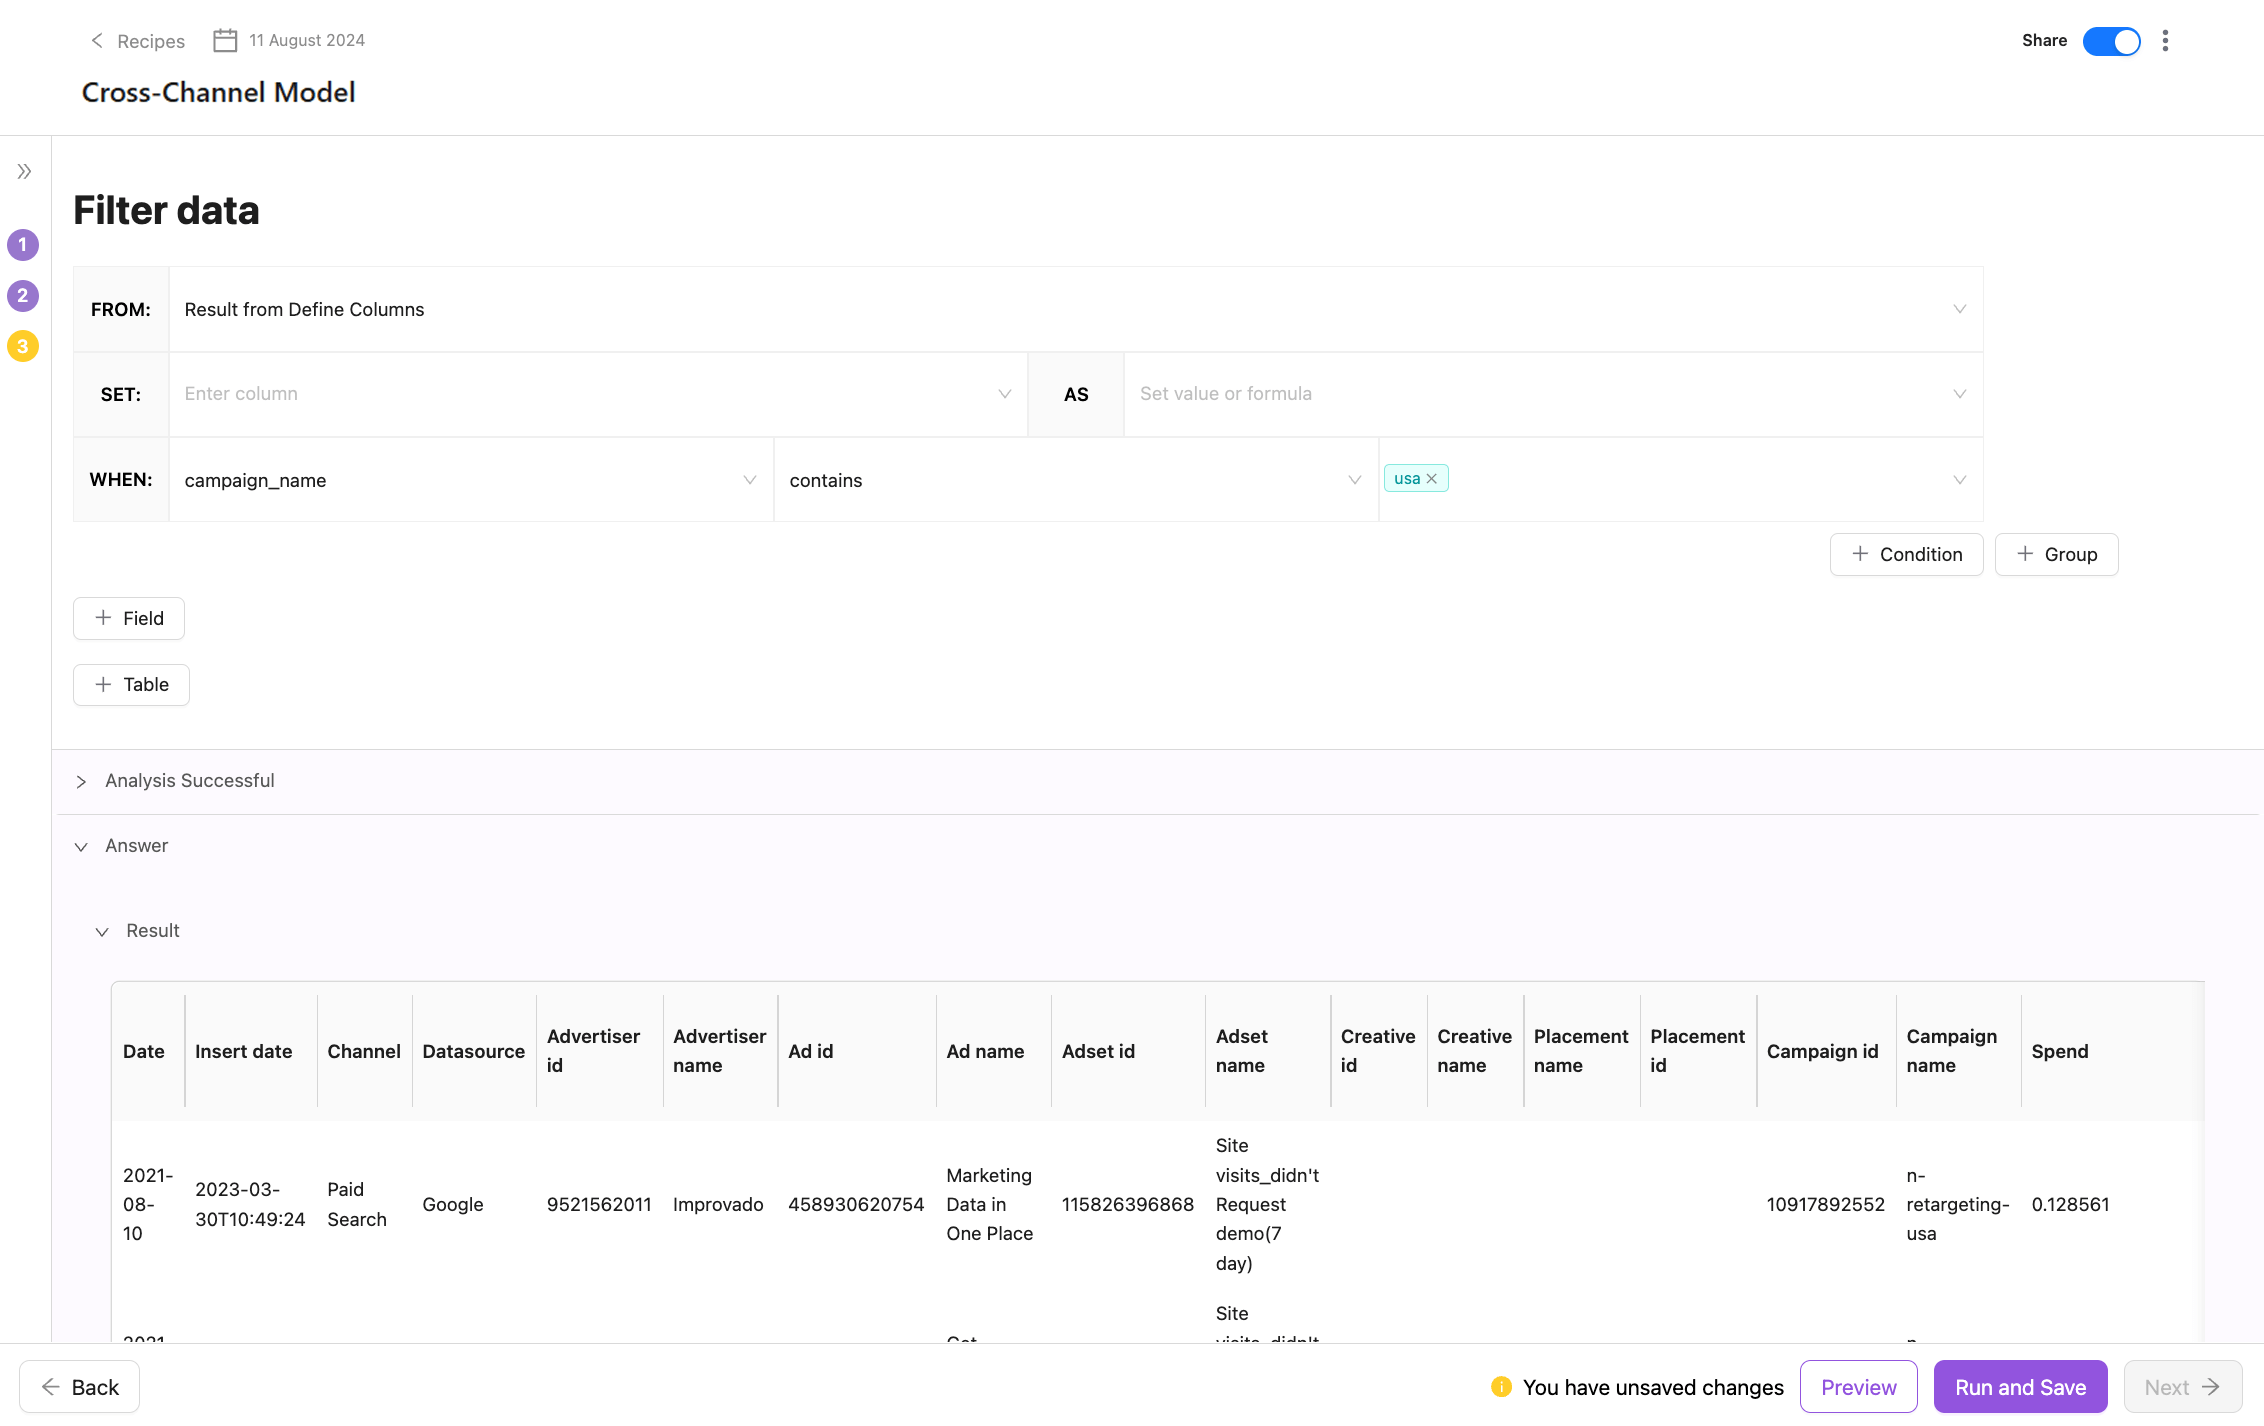
Apply the filter, check via preview that the model works correctly, and save.
Conclusion
The primary goal of this update is to make the transformation process more intuitive and user-friendly, enabling full self-service. This way, creating complex, custom models becomes easy, fast, and understandable.
Related articles
-
Apply Custom Formula
Learn how to quickly apply no-code calculations to data across columns, tables, or entire datasets using Custom Formulas.
-
Blend Data
-
Filter Data
-
Group Data
-
Handling Custom Naming Convention
Explore how to manage naming conventions with the Cross-Channel Wizard.
-
Handling Functions in Custom Formulas in Wizard
-
Join Data
-
Preview Data