Connecting SFTP hosted in Azure Blob Storage to Improvado
Overview
This guide walks you through connecting an SFTP server hosted on Azure Blob Storage to Improvado.
Azure's SFTP support for Blob Storage enables secure file transfers but requires specific configuration steps, including user creation, SSH key generation, and proper permission settings.
Creating a new user & generating a private key
Select your storage account in Azure’s Storage center
Go to Settings → SFTP for your storage account.
Click Add local user button. In the SSH keys section, select Generate new key pair.
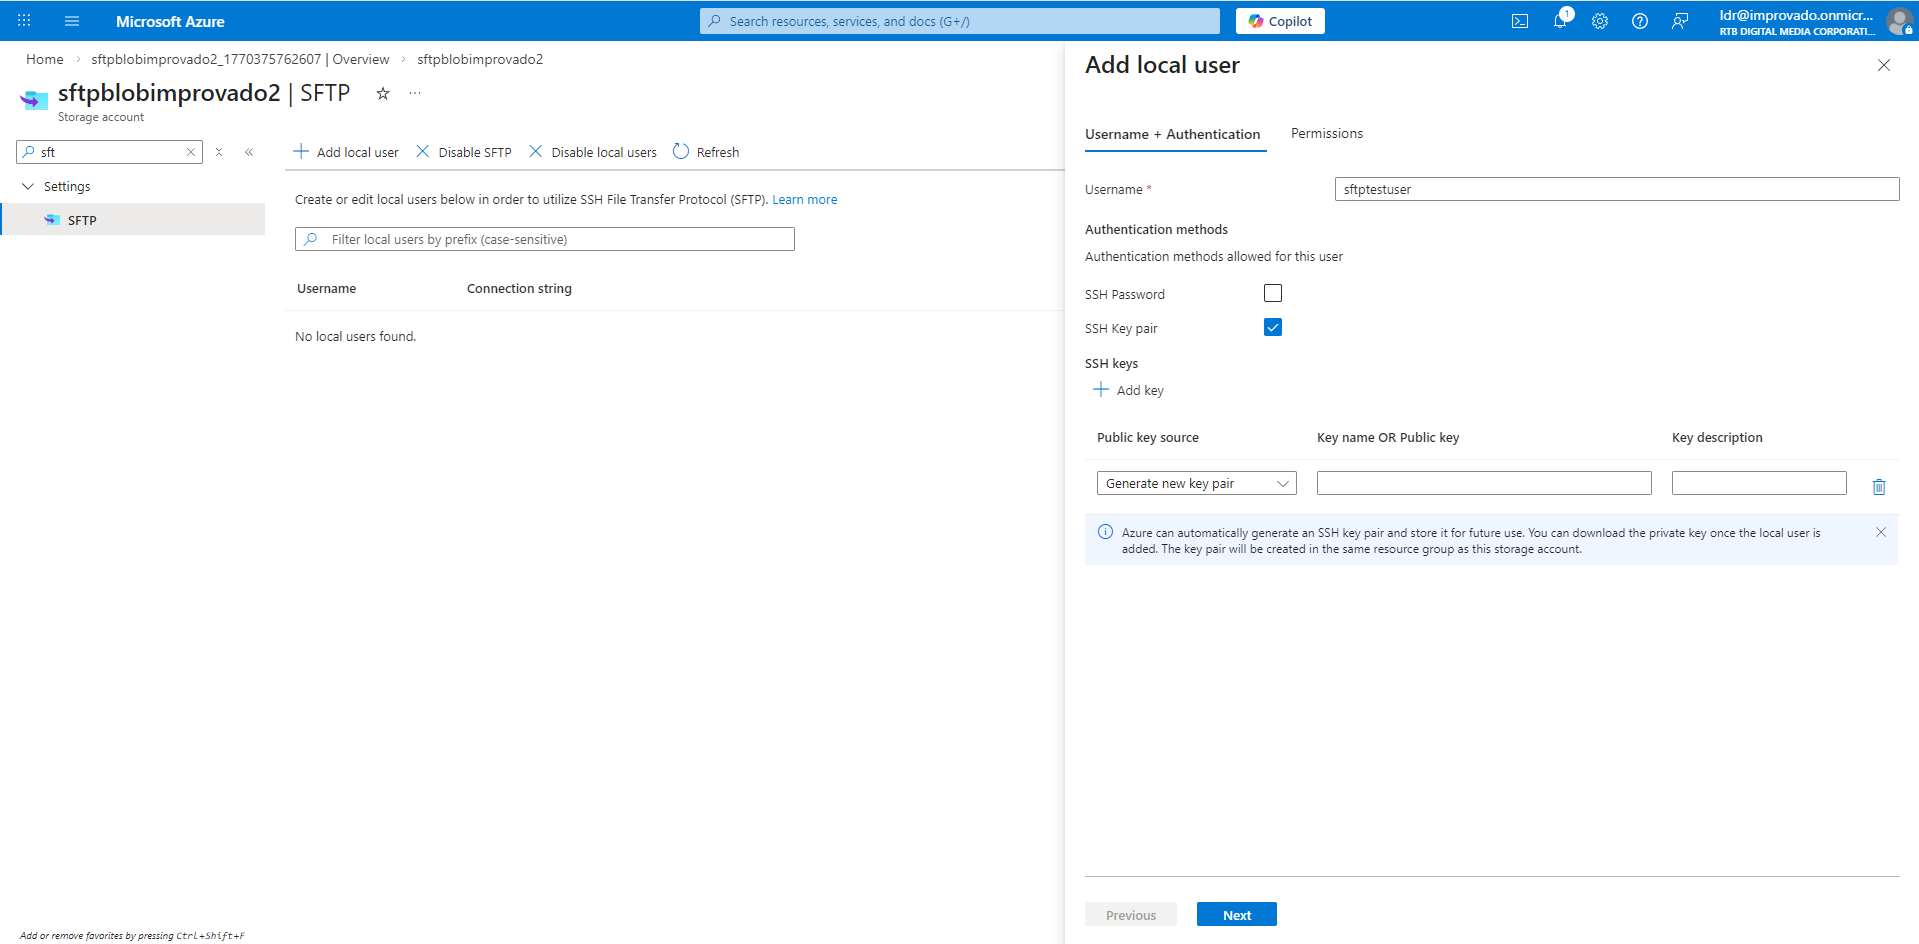
The public key is stored in Azure with the key name that you provide. The private key can be downloaded after the local user has been successfully added.
In the Permissions tab, select the containers that you want to make available to this local user.
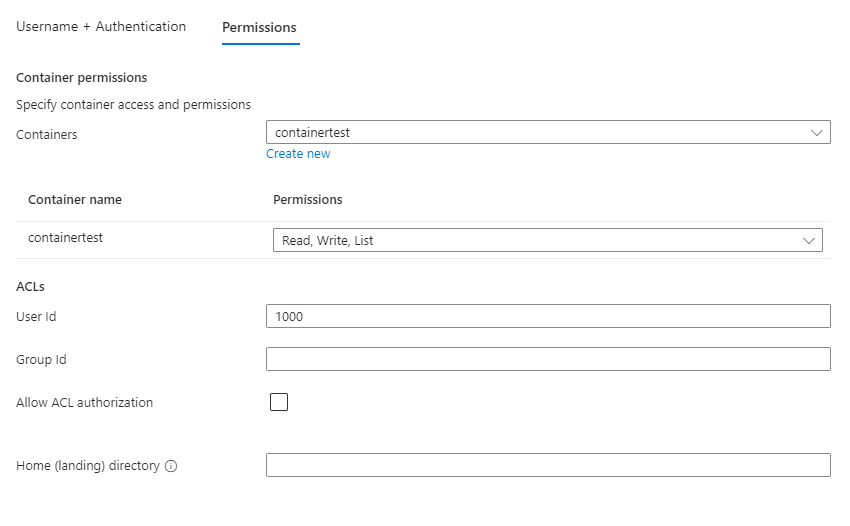
Grant the following permissions for the user:
- Write
- Read
- List
Click Add button to create a user.
Learn more in the official guide.
Where to find your credentials
Go to Settings → SFTP for your storage account. You’ll find both user name and hostname displayed in the Connection string column:
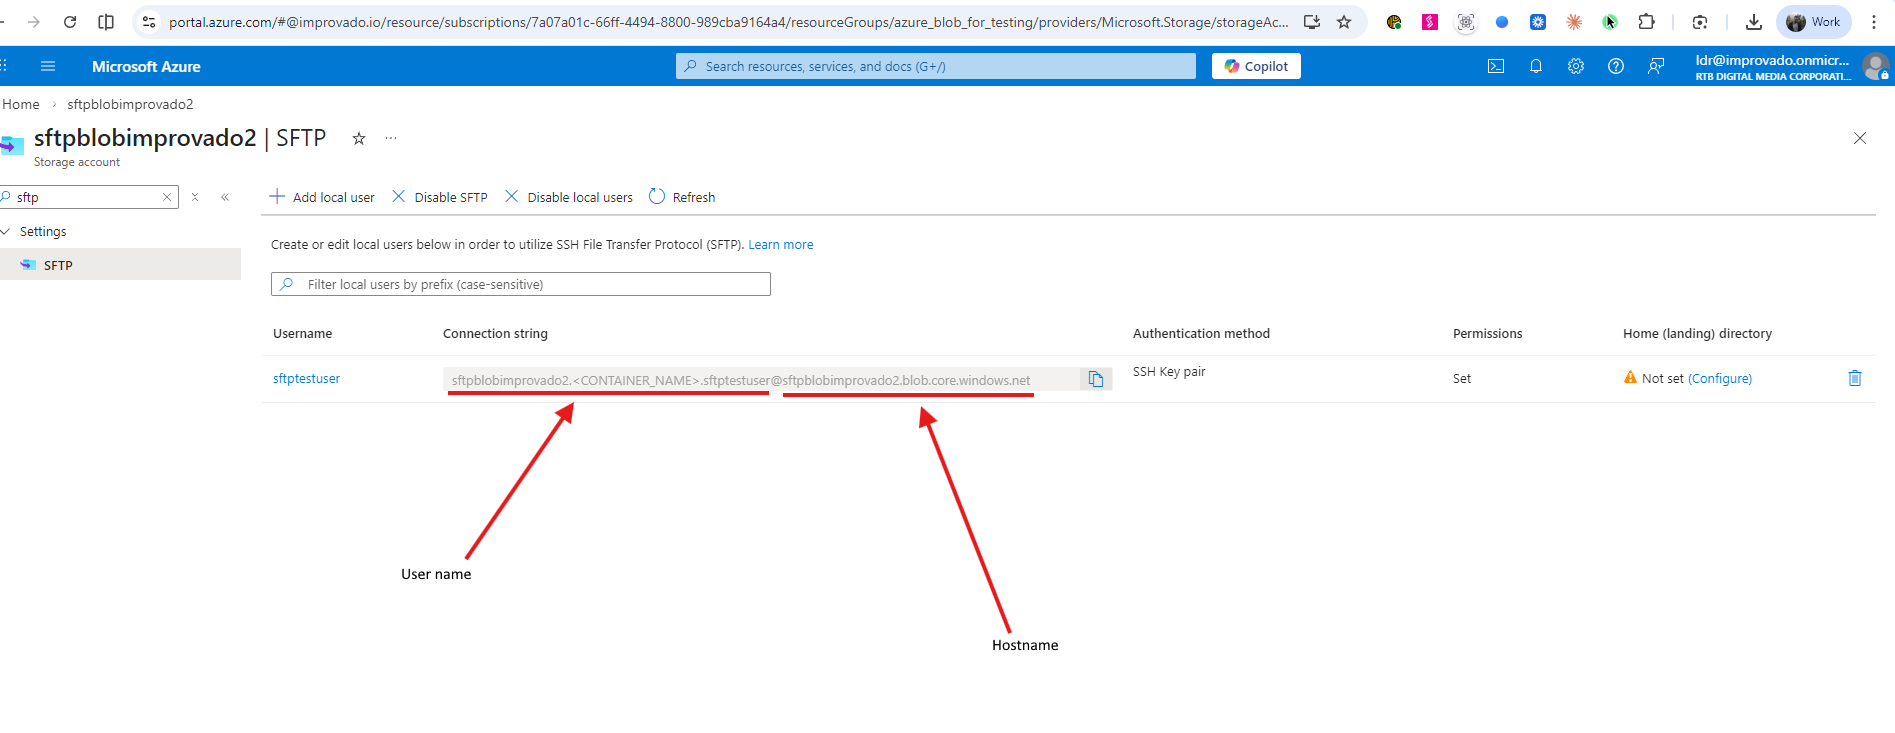
The connection string follows this format: {user_name}@{hostname}
For example, if your connection string is: sftpblobimprovado2.<CONTAINER_NAME>.sftptestuser@sftpblobimprovado2.blob.core.windows.net
and your container name is containertest, then:
Your username is sftpblobimprovado2.containertest.sftptestuser
and your domain name is sftpblobimprovado2.blob.core.windows.net.
Use the username shown in the Connection string column. The username in the first column won't work for destination connections.
After copying these credentials, fill in the form on the SFTP connection page.
You can learn more about setting up an SFTP destination here.
Was this article helpful?
Thanks for the feedback!