Updated on
March 2, 2026
Learn how to see the list of your extraction orders and their settings
You can find your extraction orders grouped by connections or by data tables.
To see the list of extraction orders related to one of your connections, you need to:
To see the extraction orders list related to one data table, you need to:
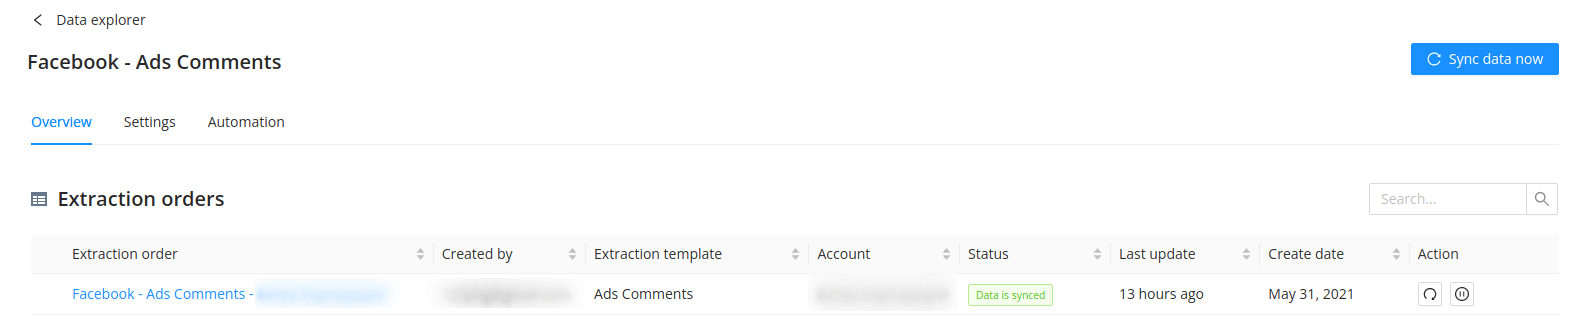
After this, you will see the overview tab. This tab shows the list of extraction orders for the current connection.
Use the search field to find the necessary extraction order by:
Also, you can sort the data ascending or descending in every column except Action.
The extraction orders list includes eight columns. Let's look at each of them in more detail.
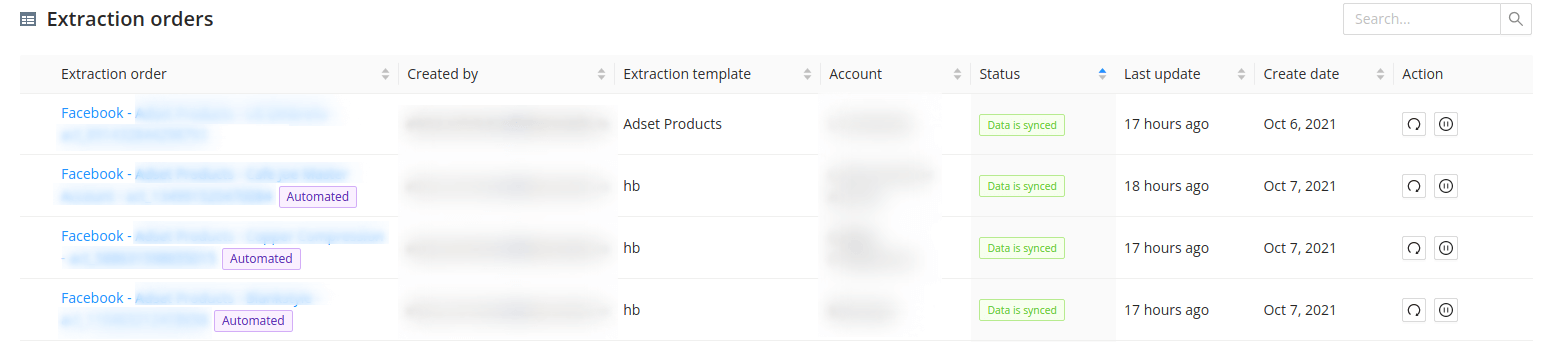
The extraction order name is formed according to the Data Source — Extraction Template — Account rule. Extraction orders created via auto-extract have the Automated label next to their names. You can click the extraction order name to dive into its settings.
Here you see the email of the user who created the extraction order.
This column shows which extraction template you’ve selected when setting up data extraction.
This column shows the account on the data source for which you created this extraction order.
{%docs-informer info%}
Extraction orders will be automatically paused in the following cases:
{%docs-informer-end%}
To see the description of an issue, you need to click the "plus" icon near the extraction order name.

Here you can see when the last data sync was completed.
Here you can see when this extraction order was created.
There are two icons in this column:
You can run extraction order, pause or start data extraction using them.
Please note that you can also use Bulk Actions for multiple selected orders. Learn more.
Note: There is no option to delete the extraction order or your extracted data. You can use Pause instead to pause an extraction. You can always start it again if necessary.
The success message means that the sync process has been successfully initiated, not completed! Until the sync of each extraction order is completed, the error message "Some of Data Table extracts are already running" will appear on repeated click.
Also, you can not run data synchronization while the extraction order is paused. You will see the following error message "Data syncronization was not started, please unpause your extraction order".
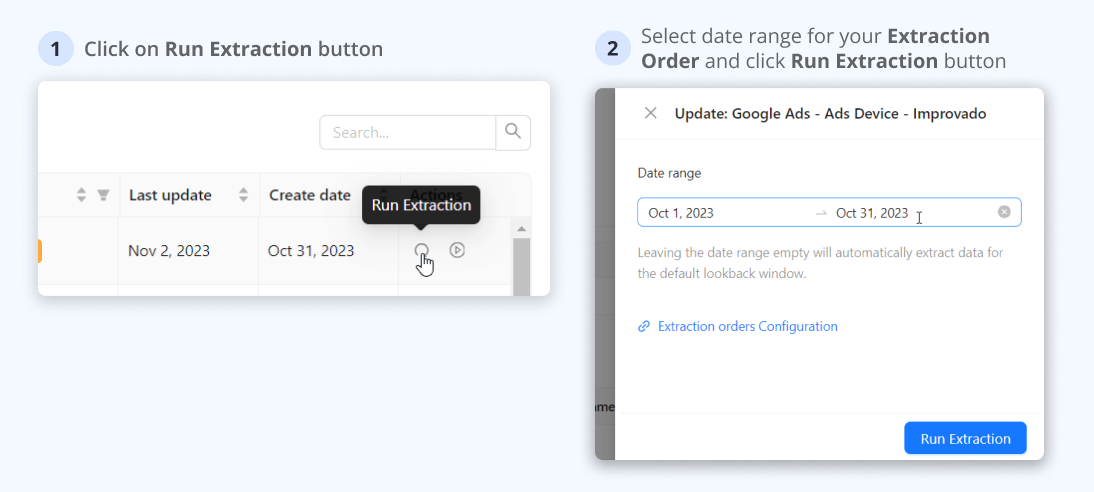
Click this button to run the Extraction order for the selected date range.
To check the freshness of your data, you can refer to the Last update column in the Data Table. This column displays the timestamp of the last data sync.
You can also manually trigger a data sync by clicking the Sync data now button from the Data Table page. This will update the data with the latest information.
You can check out a more in-depth guide for Data Tables here.
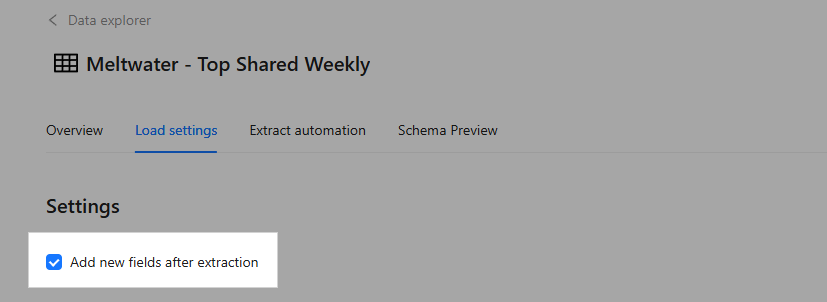
If you want to keep a fixed data schema of the Data Table, then follow these simple steps:
Learn more here.
You can connect any destination in two simple steps:
The created connection will appear at the top of the Connected destinations list.
You can check out a more in-depth guide here or find a setup guide for the specific Destination here.
When an order is manually triggered, it enters a download queue on our side before synchronization begins. The extraction process starts once the order reaches the front of the queue. The wait time can vary depending on how busy the download queue is at that moment.
This queuing mechanism ensures orderly processing and optimal system performance, so your extraction will start as soon as possible based on queue availability.
Improvado team is always happy to help with any other questions you might have! Send us an email.
Contact your Customer Success Manager or raise a request in Improvado Service Desk.


.png)