

How to Configure Extraction Orders
To see the extraction orders configuration, you need to click on the order name in the extraction orders list.
Page header
The page header shows the extraction order name and status.
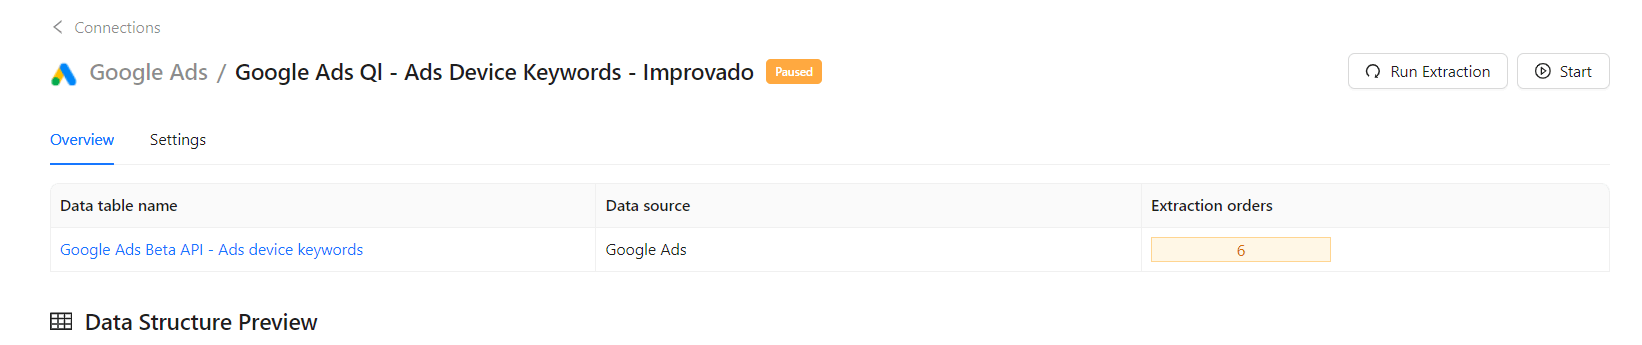
On the top right corner of this page, you’ll see Run Extraction button and a button for starting/pausing data extraction for an Extraction Order depending on its status.
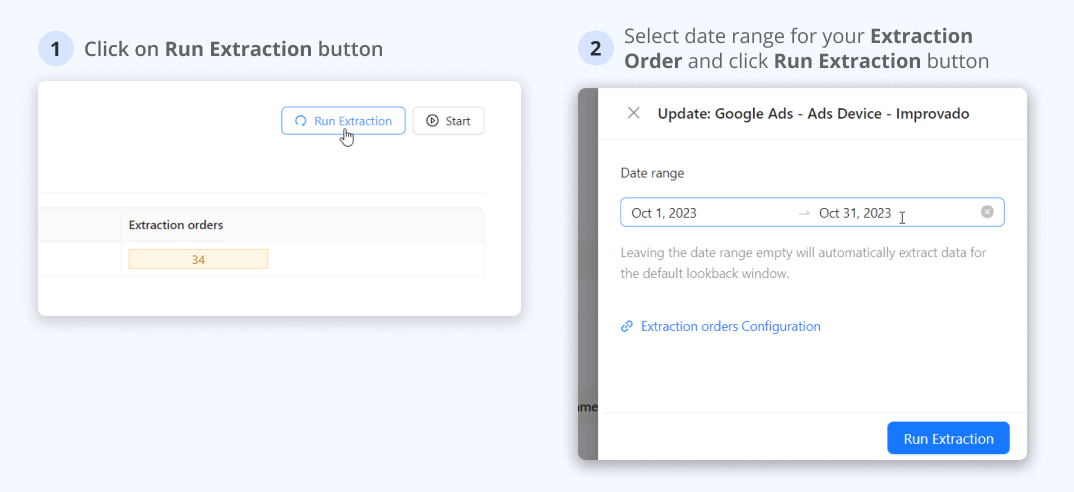
Run Extraction button
Click this button to run the Extraction order for the selected date range.
Overview tab
Here you see one line from the data tables list and the data structure preview.
Data table info
It contains brief information precisely about the data table to which the current extraction order refers:
- Data table name
- Data source
- Extraction orders number and status
The last column shows how many extraction orders relate to this table by granularity and the number of orders for each of these three statuses.
If there is no extraction orders in a certain status, then this status is not shown.
Hover over each status to see a tooltip:
- how many extraction orders were successfully loaded
- how many extraction orders are currently paused
- how many extraction orders have errors
IMPORTANT: A throbber (loading icon) means that at least one extraction order with the syncing status relates to this data table.
Hover over the loading icon to see how many extraction orders are currently syncing.
If all the extraction orders related to the data table have the syncing status you will see the total number of orders and zero on a gray background.
Data structure preview
Data structure preview is displayed if data has already been extracted.
IMPORTANT: Metrics (CPC, CPM, CPA, etc.) calculated as a ratio of dynamic values will not be pushed to the destination or shown in your BI tools (PowerBI, Tableau, etc.) since there is no use in calculating such metrics in advance and storing them.
Let's take CPC as an example. Cost per click for a period is calculated by dividing the overall cost of your ads by the number of clicks your ads received.
CPC = total_cost / number_of_clicks
| Day | Cost | Clicks | CPC |
|---|---|---|---|
| 2023-02-01 | $229.1 | 10 | $22.91 |
| 2023-02-02 | $129.3 | 7 | $18.47 |
| 2023-02-03 | $95.6 | 7 | $13.66 |
| 2023-02-04 | $34.9 | 1 | $34.93 |
| 2023-02-05 | $115.0 | 5 | $23.00 |
| 2023-02-06 | $277.0 | 15 | $18.47 |
| 2023-02-07 | $407.3 | 19 | $21.44 |
| Total | $1288.3 | 64 | ? |
Let's calculate CPC using the values given in the table above:
CPC = $1288.3 / 64 = $20.13
Avg.CPC = $21.84
As you see, CPC for a week is not equal to the CPCs for the same seven days. You will also get an inaccurate result if you use the average value.
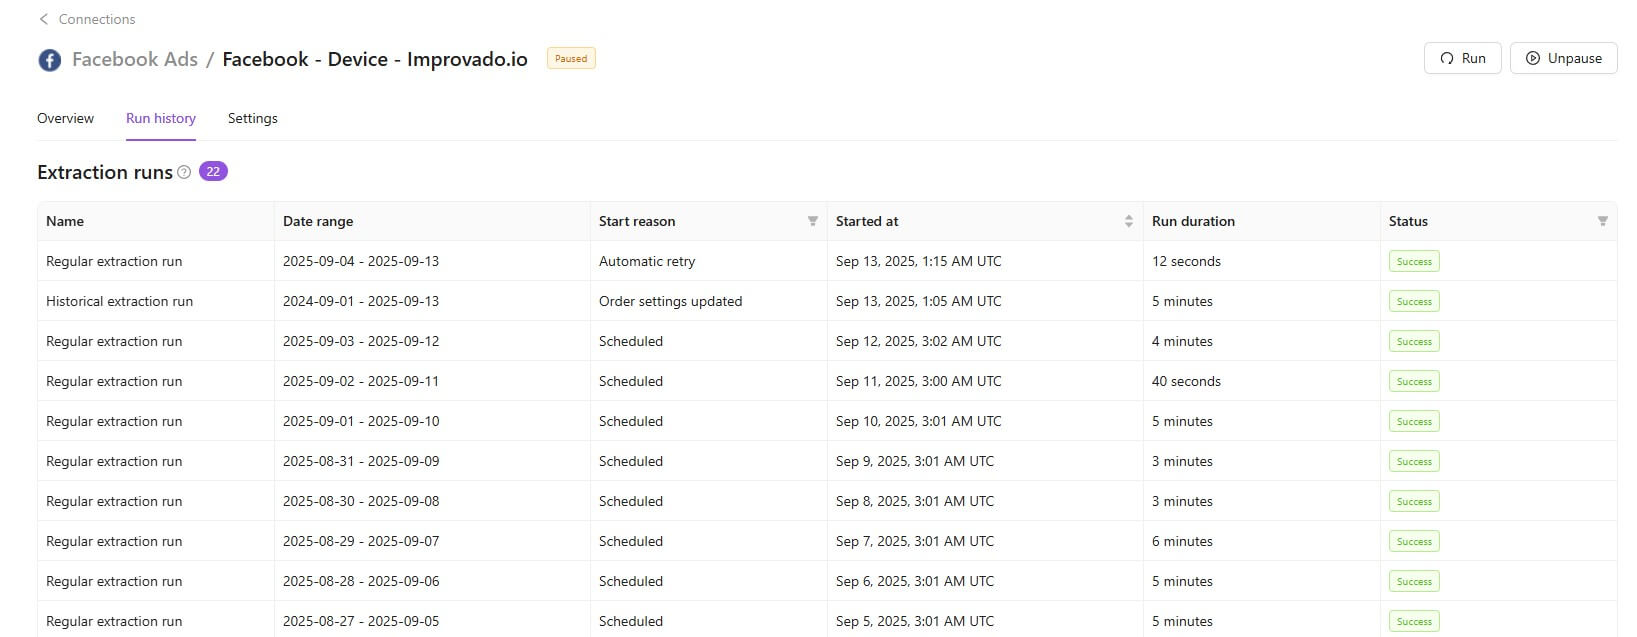
Run history
This tab lets you view detailed records of each order’s runs, making it easier to track statuses, timing, and performance. It provides clear visibility into all runs from the last 60 days.
Settings tab
This tab includes the same settings blocks you used when creating this extraction order. The set of parameters depends on the selected data source and extraction template.
Account-specific custom settings
Some custom settings need values that are specific to your connected account — for example, dataset IDs, custom conversions, or custom segments. For these, the settings form shows a picker instead of a plain text field: click it to open a per-account list of valid values, loaded directly from your account. You can search the list and select a single value or multiple values, depending on the setting.
When an extraction covers several accounts, these values are configured per account. Expand an account to load its options; a badge shows how many values are selected out of the total, so you can see at a glance which accounts still need attention. If a value isn't in the list — or the list can't be fully loaded — use the Add value manually field to enter it yourself. Your selections are saved into the extraction configuration and restored when you reopen the order.
This applies to dynamic custom settings only. Standard settings such as extraction frequency and sync history work the same as before, and each account can have different values for the same setting.
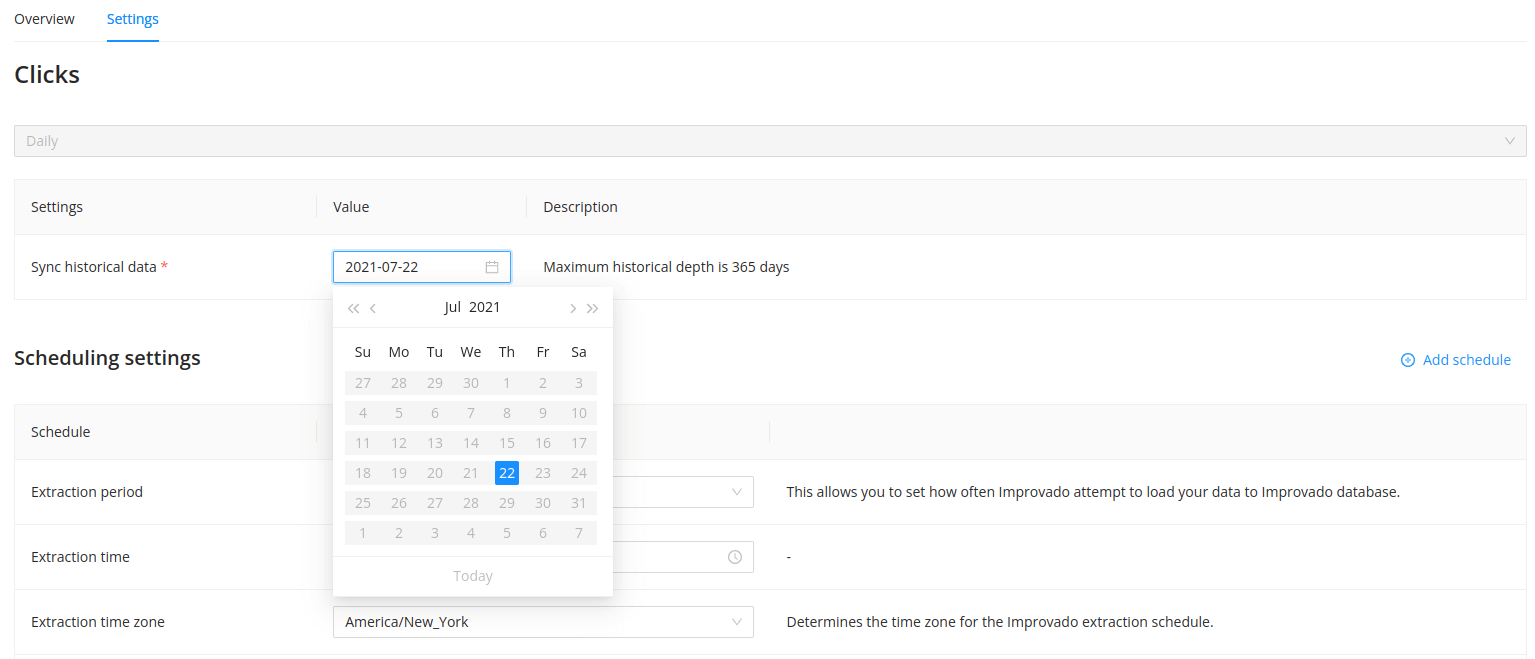
Now historical data settings are available here!
To refresh (backfill) the historical data you need to:
- change the first date of the required interval in this field
- and click the Update button to save changes.
The maximum historical data depth varies due to the API specifics of different data sources. If customer needs historical data depth over the preset maximum value, it is necessary to raise a request via Improvado Service Desk. Our team will check if it is technically possible.
Historical extraction will be triggered for the following cases:
- New metrics/properties added
- Sync historical data is changed
- Custom setting changed
Note that this is only applicable to Active extraction orders. Orders with Error/Paused status will not trigger extraction after your updates.
Scheduling Settings
You can read more about scheduling settings here.
Dimensions/metrics list
Available dimensions and metrics are presented the same way as before: all available are on the left, all selected on the right. The “locker” icon shows those dimensions, but also, some metrics are selected by default, and you can not deselect them because they define the data table structure.
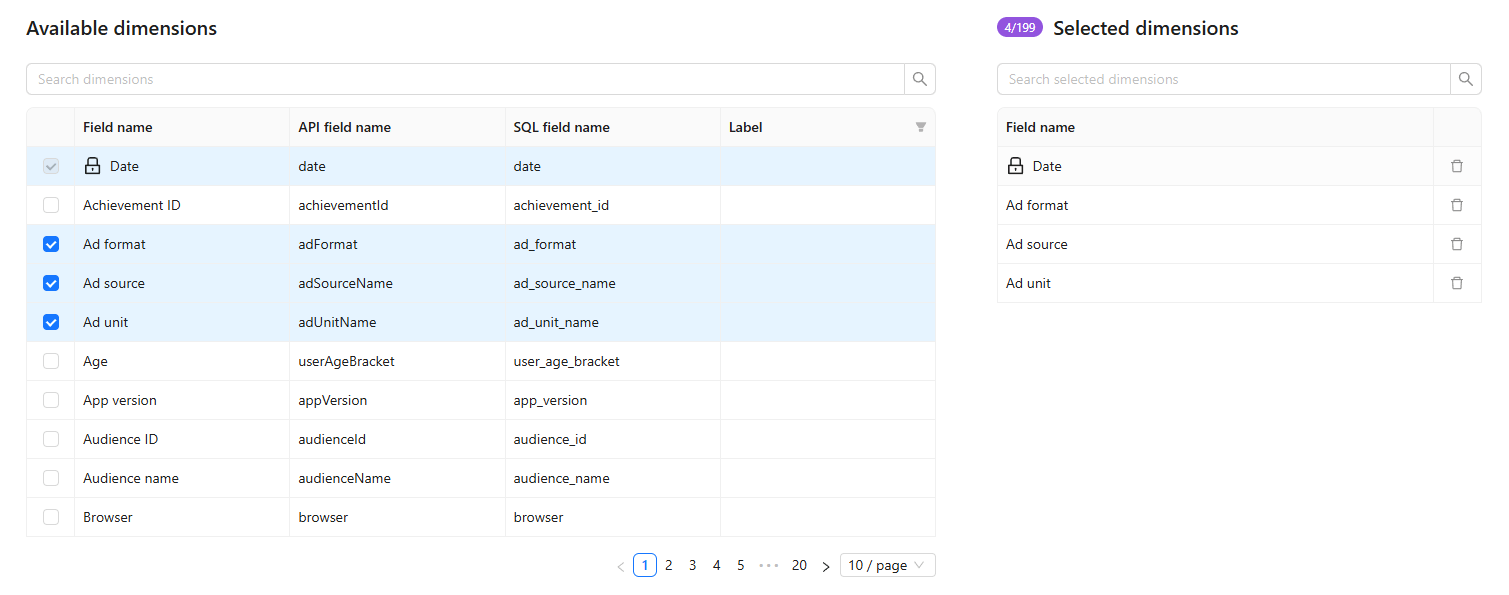
You cannot change or add dimensions once an extraction order is created. To avoid confusion, dimensions that were not selected during the initial configuration are not displayed in this list. However, you can still update properties and metrics.
Fields the source no longer provides
Some data sources let you select custom fields, such as custom metrics or events. When the source stops providing one of them, the field stays in the list, keeps its place, and gets a red Unavailable label. Once Improvado confirms the field is gone, hovering over the label shows since when, for example “The field is no longer available in the API. Missing since Oct 1, 2026.” The date is in UTC.
An unavailable field is deselected and locked, and saving the settings does not switch it back on. The fields that were switched off this way are listed under Auto-disabled metrics, below Selected metrics.
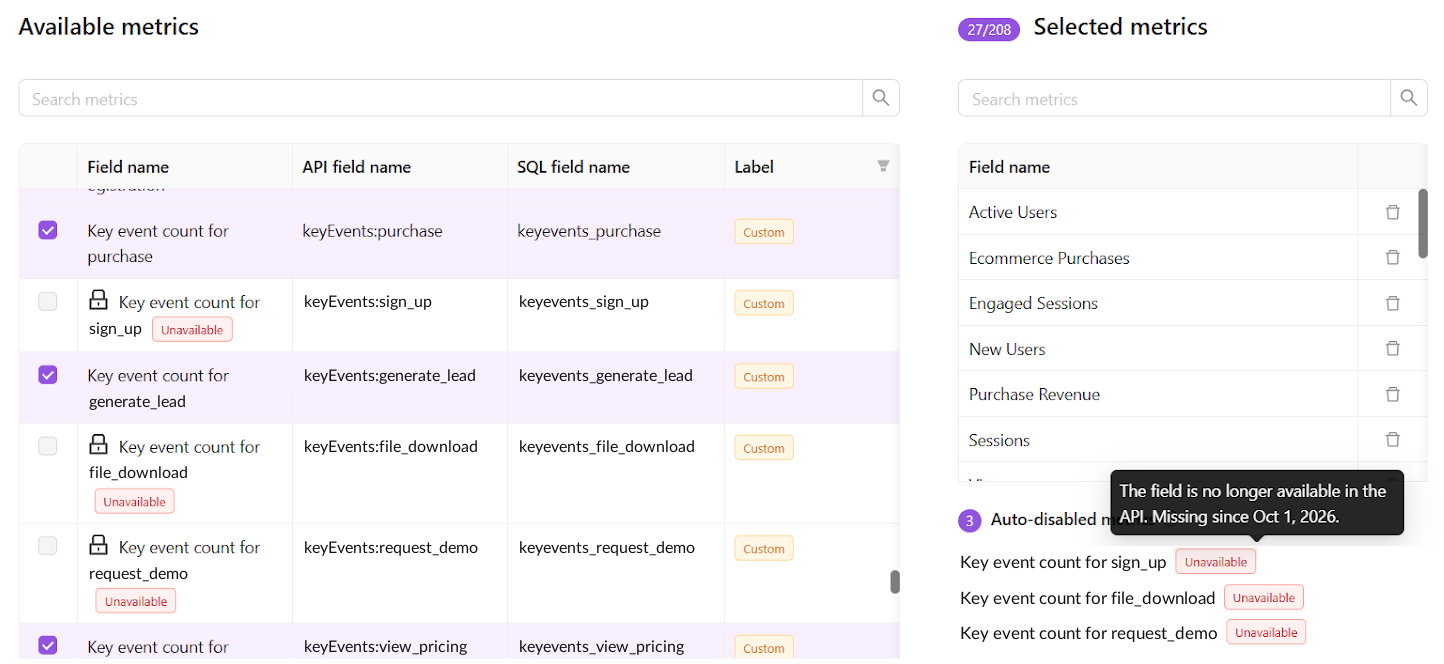
If you need to update your extraction order, it is essential to remember the following:
- Updating metrics/dimensions for the extraction order will not automatically start data re-loading.
- Updated extraction order will not generate a new data table, but it will update the data that will be loaded into the existing table.
- To see the changes immediately, you can start data synchronization (click “Sync Data Now” action from the list of extraction orders); otherwise, you need to wait for the next scheduled data extraction.
- After your changes are applied, data will be loaded to newly chosen fields and stop populating to the deselected ones.
It is now possible to create a template directly from an order. This allows you to quickly generate a template based on the data structure of a specific order, simplifying the template creation process and saving time.
Steps to create a template from an order:
Navigate to the relevant order.
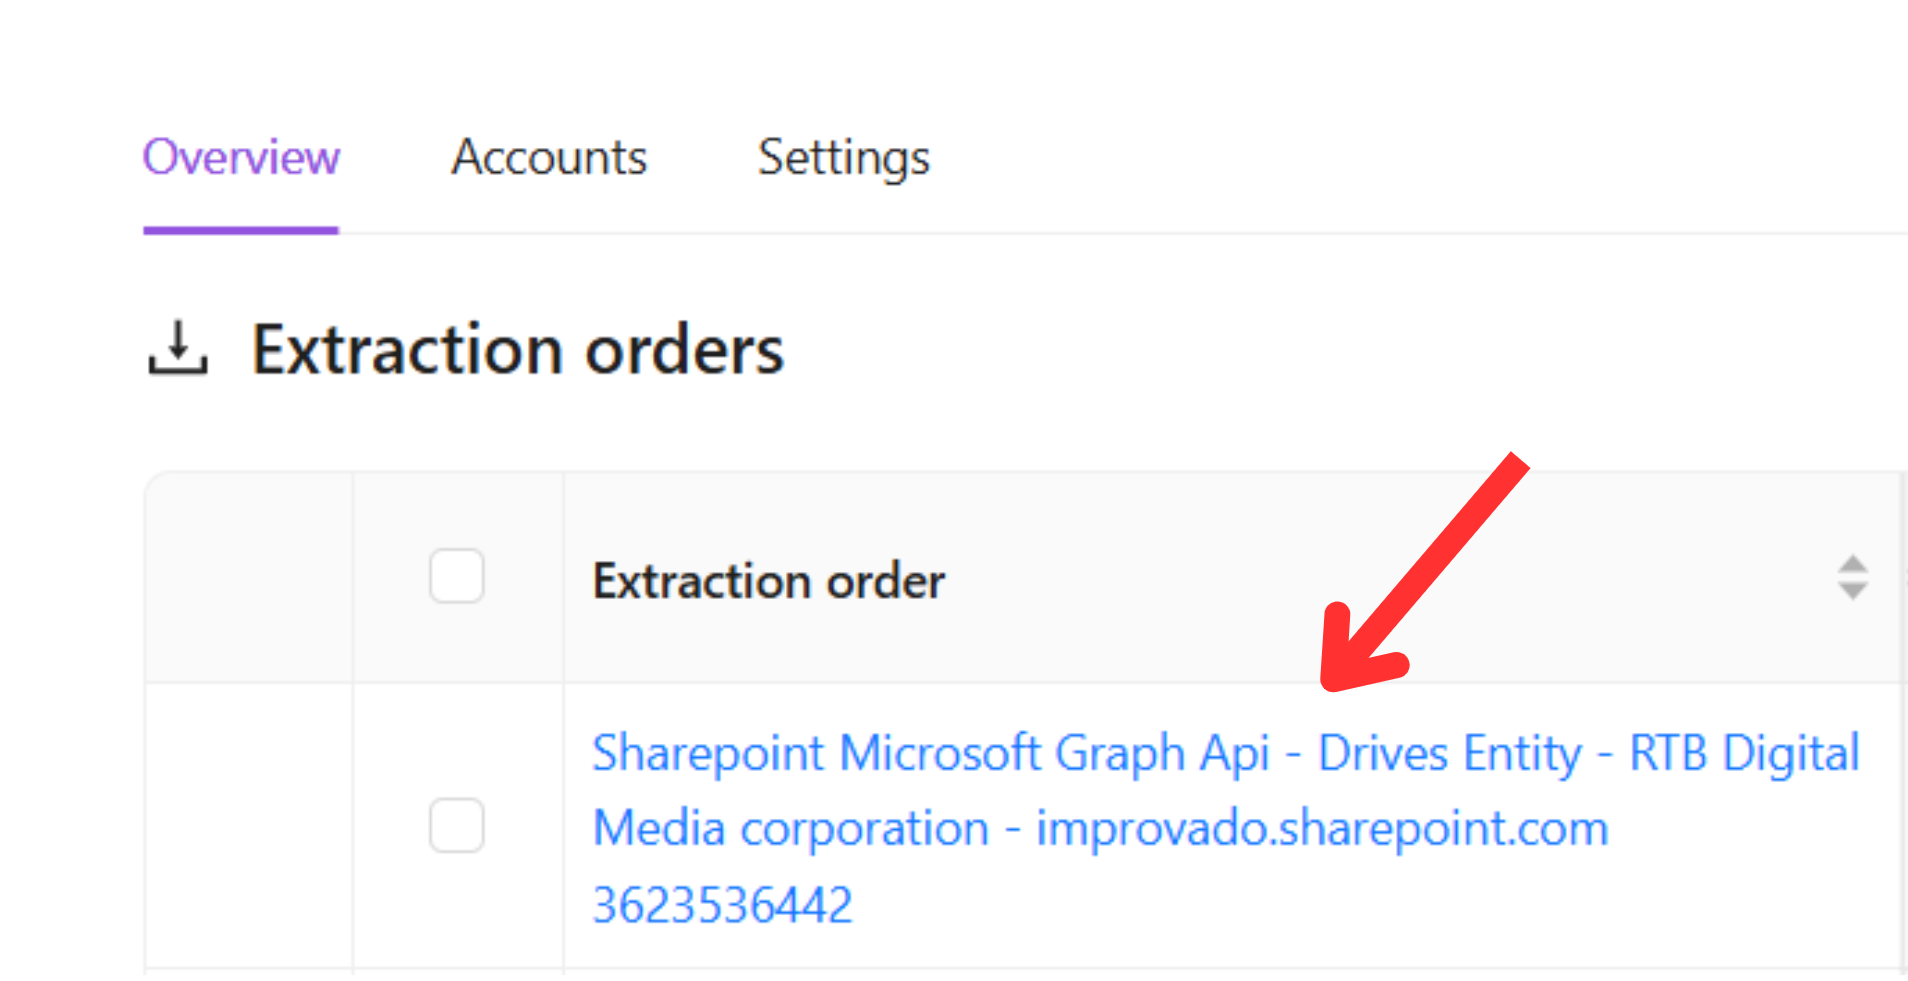
Click the three dots (⋮) in the upper-right corner of the order screen.
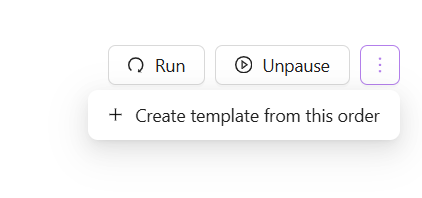
Select the “Create template from this order” option.
Review and adjust the extracted fields as needed.
Save the template for future use.
Was this article helpful?
Thanks for the feedback!
Questions? The Improvado team is always happy to help. Send us an email, contact your Customer Success Manager, or raise a request in the Improvado Service Desk.