Webhooks
Overview
Webhooks allow you to receive automated HTTP notifications when events occur in your Improvado workspace — such as connection status changes, extraction completions, data table updates, and more. Instead of polling the API, your server gets notified automatically.
Think of webhooks like a text message alert. Instead of constantly checking Improvado for updates, you register a web address (URL) that Improvado will automatically "ping" whenever something happens — like when a data extraction finishes or a connection breaks. Your system receives the message and can act on it immediately.
Event delivery may be delayed by up to ~15 minutes after the event occurs. Webhooks are designed for automation and integration workflows, not for use cases that require instant reaction.
You can manage webhooks from Settings → Notification Center → Webhooks.

Adding a Webhook
Before you start
You'll need a publicly accessible URL that Improvado can send data to. If you don't have a developer or server set up, here are two easy options to get started:
- Zapier or Make (Integromat): These no-code tools generate a webhook URL for you in seconds. Go to zapier.com, create a new Zap, choose "Webhooks by Zapier" as the trigger, and copy the URL provided.
- webhook.site: A free tool at webhook.site that instantly gives you a test URL and lets you see incoming notifications in your browser — no setup needed. Great for testing before you go live.
To start receiving event notifications, register your existing server endpoint in Improvado:
- Navigate to Settings → Notification Center.
- Scroll to the Webhooks section and click Add.
- Enter the URL of your server that will receive webhook events (the endpoint must already be deployed and publicly accessible).
- Select the event types you want to subscribe to.
- Click Save.
After registration, the webhook will be in Unverified status. Events will not be delivered until the endpoint passes verification.
For a step-by-step example of using webhooks with Make, see our Make.com integration guide.
Endpoint Verification
Improvado uses a challenge-response mechanism to verify that you own and control the webhook endpoint URL. Until verification is complete, the endpoint stays in unverified status and will not receive any events.
What this means in plain terms: Improvado sends a quick test to your URL to confirm it's real and working. Your server must respond with the exact code Improvado sent. Tools like Zapier and webhook.site handle this automatically.
Improvado uses a challenge-response mechanism to verify that you own and control the webhook endpoint URL. Until verification is complete, the endpoint stays in unverified status and will not receive any events.
Verification Flow
- Click the Verify button next to your webhook URL in the Notification Center.
- Improvado generates a random challenge token and sends a GET request to your endpoint URL with the following headers:
X-Improvado-Challenge— a random challenge string your server must echo back.X-Improvado-Verify-Token— the signing secret of your endpoint (so your server can confirm the request is from Improvado).
- Your server must respond with:
- HTTP status 200
- The exact value of the
X-Improvado-Challengeheader as the response body (plain text).
- If the response body matches the challenge, the endpoint status changes to active and events will start being delivered.
Verification Errors
- Challenge response did not match — your server returned a response, but the body did not match the challenge value. Make sure you are returning the exact value from the
X-Improvado-Challengeheader. - Failed to reach endpoint — Improvado could not connect to your URL. Verify the URL is publicly accessible and your server is running.
Event Payload
When an event occurs, Improvado sends a POST request to your endpoint with a JSON payload. Here is an example of an extraction_paused event:
  {
 "id": "A1B2C3D4E5F6789012345678ABCDEF90",
 "type": "extraction_paused",
 "timestamp": "2026-04-06 11:39:46.752000",
 "data": {
   "product_domain_event_inserted_at": "2026-04-06 12:00:12.000",
   "product_domain_event_aggregate_class": "Extraction",
   "product_domain_event_class": "ExtractionPaused",
   "product_domain_event_usecase": "PauseExtractionUseCase",
   "product_domain_event": "",
   "is_action_log": "1",
   "agency_title": "My Agency",
   "workspace_title": "Main Workspace",
   "dts_order_params_id": "123456",
   "order_id": "654321"
 }
}
Each event contains:
id— unique event identifiertype— the event type name (matches your subscription)timestamp— when the event occurreddata— event-specific payload with details about what happened
Signing Secret
Each webhook has a unique signing secret, visible in the Notification Center while the endpoint is unverified. Use this secret to verify that incoming webhook requests are genuinely from Improvado. During verification, the secret is sent in the X-Improvado-Verify-Token header. During event delivery, the secret is used to compute an HMAC-SHA256 signature sent in the X-Improvado-Signature header — compute the same signature on your side and compare.
Event delivery requests also include an X-Improvado-Idempotency-Key header that you can use to deduplicate events.
Managing Subscriptions
Each webhook can subscribe to specific event types. You can update subscriptions at any time by editing the Subscribed events field on the webhook card. Use the clear button to remove all subscriptions, or select individual events from the dropdown.
Available event categories include:
- Account events — account created, enabled, disabled, name changed
- Connection events — connection created, deleted, invalidated, reconnected
- Extraction events — extraction created, paused, unpaused, fields changed, downloads started
- Load events — load created, started, completed, paused
- Transformation events — transformation created, started, completed
- Data table events — table created, title changed, freshness changed
- User events — user invited, added to workspace, removed, role changed
- Recipe events — recipe activated, deactivated, promoted, validated
Webhook Statuses
- Unverified — the endpoint has not passed the challenge-response verification. No events will be delivered.
- Active — the endpoint is verified and receiving events.
Best Practices
- Always validate the
X-Improvado-Signatureheader by computing HMAC-SHA256 of the request body with your signing secret and comparing the result. - Respond to webhook deliveries with a 2xx status code promptly. Long-running processing should be done asynchronously.
- Use the
X-Improvado-Idempotency-Keyheader to deduplicate events in case of retries. - Keep your endpoint URL publicly accessible and ensure TLS (HTTPS) is configured.
What a webhook notification looks like
When an event fires, Improvado sends a message (called a "POST request") to your URL containing a JSON payload — a structured block of data. Here's what that looks like in practice:
Example: an extraction is paused
  {
  "id": "A1B2C3D4E5F6789012345678ABCDEF90",
  "type": "extraction_paused",
  "timestamp": "2026-04-06 11:39:46.752000",
  "data": {
    "agency_title": "My Agency",
    "workspace_title": "Main Workspace",
    "order_id": "654321"
  }
}
Each field tells your system something useful:
id — a unique ID for this specific notification (useful for deduplication)type — what happened (e.g.extraction_paused,load_completed)timestamp — when it happeneddata — the details: which workspace, which extraction, etc.
If you're using a no-code tool like Zapier, this is what you'd see in your trigger step:
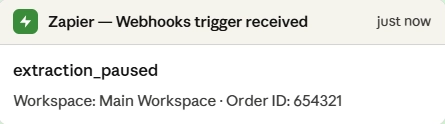
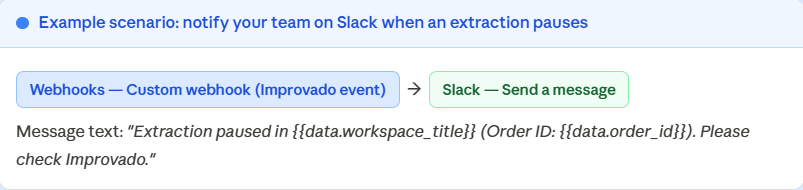
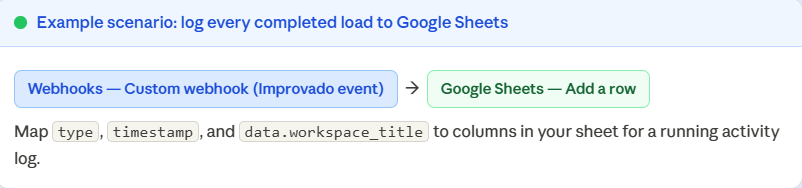
From here, you can route the event to Slack, send an email, trigger another workflow, and more — all without code.
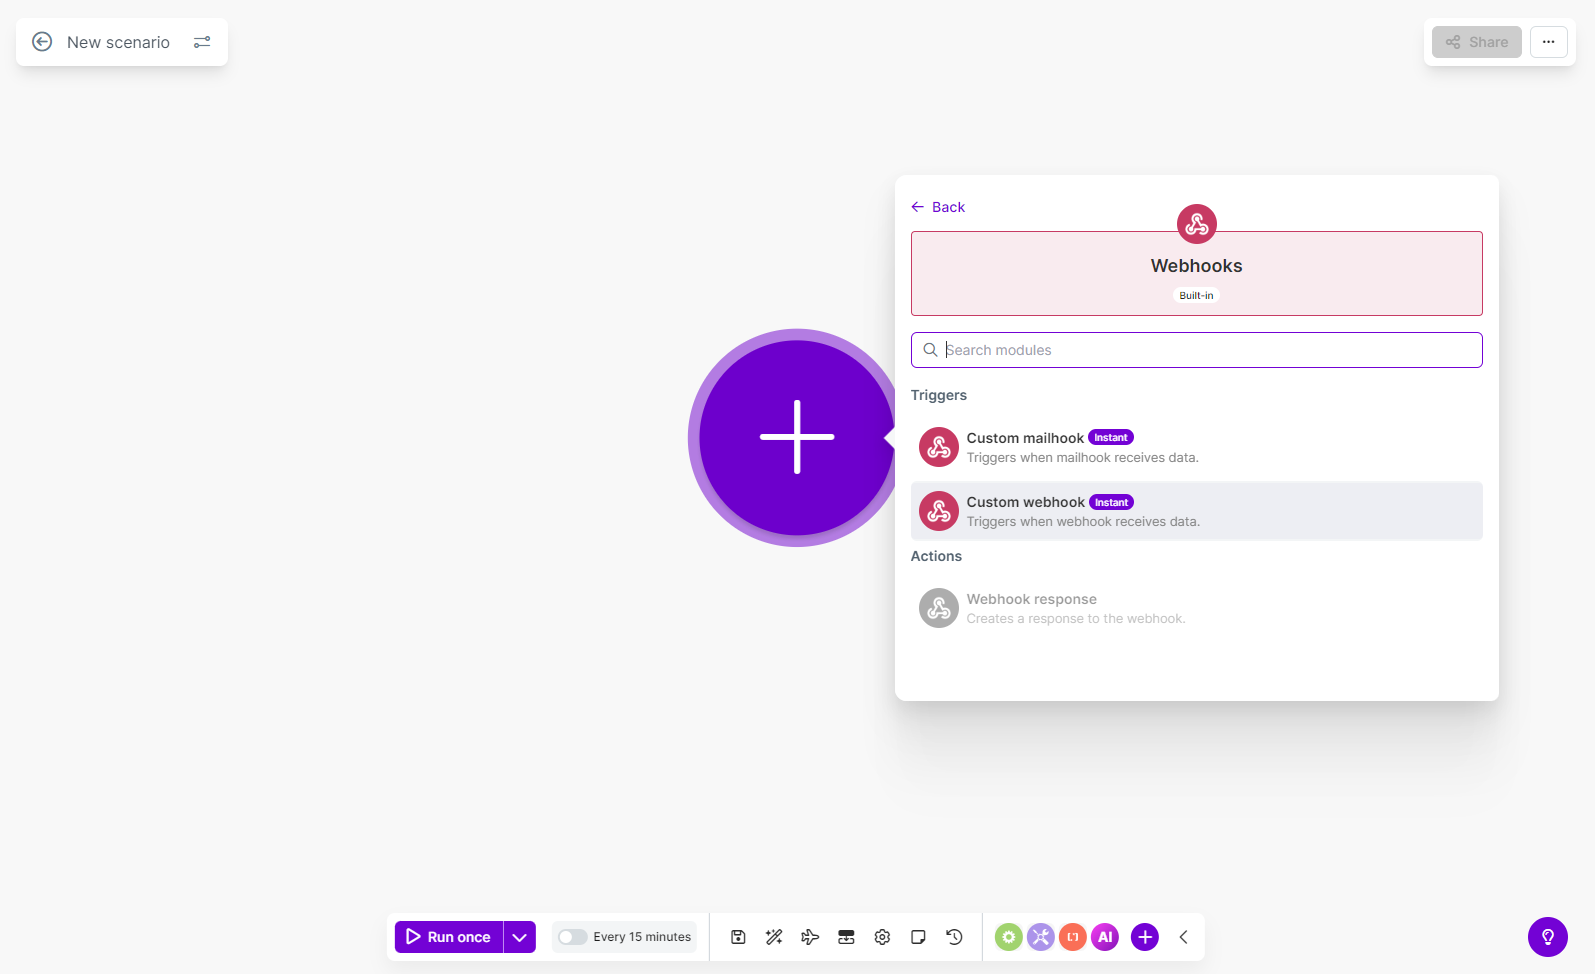
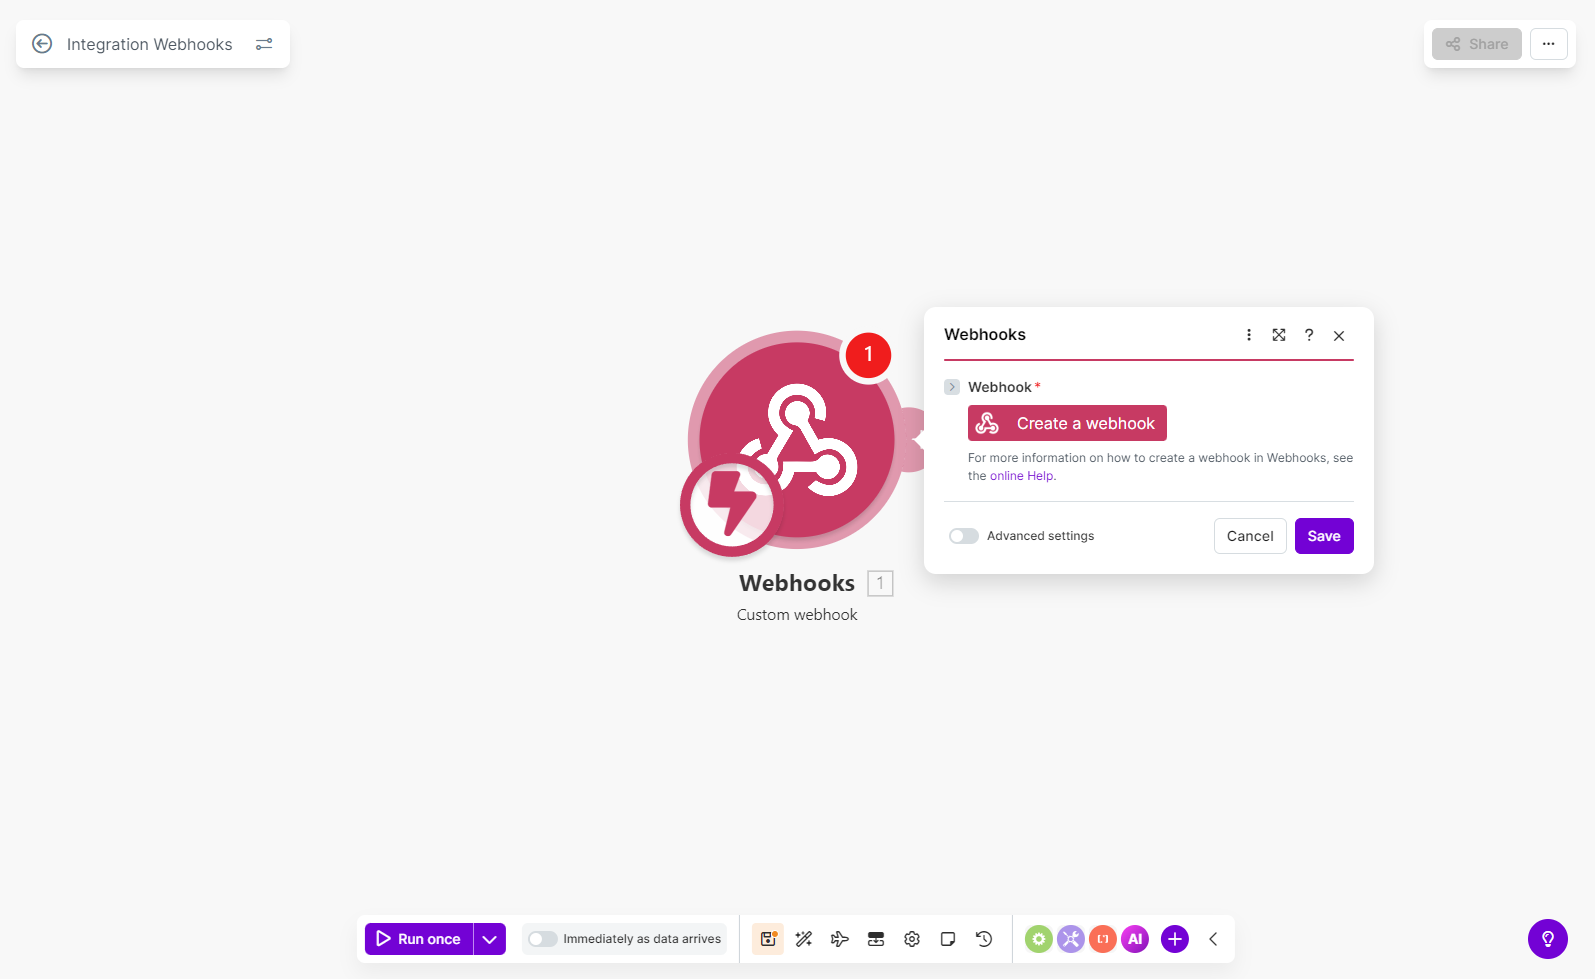
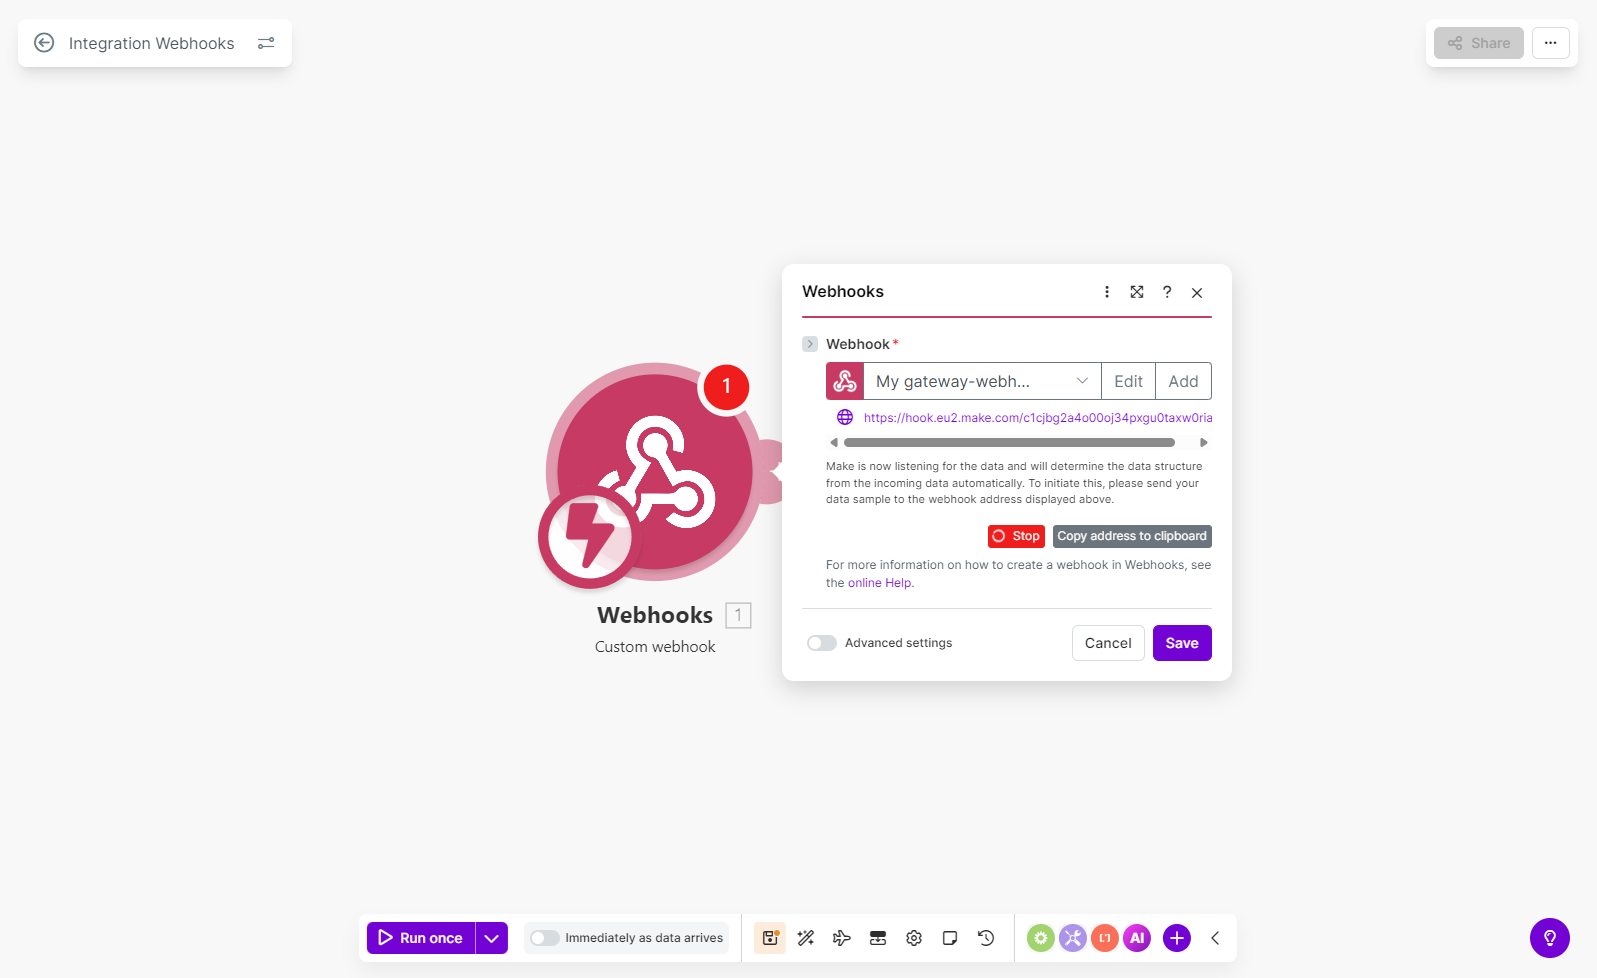
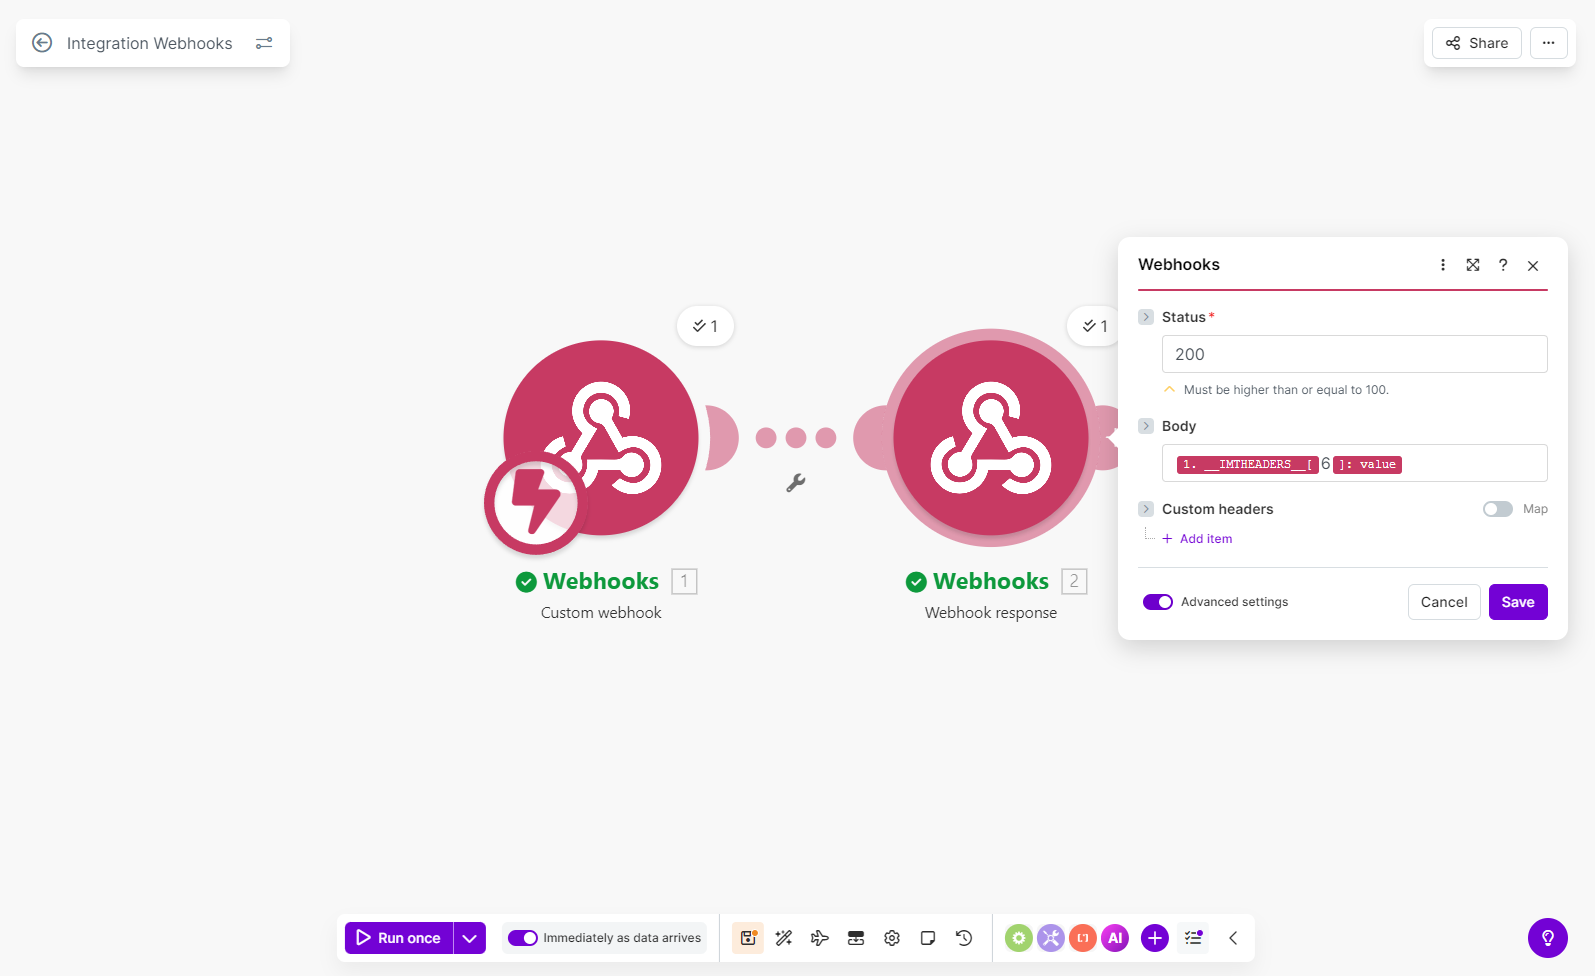
Integrating webhooks with Make
Make (formerly Integromat) is a no-code automation platform that lets you connect Improvado webhook events to hundreds of other apps — like Slack, Google Sheets, Notion, Jira, and more — without writing any code. This section walks you through setting up your first Make scenario using an Improvado webhook as the trigger. Step 1. Create a webhook module in Make Log in to your Make account at make.com and click Create a new scenario. Click the + button to add your first module, search for Webhooks, and select Custom webhook under Triggers. Click Create a webhook, give it a name (e.g., "Improvado — Extraction paused"), and click Save. Make generates a unique webhook URL and starts listening for incoming data. Click Copy address to clipboard — you'll need this URL in the next step. Step 4. Map the payload and build your automation Once the first event arrives, Make will automatically detect the payload structure and let you map fields to other actions. Here's an example of what the incoming data looks like inside Make: You can use any of these fields in downstream modules. For example: Tips for working with Make:<strong>Use Case: Integrating webhooks with Make</strong>

  {
  "id": "A1B2C3D4E5F6789012345678ABCDEF90",
  "type": "extraction_paused",
  "timestamp": "2026-04-06 11:39:46.752000",
  "data": {
    "agency_title": "My Agency",
    "workspace_title": "Main Workspace",
    "order_id": "654321"
  }
}
type equals a specific value (e.g. load_completed).id field in the payload to detect and skip duplicates in your downstream apps.
Was this article helpful?
Thanks for the feedback!