Updated on
Jan 13, 2026
Note: This article covers the process of loading data to Google BigQuery Destination. You can learn how to extract data from Google BigQuery here.
BigQuery is Google's serverless, highly scalable enterprise data warehouse designed for your data analysts. Improvado can load all data gathered from dozens of available data sources to this storage.
Follow our setup guide to connect Google BigQuery to Improvado.
In order to use Service Account Key authentication, first, you need to generate a JSON file via Google Cloud Console using official documentation or an interactive step-by-step guide provided by Google. Alternatively, you can follow the instructions below.
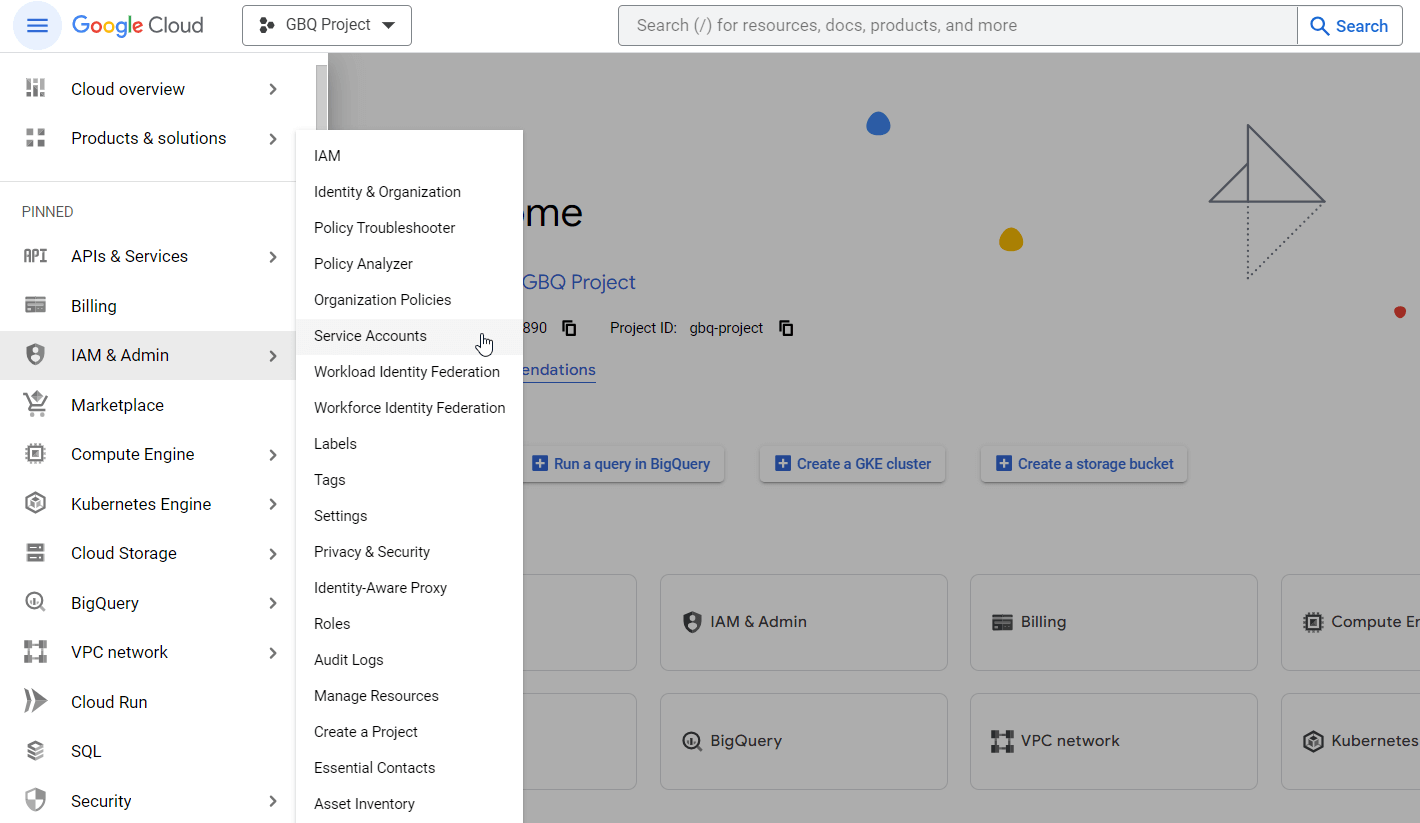
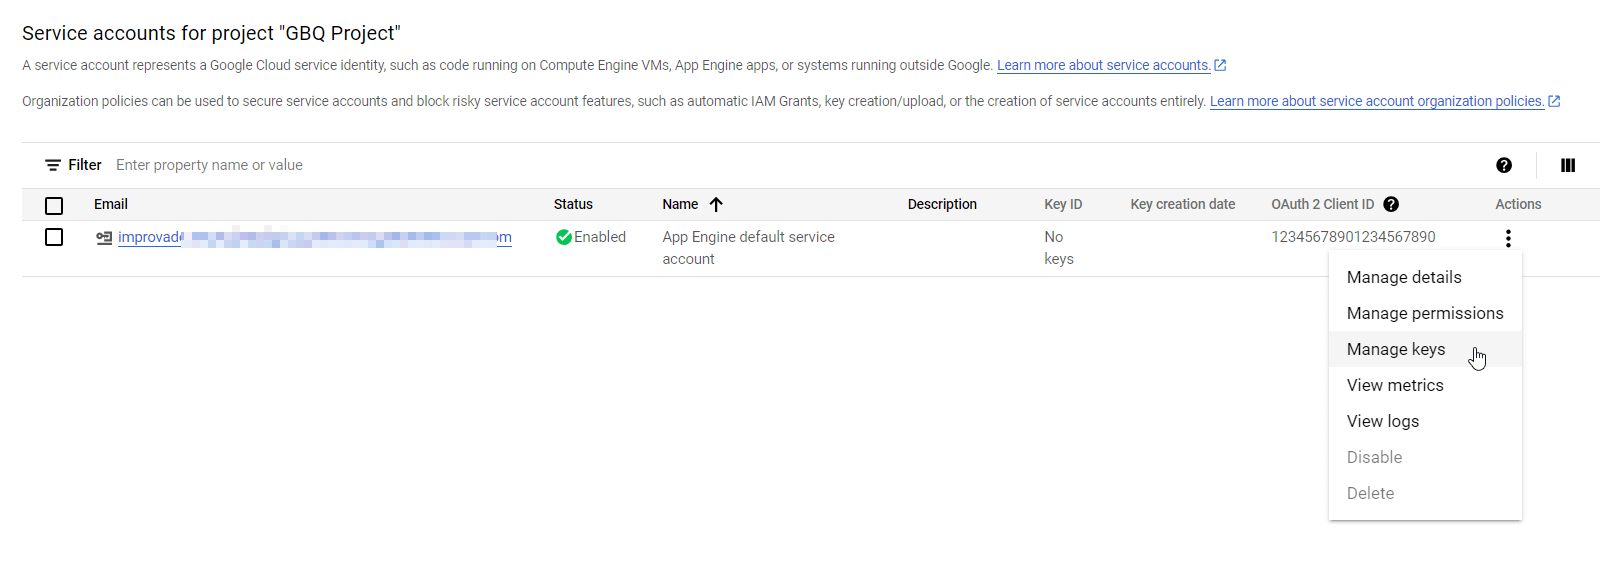
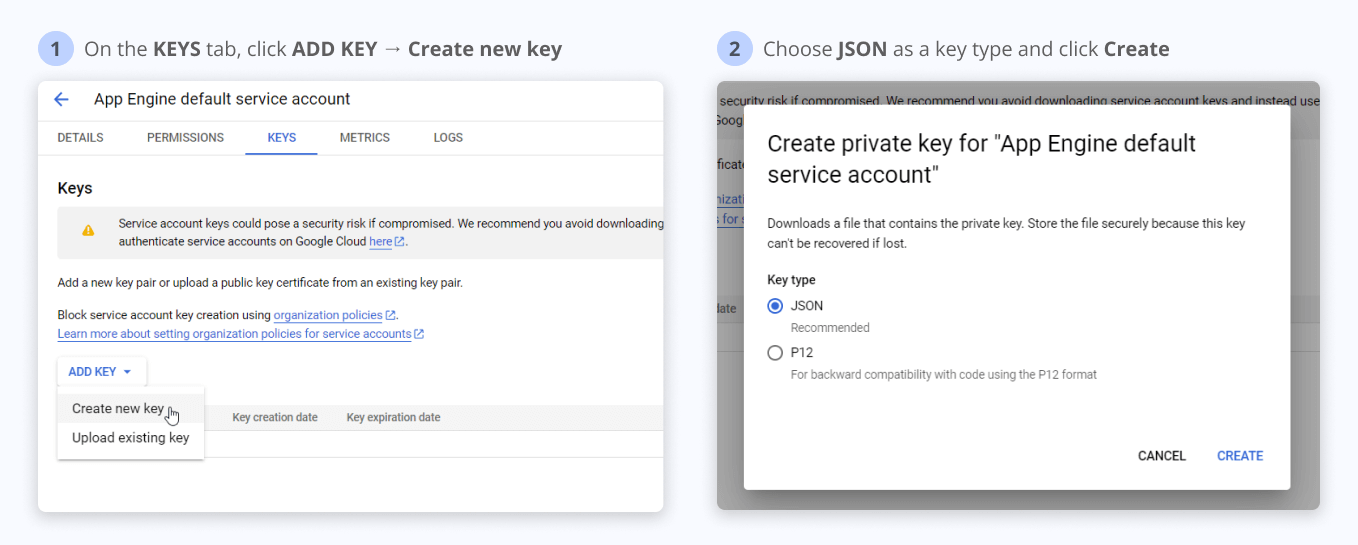
Note: Clicking Create downloads a service account key file. After you download the key file, you cannot download it again.
Learn more about Workload Identity Federation configuration here.
Don't forget to set up the jobUser & dataEditor/dataOwner roles given to the Service account or a custom role with needed permissions. A detailed list of required permissions should look as follows:
On the Google BigQuery connection page, fill in the following fields:
{%dropdown-body name="use-static-ip"%}
You can learn how to restrict IP addresses that are allowed to access Google BigQuery here: Restrict IP addresses allowed to access Google BigQuery. Learn more about VPC Service Controls in the official documentation here.
Select Yes for Use static IP option if you allow Improvado to connect your database by the static IPs mentioned on the Destination connection page.
Select No if you have permitted access to your database from any IP. In this case, Improvado will connect your database using dynamic IPs not listed on the Destination connection page.
{%dropdown-end%}
{%dropdown-body name="use-binary-strings"%}
The "Use binary strings" determines whether string fields are encoded in binary format when loading data.
Recommended setting: "No" (default).
{%dropdown-end%}
Note: We recommend using the Service Account Key as an authentication method.
With Identity Federation, you can use Identity and Access Management (IAM) to grant external identities IAM roles, including the ability to impersonate service accounts. This approach eliminates the maintenance and security burden associated with service account keys.

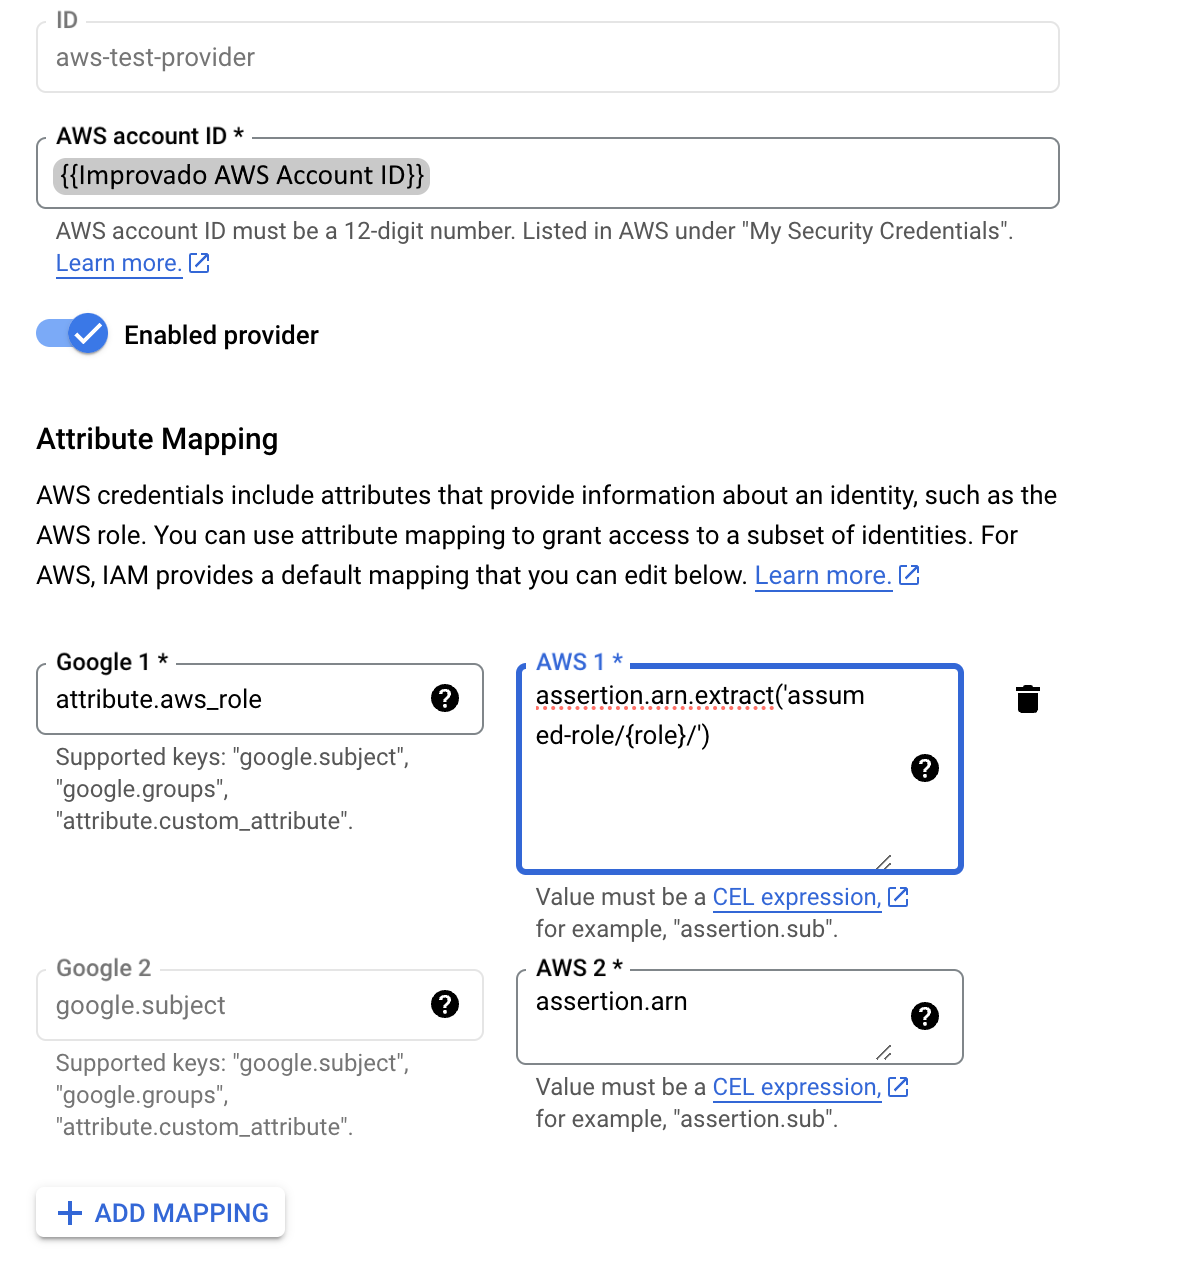
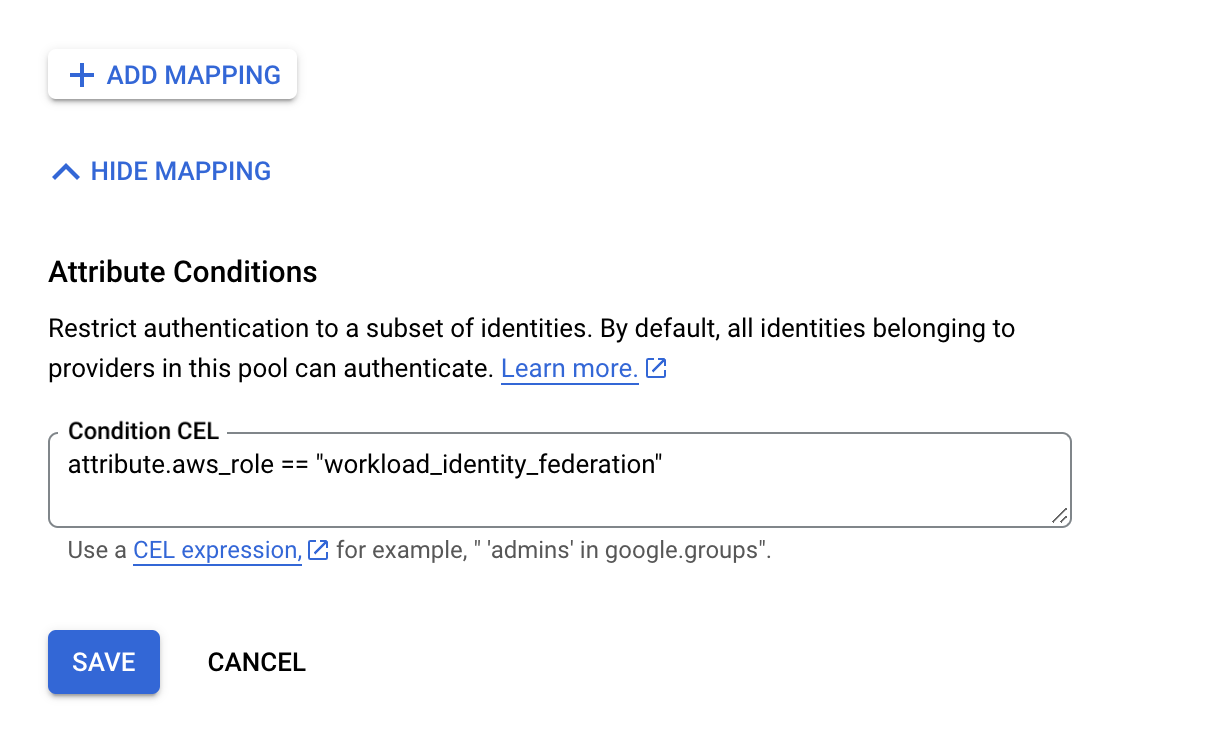
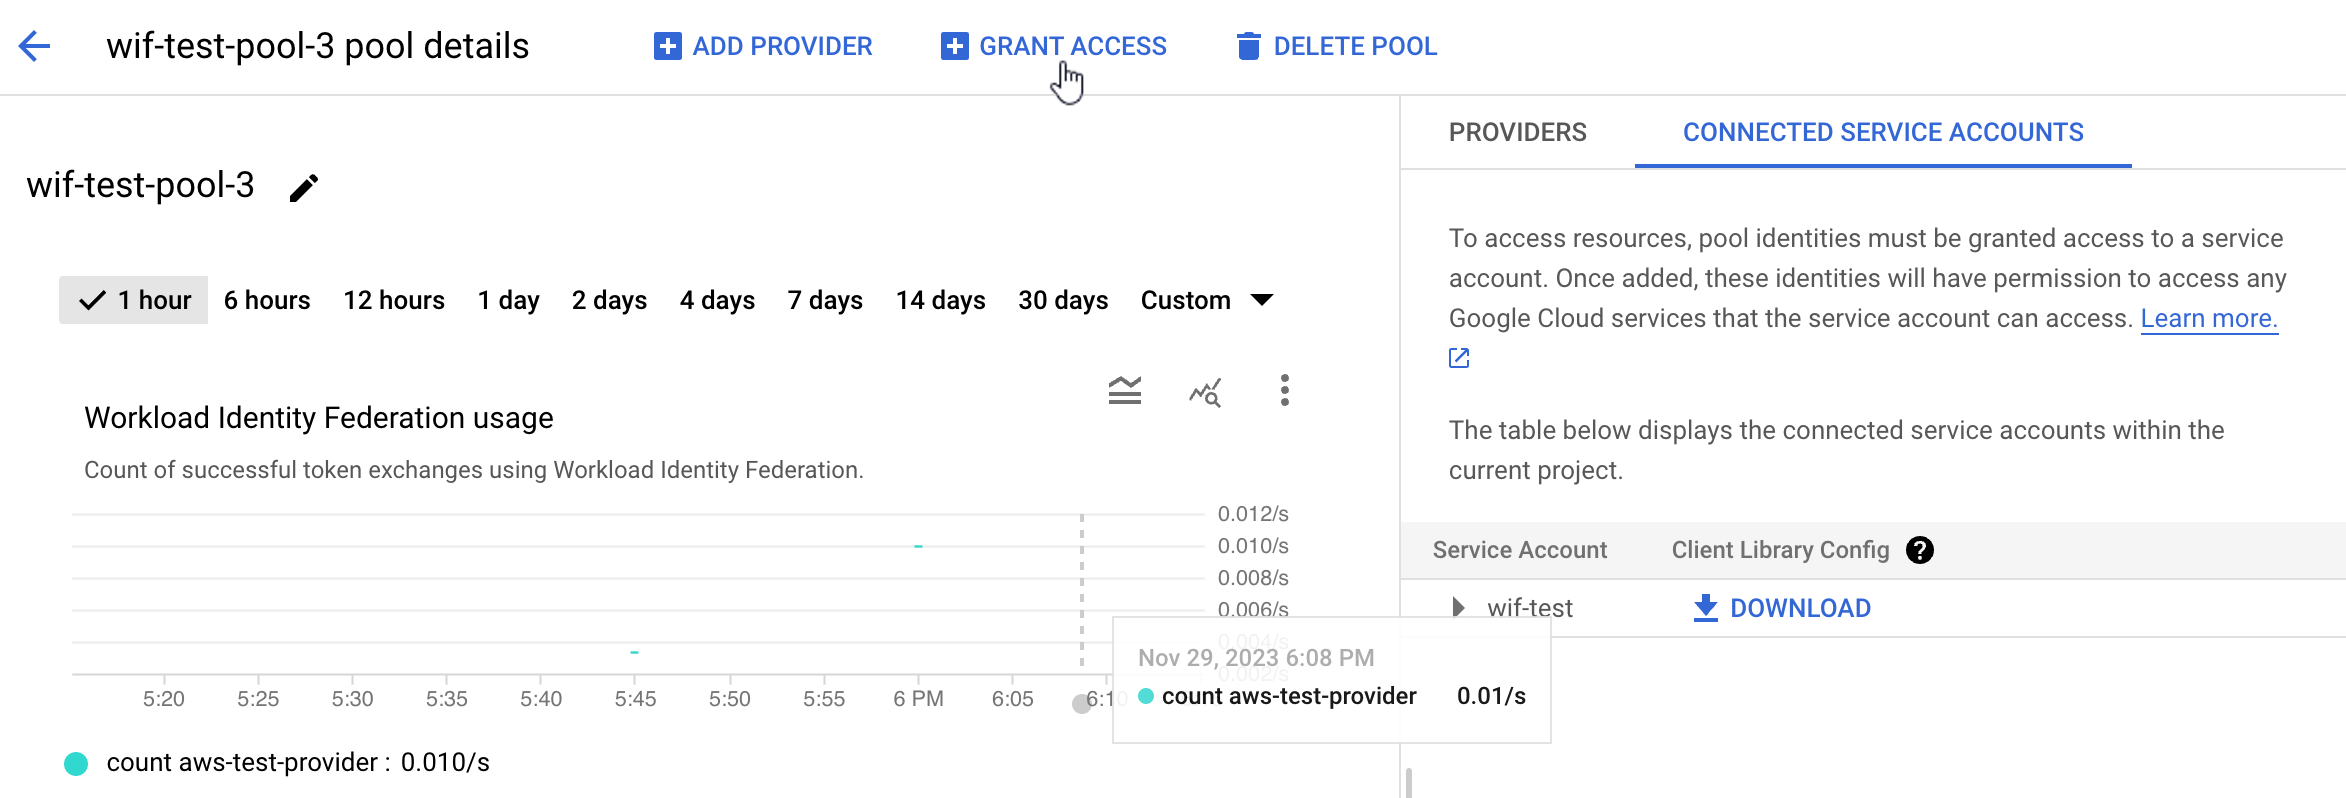
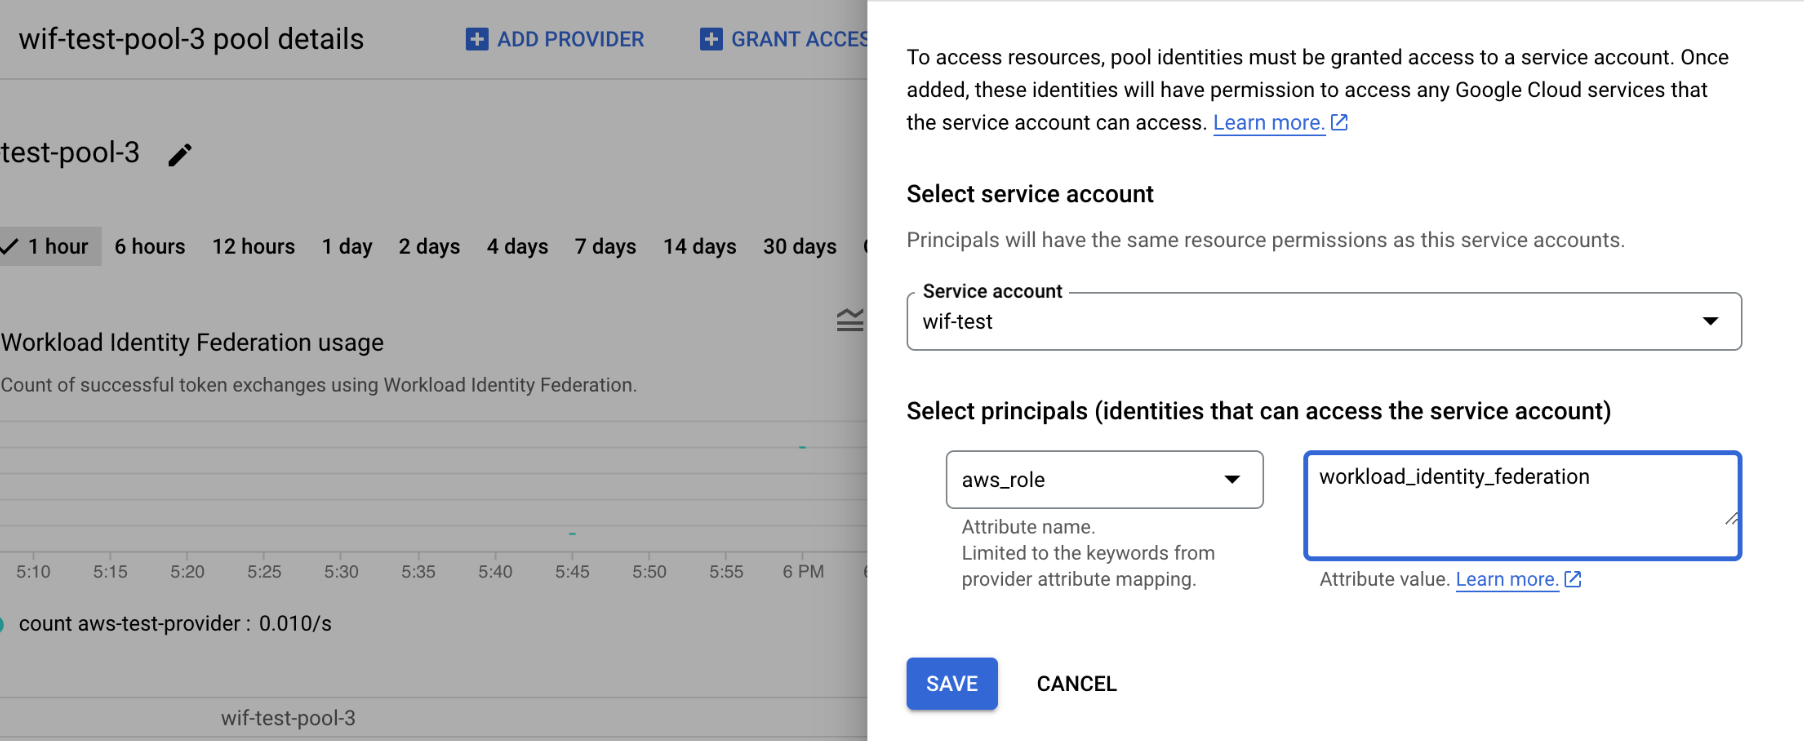
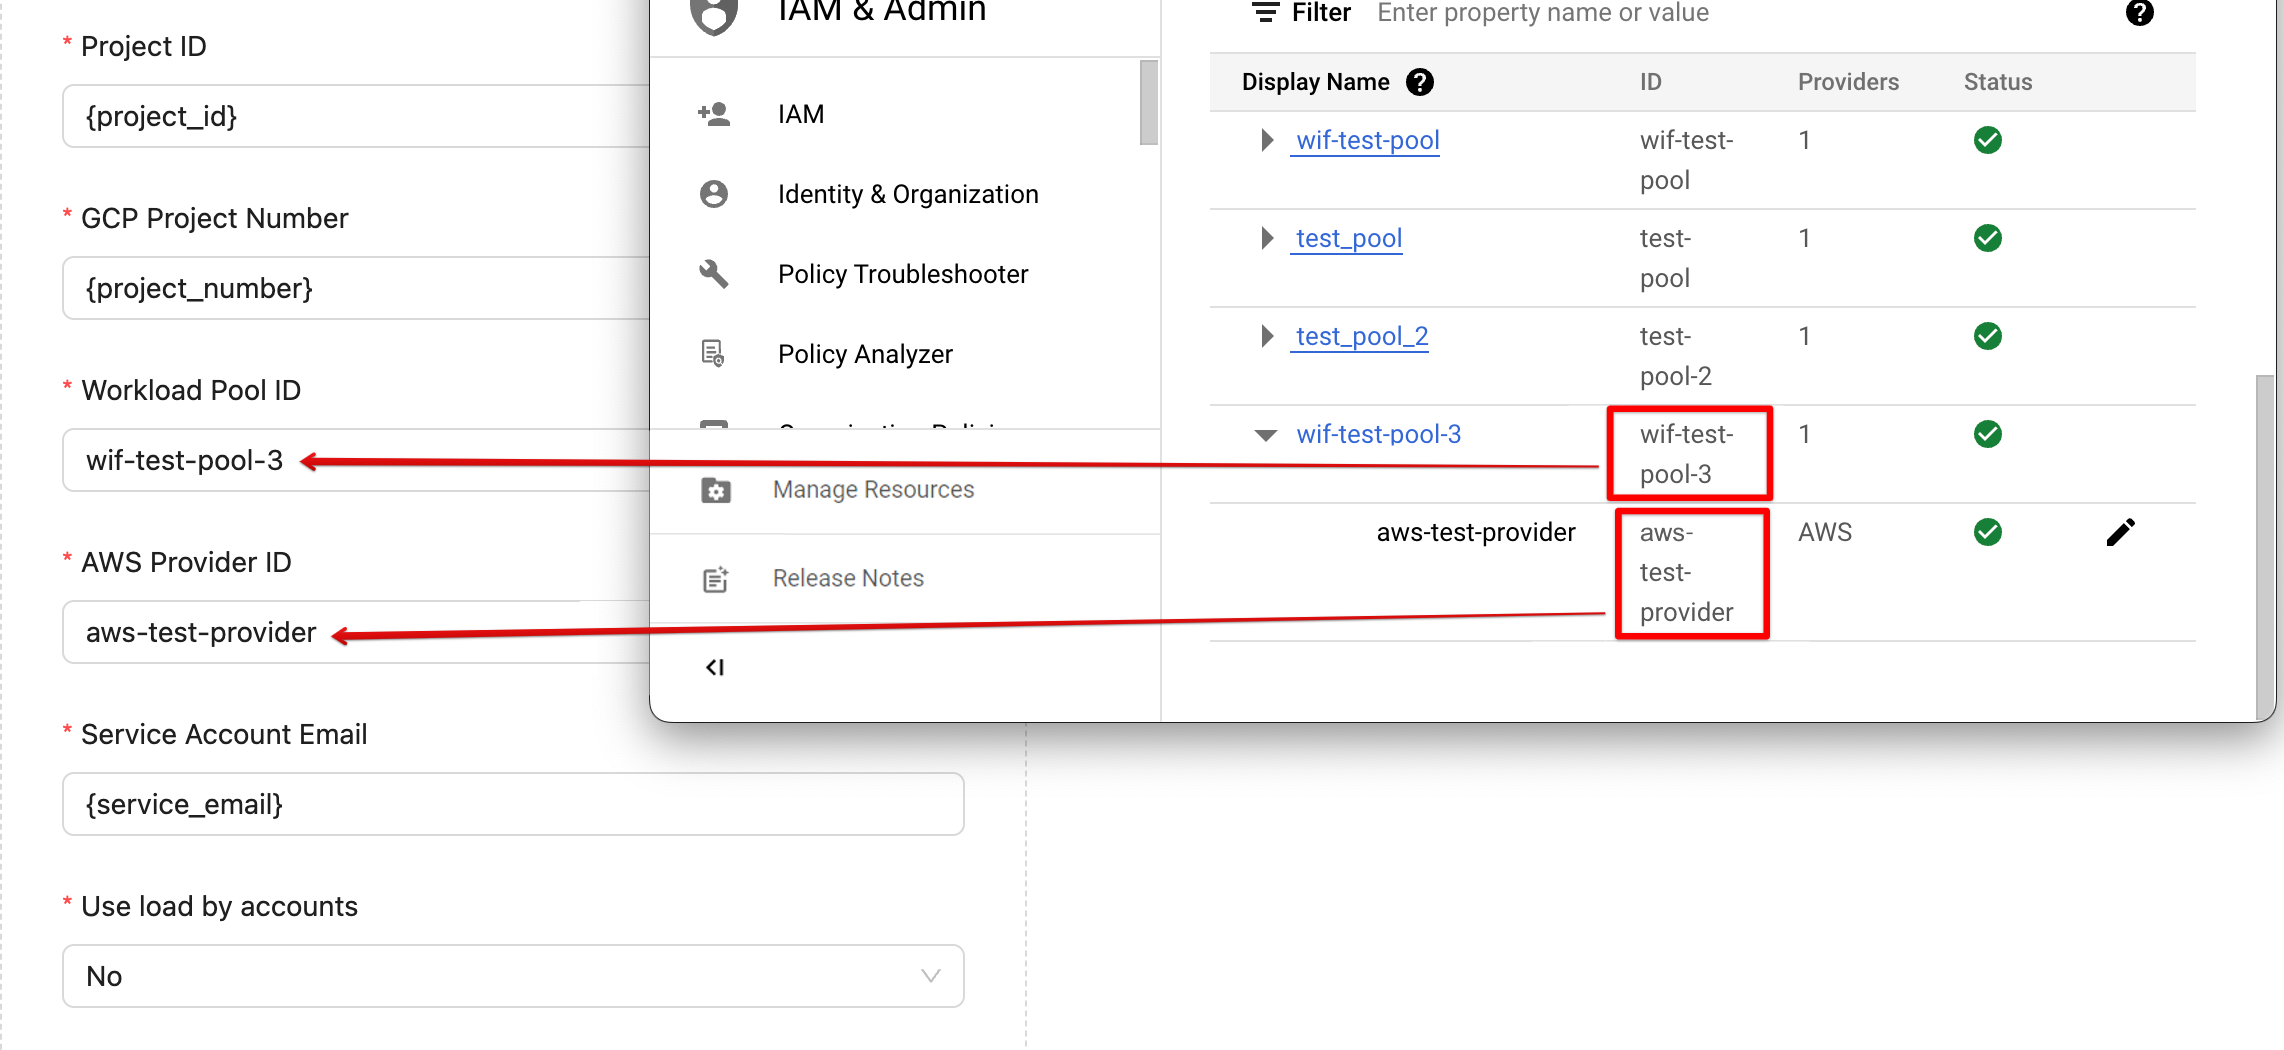
Learn more about Workload Identity Federation configuration here.
Improvado stores data GBQ in "sharding" format in tables named like ```TABLE_NAME_YYYYMMDD```. Typically we break the data down by platform, account, dimension, and month, but there are some alternatives. We can implement a day-by-day division if you need it.
If you want to have your accounts divided into groups and load those groups into different datasets (and even different GBQ accounts), we can handle this. Don't hesitate to reach our support for additional details.
Improvado team is always happy to help with any other questions you might have! Send us an email.
Contact your Customer Success Manager or raise a request in Improvado Service Desk.