Updated on
October 9, 2025
Learn how you can create custom extraction with flexible dimension settings via the Improvado UI.
{%docs-informer info%}
Custom Configuration is now available for all data sources with Custom report type.
{%docs-informer-end%}
Custom Configuration is a feature that allows you to extract your data with flexible dimension settings. There is no binding to the data structure specified in Improvado. Any set of dimensions and metrics allowed in the data source API is available for extraction.
First, make sure that the data source you need supports Custom report types. The schema information shows all data sources you can use to extract data with Custom Configuration feature.
To start using Custom Configuration feature, select any template with Custom label from the list.
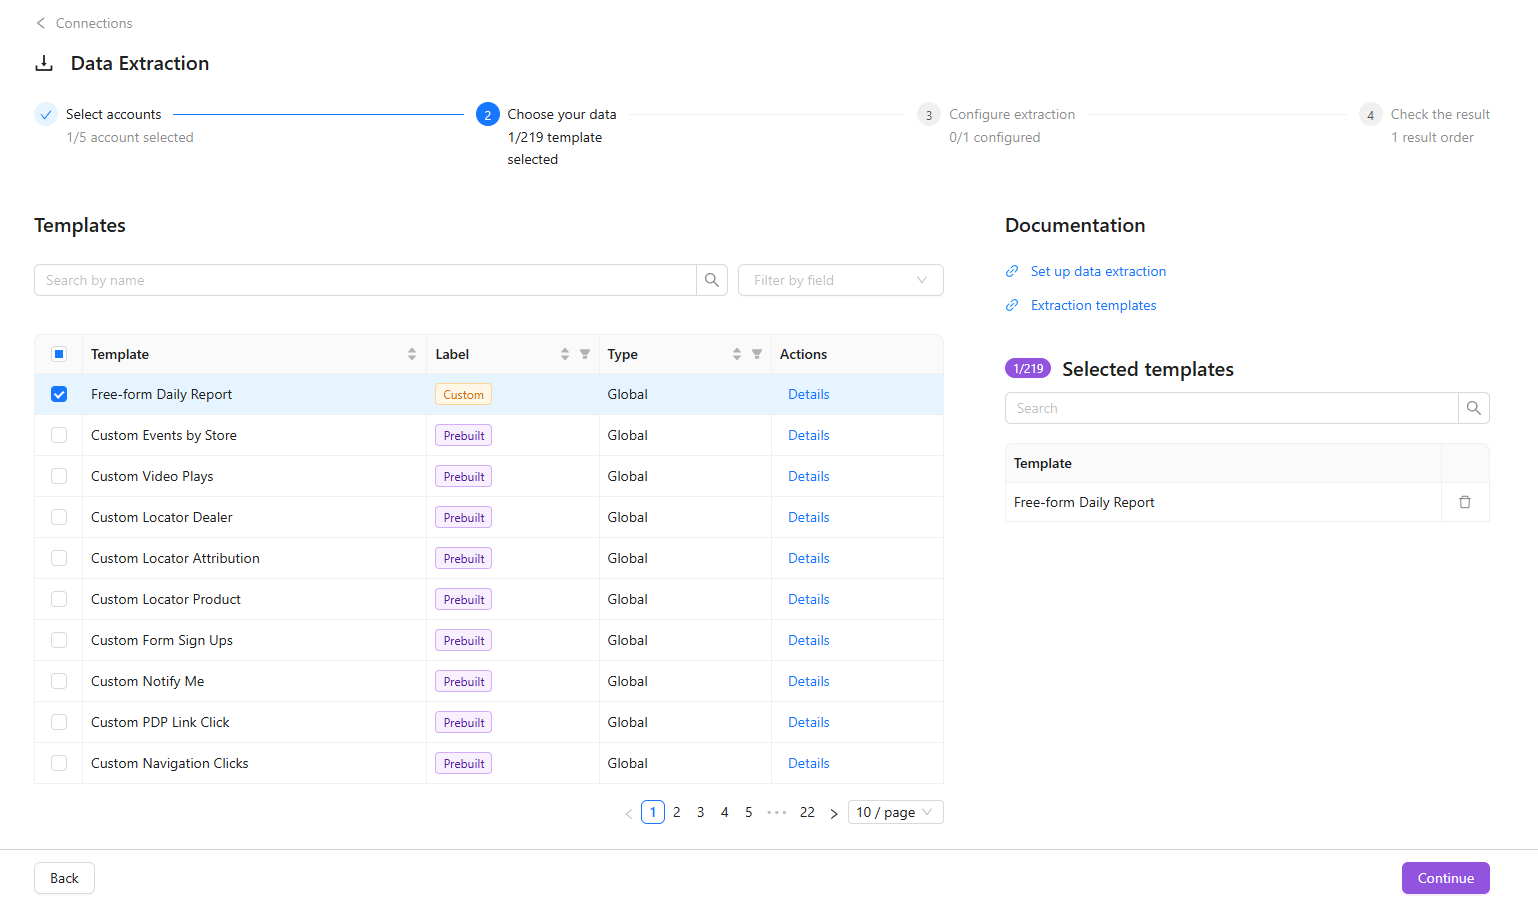
Once you have selected all the required templates, click the Continue button to start configuring your data extraction.
Now you need to configure the selected template.
You need to select the first date of the historical data interval in the Sync historical data field. The maximum historical data depth varies due to the API specifics of different data sources. If you need historical data depth over the preset maximum value, it is necessary to raise a request via Improvado Service Desk. Our team will check if it is technically possible.
You can configure your reports to display data aggregated by year, quarter, month, week, day, or lifetime. This setting is supported by the data source API, ensuring accurate data aggregation without requiring separate reports for each granularity level.
If lifetime granularity is selected, no lookback window, sync historical data, or custom refresh window parameters are applied — the report always includes all available historical data, presented as sums of metrics for the entire historical depth.
Note: It’s currently available only in some reports and will be gradually implemented for more soon.
{%docs-informer info%}
The “Sync historical data” date range is automatically rounded up to match the selected granularity (entire week, month, year).
The date range is automatically rounded up to match the selected granularity (entire week, month, year).
{%docs-informer-end%}
Here you can set the frequency of data extraction by changing the scheduling settings and adding or deleting schedules.
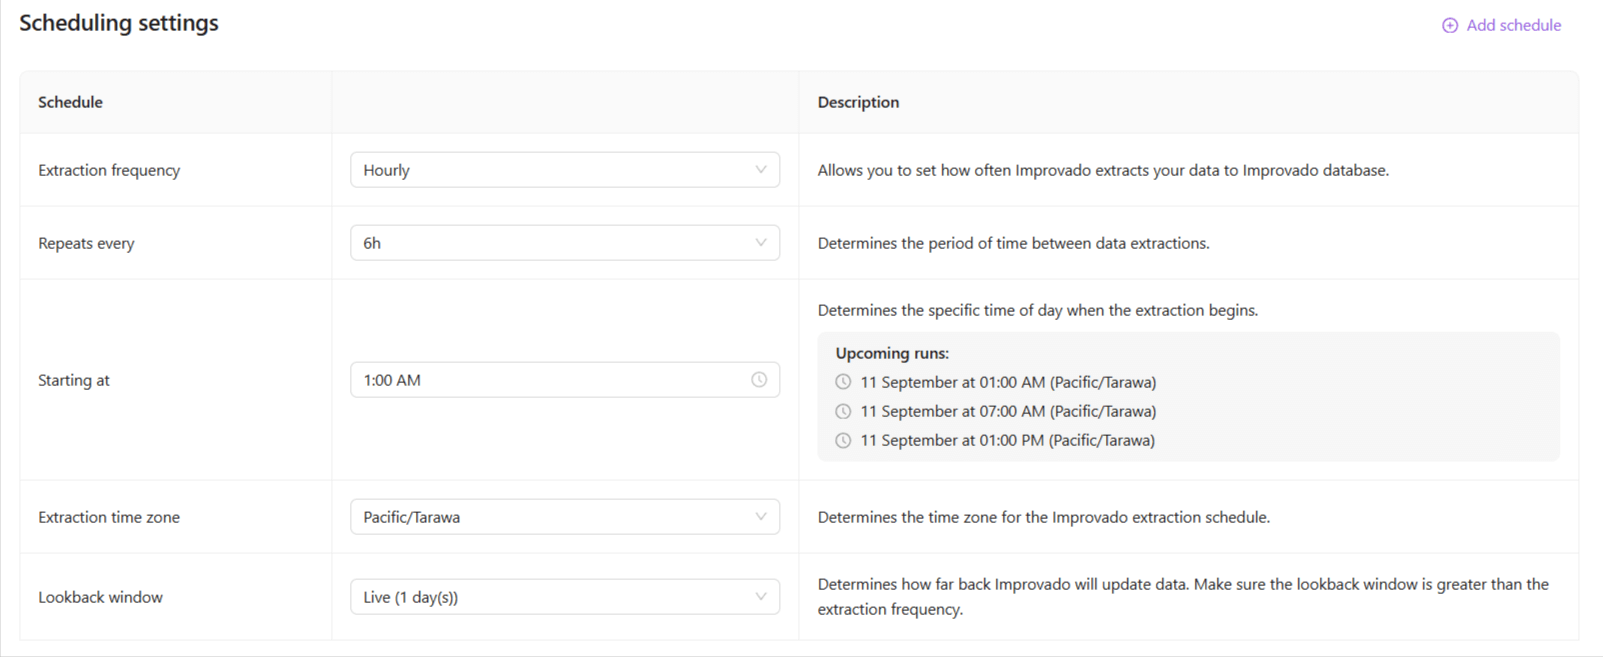
One schedule is always created by default. You can add one or several more by clicking Add Schedule in the top right corner of this section. If this is not available, it means you have reached your limit. The contract determines the limit. To increase it, please get in touch with your Customer Success Manager.
Also, you can delete the schedule by clicking the “trash bin” icon, but it is impossible to delete a schedule if it is the only one.
The schedule settings include four main fields, the additional fields depend on the chosen extraction period:
{%docs-informer info%}
A warning message will appear if the scheduled extraction time exceeds the sum of your Data Delivery ETA and the average sync time (calculated as the median of the report’s dataflow duration over the past 60 days). This notification helps avoid scheduling conflicts that could delay data delivery and result in SLA violations. The warning includes a recommended extraction time range based on historical sync performance for adjustments.
If you want to change your current Data Delivery ETA, you can edit it in the Organization Settings. Learn more.
{%docs-informer-end%}
Note that you will be able to change it later by editing the extraction order configuration on the Settings tab.
With Custom Configuration, you can select and combine dimensions and metrics, providing flexibility in data extraction. All available dimensions and metrics are presented in lists similar to accounts and templates and work in the same manner.
Select the necessary dimensions and metrics for your Data Extraction.
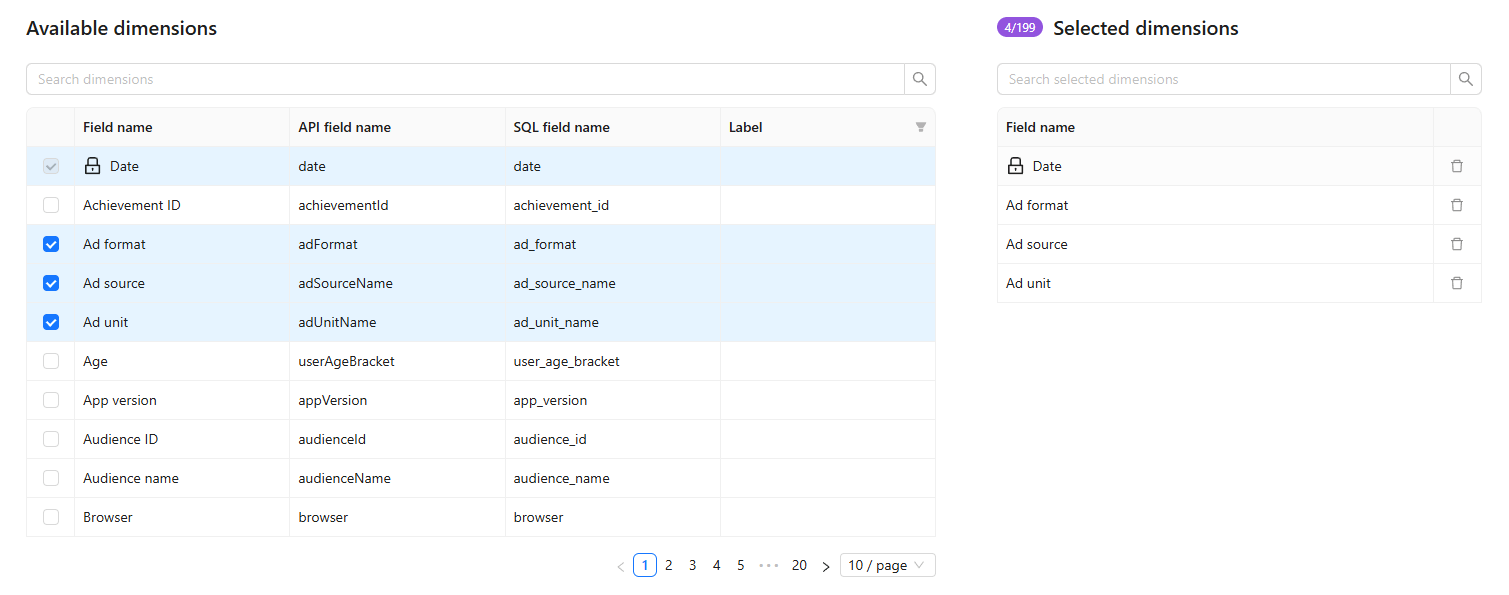
Note: You can also remove selected fields by clicking the Bin button in the Selected dimensions/metrics list.
Some dimensions and metrics are selected by default. You can not deselect them because they define the data table structure.
Please note that once an extraction order is created, you cannot change or add dimensions. This ensures the data table structure remains consistent. However, you can still update properties and metrics.
After you've determined the combination of metrics and dimensions you need, click the Validate button to start the compatibility check.
If you’ve set up a valid configuration, the Data table name field appears below the Available metrics table.
If you’ve set up an invalid configuration, the Warning pop-up message will show what you need to fix. There are two reasons for this message:
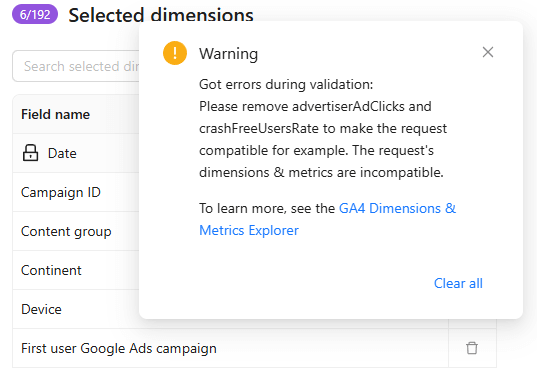
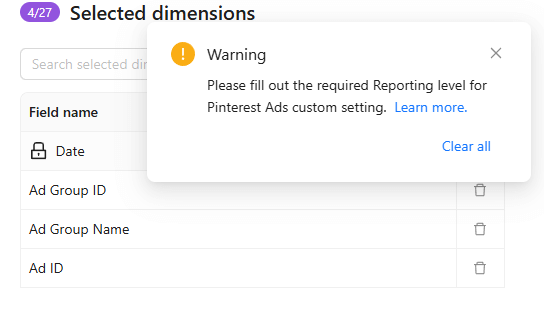
{%docs-informer info title="How to resolve Warning pop-up message"%}
{%docs-informer-end%}
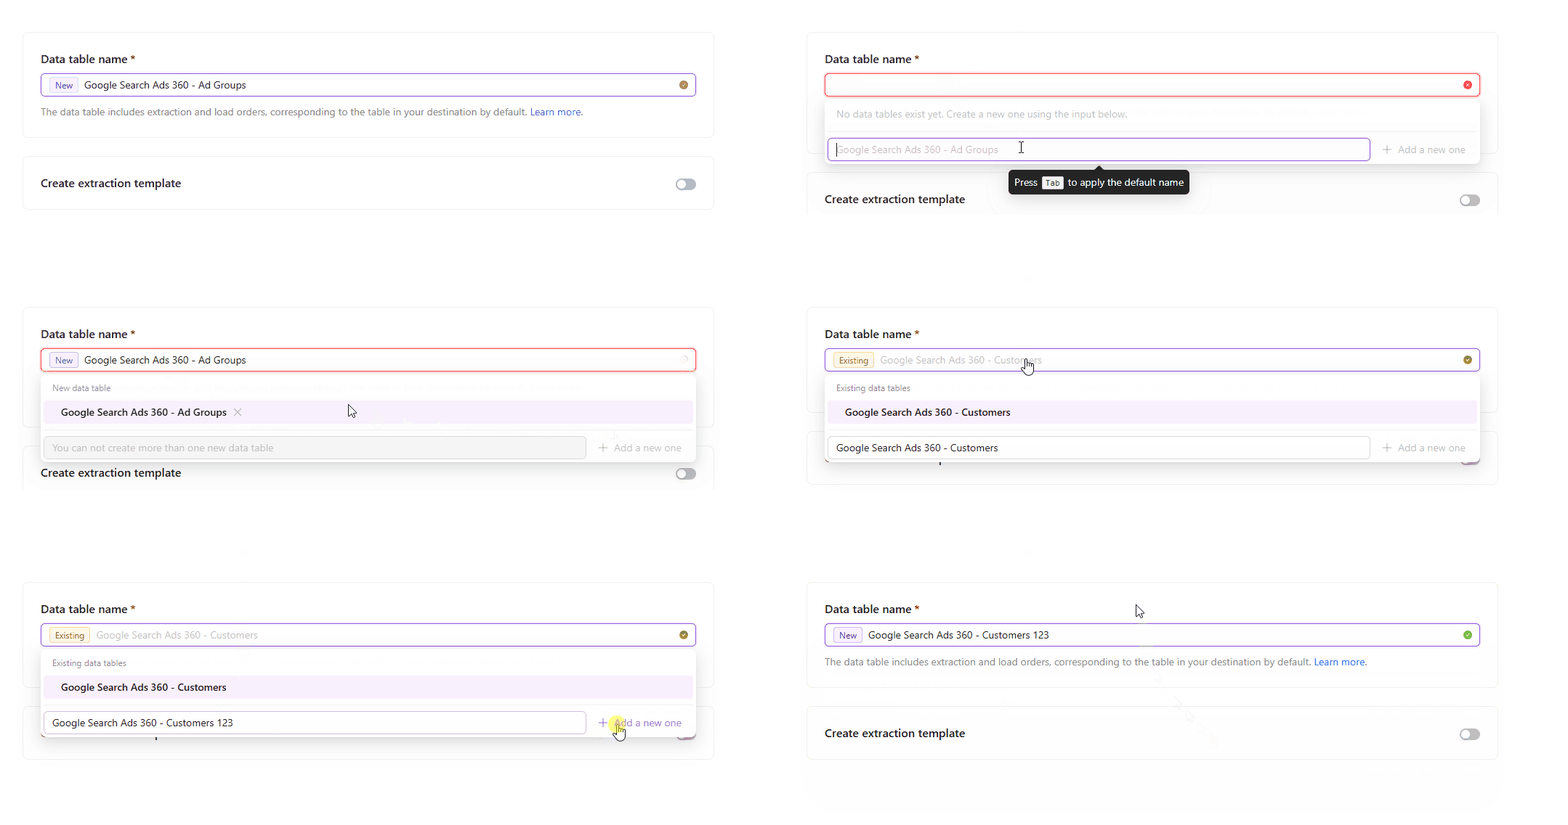
The Data Table name field can be found below the selection of dimensions & metrics and appears just after the successful field compatibility check.
The label to the left of your data table name indicates whether you are creating a new table or making changes to an existing one.
If you already have a Data Table with the same level of granularity, you can either select it from the dropdown or create a new one:

You can rename your data table by following these steps:
{%docs-informer info title="Note" %}
Improvado will automatically suggest Data table title based on the selected dimensions if you don't have any configurations yet.
{%docs-informer-end%}
If all extraction templates are configured, click the Continue button and check your result.
This is the last step before the data extraction starts. Here you can see the list of extraction orders you’ve configured in previous steps. It includes the following:
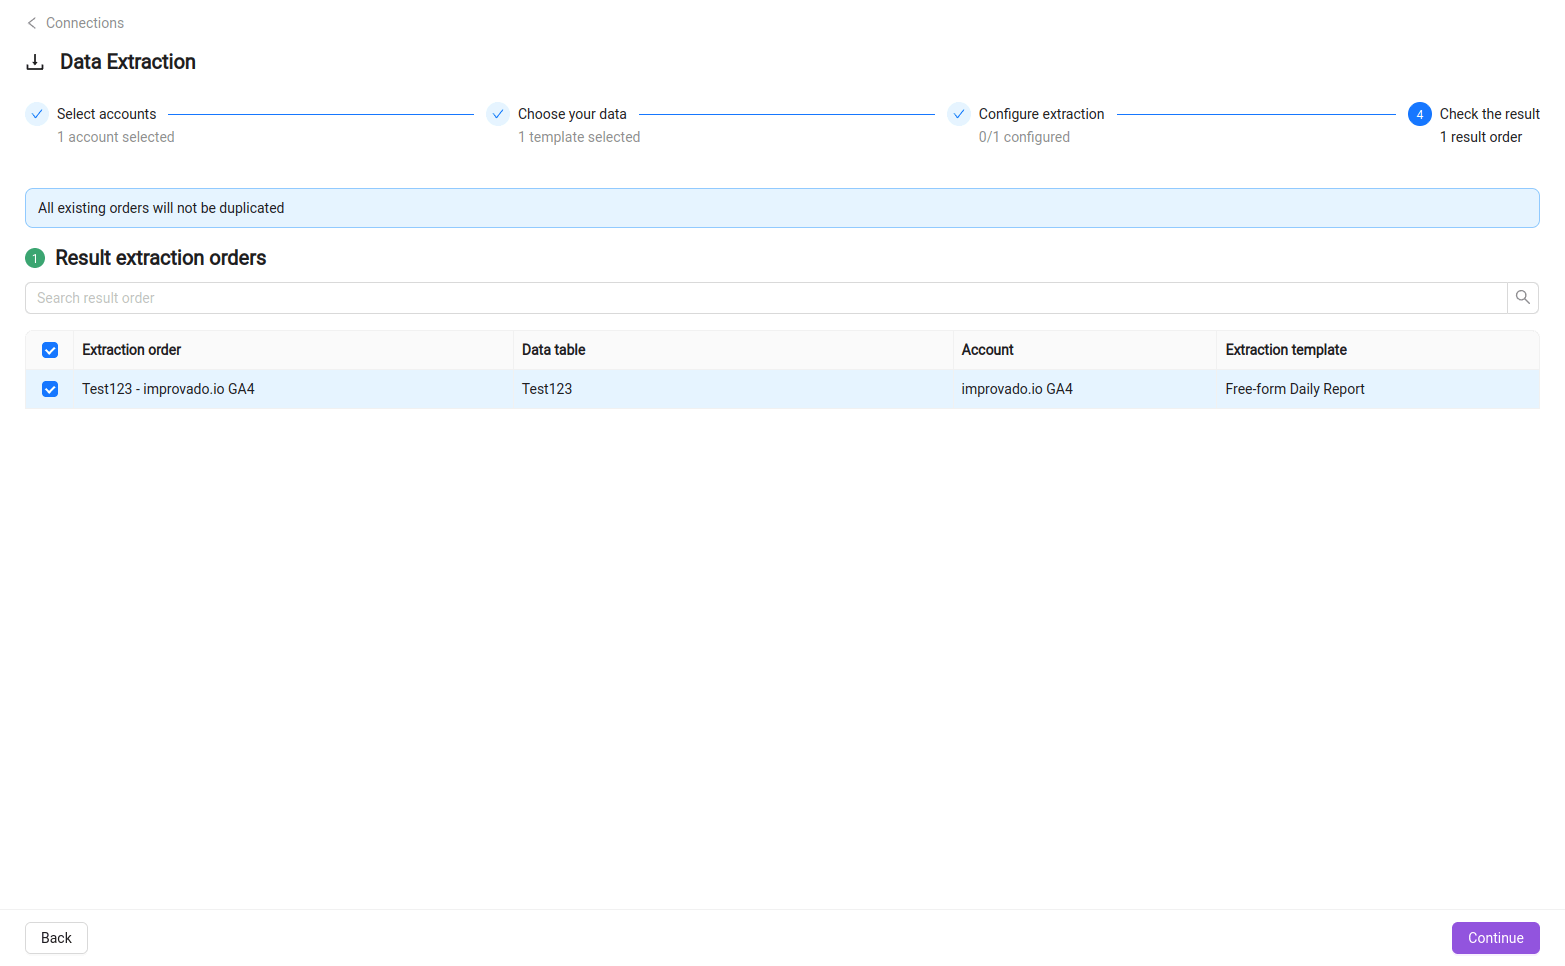
Check the resulting extraction orders carefully. Remove the selection if you notice that some order was added to this list by mistake. Only selected extraction orders will be set up.
Click the Continue button to finish the extraction configuration process.
Improvado team is always happy to help with any other questions you might have! Send us an email.
Contact your Customer Success Manager or raise a request in Improvado Service Desk.