Updated on
Sep 4, 2025
Adobe Analytics lets you mix, match, and analyze data from any digital point in the customer journey.
Step 1. Click the Make a new Connection on the Connections page.
Categories on the Data sources page group all available platforms. Use a search to find the required one.
Step 2. Click on the Adobe Analytics tile.
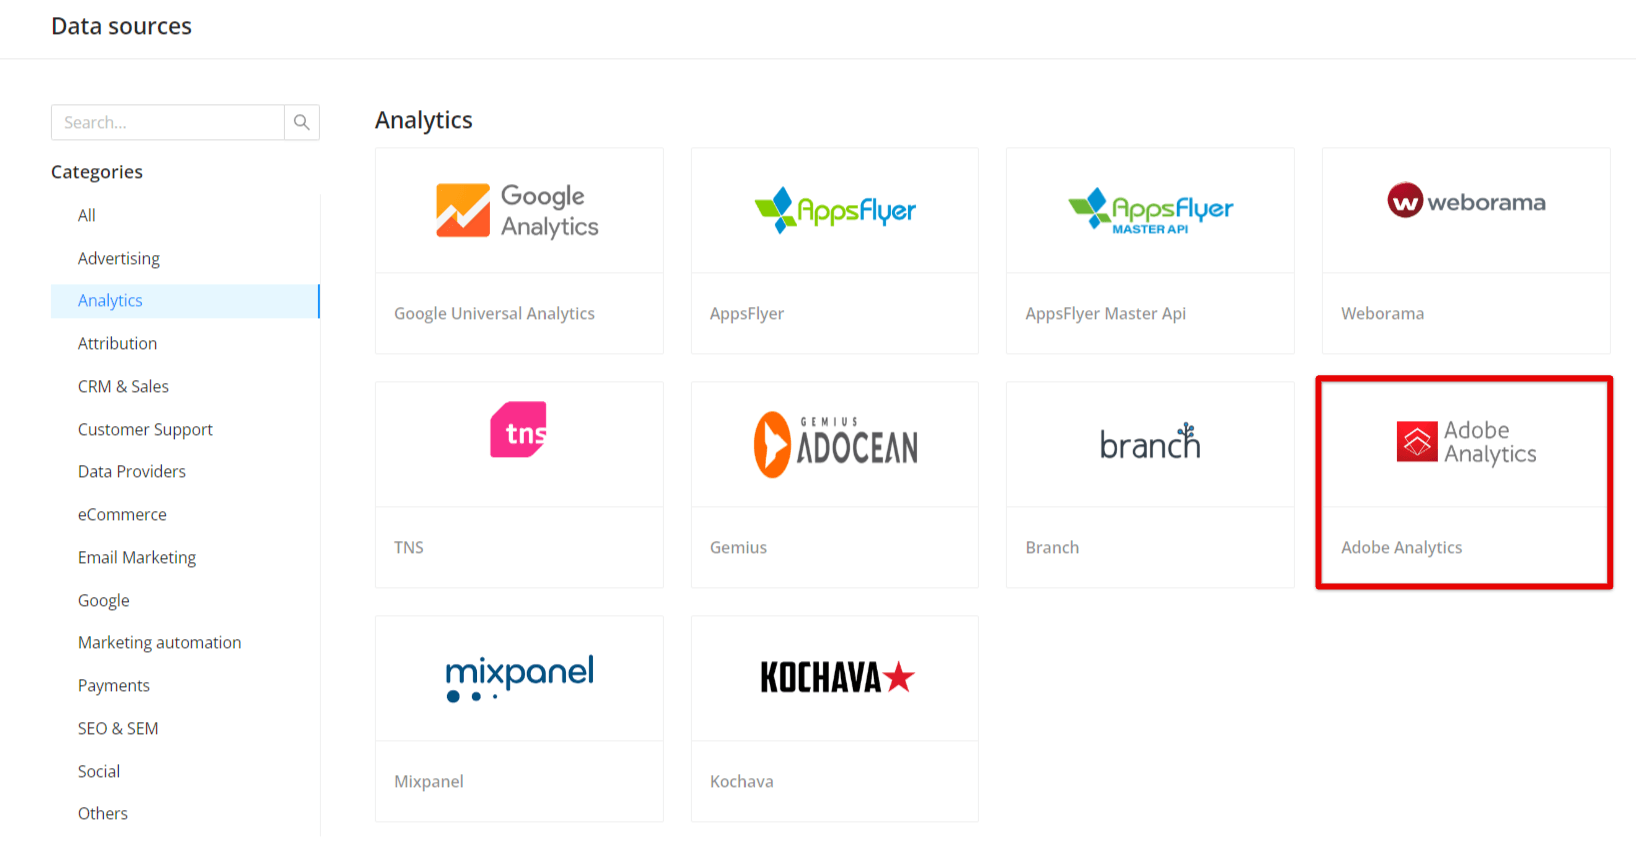
Step 3. To authorize your account you need to fill in the required fields below following steps 3.1 - 3.13:
Step 3.1. The following sequence is a customized version of the Setting up the OAuth Server-to-Server credential.
Step 3.2. Create a Product Profile
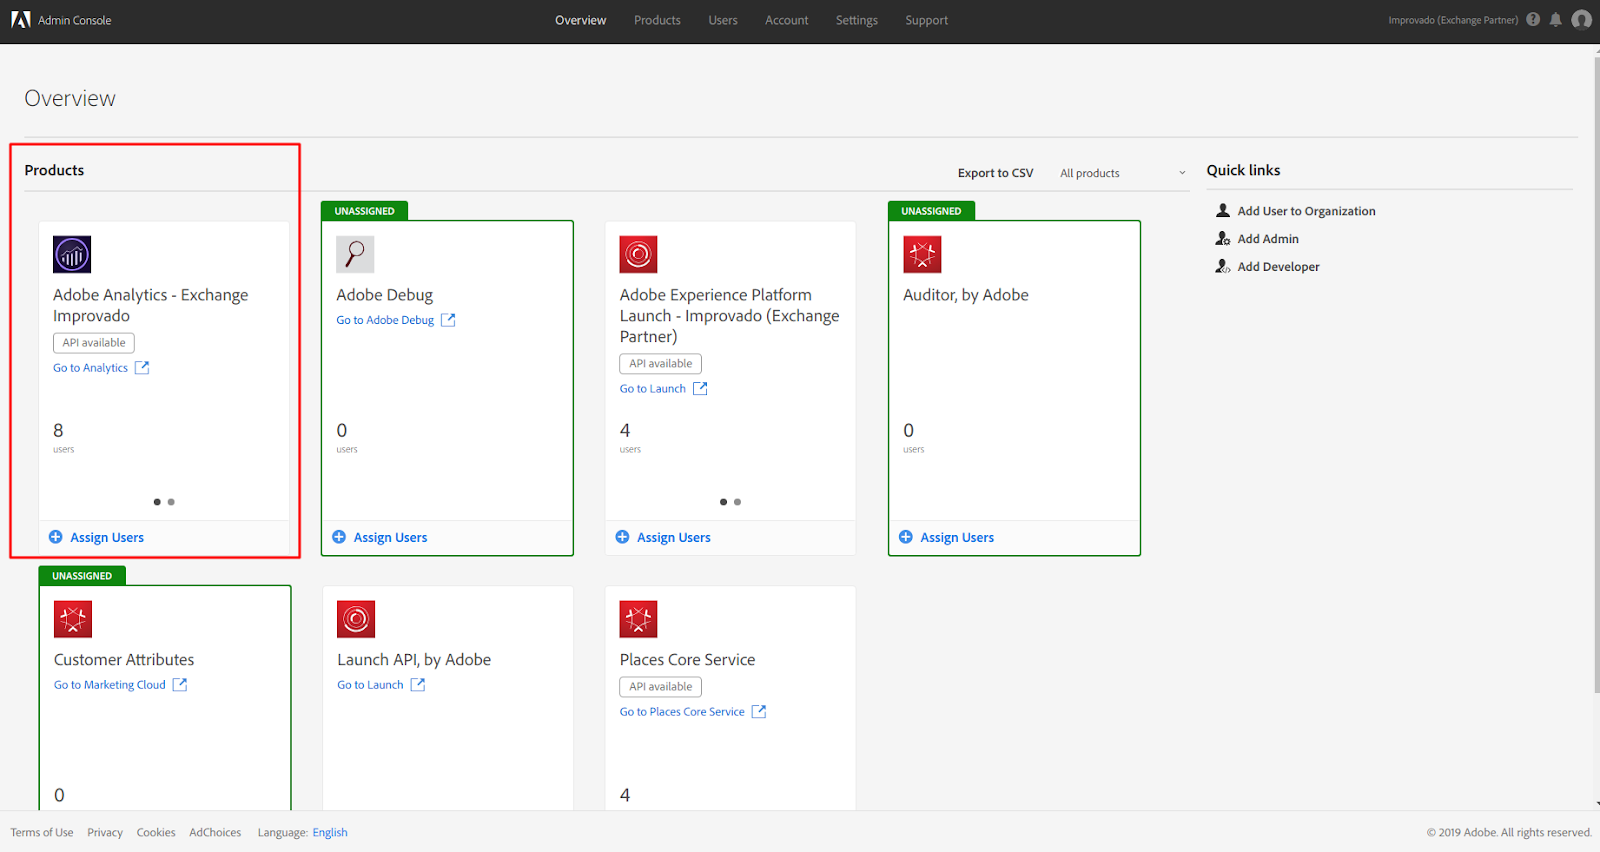

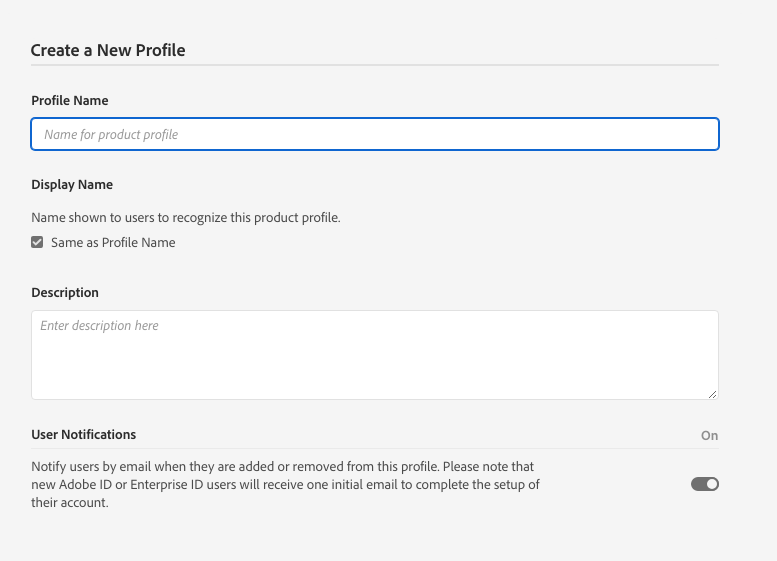
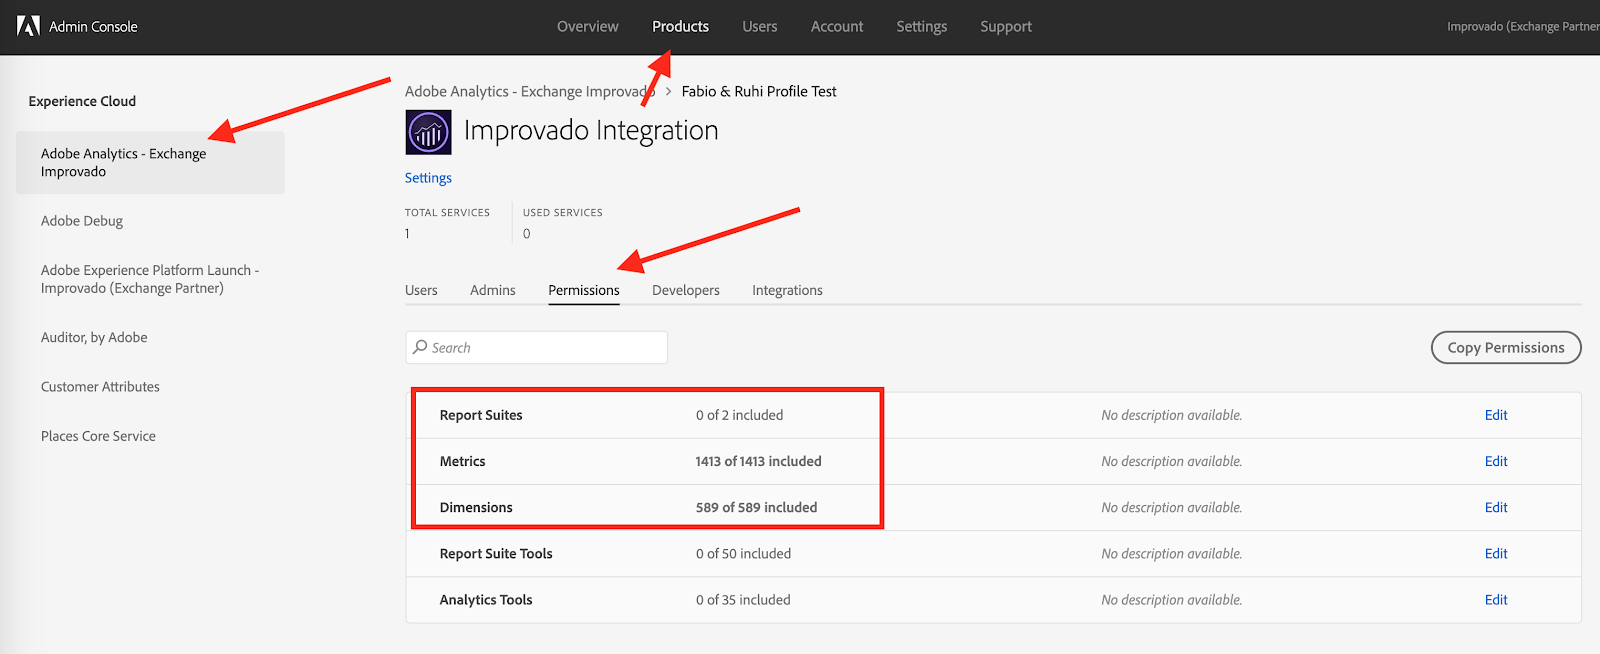


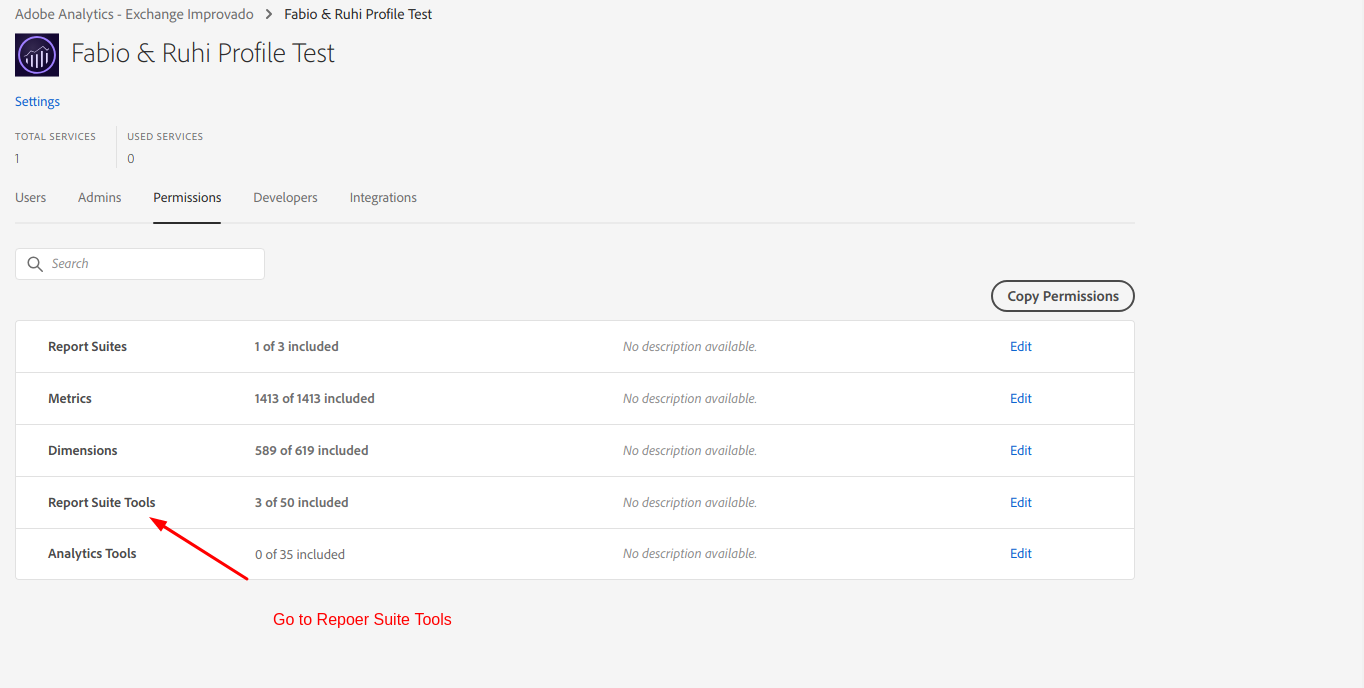
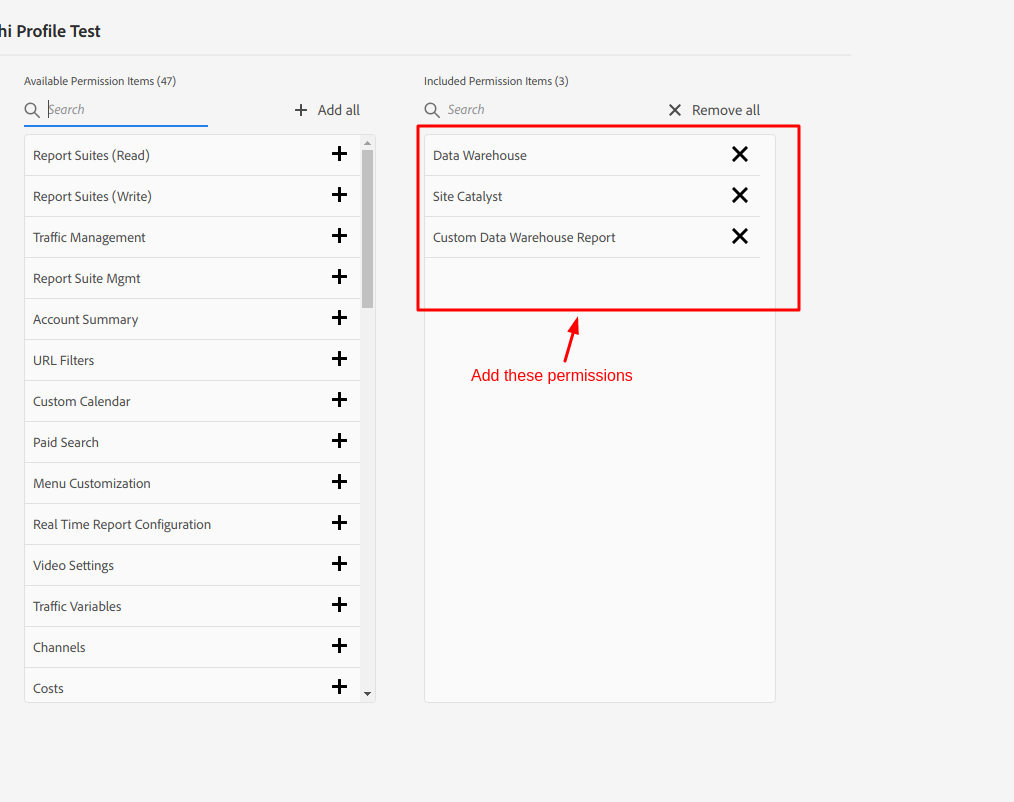
Step 3.3. Back to Adobe Console IO and select a product profile and click Create integration
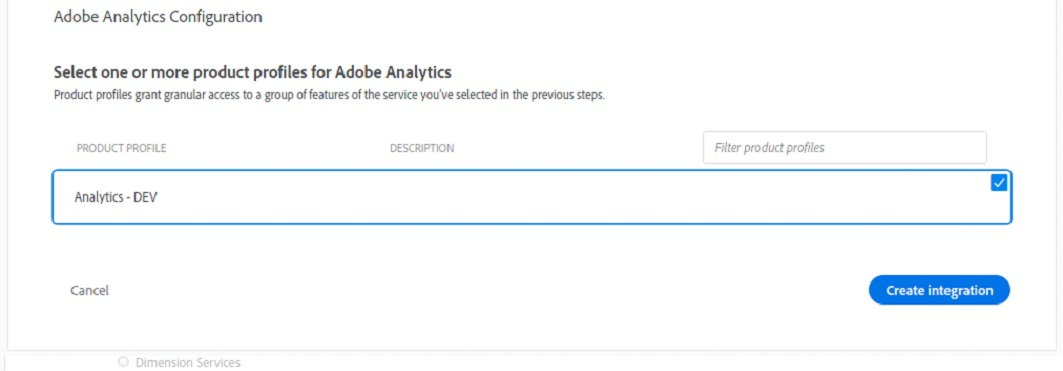
Important: Please, check that the selected profile has all the required permissions!
Step 3.4. Go to Adobe I/O Console > Projects, and click Create new project button.
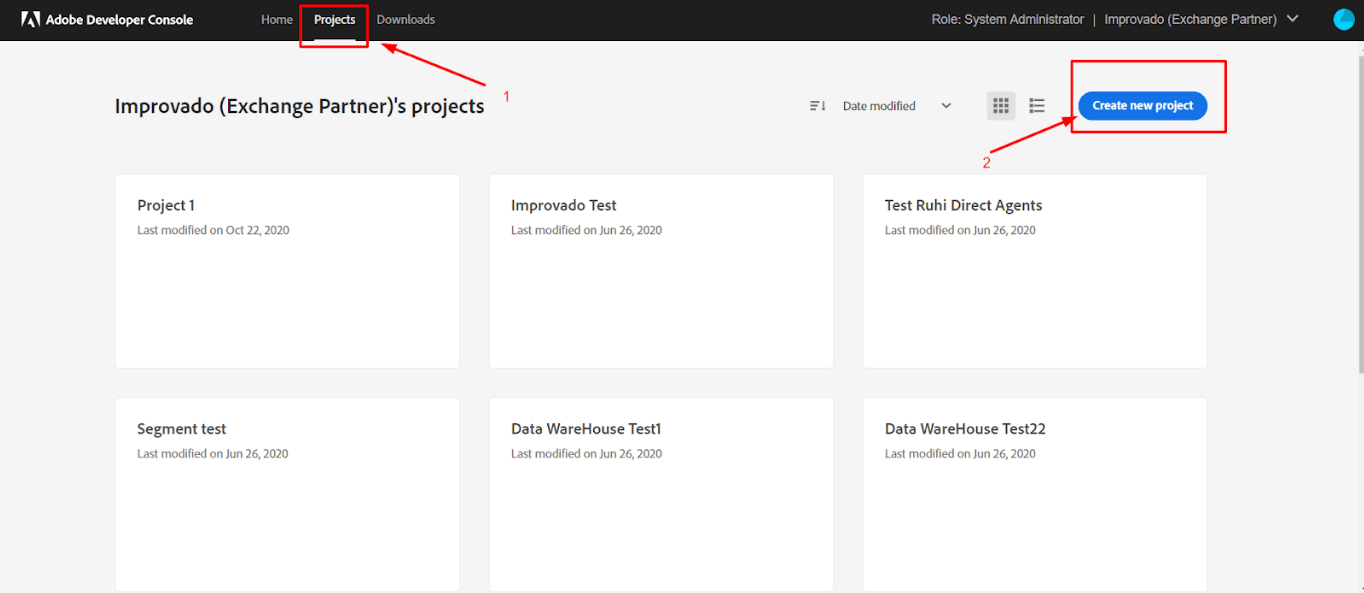
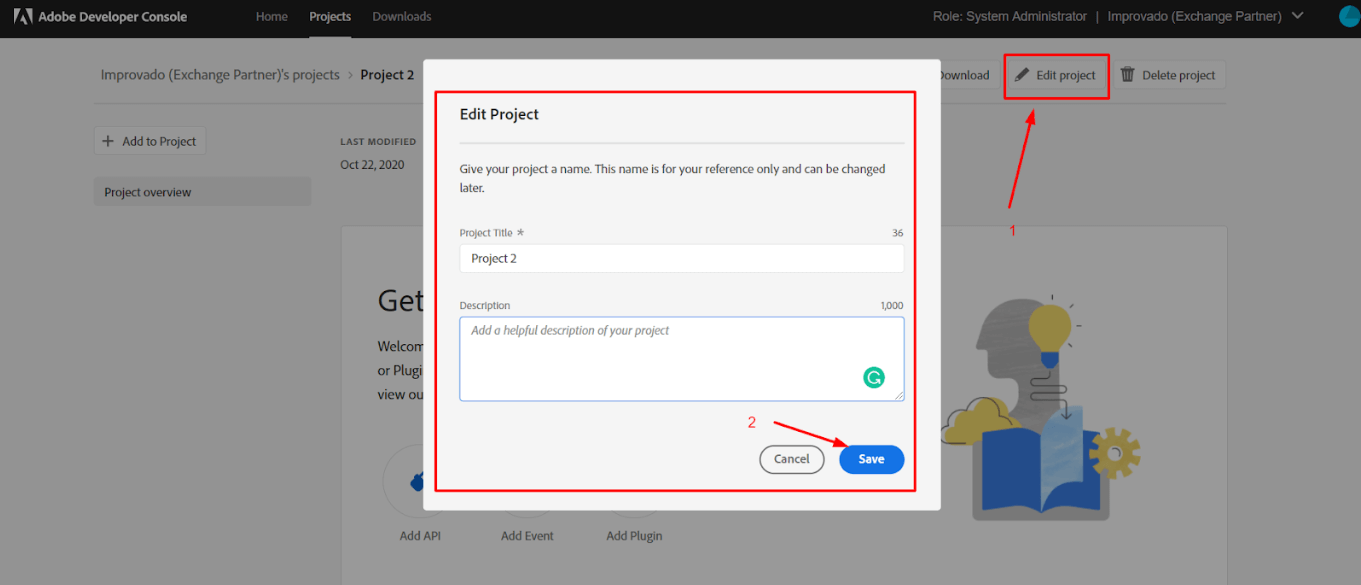
Step 3.5. Once you clicked the button, the new Project will be created and you can edit your project information.
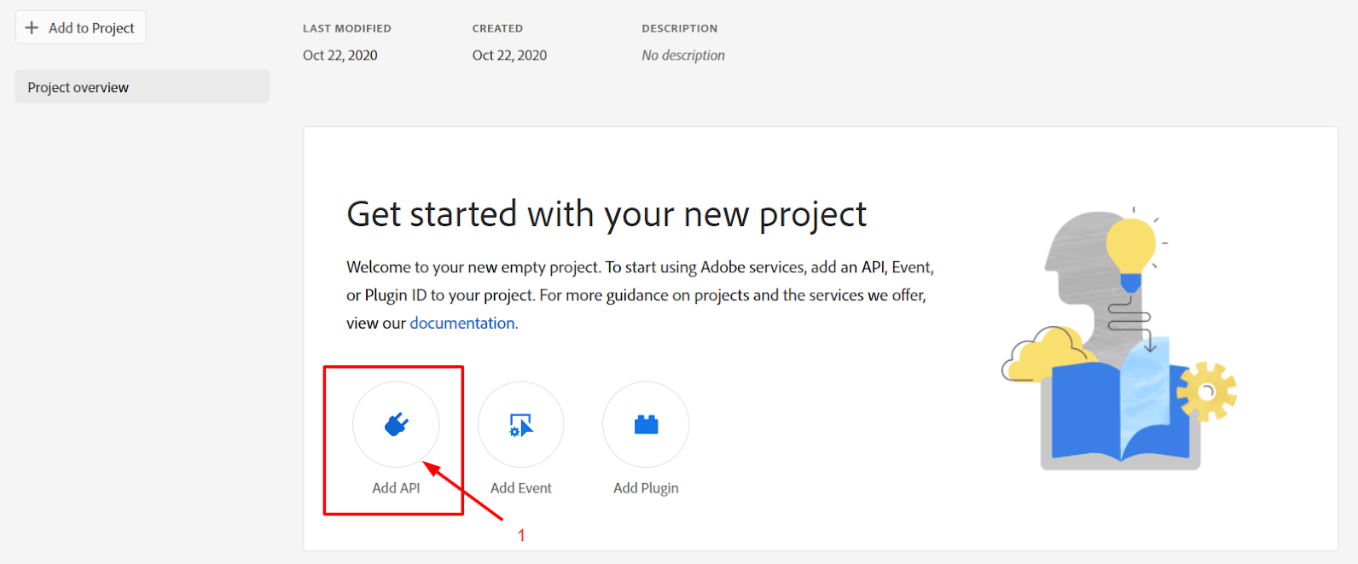
Step 3.6. Next, click Add API.
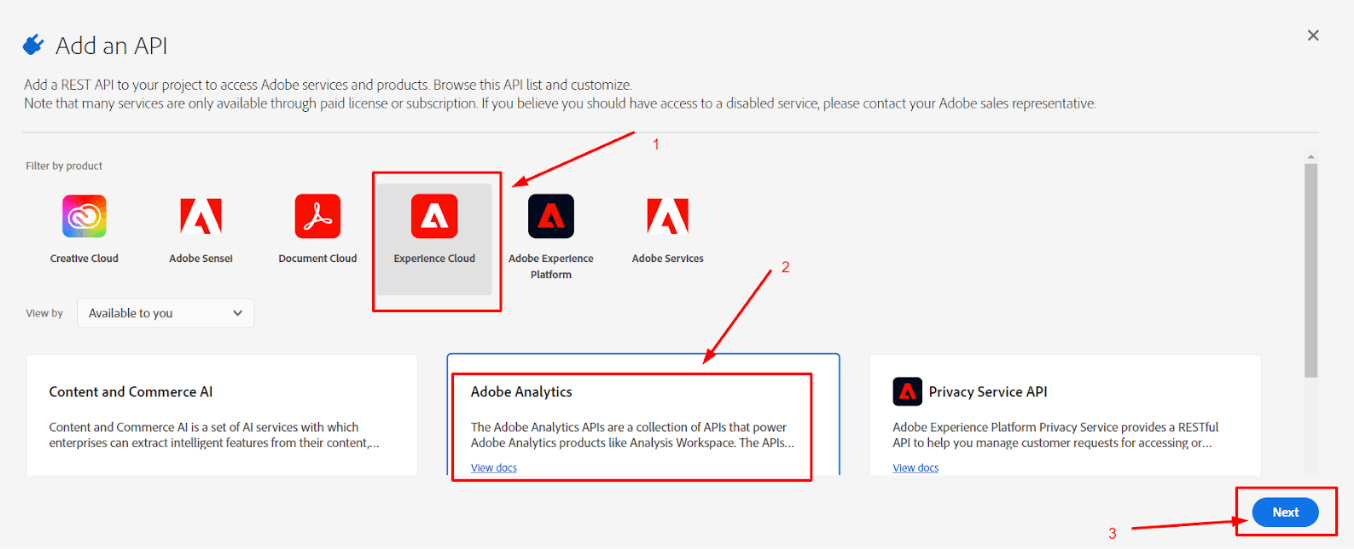
Step 3.7. Then, choose Adobe Analytics API and click Next.
Step 3.8. On next page select OAuth Server-to-Server.
.png)
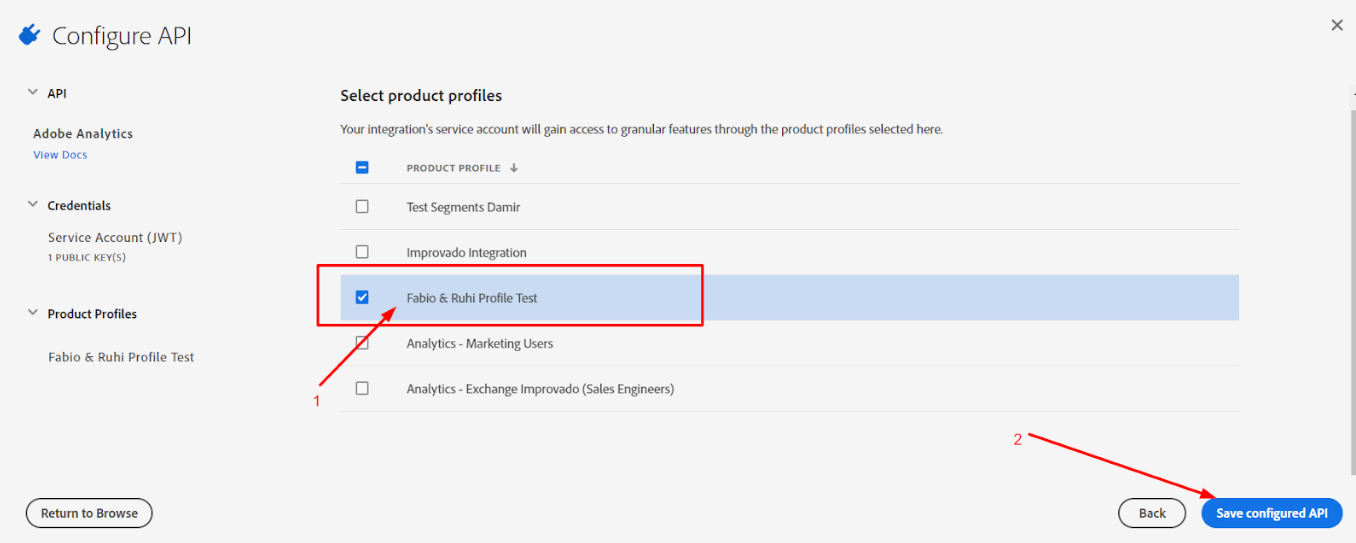
Step 3.9. Select a product profile, which you created in steps 2-3 and click Save Configured API.
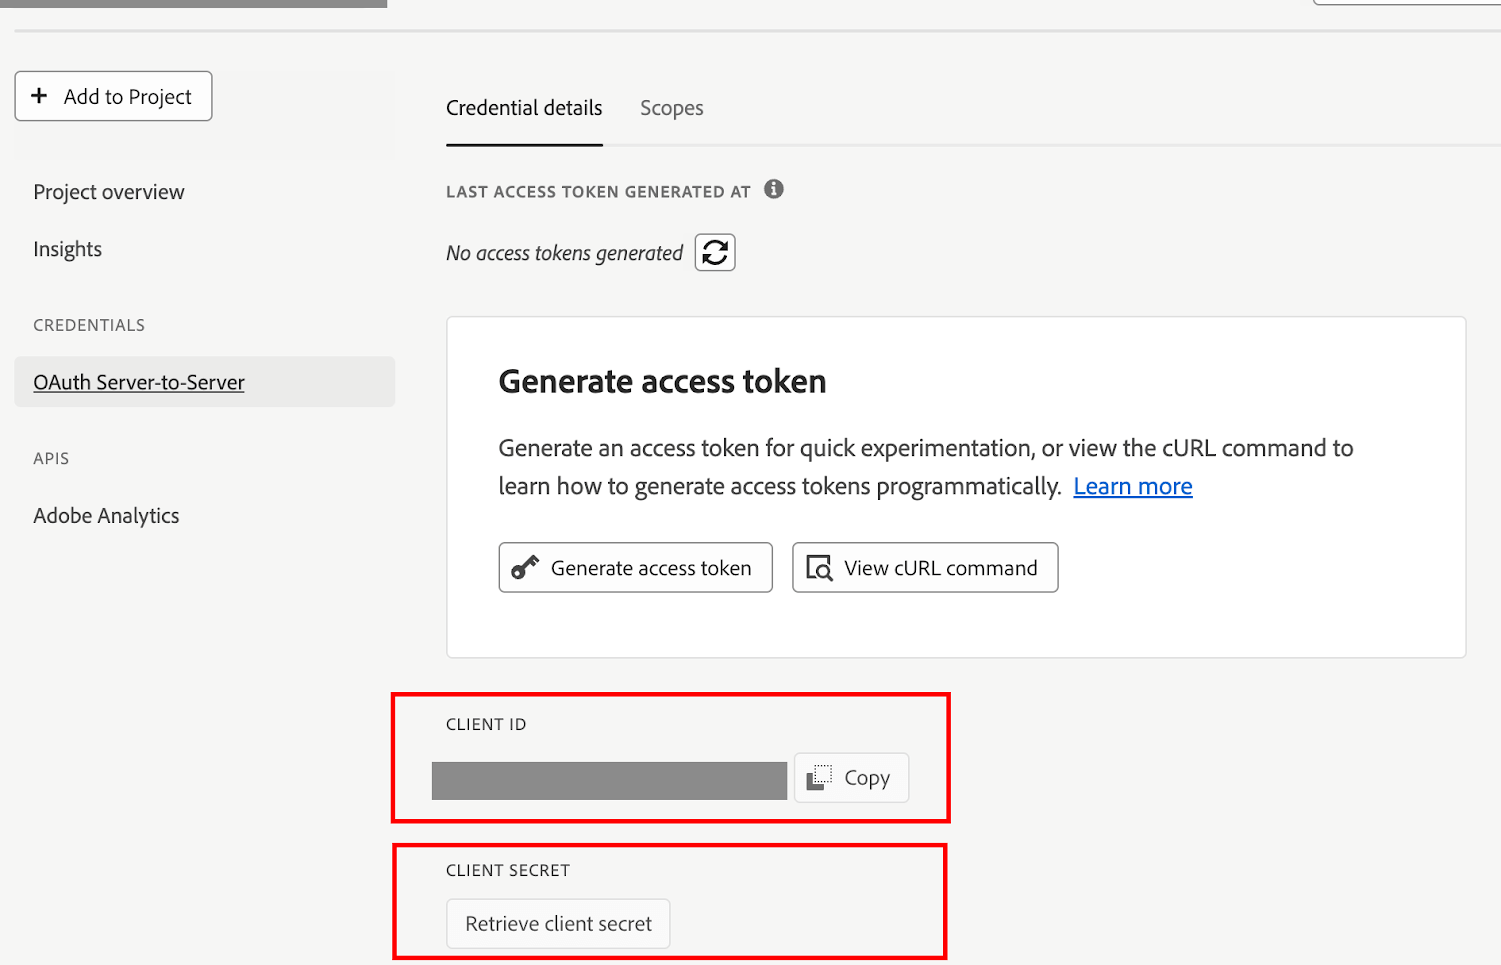
Step 3.10. Copy API Key (Client ID) and Client secret somewhere, you need them later to connect Adobe Analytics to Improvado.
Step 3.11. Find the required Report Suite Id where to take data from:
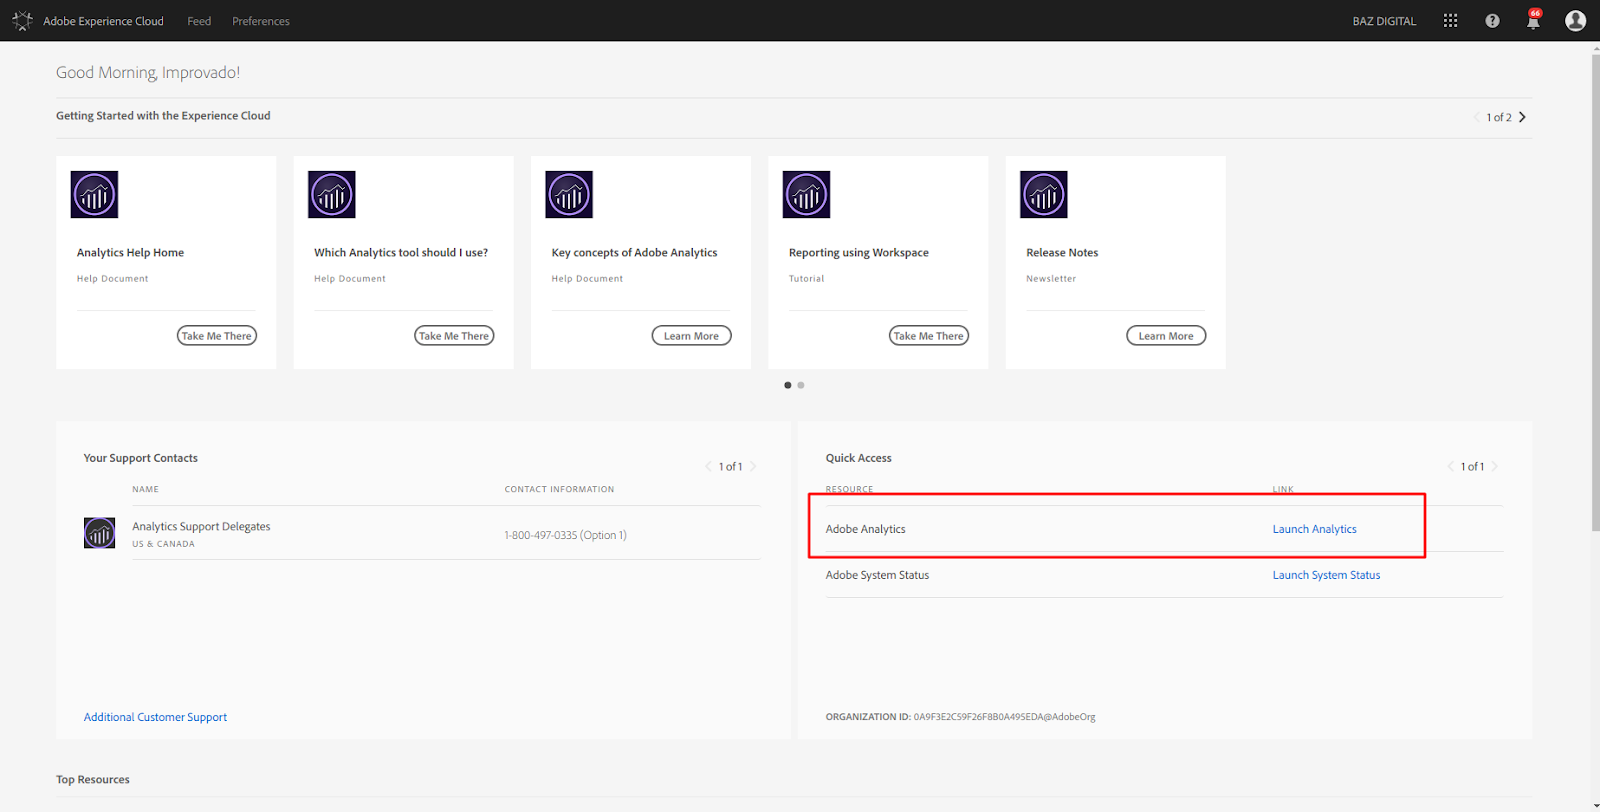

The Report Suite ID (RSID) is an entity in Adobe where the data lives.

Step 3.12. Enter copied values into the Improvado authorization form.
Note: If you are not familiar with Adobe Console IO, please add support@improvado.io as a Developer in your Adobe organization and we kindly will go through this instruction. Guide on how to add a developer to your organization can be found here.
Step 4. After the connection process is completed successfully, the Adobe Analytics connection will appear in your Connected sources list.
Step 5. When the connection status is Active, and the account status column shows a number of accounts, you can move on to data extraction.

Step 6. To extract data from the connected sources, check the instruction on how to set up data extraction.Follow our setup guide to connect Adobe Analytics to Improvado.
The schema information shows all report types you can use to extract data from Adobe Analytics.
You can find information about the latest API changes in the official Release notes.
Improvado team is always happy to help with any other questions you might have! Send us an email.
Contact your Customer Success Manager or raise a request in Improvado Service Desk.