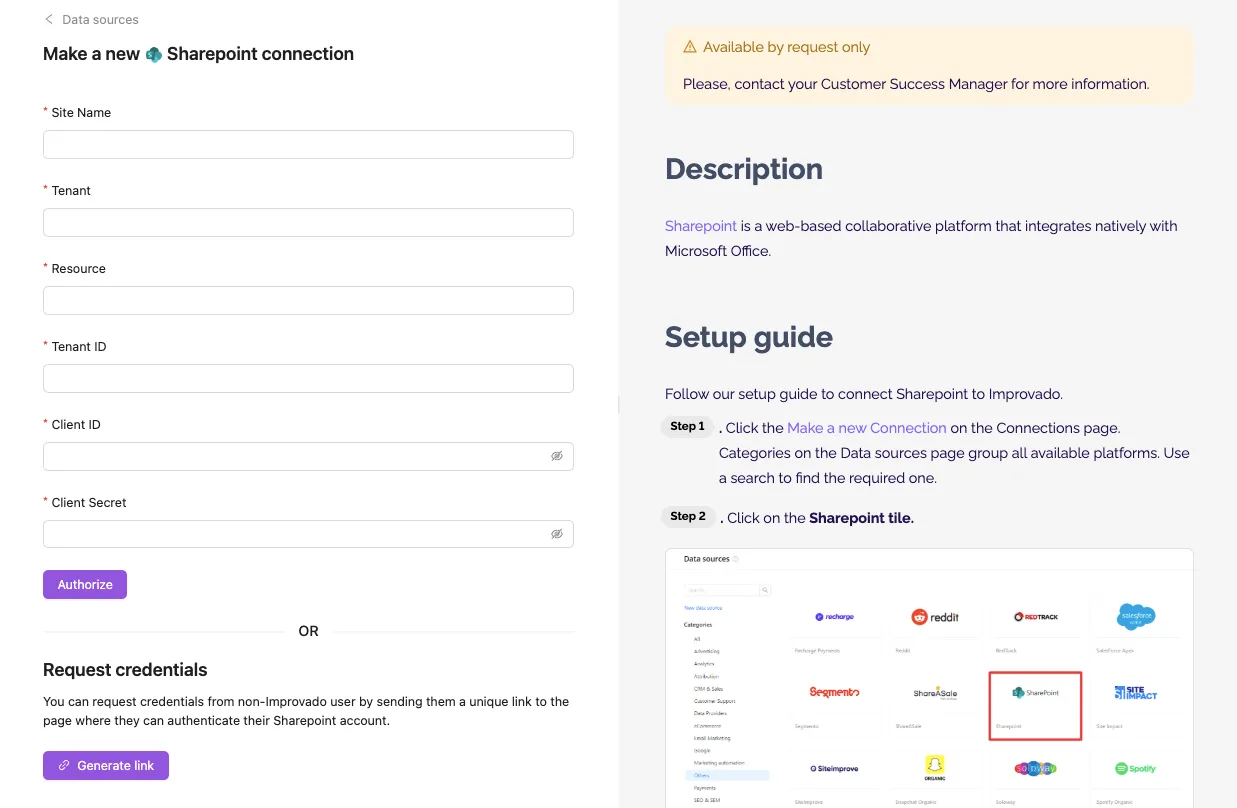
Sharepoint
Please, contact your Customer Success Manager for more information.
Description
Sharepoint is a web-based collaborative platform that integrates natively with Microsoft Office.
Setup guide
Follow our setup guide to connect Sharepoint to Improvado.
Step 1. Click the Make a new Connection on the Connections page.
Categories on the Data sources page group all available platforms. Use a search to find the required one.
Step 2. Click on the Sharepoint tile.
To authorize your account, you need to fill in the required fields below following steps 3.1 - 3.12:
- Tenant - Organization identifier
https://{your-tenant-prefix}-admin.sharepoint.com - Resource - Fixed value for any request “00000003-0000-0ff1-ce00-000000000000“
- Tenant ID - Globally Unique Identifier for Microsoft 365
- Client ID
- Client Secret
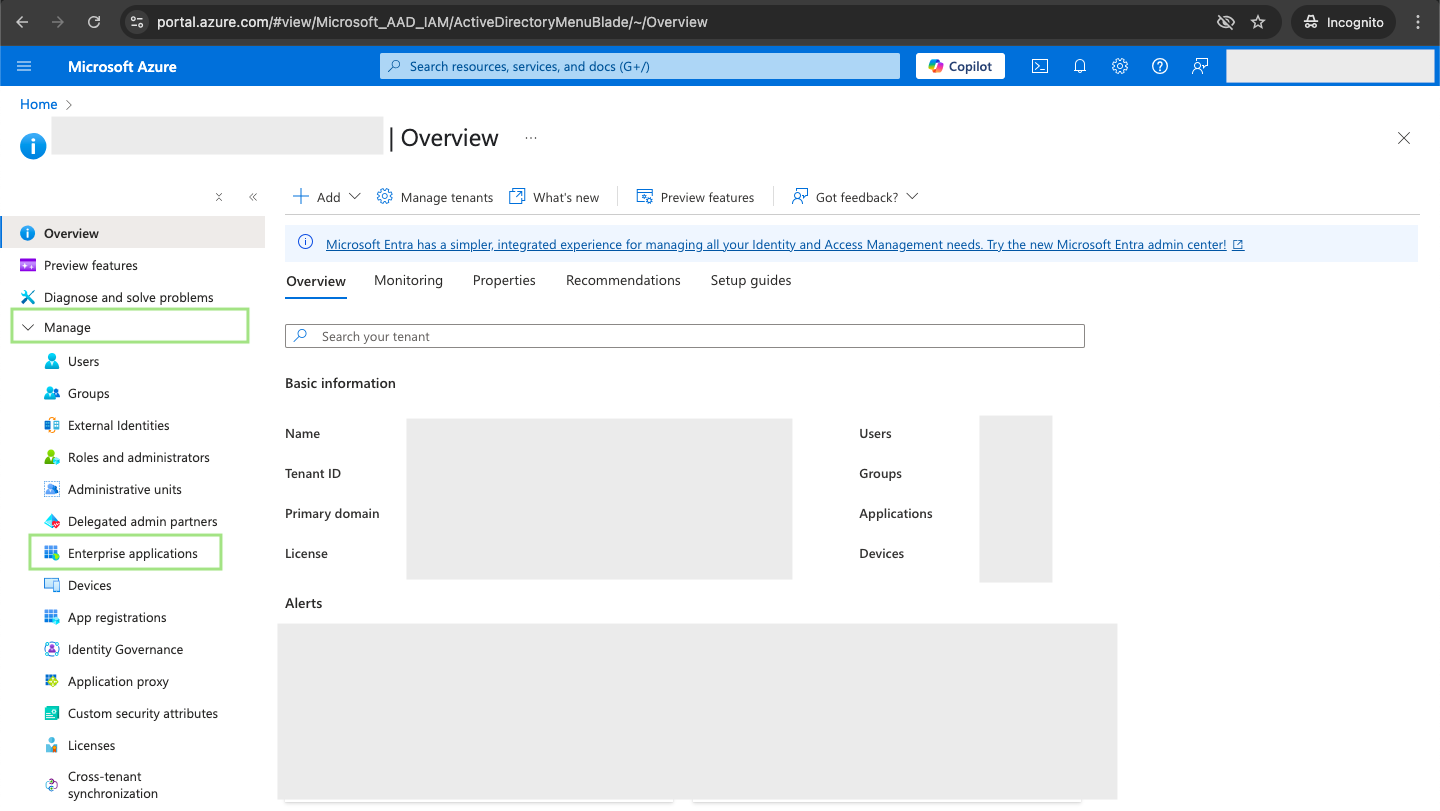
In the Azure Portal, go to Microsoft Entra ID > Manage > Enterprise applications

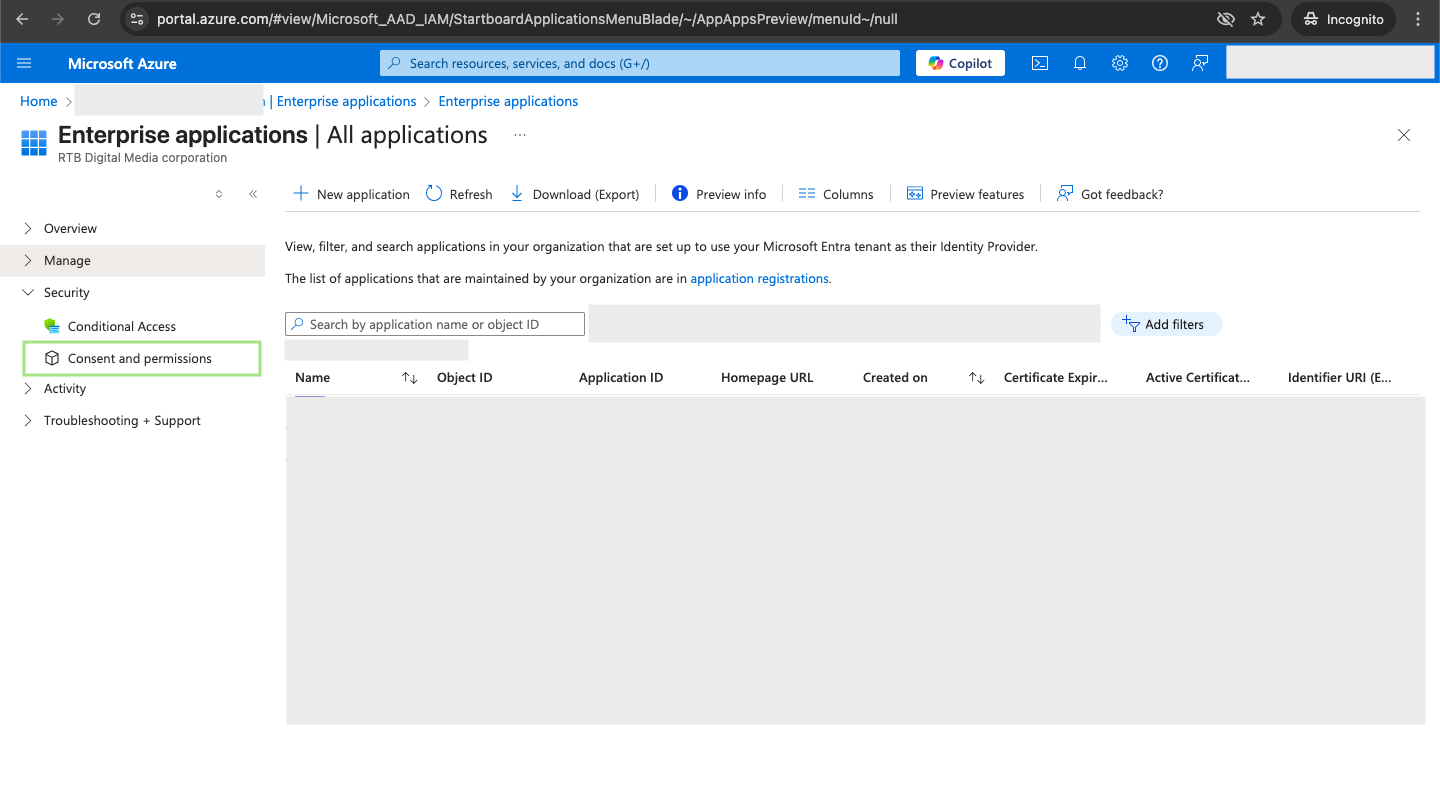
Go to Security > Consent and permissions.
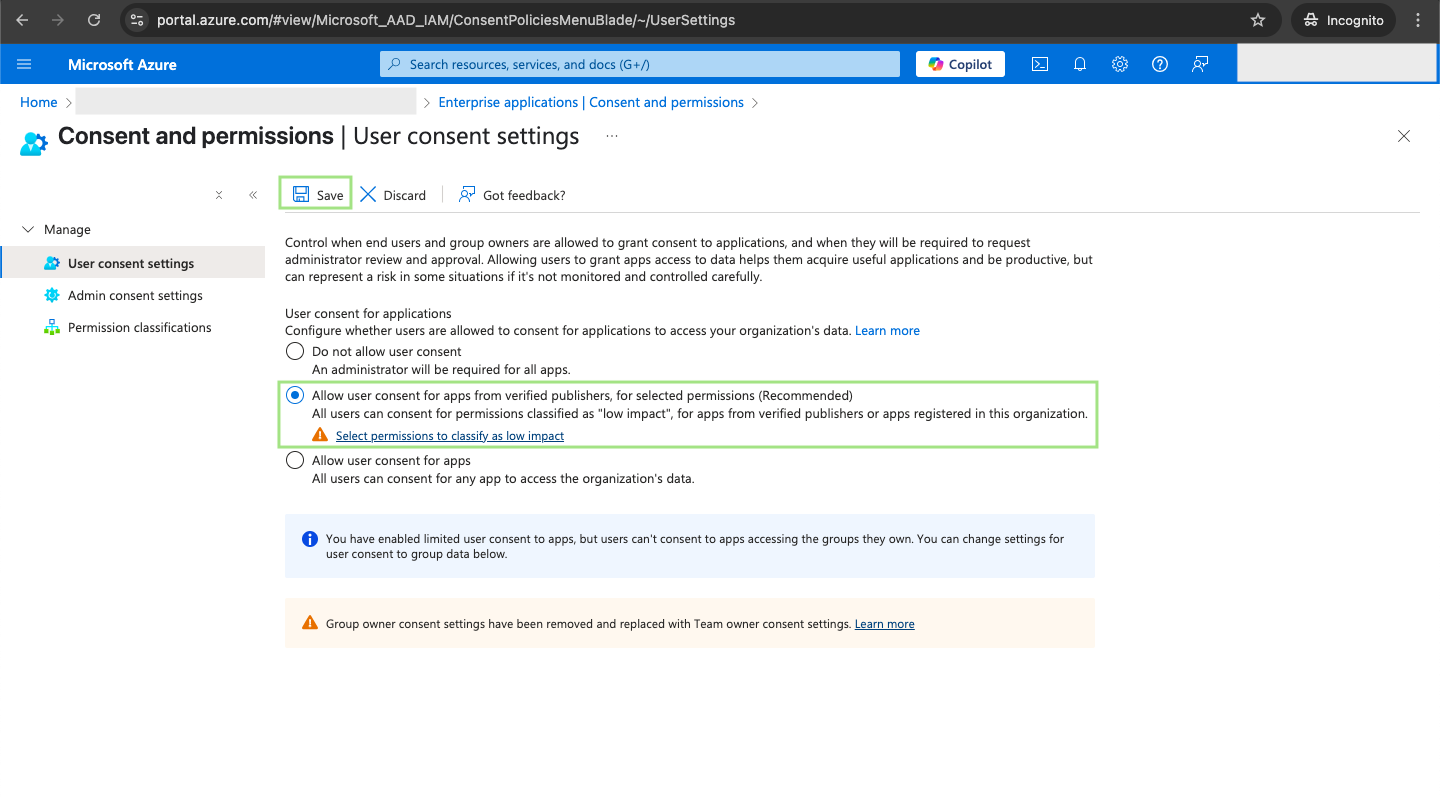
Go to User consent settings.
Select Allow user consent for apps from verified publishers for selected permissions. Click Save.
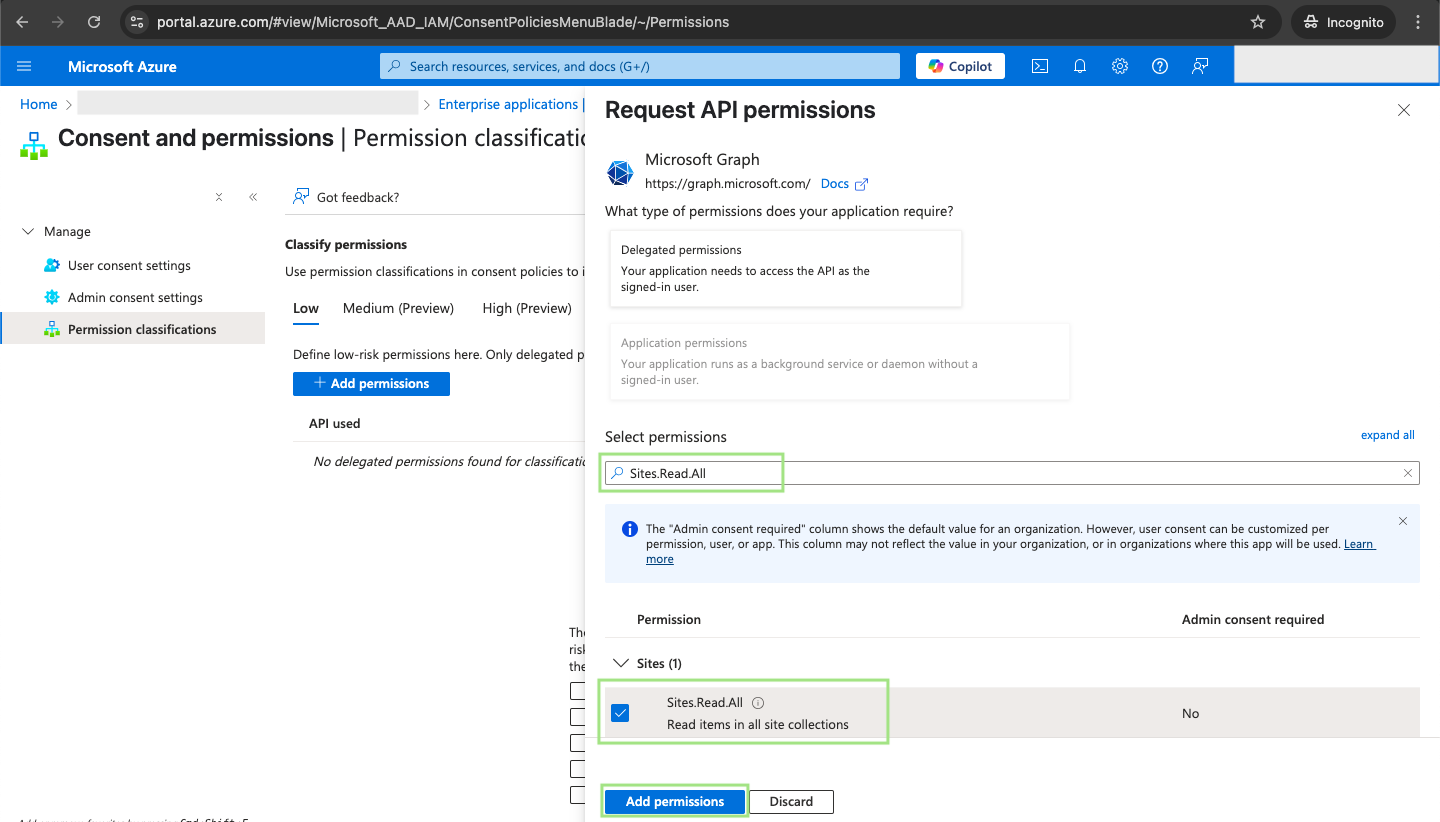
Step 3.2. Go to Permission classifications.
Click Add permissions. Select Microsoft Graph.

Step 3.3. Add the following permissions:
| Permission | Additional information |
|---|---|
Sites.Read.All |
Read items in all site collection |
Files.Read |
Read user files |
offline_access |
Maintain access to data you have given it access to |
profile |
View users' basic profile |
openid |
Sign users in |
email |
View users' email address |
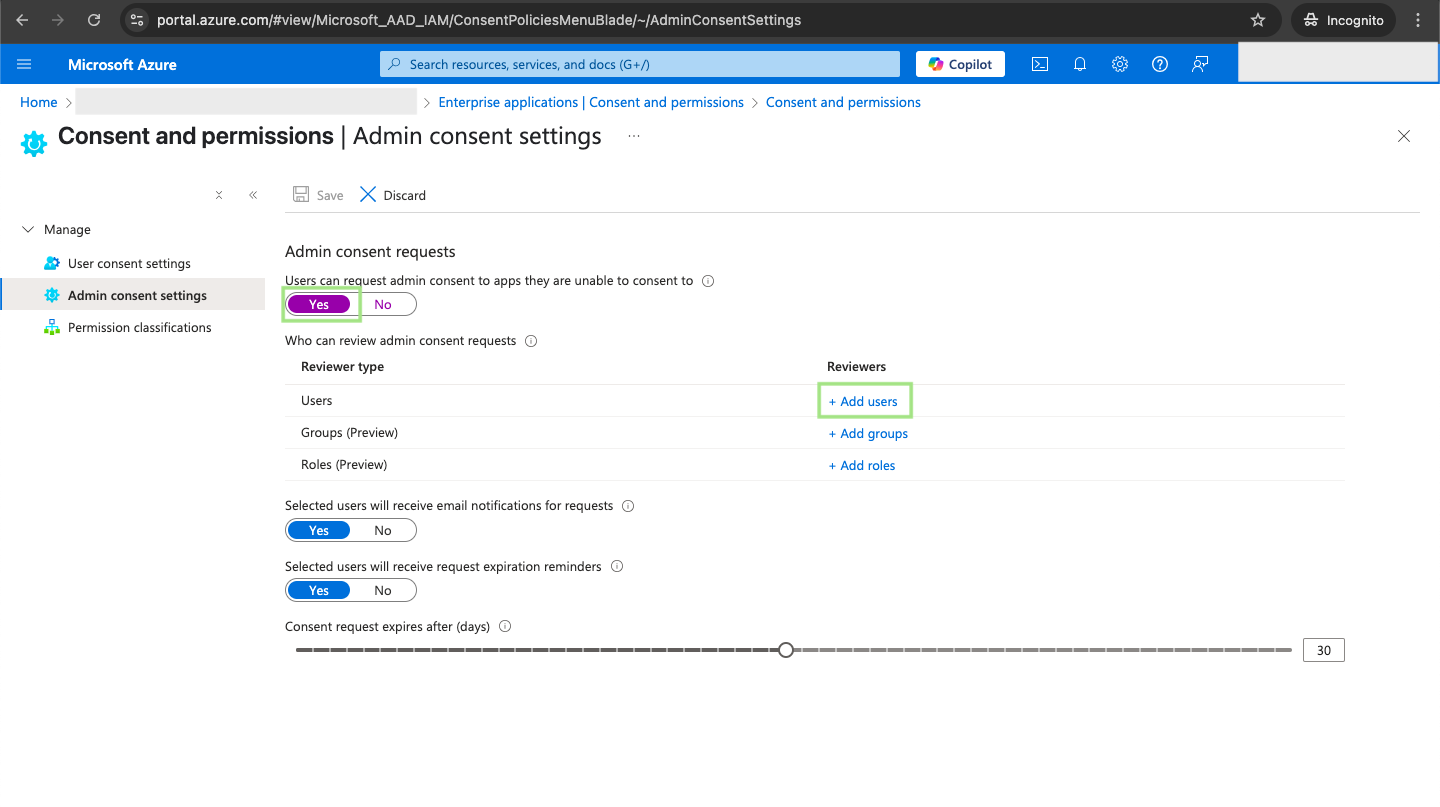
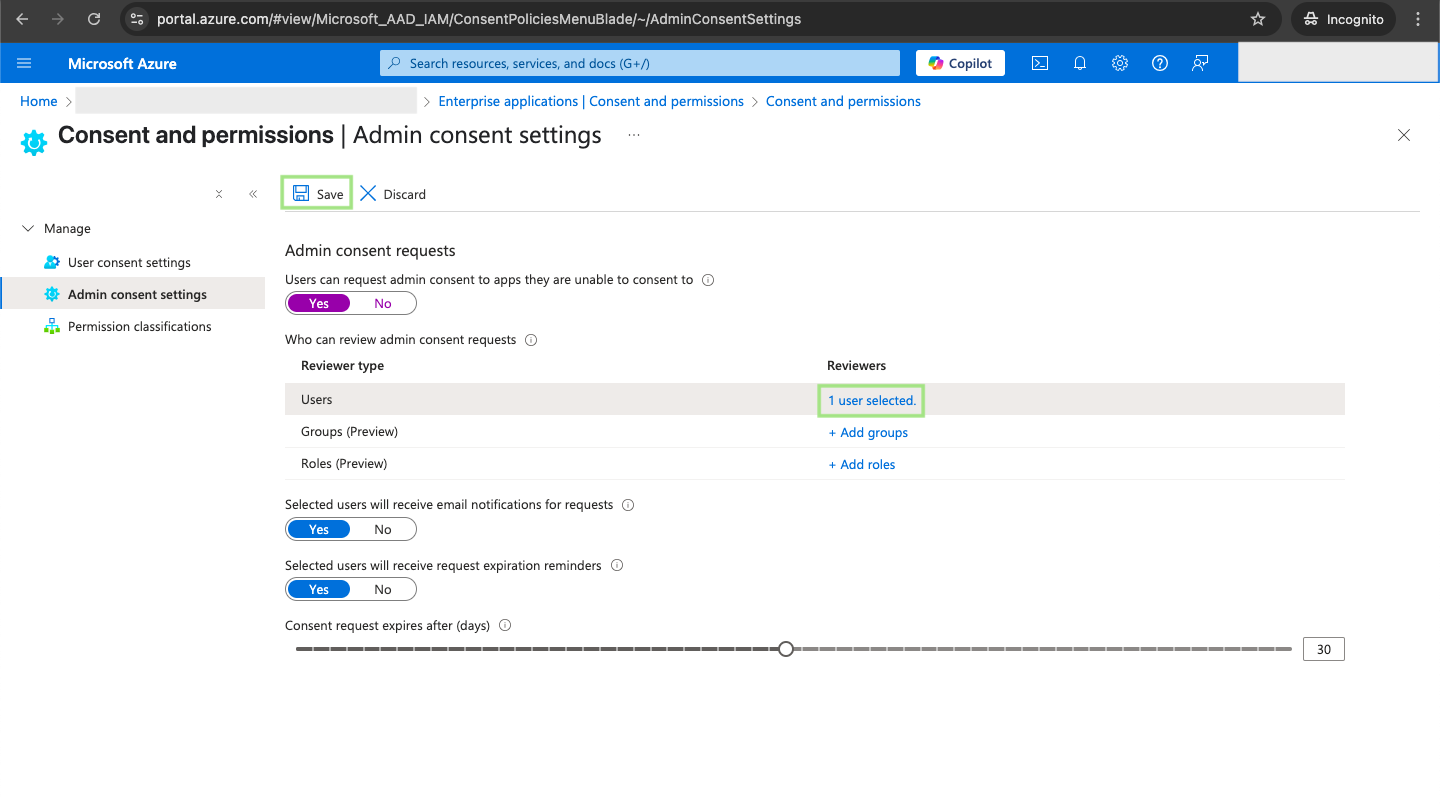
Go to Admin consent settings.
Set the Users can request admin consent to apps they are unable to consent to toggle to Yes. Click Save. If the Save button is grayed out, add a reviewer user.

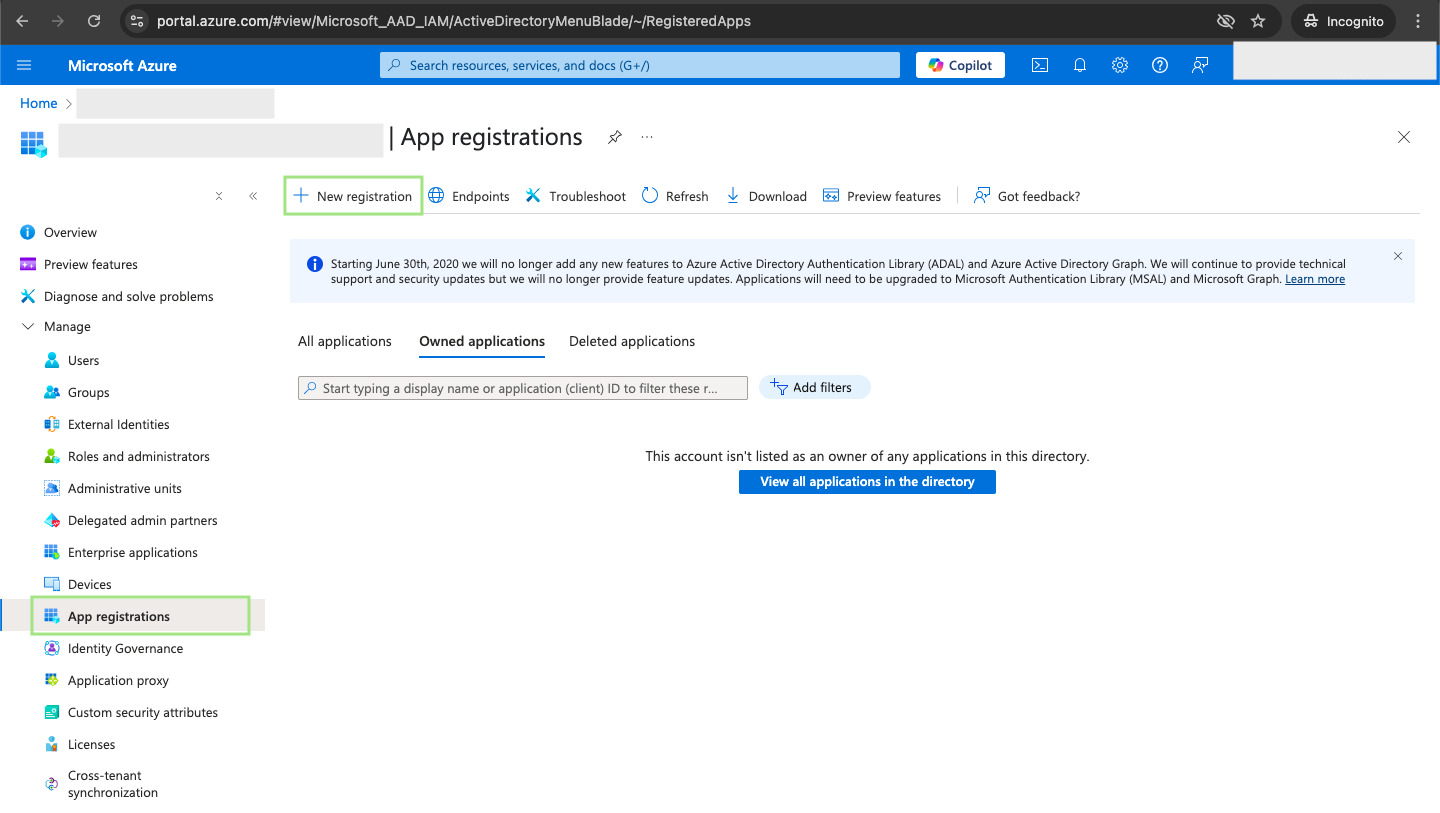
Step 3.5. Go to Microsoft Entra ID > App Registrations > New Registration.
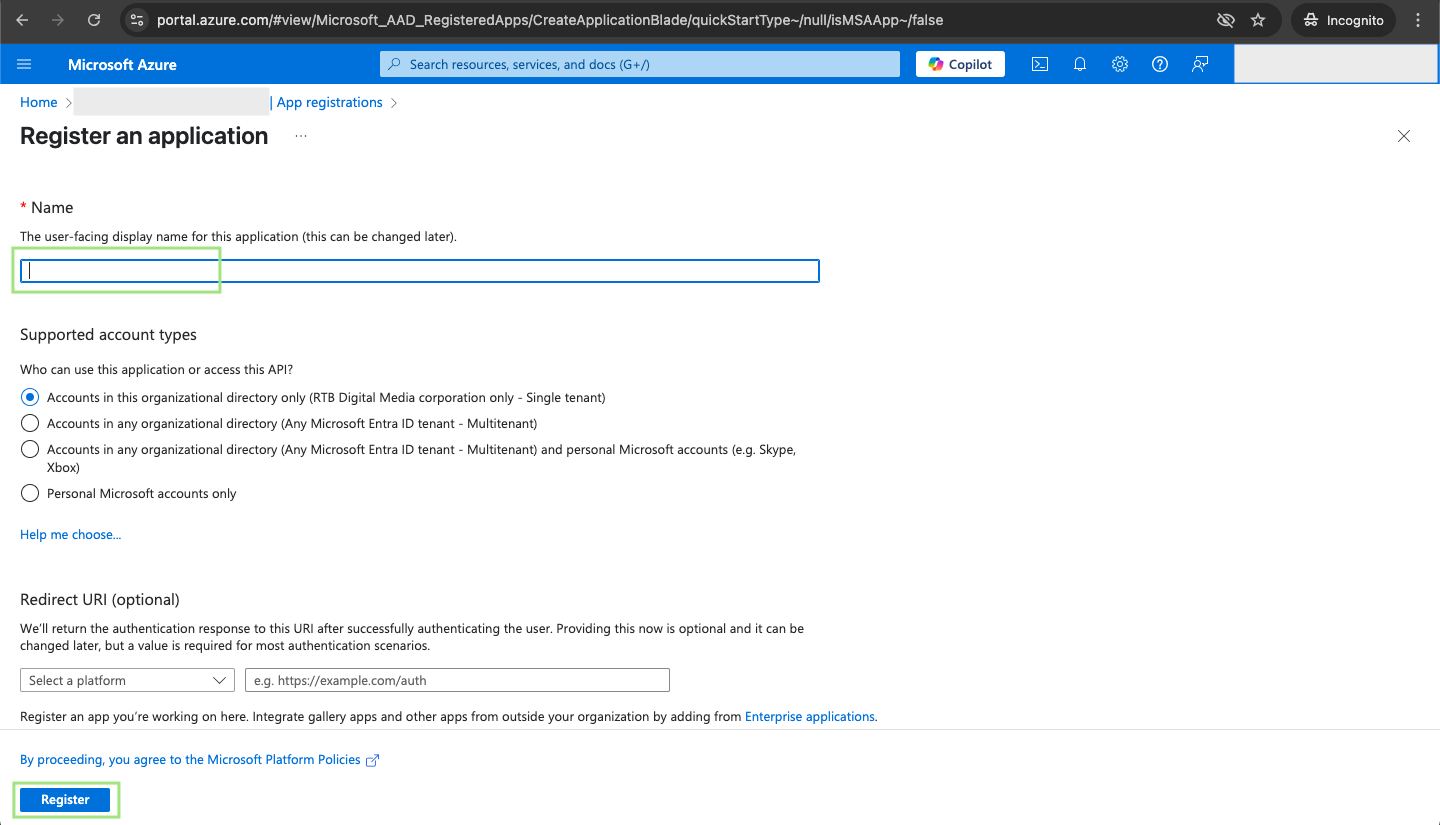
Enter an arbitrary name (for example, "Improvado") and click Register.
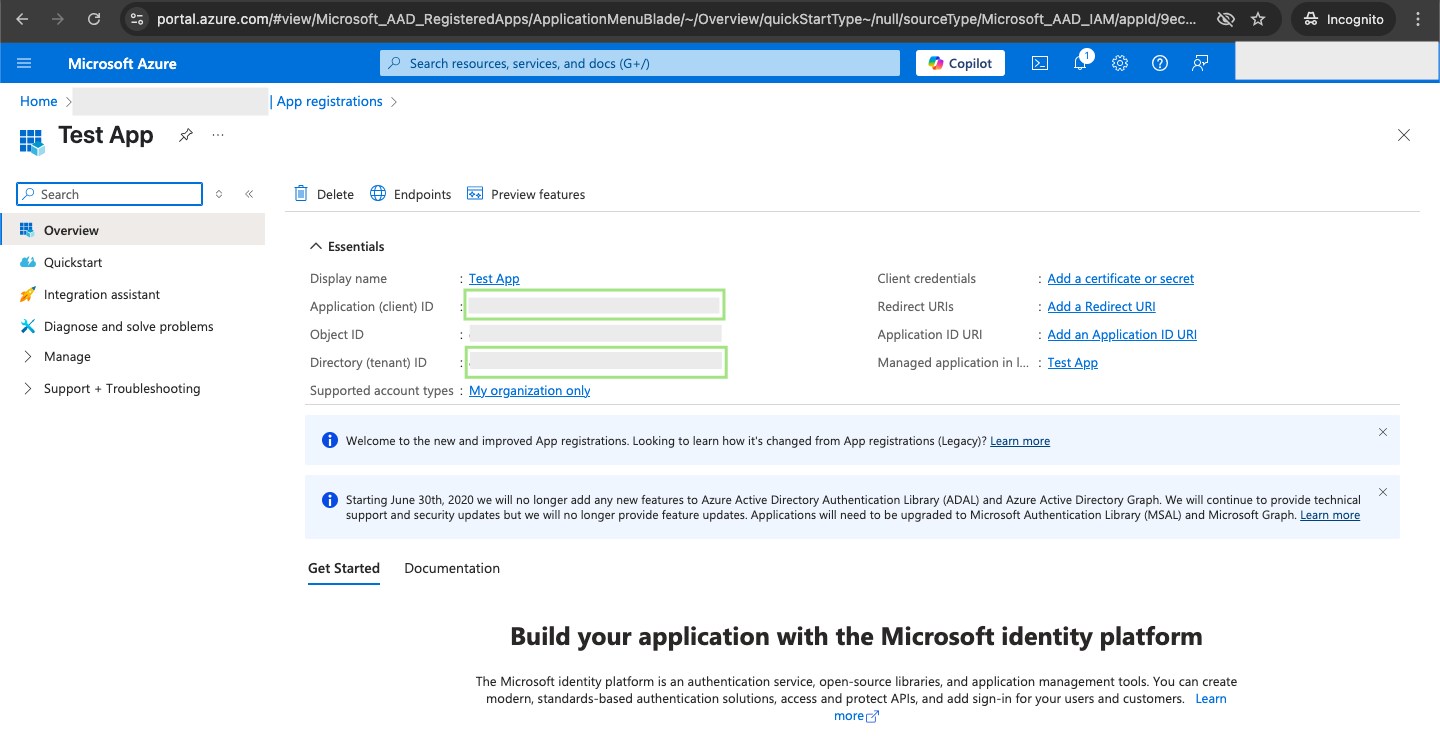
Step 3.6. In the Overview section of your app, copy the Application (Client) ID and Tenant ID values.
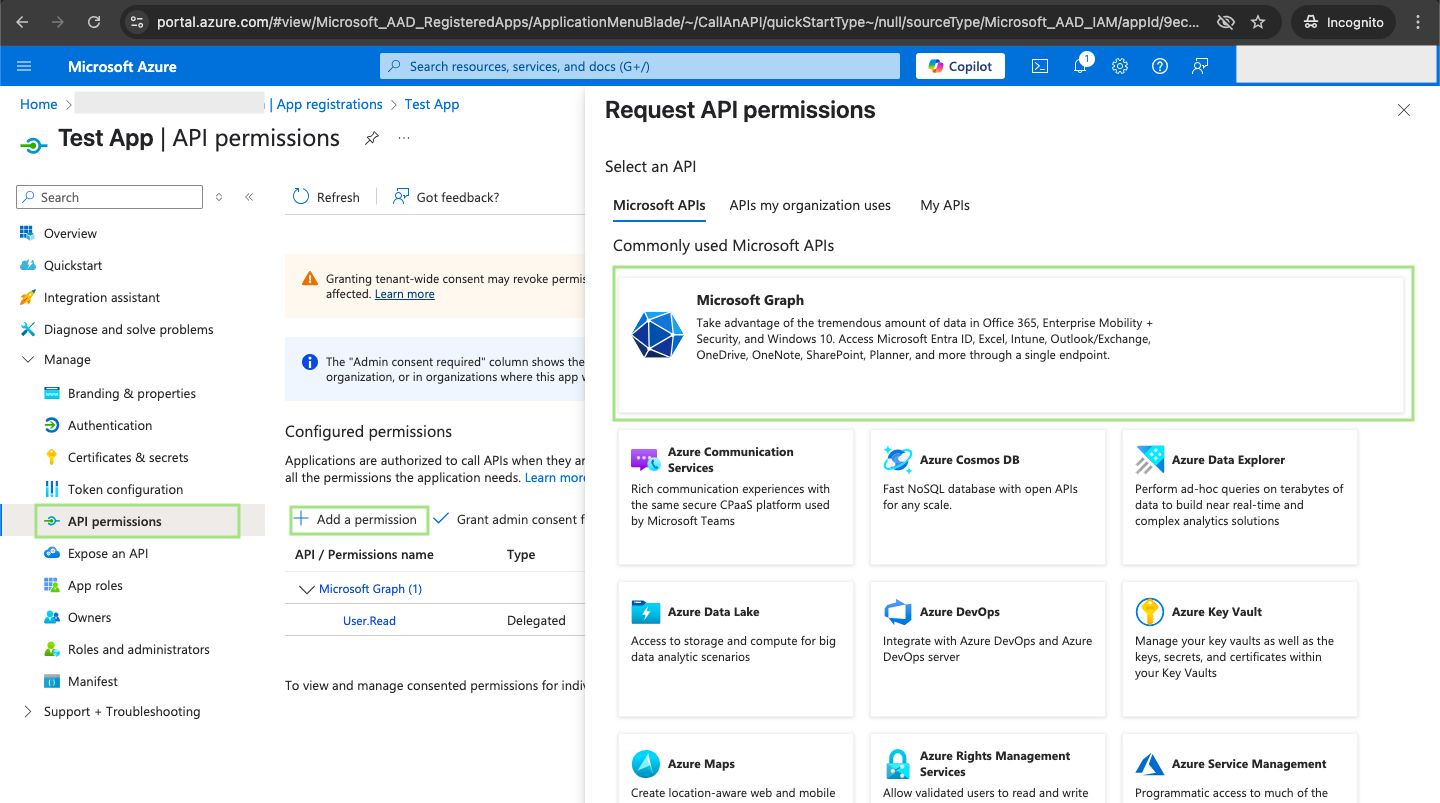
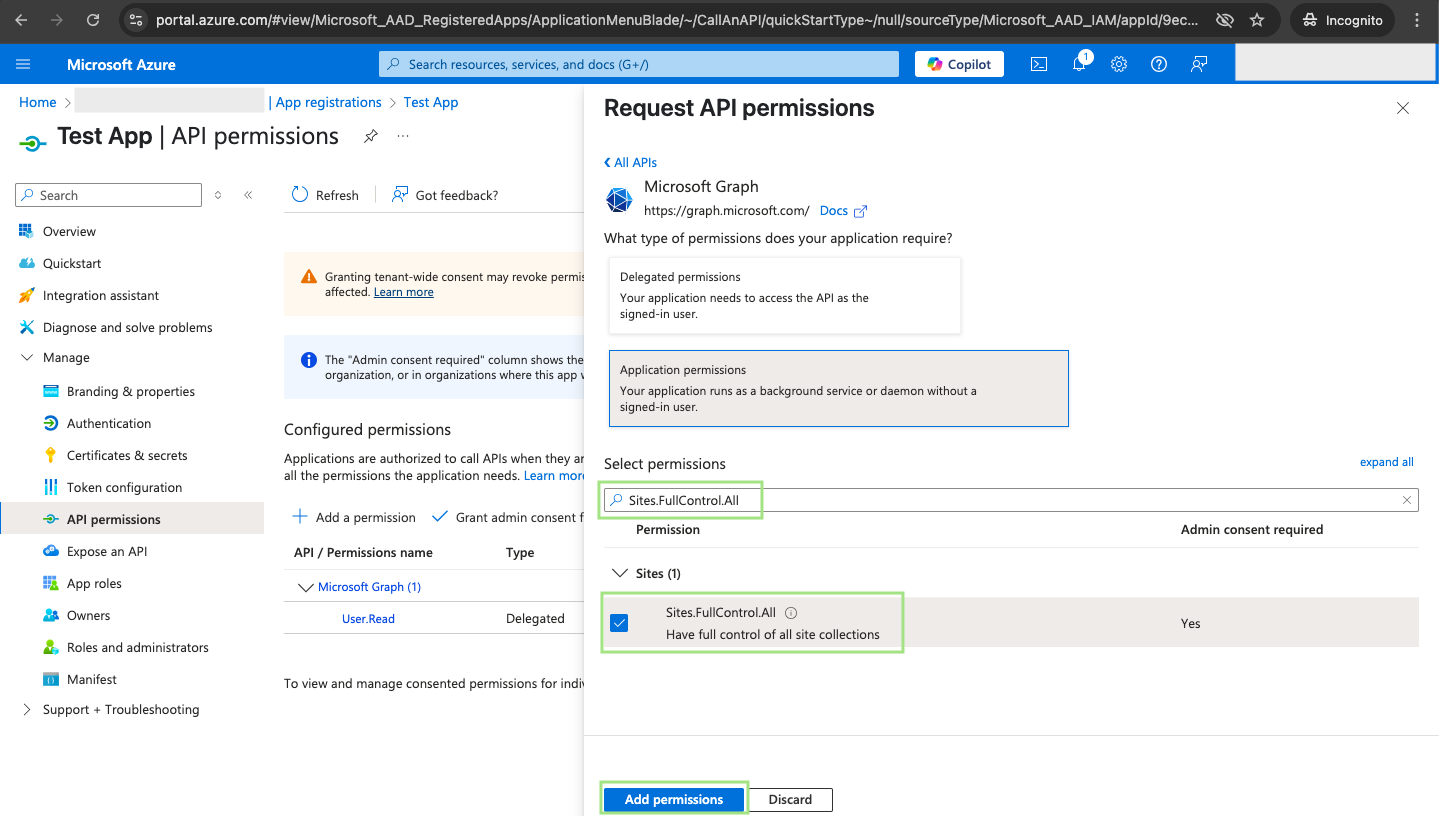
Step 3.7. Go to Manage > API permissions > Add a permission > Microsoft Graph > Application permissions > Add Sites.FullControl.All permission.
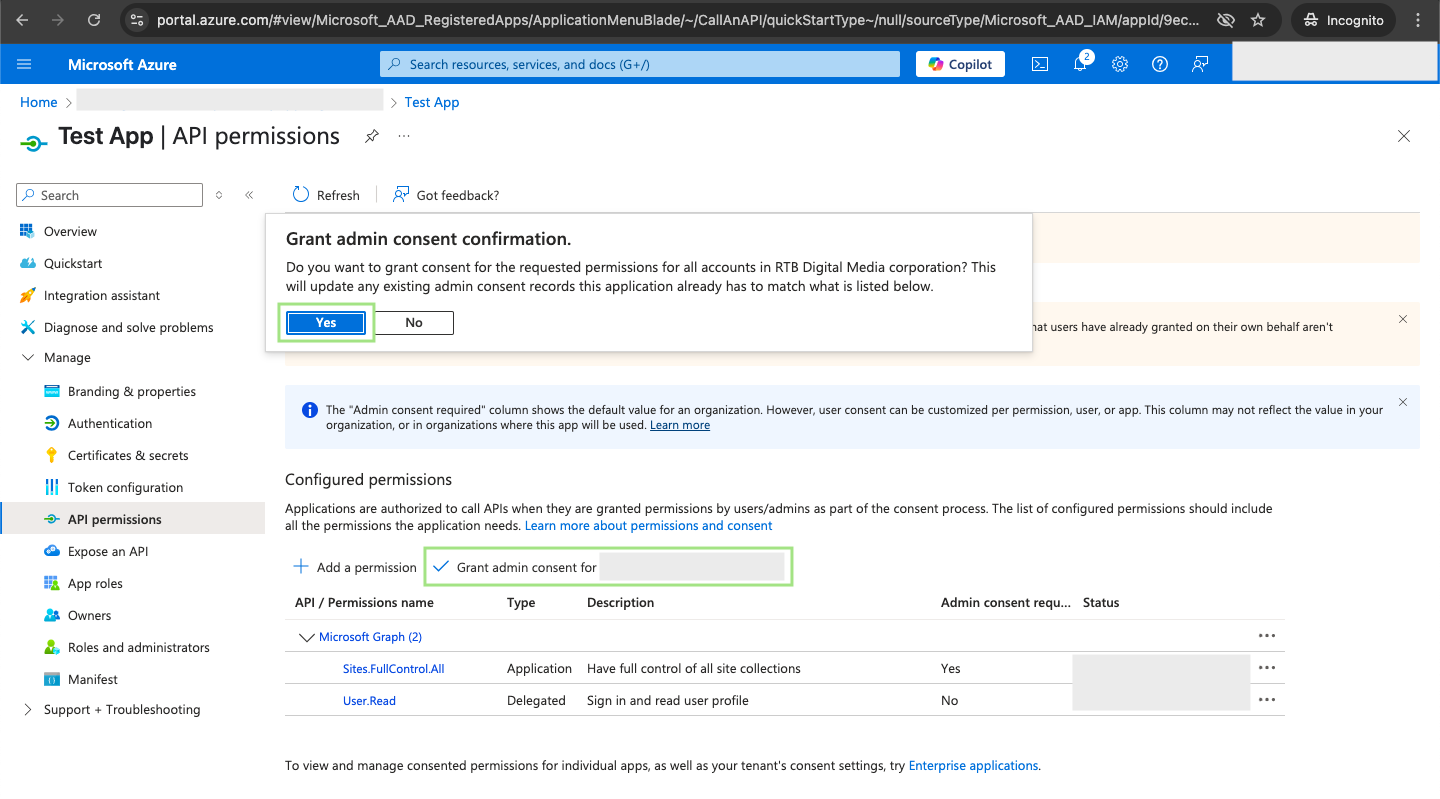
Step 3.8. Click Grant Admin Consent for your tenant name, and then click Yes.
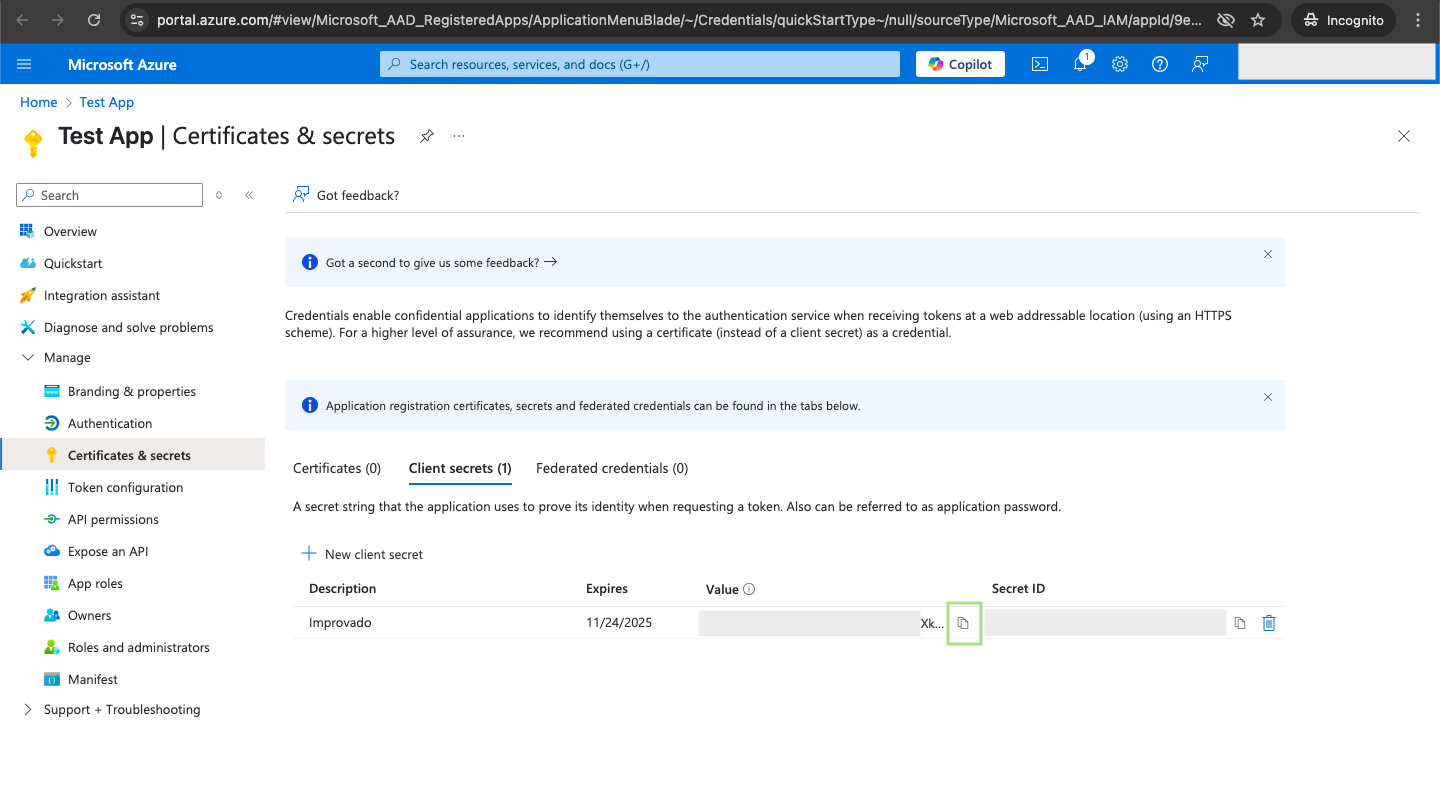
Step 3.9. Go to Manage > Certificates & secrets > Add New client secret.
Make a note of the Value. You will need this Client Secret value in the next step.
Step 3.10. Tenant value is your organization identifier: https://<strong>{your-tenant-prefix}</strong>-admin.sharepoint.com.
Step 3.11. Resource is the following fixed value that you need to copy: 00000003-0000-0ff1-ce00-000000000000.
Step 3.12. Enter copied values into the Improvado authorization form.
Also, you can find the additional information and in-depth step-by-step guide at the links here:
- Find your Microsoft 365 tenant ID - SharePoint in Microsoft 365 | Micr...
- Managing user consent to apps in Microsoft 365 - Microsoft 365 admin |...
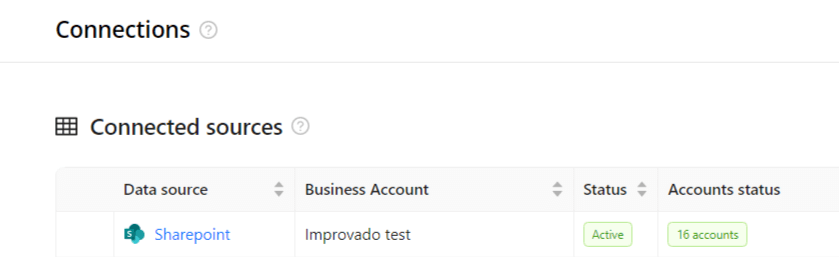
After completing the connection process, the Sharepoint connection will appear in your Connected sources list.
Step 5. When the connection status is Active and the account status column shows a number of accounts, you can move on to data extraction.
To extract data from the connected sources, check the instruction on how to set up data extraction.
Release notes
You can find information about the latest API changes in the official Release notes.
Was this article helpful?
Thanks for the feedback!