How to Set Up a Recipe Dashboard in Looker Studio
Introduction
When setting up a Looker Studio dashboard for your recipe data, you have two options:
- Separate Dashboards – Create an individual dashboard for each recipe.
- Unified Dashboard – Combine multiple recipes into a single dashboard.
Note
If you choose a unified dashboard and do not have access to all recipes, some sections may display demo data. Please contact Improvado Support to hide these sections.
Prerequisite
Ensure that the recipe data is loaded into a database supported by Looker Studio.
Step-by-Step Guide
1. Copy Looker Data Source Templates
1.1. Selecting the Appropriate Data Source Template
Refer to the table below to determine the correct Looker Data Source Template for your recipe:
| Recipe | Data Table in Data Explorer | Table in Destination | Looker Data Source Template | Looker Dashboard Template |
|---|---|---|---|---|
| Cross-Channel | Cross-Channel Model Recipe | cross_channel_model_recipe | Link | Link |
| Paid Ads x Google Analytics | Paid Ads Google Analytics Basic Analytics Recipe | paid_ads_google_analytics_basic_analytics_recipe | Link | Link |
| Paid Search | Paid Search Keywords Recipe | paid_search_keywords_recipe | Link | Link |
| Paid Social | Paid Social Basic Performance Recipe | paid_social_basic_performance_recipe | Link | Link |
| SEO | SEO Basic Performance Recipe | seo_basic_performance_recipe | Link | Link |
| eCommerce | Ecommerce Paid Ads Orders Recipe | ecommerce_paid_ads_orders_recipe | Link | Link |
| All in One | All relevant Data Tables | All relevant Tables | All relevant Templates | Link |
1.2. Copying the Data Source Template
- Open the selected Data Source Template from the table above.
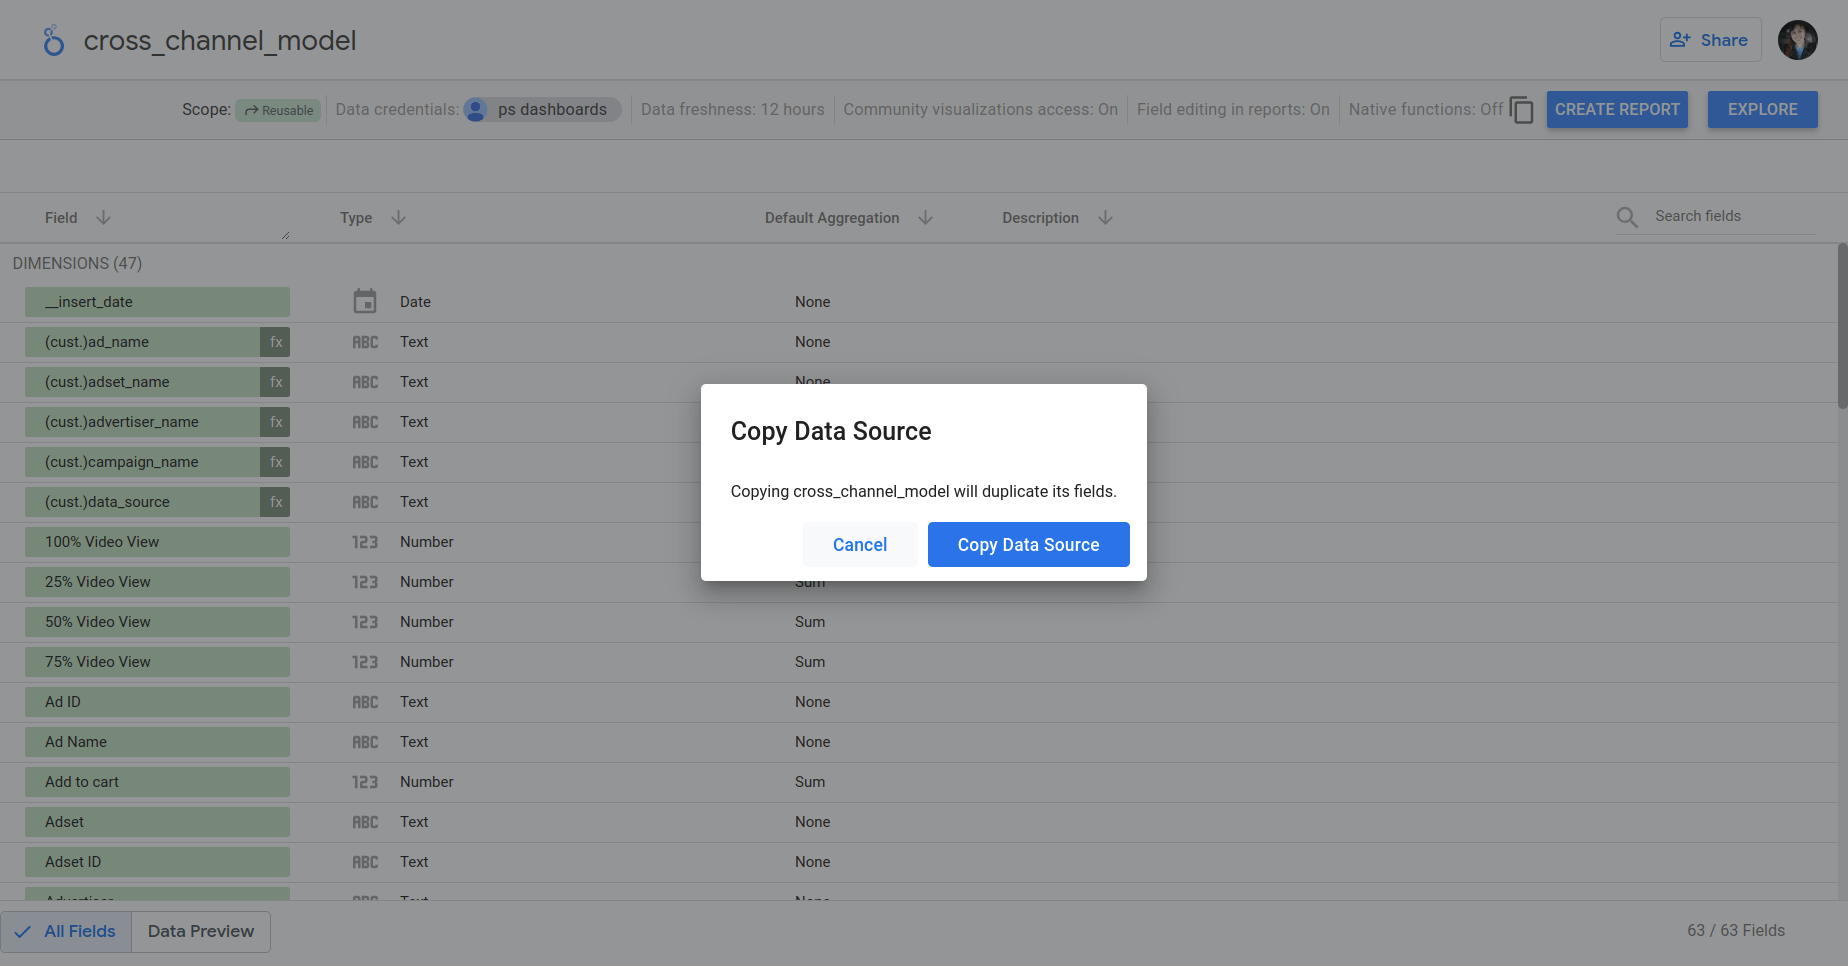
- Click Make a Copy.
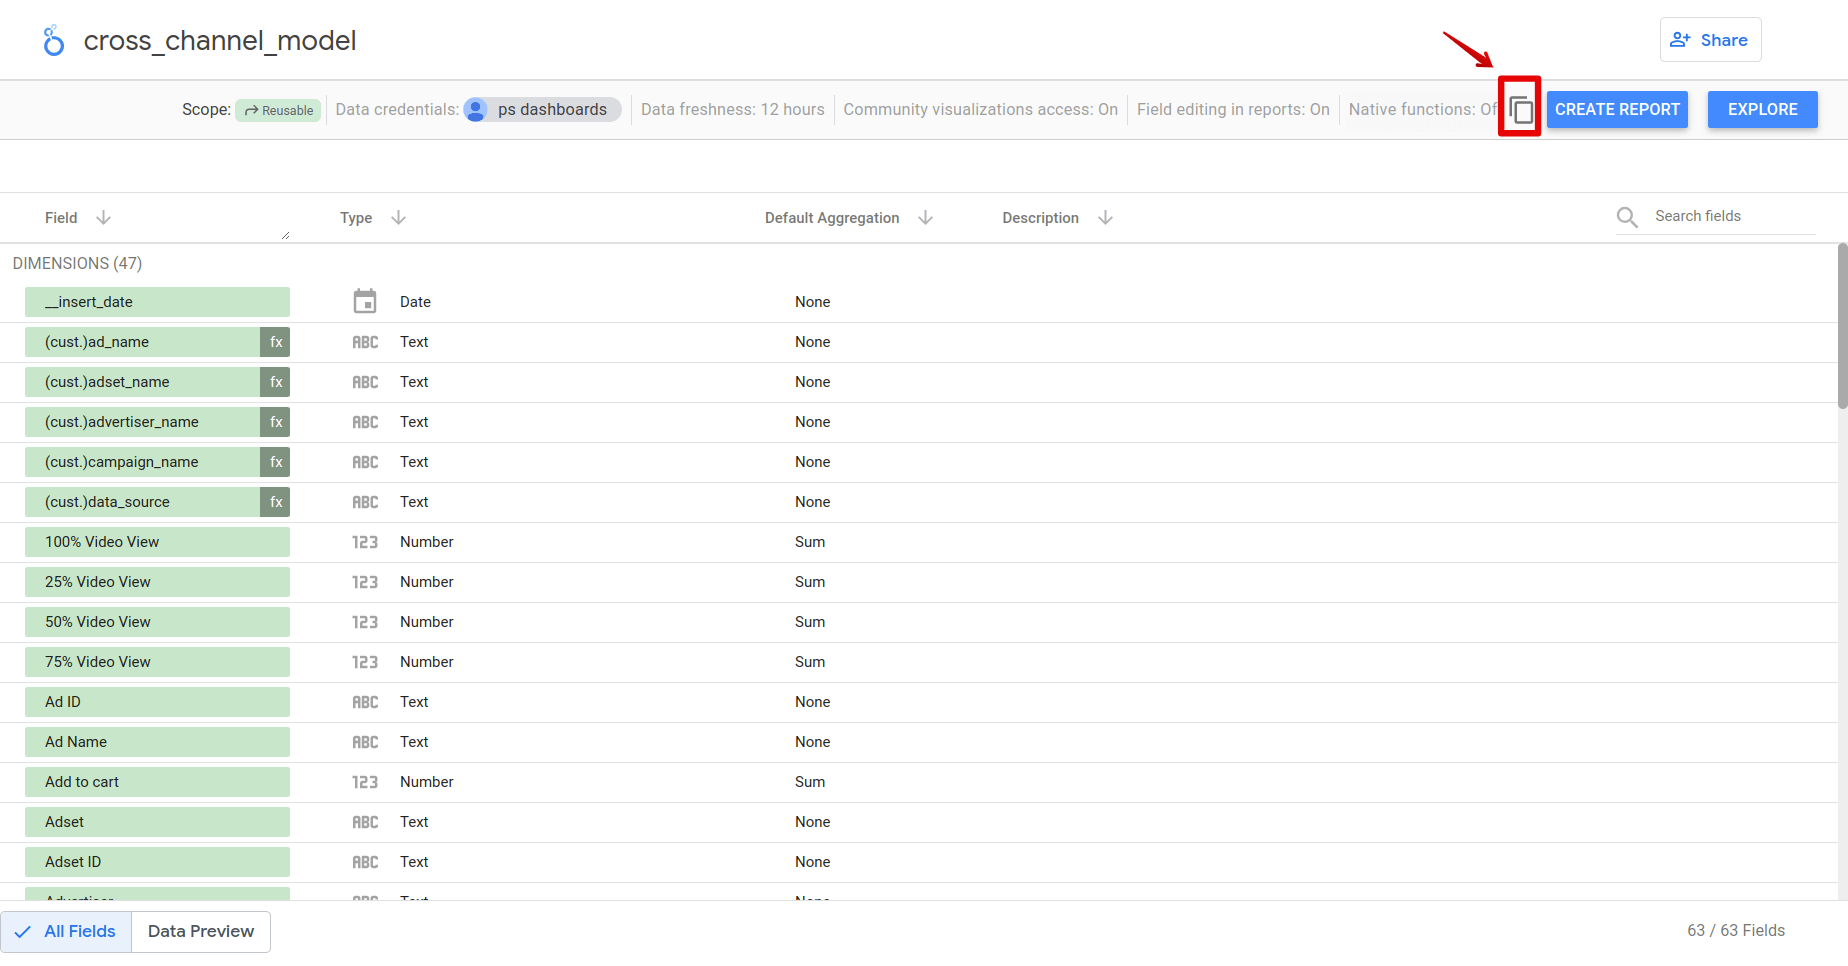
- Upon clicking "Copy Data Source," you will be directed to the Connector selection page.
- Rename the copied Data Source as needed.
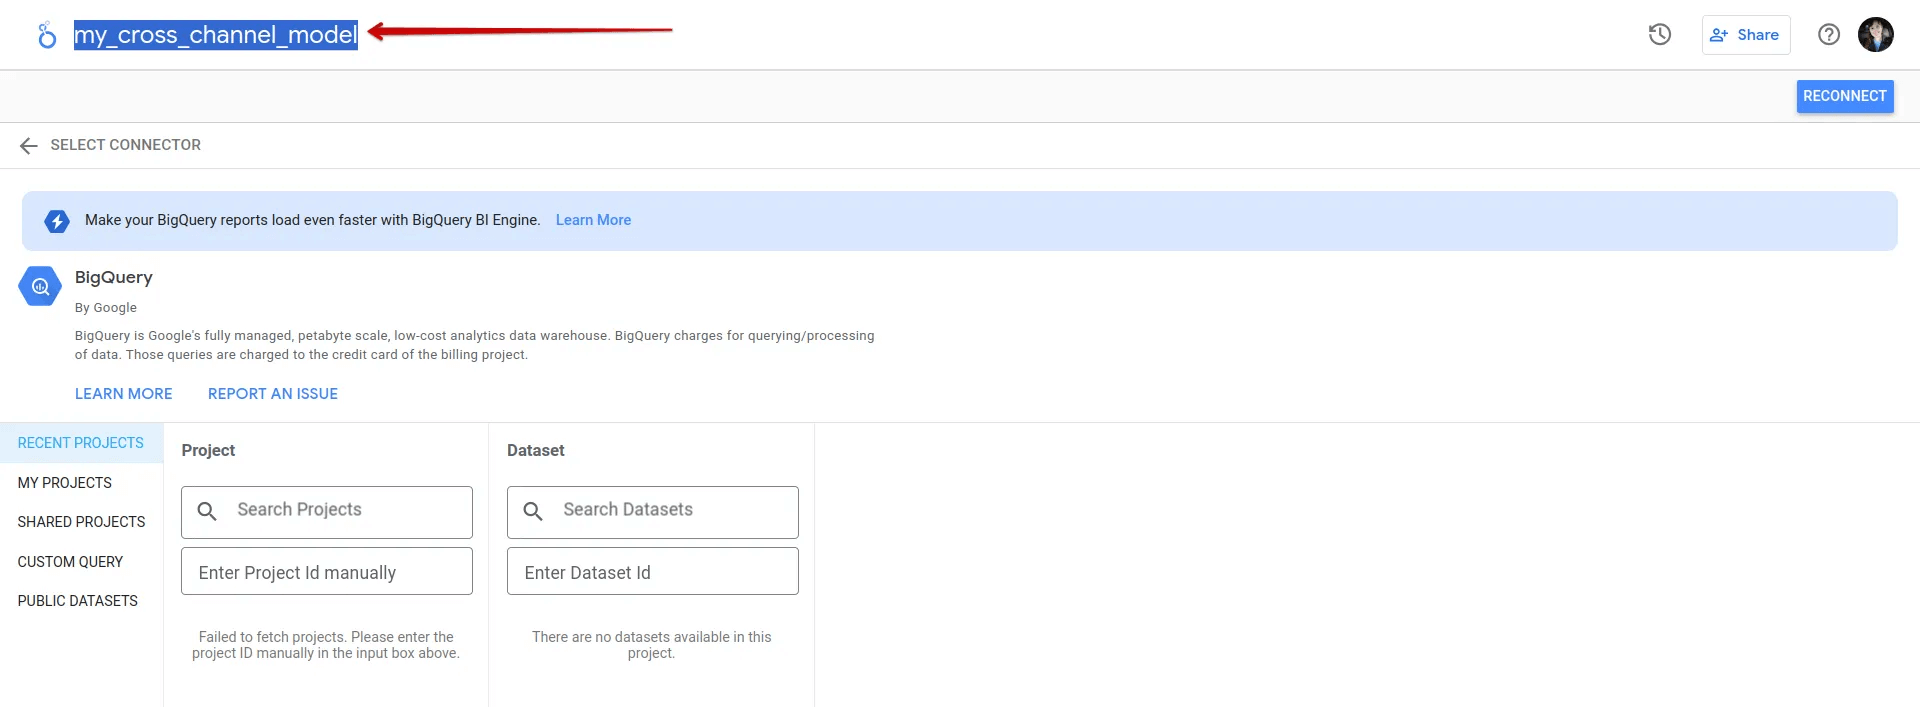
- If your data is not in BigQuery, select the appropriate connector.
1.3. Using Google BigQuery (GBQ)
If your data is stored in GBQ:
- Navigate to My Projects in the connector selection.
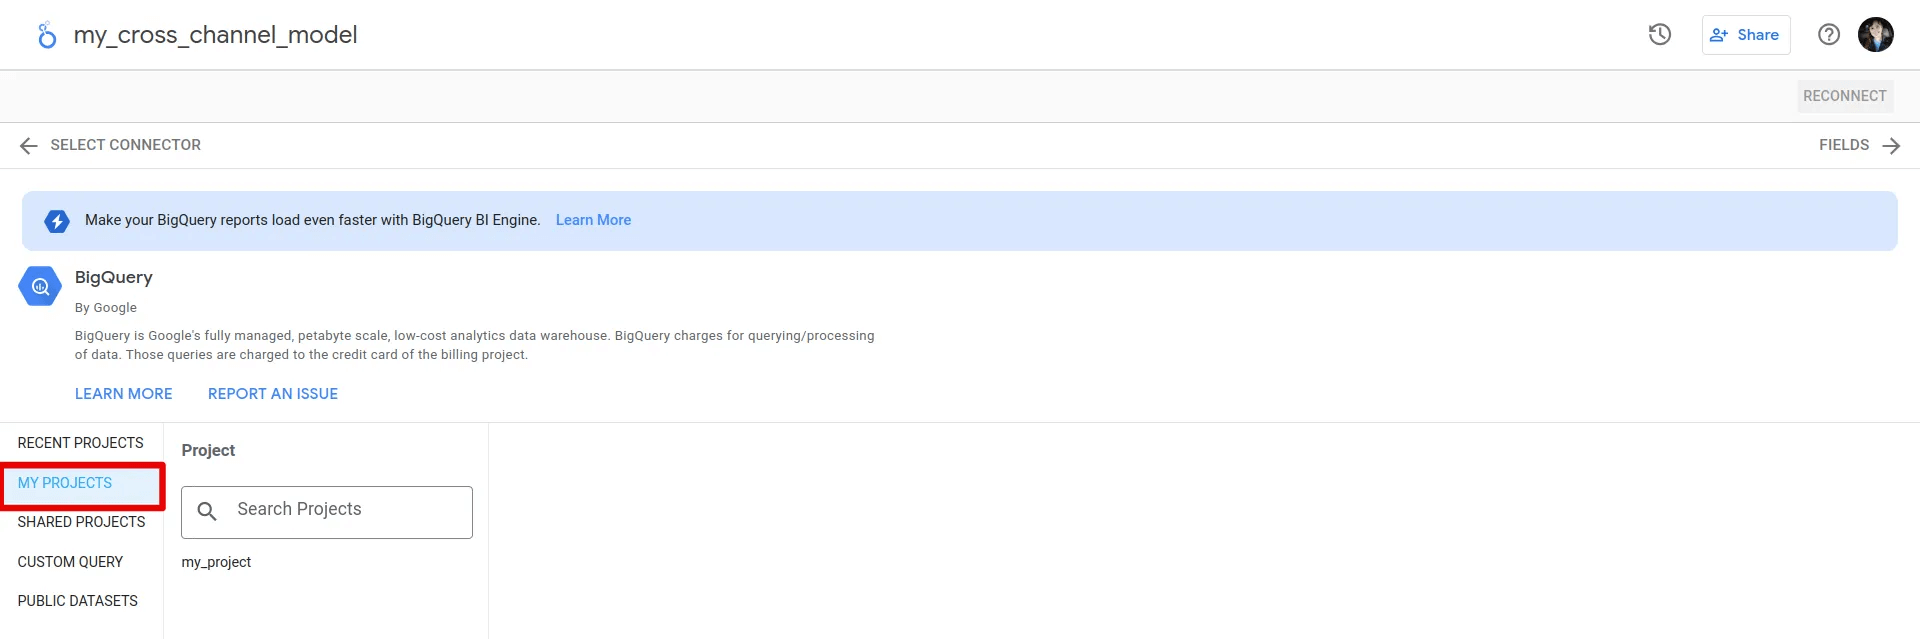
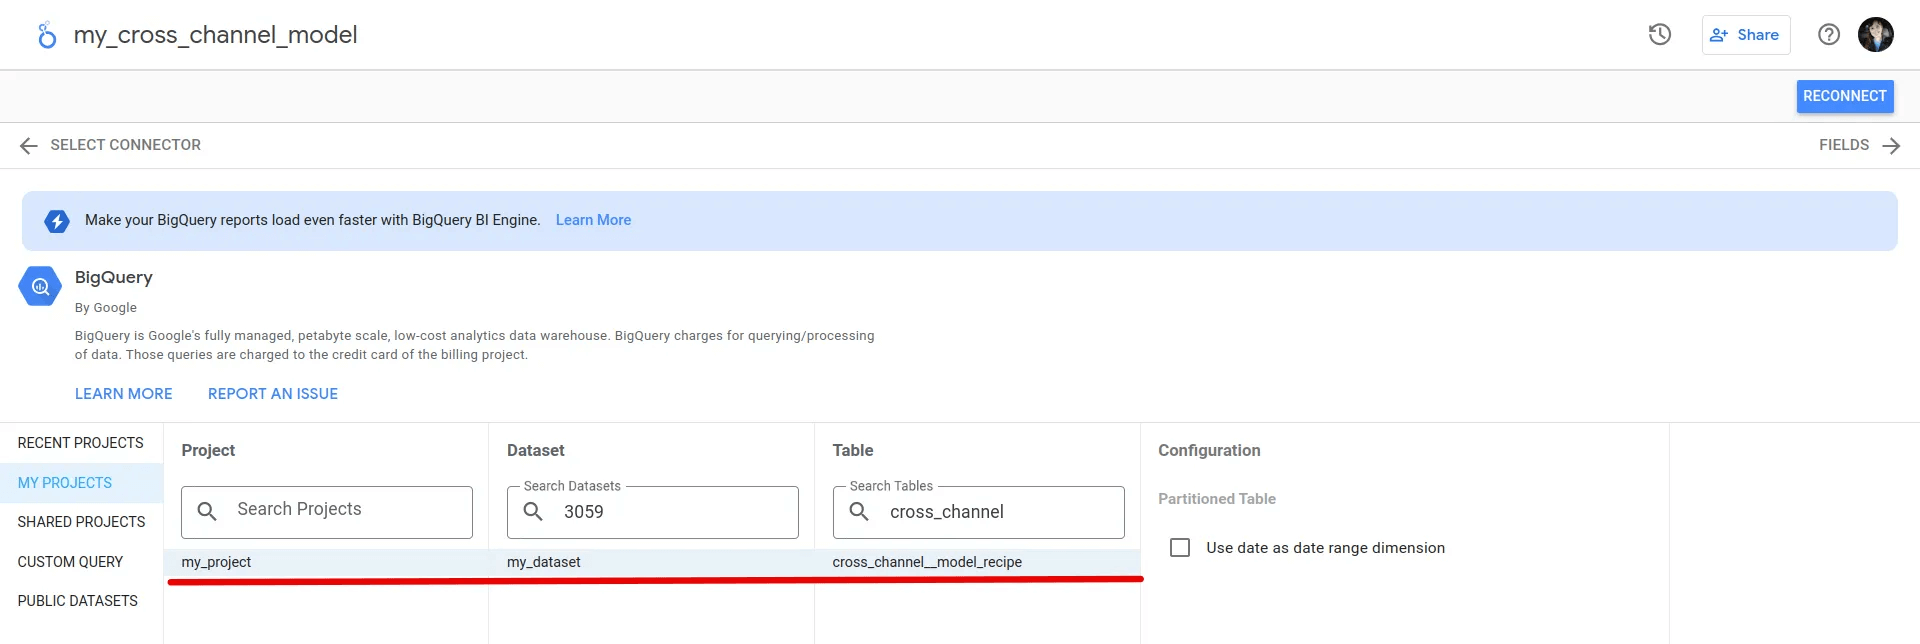
- Select the relevant Project, Dataset, and Table.
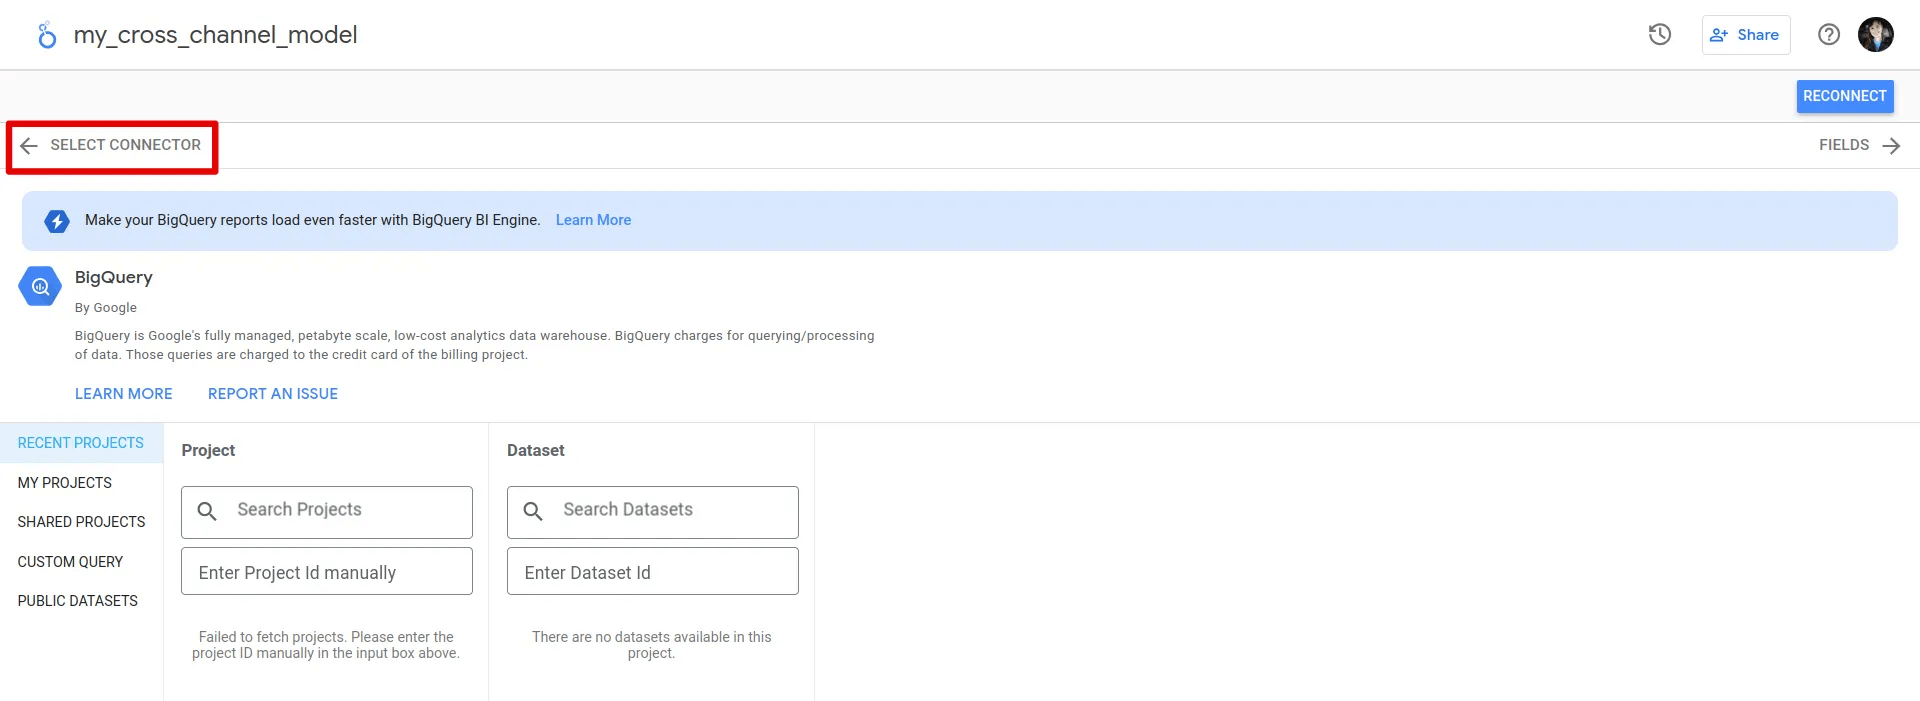
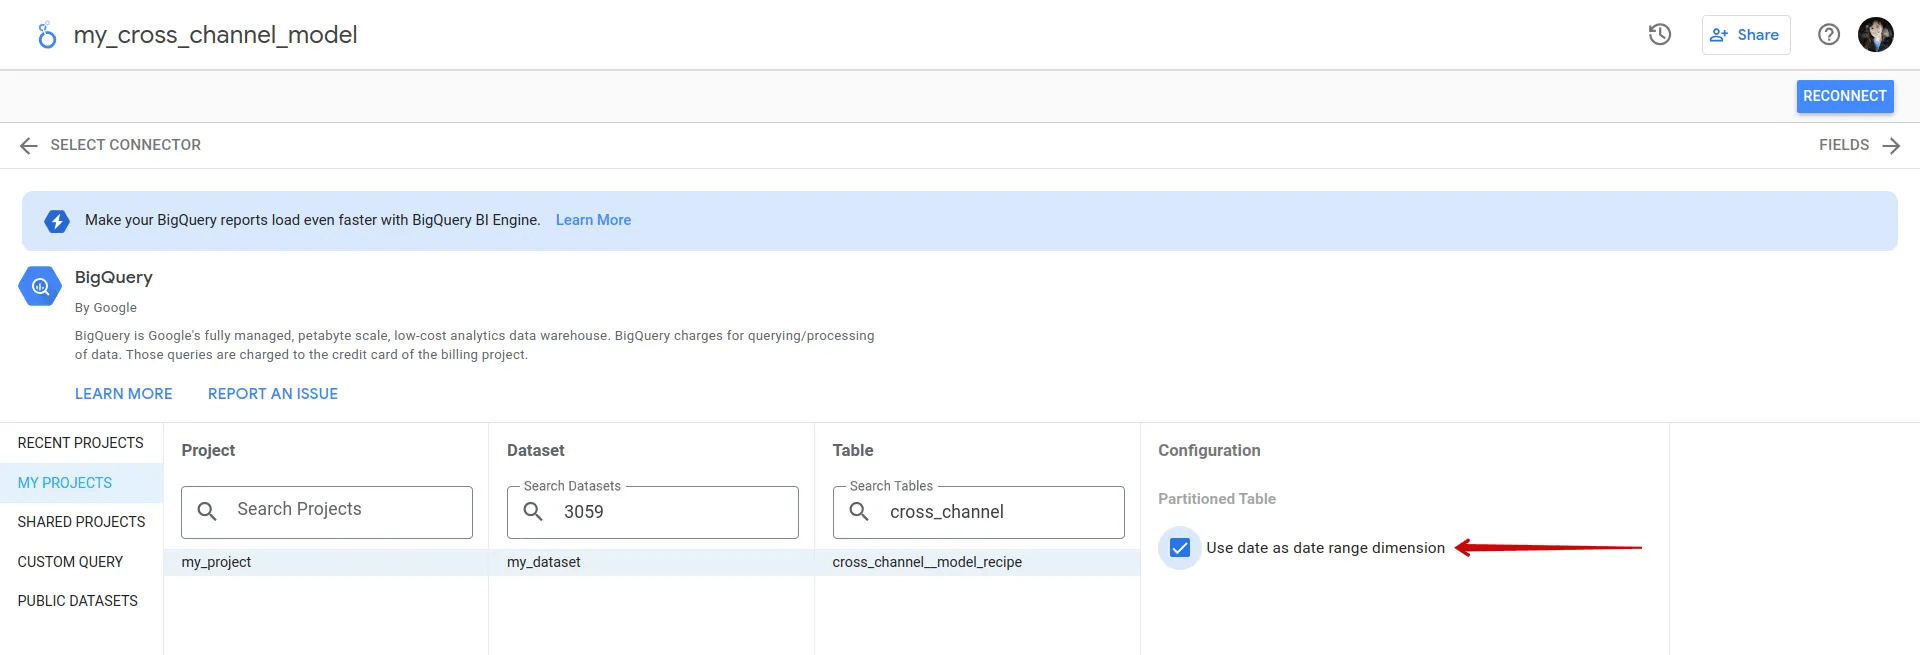
- Enable the checkbox "Use date as date range dimension" to optimize BigQuery usage.
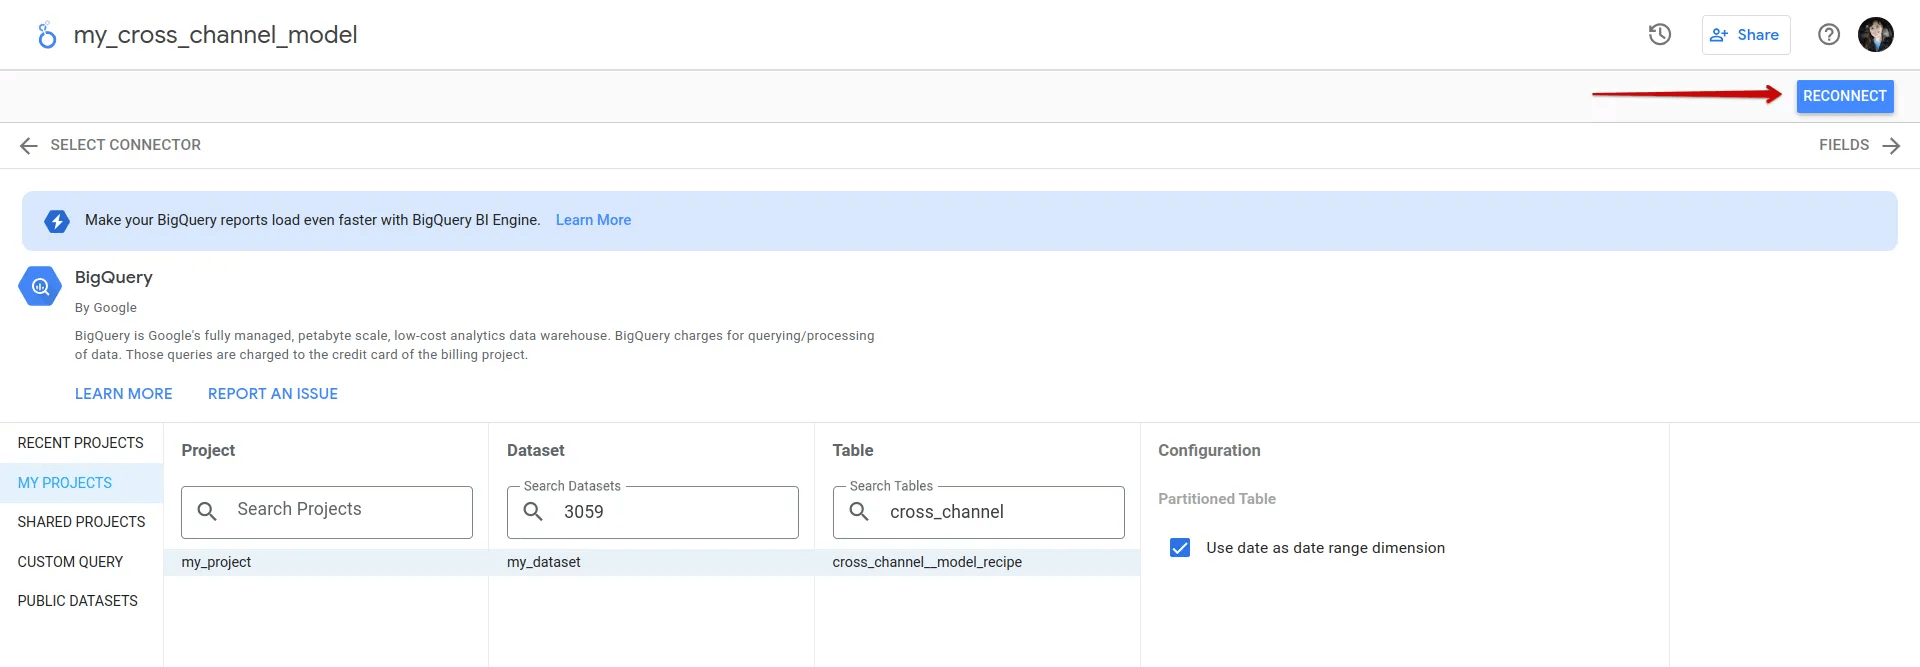
- Click Reconnect and apply the changes.
- Share the data source as needed using the menu options.
2. Copy the Looker Studio Dashboard Template
- Find the appropriate Looker Studio Dashboard Template from the table above.
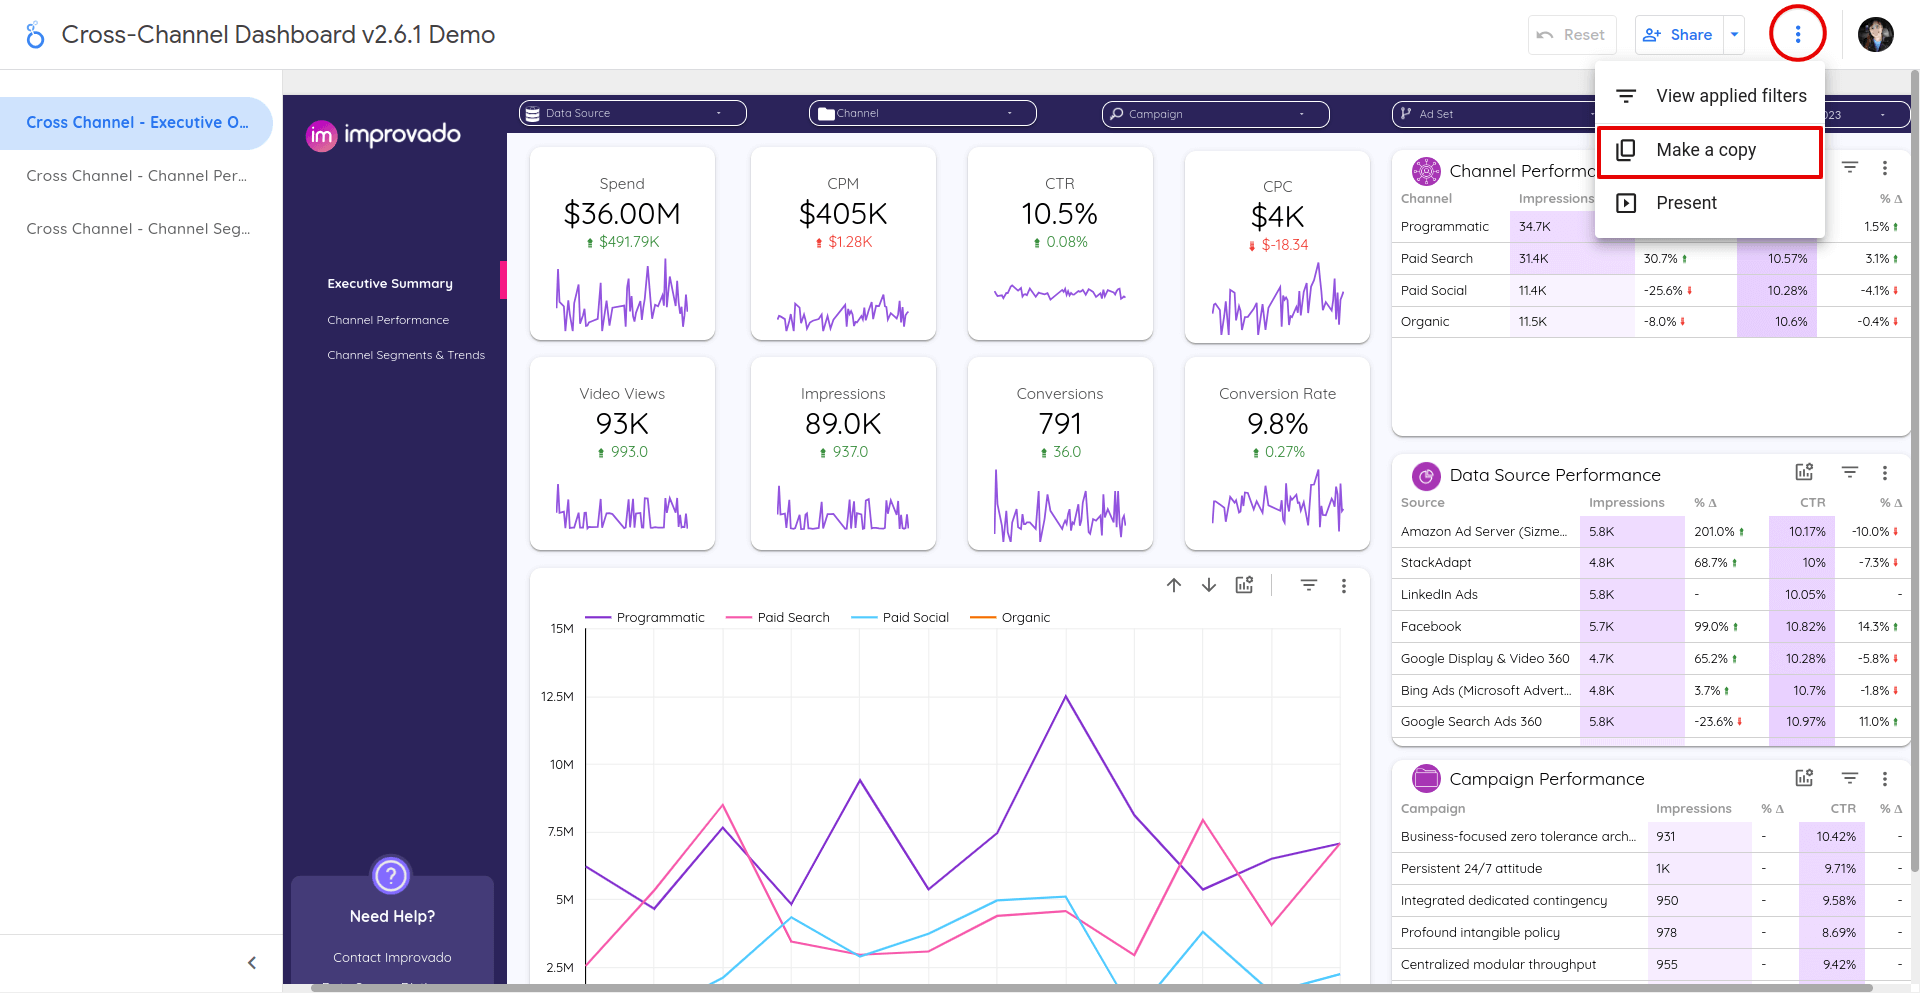
- Open the dashboard and click the kebab menu (three vertical dots) to make a copy.
- In the pop-up window, assign a New Data Source for each Original Data Source.
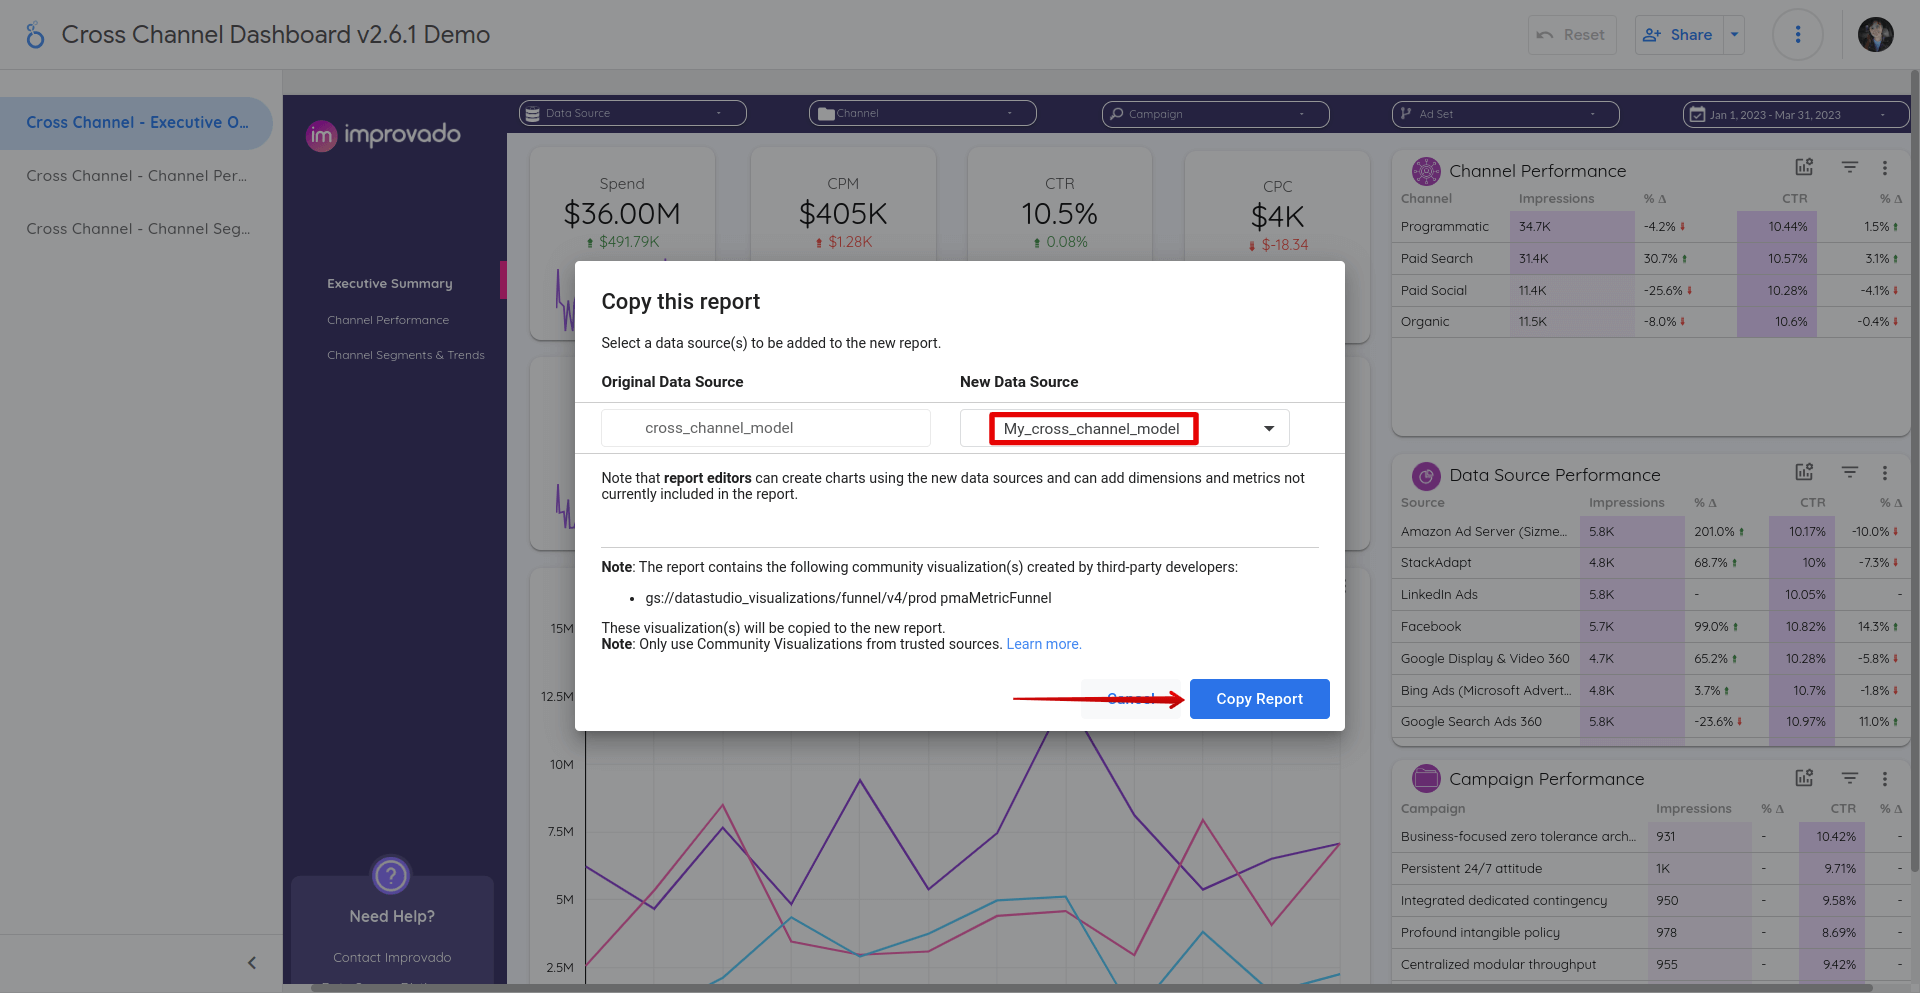
- Click Copy Report and rename the dashboard.
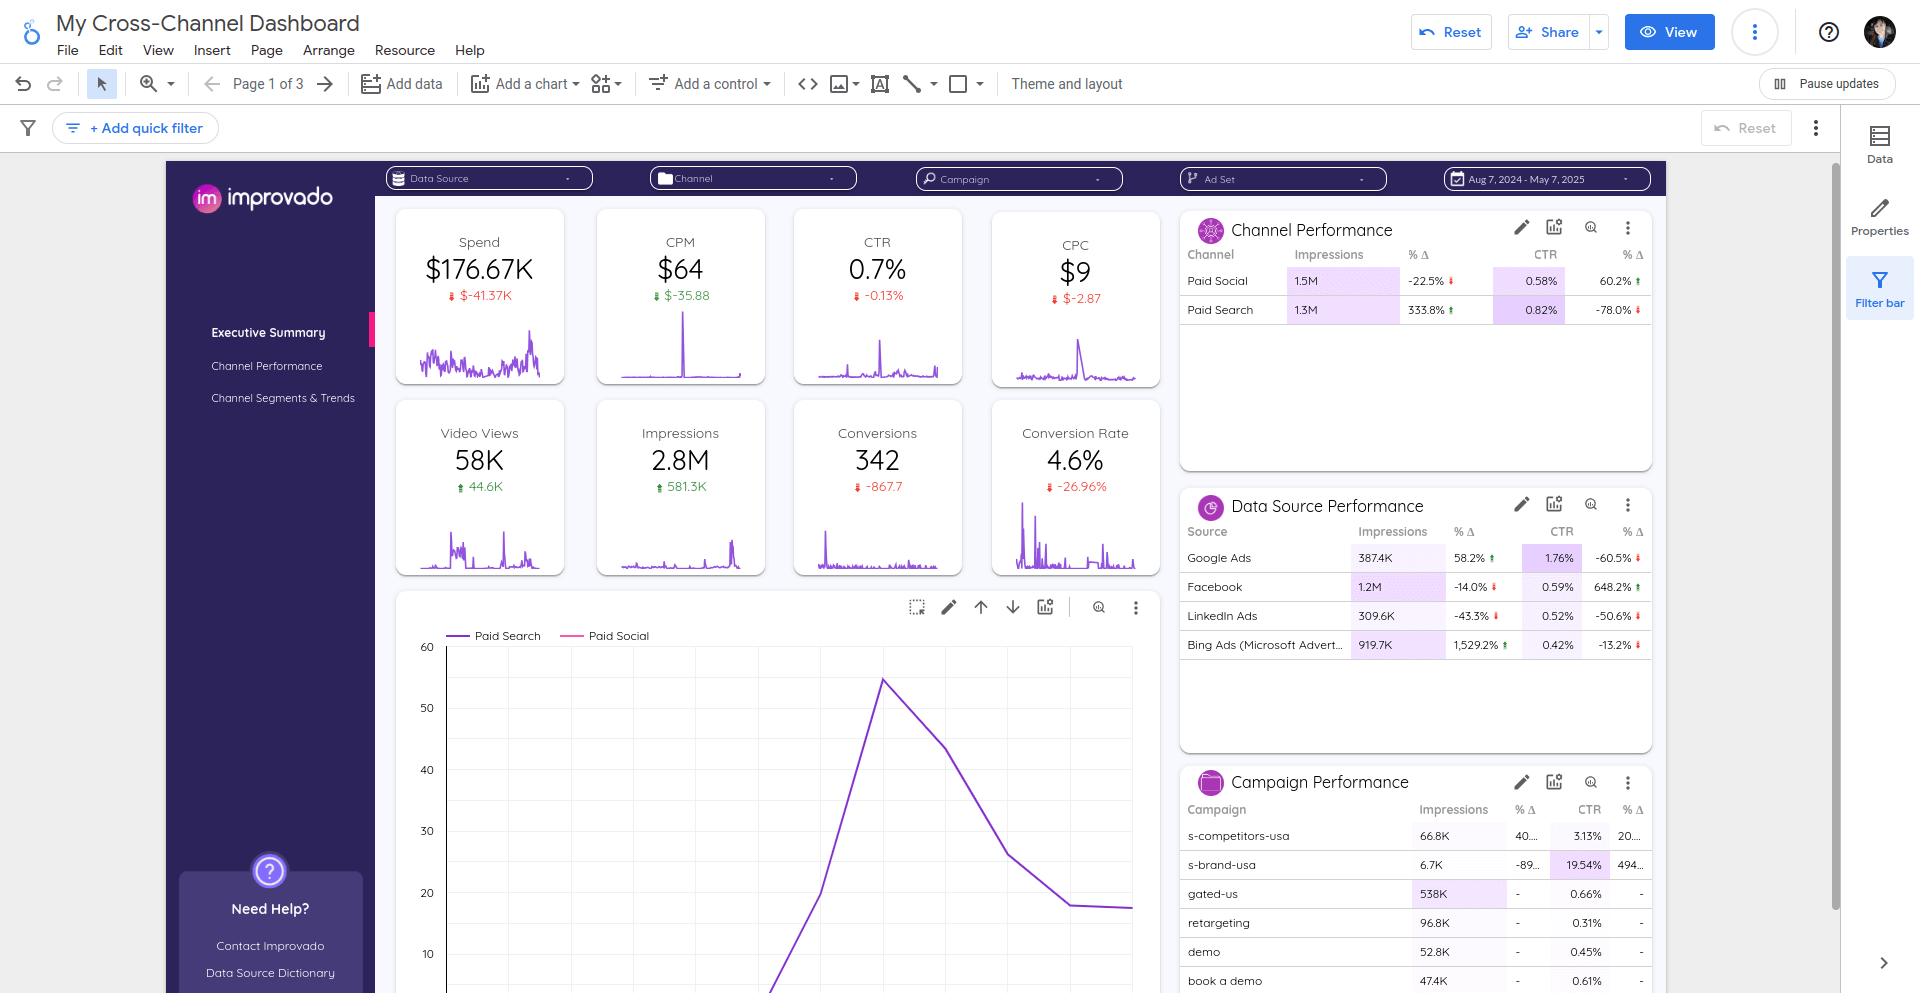
3. Share the Dashboard
Once the dashboard is created, you can share it with relevant team members by adjusting the access settings.
This guide ensures a smooth setup of your Looker Studio dashboard. If you need assistance, contact Improvado Support.
Was this article helpful?
Thanks for the feedback!