Updated on
January 15, 2026
Learn about the advantages of using extraction templates.
Extraction template is a feature that allows you to simplify the data extraction process by using the predefined set of metrics/dimensions and most common settings for such metrics/dimensions.
{%docs-informer info title="Remember"%}
Your custom extraction templates are available for extraction/auto extraction. Create them once and you won't have to customize the settings again and again.
{%docs-informer-end%}
Global templates are available to all Improvado users. If you create a Custom template based on any Global template, it is available only to your team members.
When using a global template for data extraction, you configure its settings only for the current extract. These settings will NOT be saved for future use. The next time you select any global template, its settings will have default values, and you will have to customize them again.
For example, the default settings of the Ads global template for Facebook connector are the following:
When you select the Ads global template for data extraction from Facebook, you will see exactly these settings.
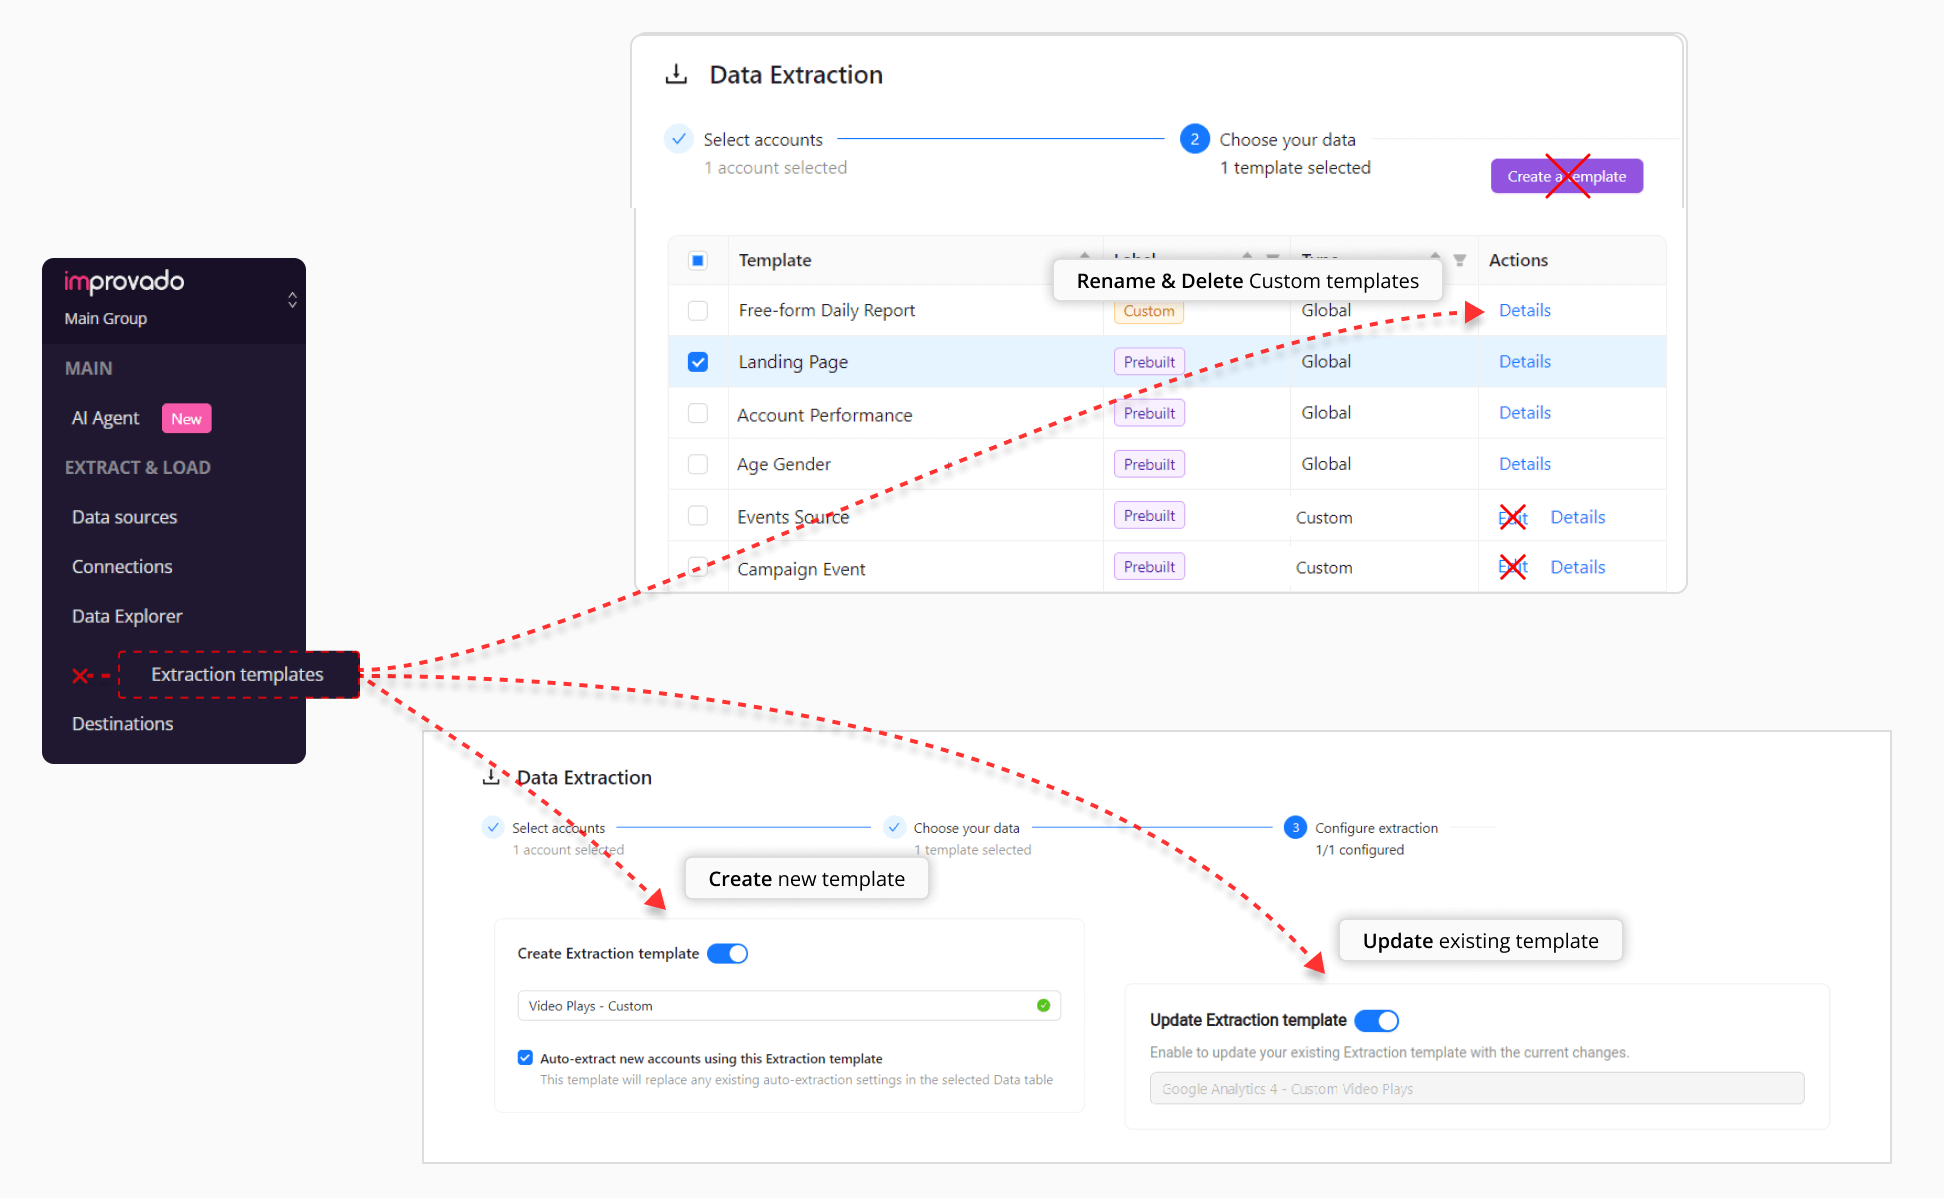
To enhance and simplify your experience, we've empowered you to create and update custom extraction templates directly within the Extraction flow, streamlining your workflow.
{%docs-informer info%}
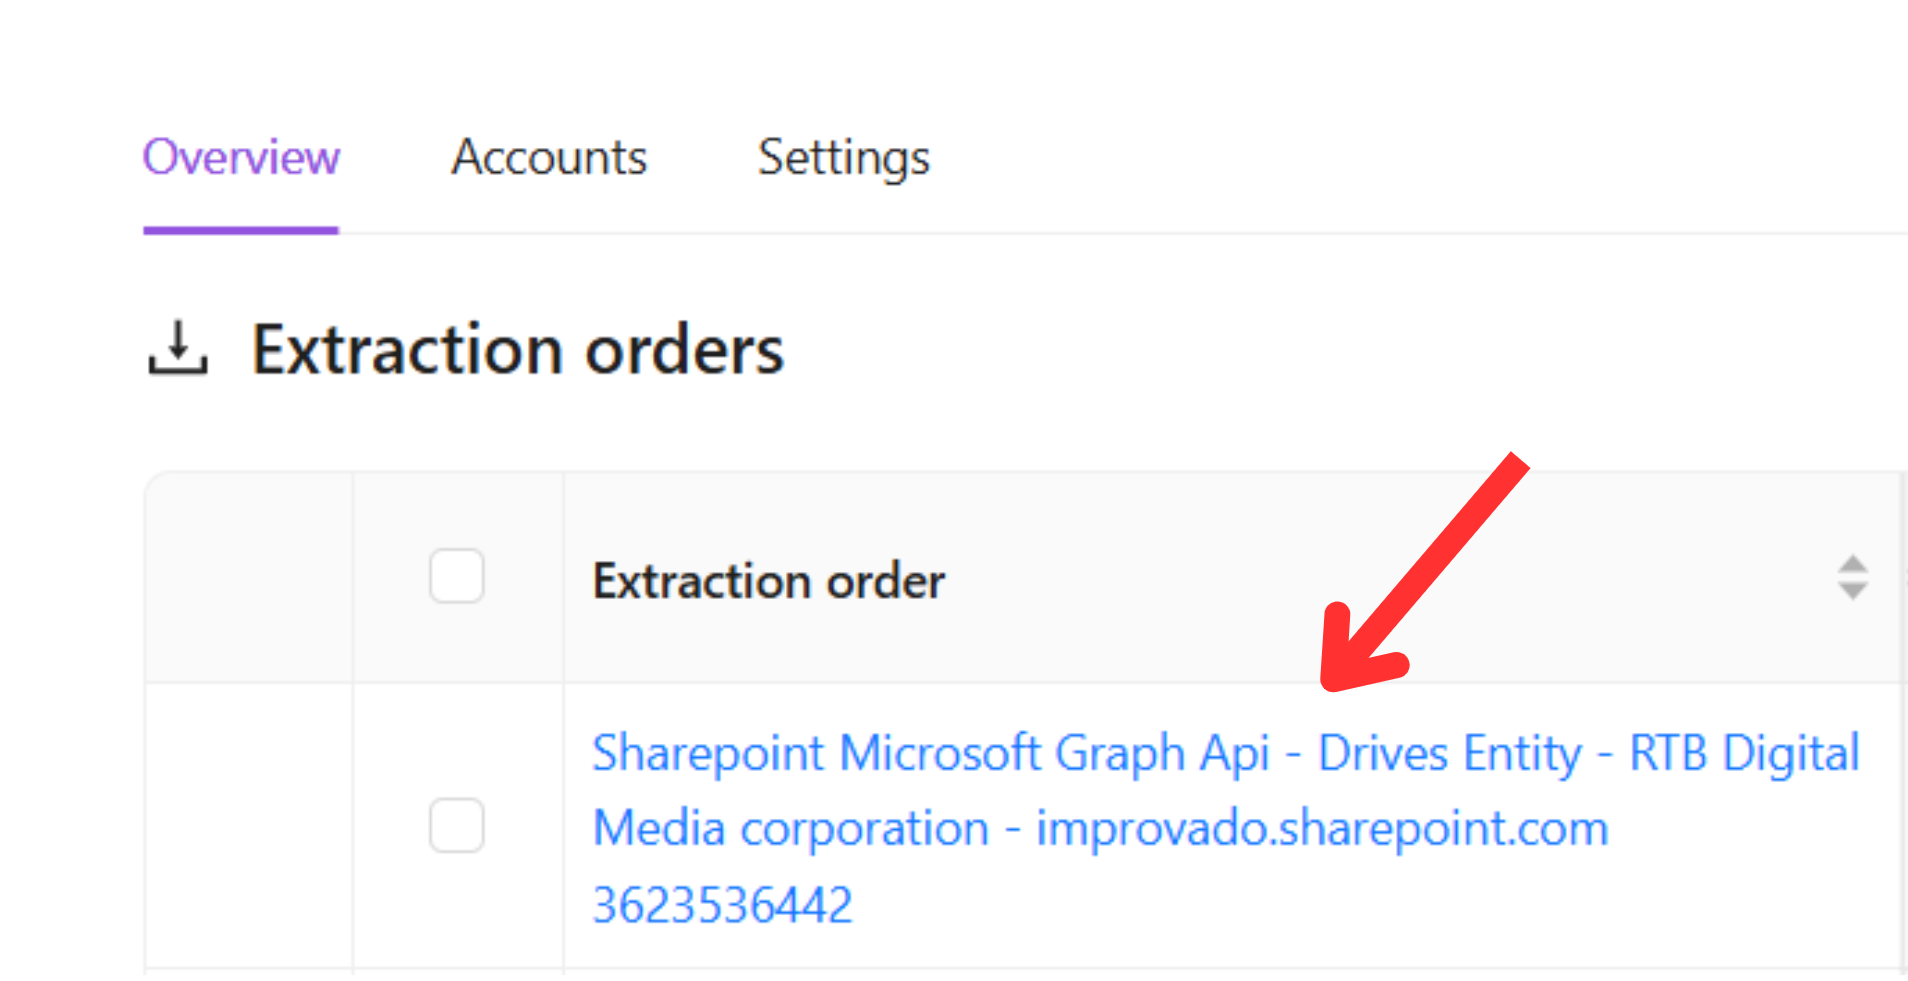
It is now possible to create a template directly from an order. This allows you to quickly generate a template based on the data structure of a specific order, simplifying the template creation process and saving time.
Steps to create a template from an order:
Step 1. Navigate to the relevant order.
Step 2. Click the three dots (⋮) in the upper-right corner of the order screen.
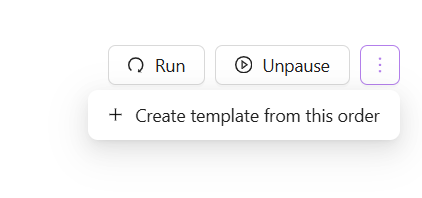
Step 3. Select the “Create template from this order” option.
Step 4. Review and adjust the extracted fields as needed.
Step 5. Save the template for future use.
{%docs-informer-end%}
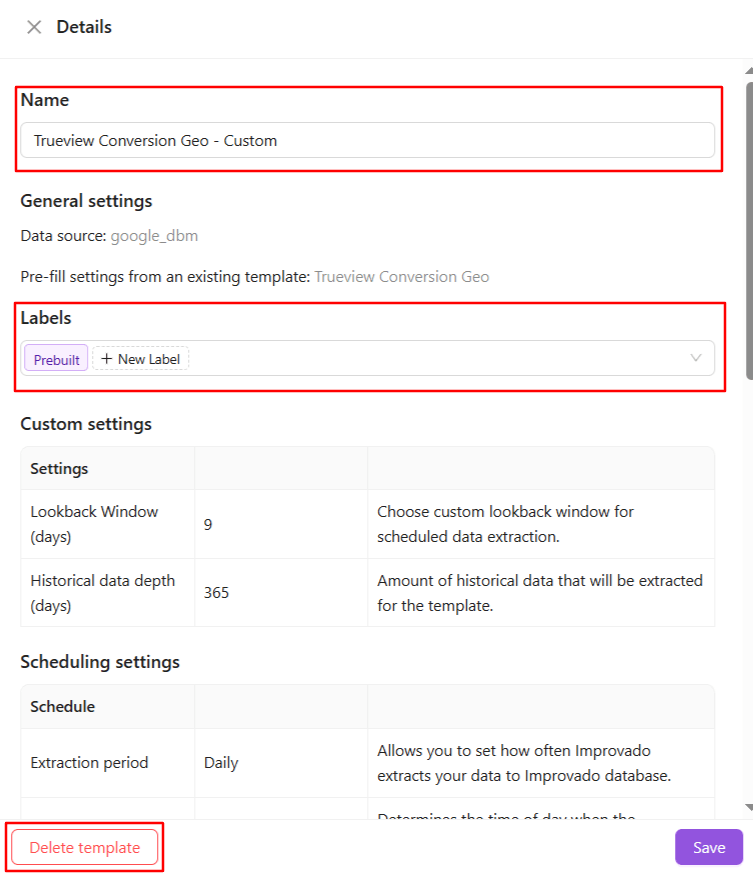
In the Details panel, you can check the detailed settings of your template, including selected dimensions and metrics.
For Custom-type templates only, you can:
How to use custom labels:
You will be able to reuse your new/updated template later. You will find it in the list of extraction templates in the 2nd step.
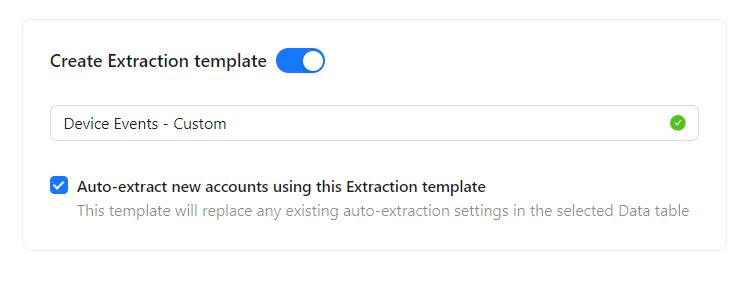
Enable the Create Extraction template toggle to save the settings you’ve just configured as a new template or keep it disabled to apply these settings only for the current data extraction setup.
{%docs-informer info%}
Templates containing Custom account-specific fields cannot be saved. Since these fields are unique to a single account and only available in free-form reports, such templates cannot be reused across other accounts.
{%docs-informer-end%}
By default, the template name is formed based on the following rules:
{%docs-informer info%}
The result of extraction template creation is always an extraction template with a Prebuilt label and Custom type.
{%docs-informer-end%}
Improvado will extract new accounts as they become available in the connected credentials if enabled. This template will replace any existing auto-extraction settings in the selected data table.
{%docs-informer info%}
The data table Auto-extract settings can be found on the Automation tab of your data table.
{%docs-informer-end%}
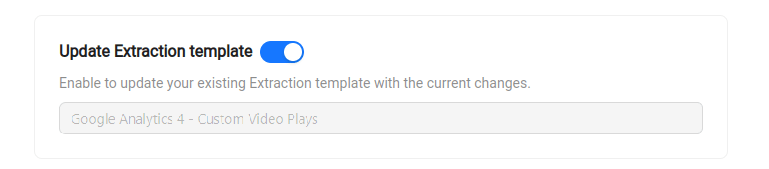
The Update Extraction template allows you to apply the settings you’ve just configured for the existing extraction template. Keep the toggle disabled to use the settings you’ve just configured only for the current data extraction setup.
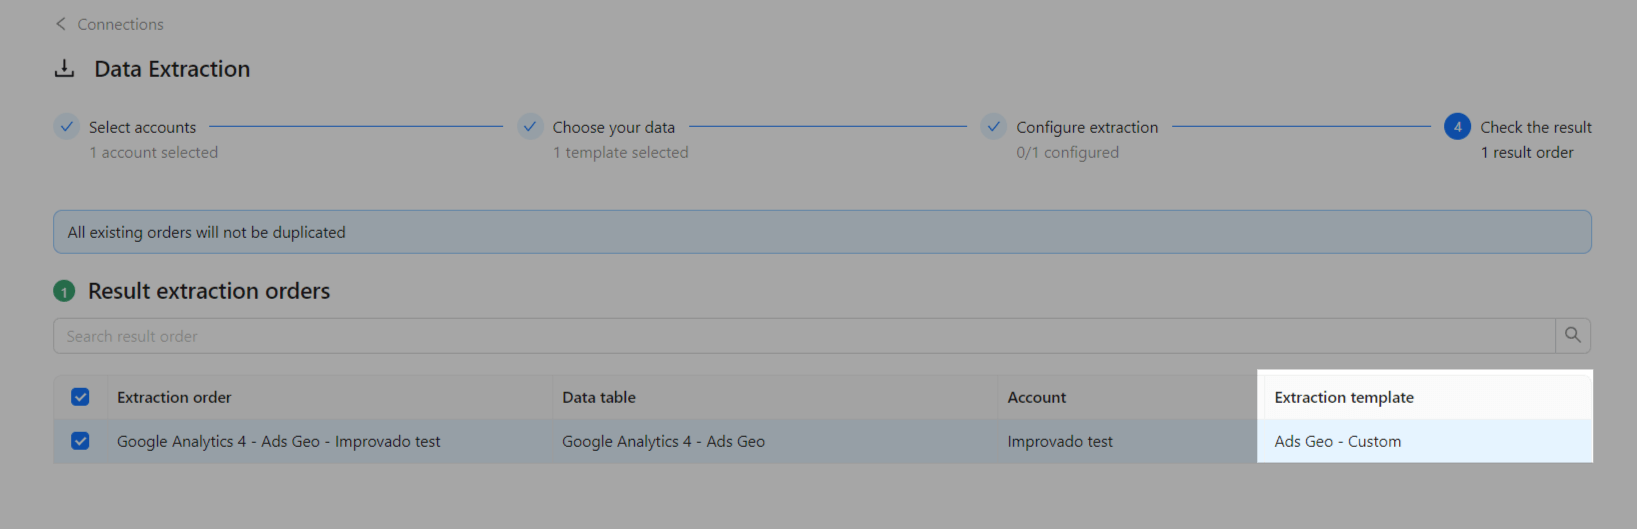
The Result extraction orders list now displays a new extraction template name that you set for a new extraction template in the 3rd step, or the Parent template name if you skipped creating a new extraction template.
By segmenting the reports in this manner, we can deliver clearer insights and more accurate data, thereby improving overall reporting efficiency and user satisfaction.
Extraction template selection depends on the specific Data source and the type of data you want to extract. Here are some steps to help you choose the appropriate Extraction template:
If you didn’t find the needed global Extraction template, you can create a custom one:
You can check out a more in-depth guide here.
You can find an extensive overview of all common Report types by Data sources in the Improvado Data Dictionary. It includes metrics, properties, dimensions, etc.
If you didn’t find Report types you were looking for - you can create a request for a new Request type via the Service Desk.
Improvado team is always happy to help with any other questions you might have! Send us an email.
Contact your Customer Success Manager or raise a request in Improvado Service Desk.


.png)