Data Deletion
Learn how to to hard delete extraction orders and extract data loaded to the destination.
Safeguard Your Data: Backup Recommendation
Before setting up data deletion, we strongly recommend creating a backup on your destination system. This is important because all related data will be permanently removed from your destination during the next historical load.
For guidance on creating a backup in various destinations, including Snowflake, refer to this example.
Backup functionality will be available in the next version of this feature.
How to Delete Extraction Orders
Follow these steps to ensure a smooth deletion process:
- Choose the extraction order you want to delete.
Need to stop data extraction but keep historical data? Use the Pause Extraction Order option instead.
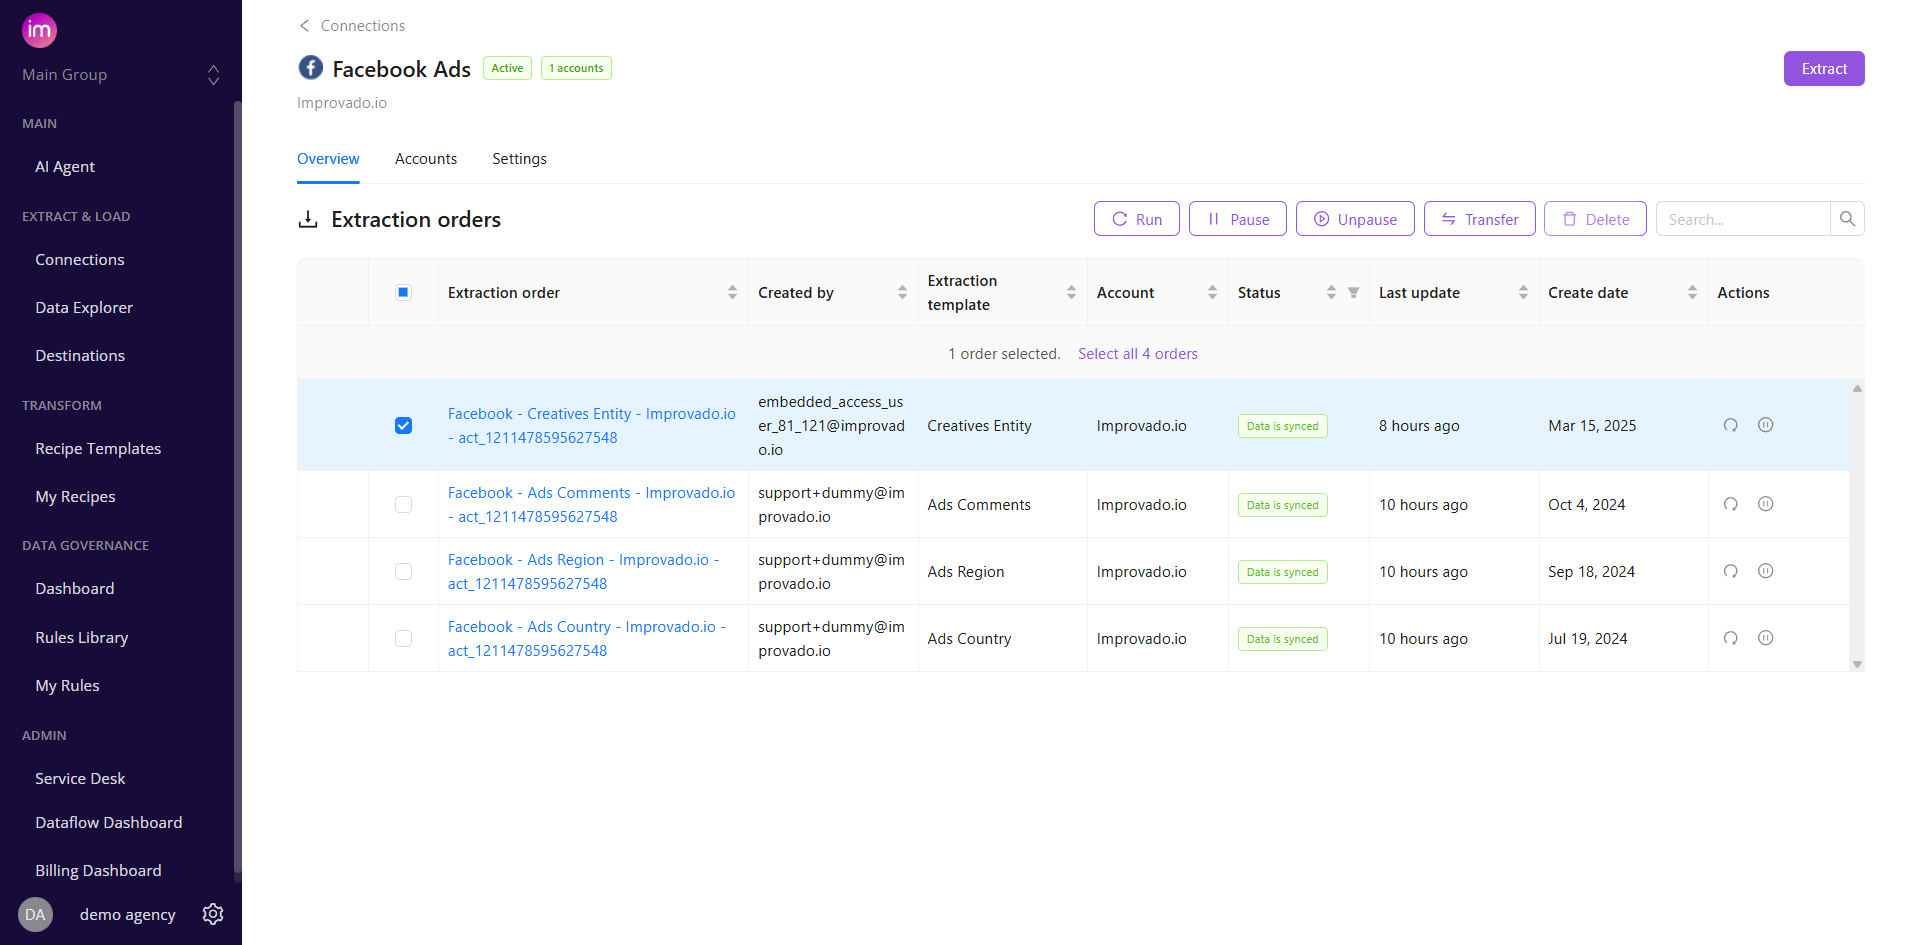
- The confirmation step will display the list of orders marked for deletion.
Deletion is only possible after the extraction process is complete. Orders with a “syncing” status cannot be deleted — please wait for the process to finish.
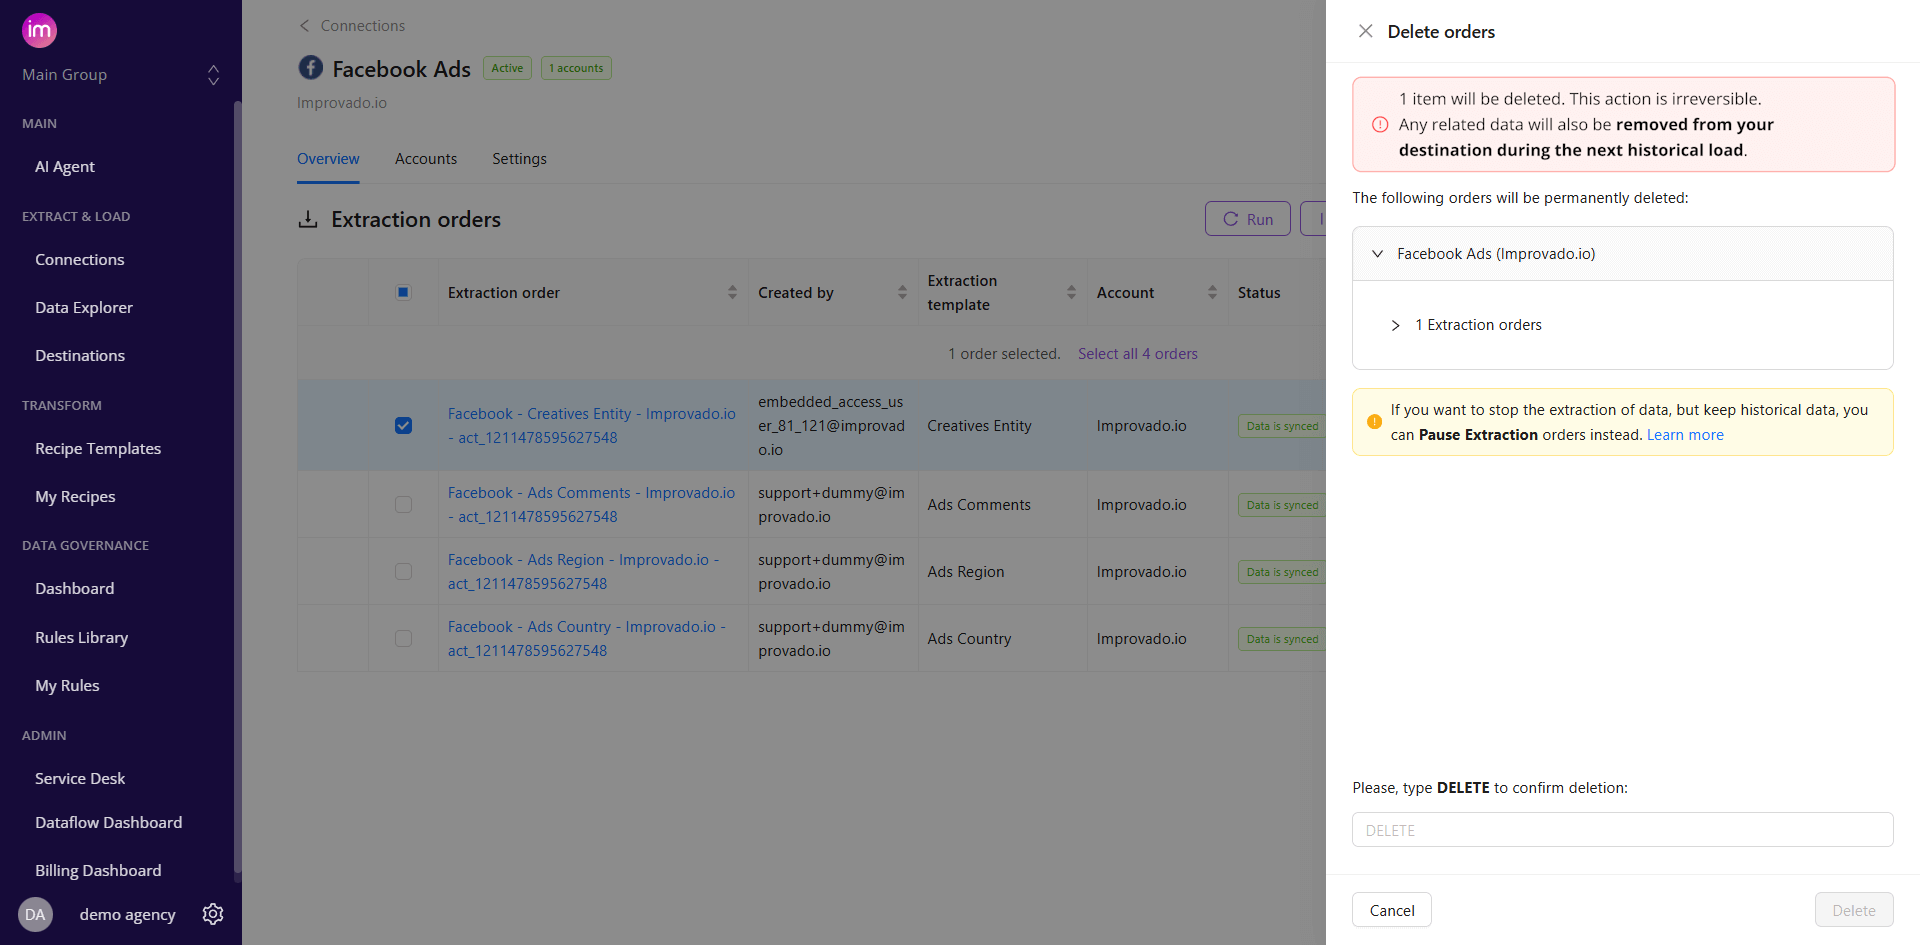
- Once you've confirmed your selection, the DELETE button will become active.
Any related data will be removed from your destination during the next historical load.
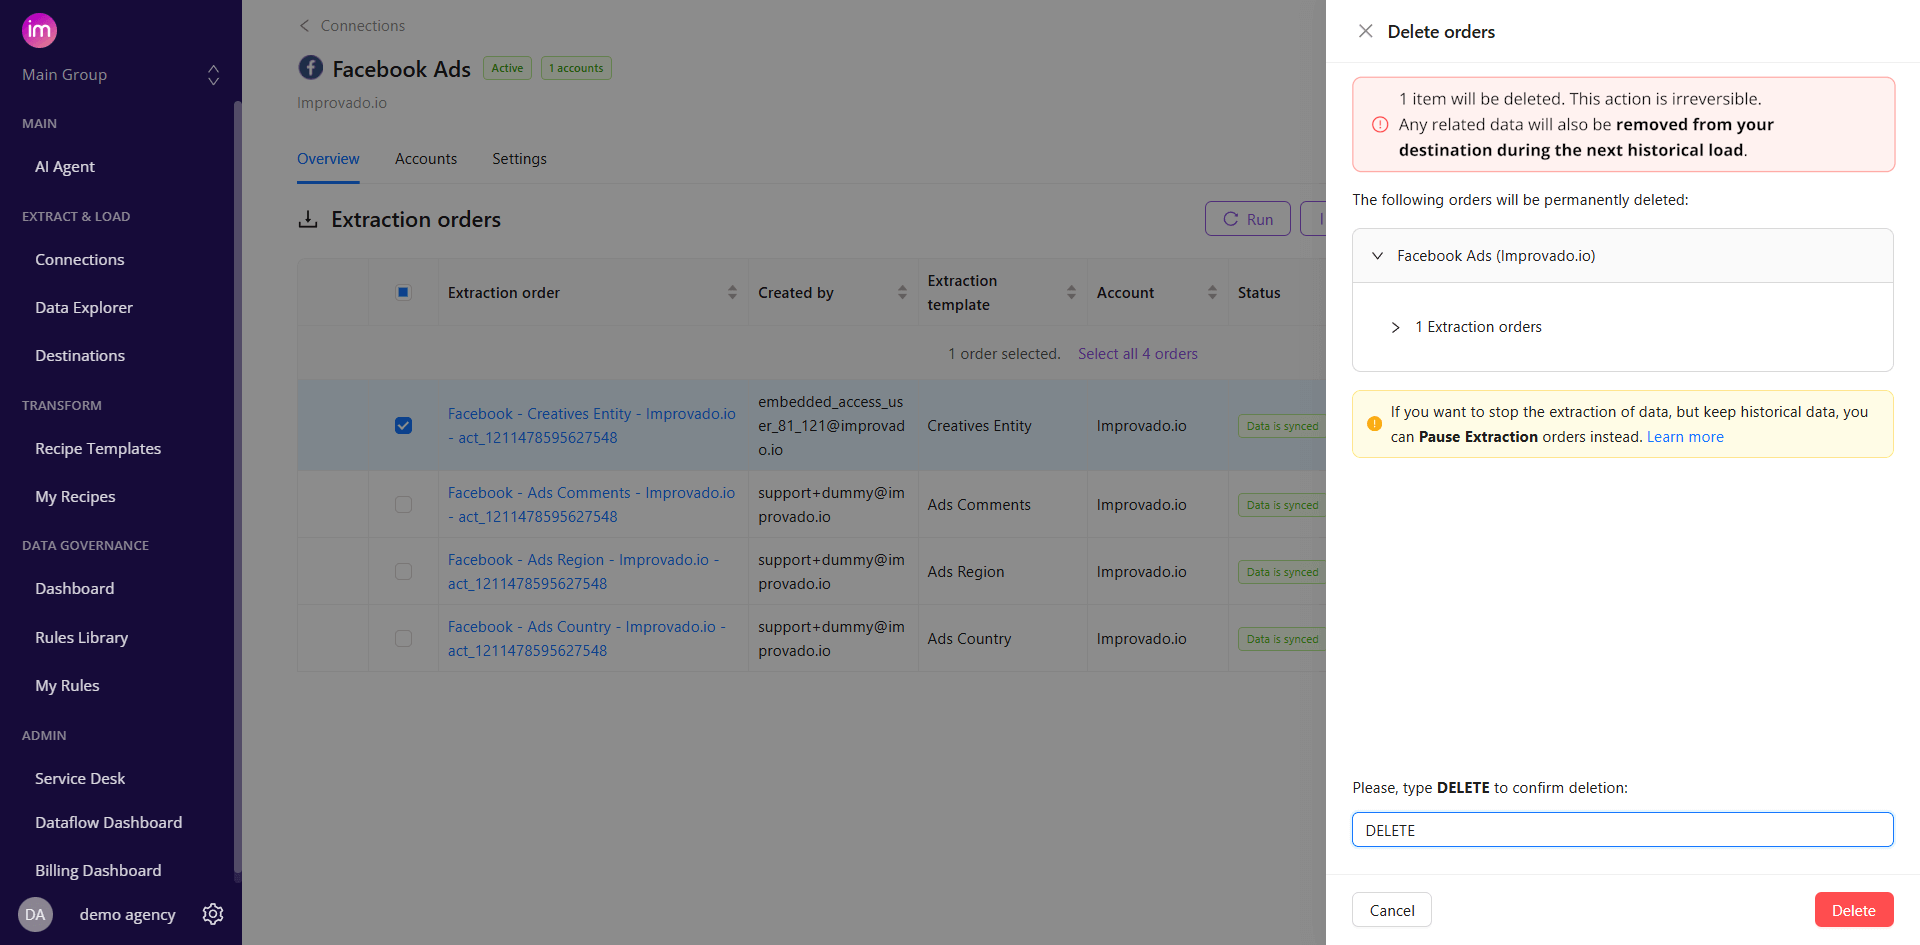
- The system will remove related data from both internal storage and your destination as part of the historical load process.
- Please note that data from our internal storage will be deleted imediatelly, while data on your destination will be removed only during the next historical load.
- You will receive a notification once the deletion process is successfully completed.
How to Delete Data Tables
Data Deletion allows you to remove data tables directly from the user interface, helping you clean up irrelevant objects and manage your workspace more efficiently.
Over time, your workspace can accumulate data tables that are no longer needed—outdated extractions, test data, or deprecated sources. Data Deletion gives you control over your environment by letting you remove these objects without submitting a support request or running manual cleanup scripts.
If you want to stop the extraction of data, but keep historical data, you can Pause Extraction orders instead. Learn more
Follow these steps to ensure a smooth deletion process:
Navigate to Data Explorer.
Select the table you want to delete.
Click Delete.
Type DELETE in the confirmation field to confirm the deletion.
Frequently Asked Questions (FAQ)
Q: Will the data table also be deleted if I delete all its extraction orders?
A: No, the data table will still exist. Deletion of data tables will be supported in the next version of this feature.
Q: Is Data Deletion supported for all Destinations?
A: Yes, but for file destinations - no existing files will be affected by historical load. We'll only delete data in our internal storage, and new files will not have data you've deleted.
Q: Can I run a historical load for a specific date range after deleting extraction orders?
A: Yes, you can specify the date range for your load in Run load feature. Learn more.
Was this article helpful?
Thanks for the feedback!