Updated on
Feb 7, 2025
Custom Formula is a way that allows you to quickly apply changes and modifications to data through a no-code interface. You can use Custom Formulas for a single column, a table, or an entire dataset. This feature enables you to easily create calculations that are automatically applied to the selected data.
To use it, simply follow the steps outlined below:
Suppose you have a table where you want to change the calculation method for the revenue metric. You can set a new value for revenue by applying the following formula:

This means that for the data in the table, such as Google, the revenue value will be calculated as half of the total conversions (all conversions value / 2). This approach is applied only to the data in the specified table.
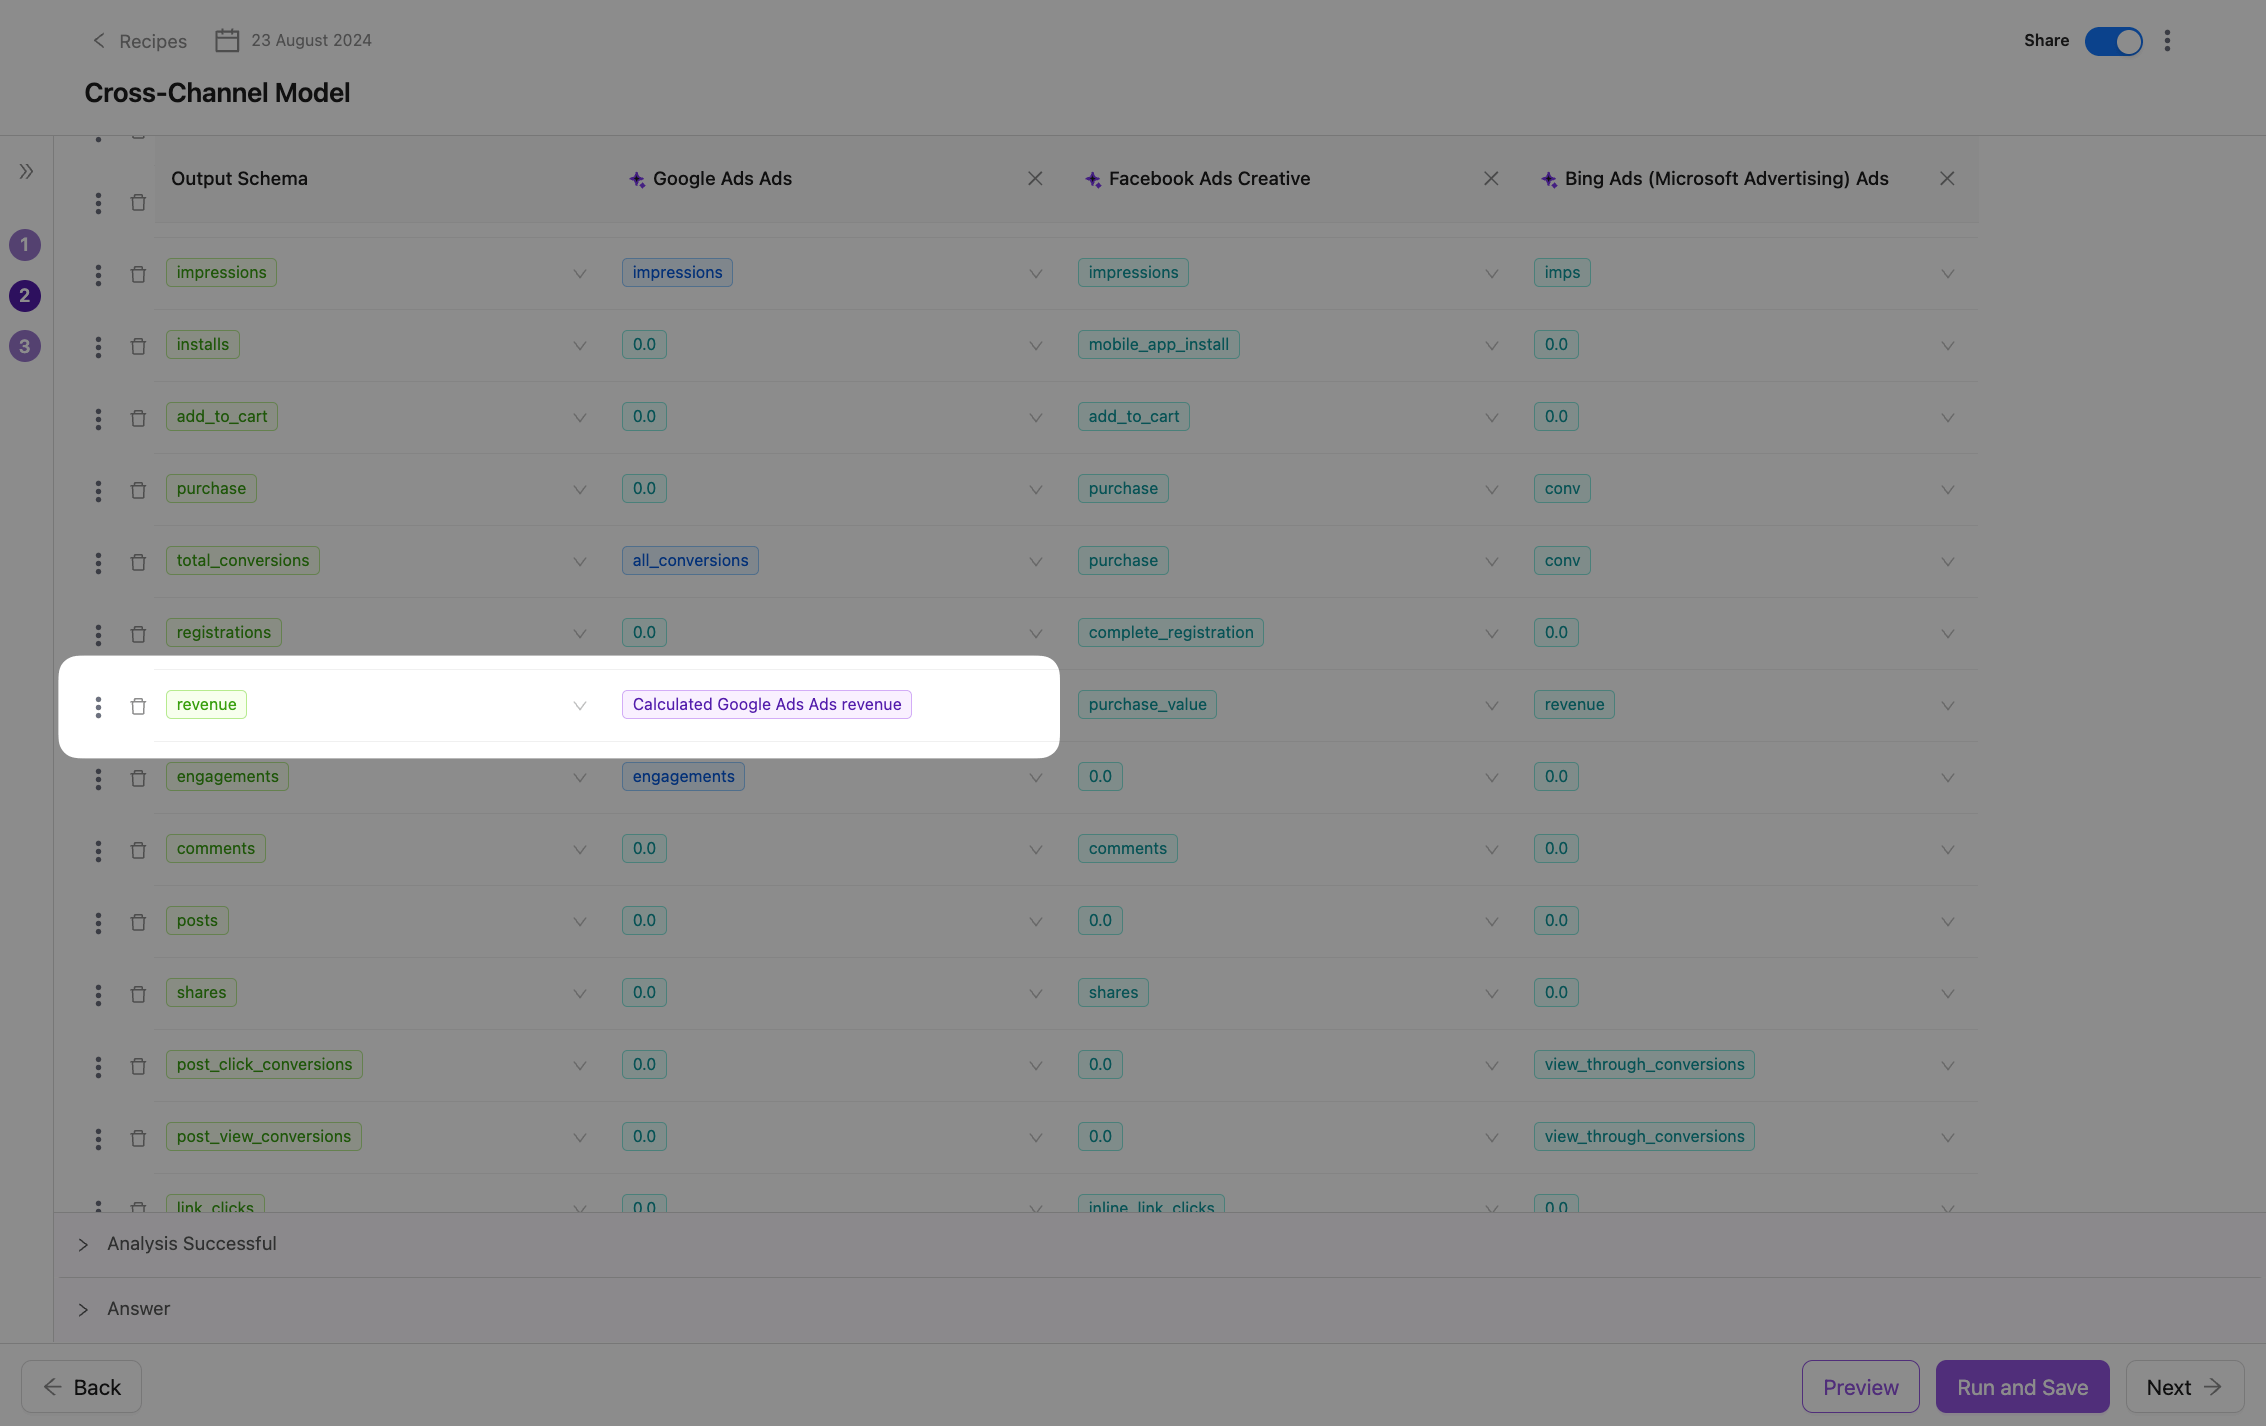
In addition to simple calculations, Custom Columns support more complex computations using Conditions and Fields, allowing you to customize calculations based on various criteria.
Imagine you need to set up dynamic determination of the Channel field value based on the type of ad network specified in the Ad Network Type field. Suppose you’re working with Google data and want the Channel field to automatically change depending on the Ad Network Type.
To achieve this, you create a series of conditions (Conditions) that will check the value in Ad Network Type and accordingly set the value for Channel.
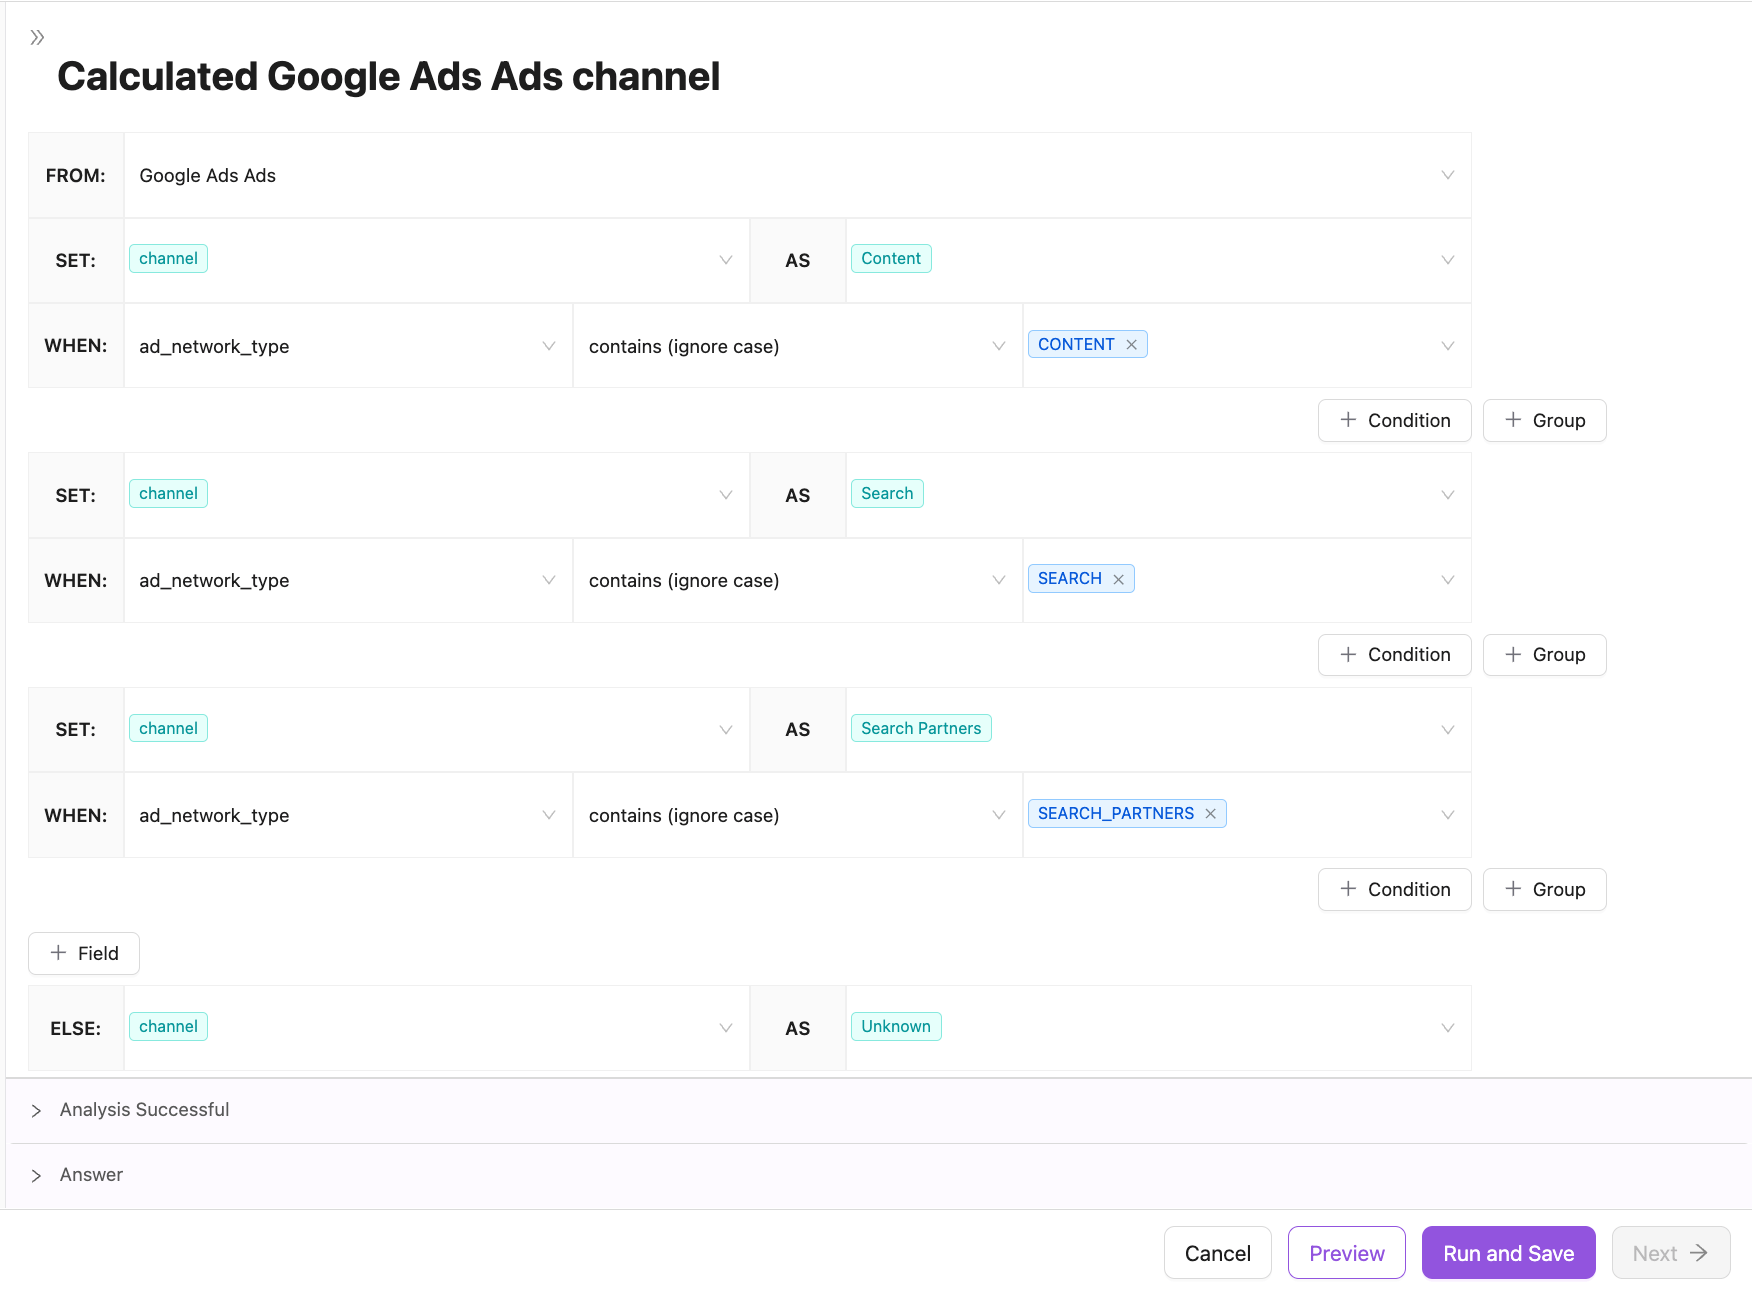
This process allows you to automatically classify channels based on the type of ad network in Google, ensuring accurate and dynamic assignment of values in the Channel field.
If you want to apply a change to the revenue metric across the entire dataset, you’ll need to create a new column. Let’s call it revenue_custom.
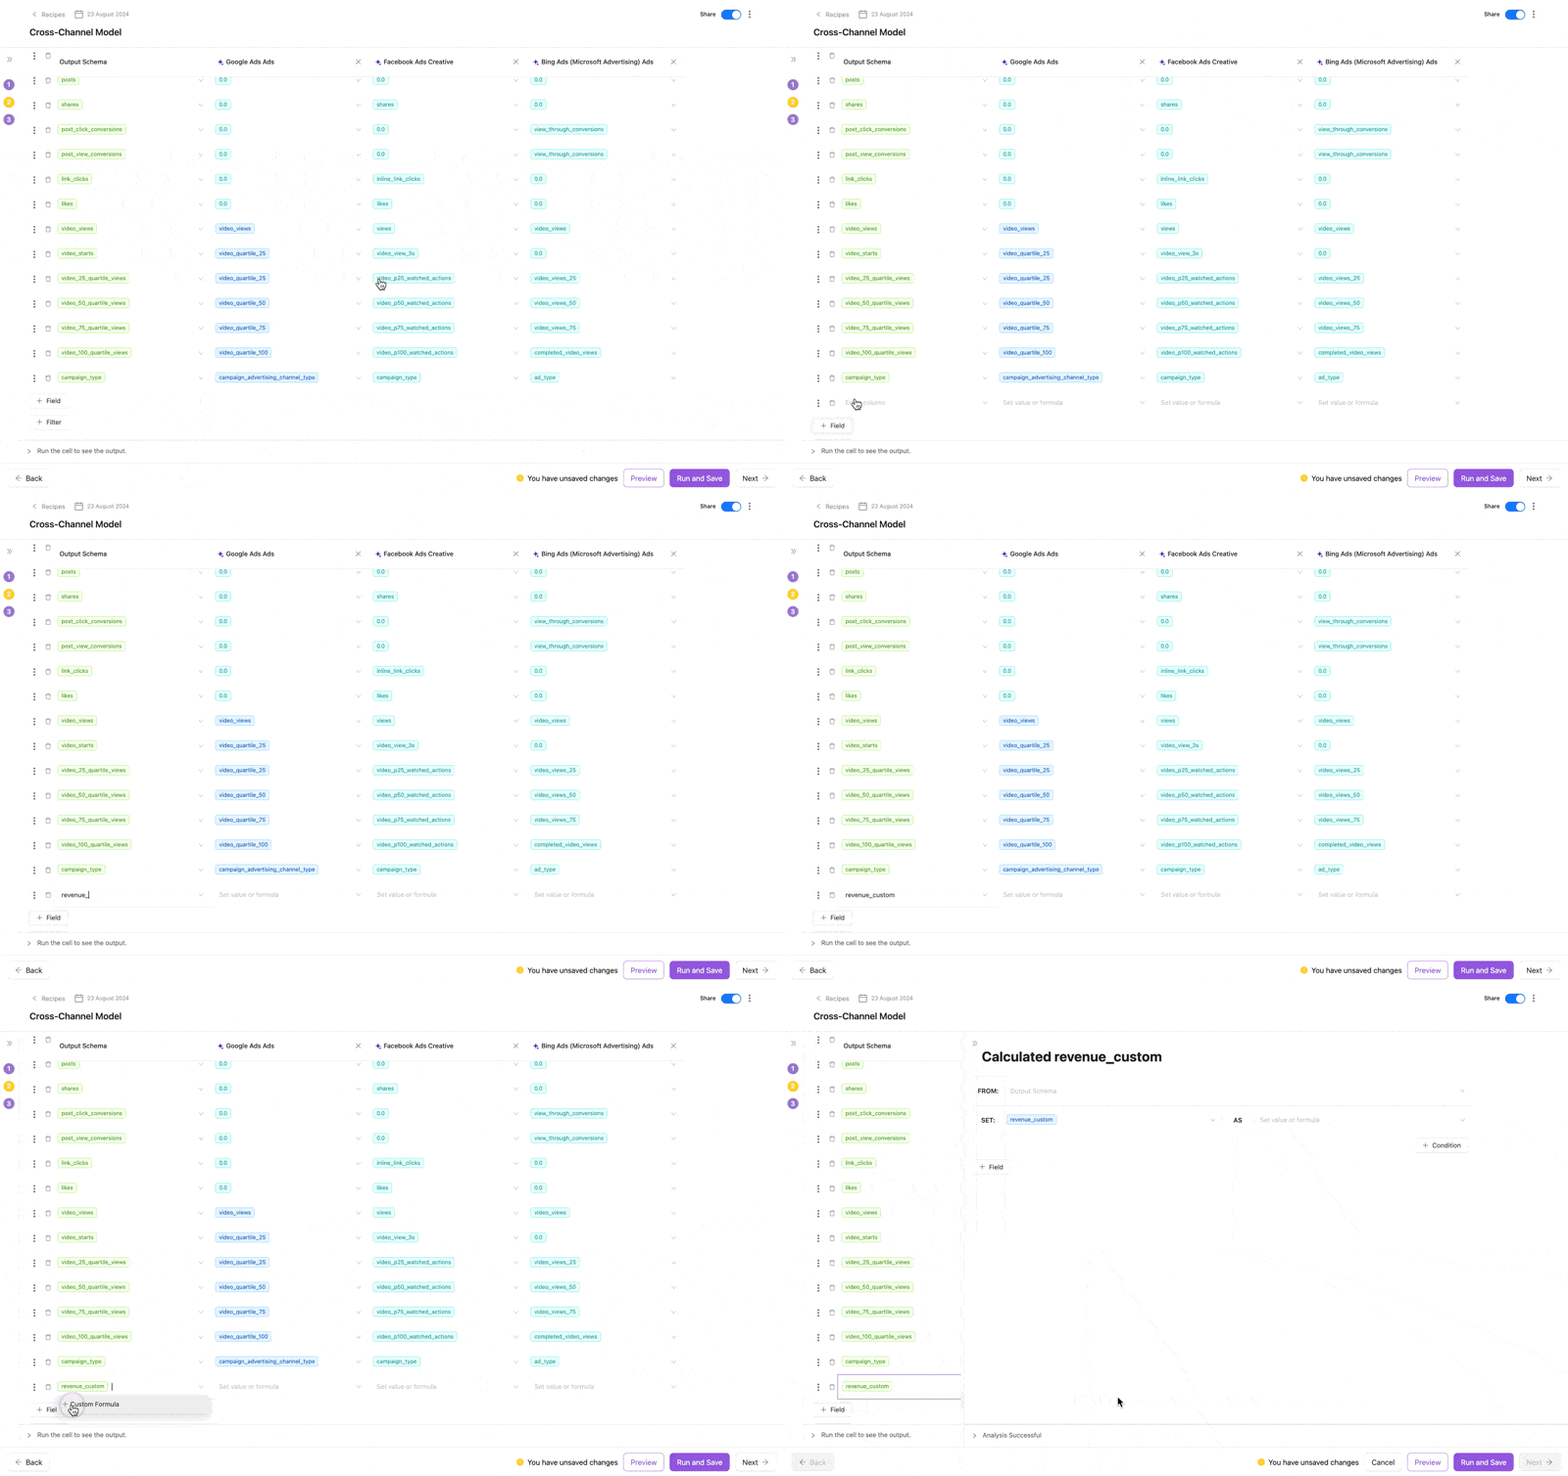
As in the first example, you can apply a custom calculation like revenue / 2.

And unlike the example with Google, this column is now applied to the entire dataset, and it will calculate the custom revenue in other data sources.
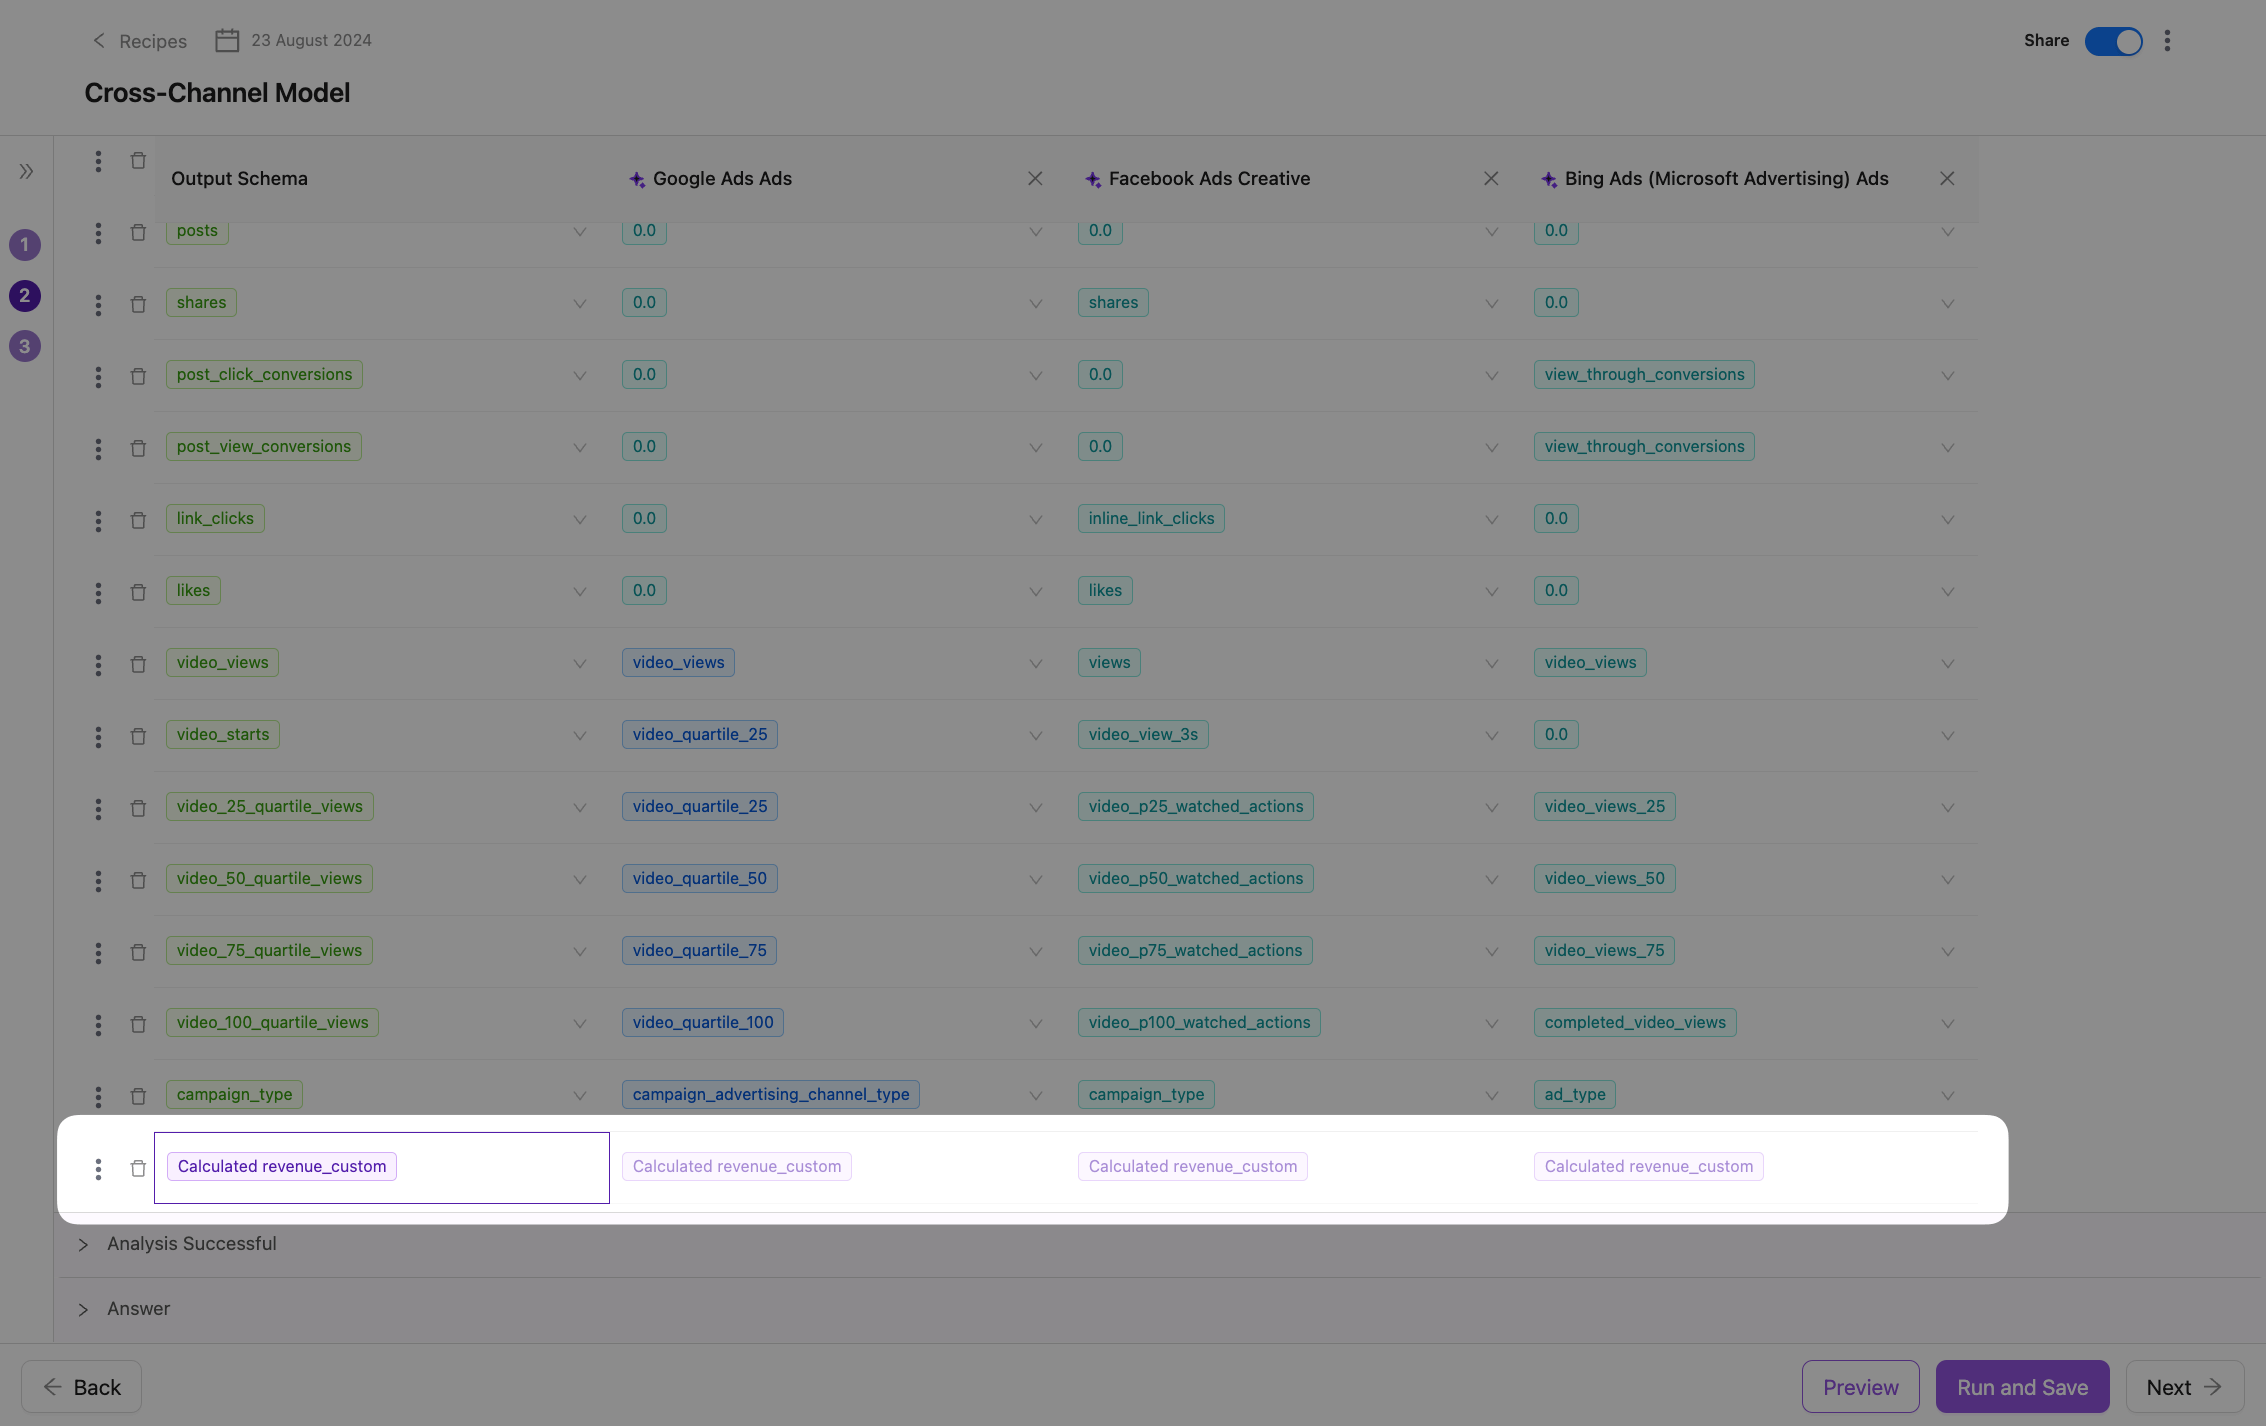
Similarly to the single table example, you can create more complex calculations using Conditions and Fields. For instance, based on location.
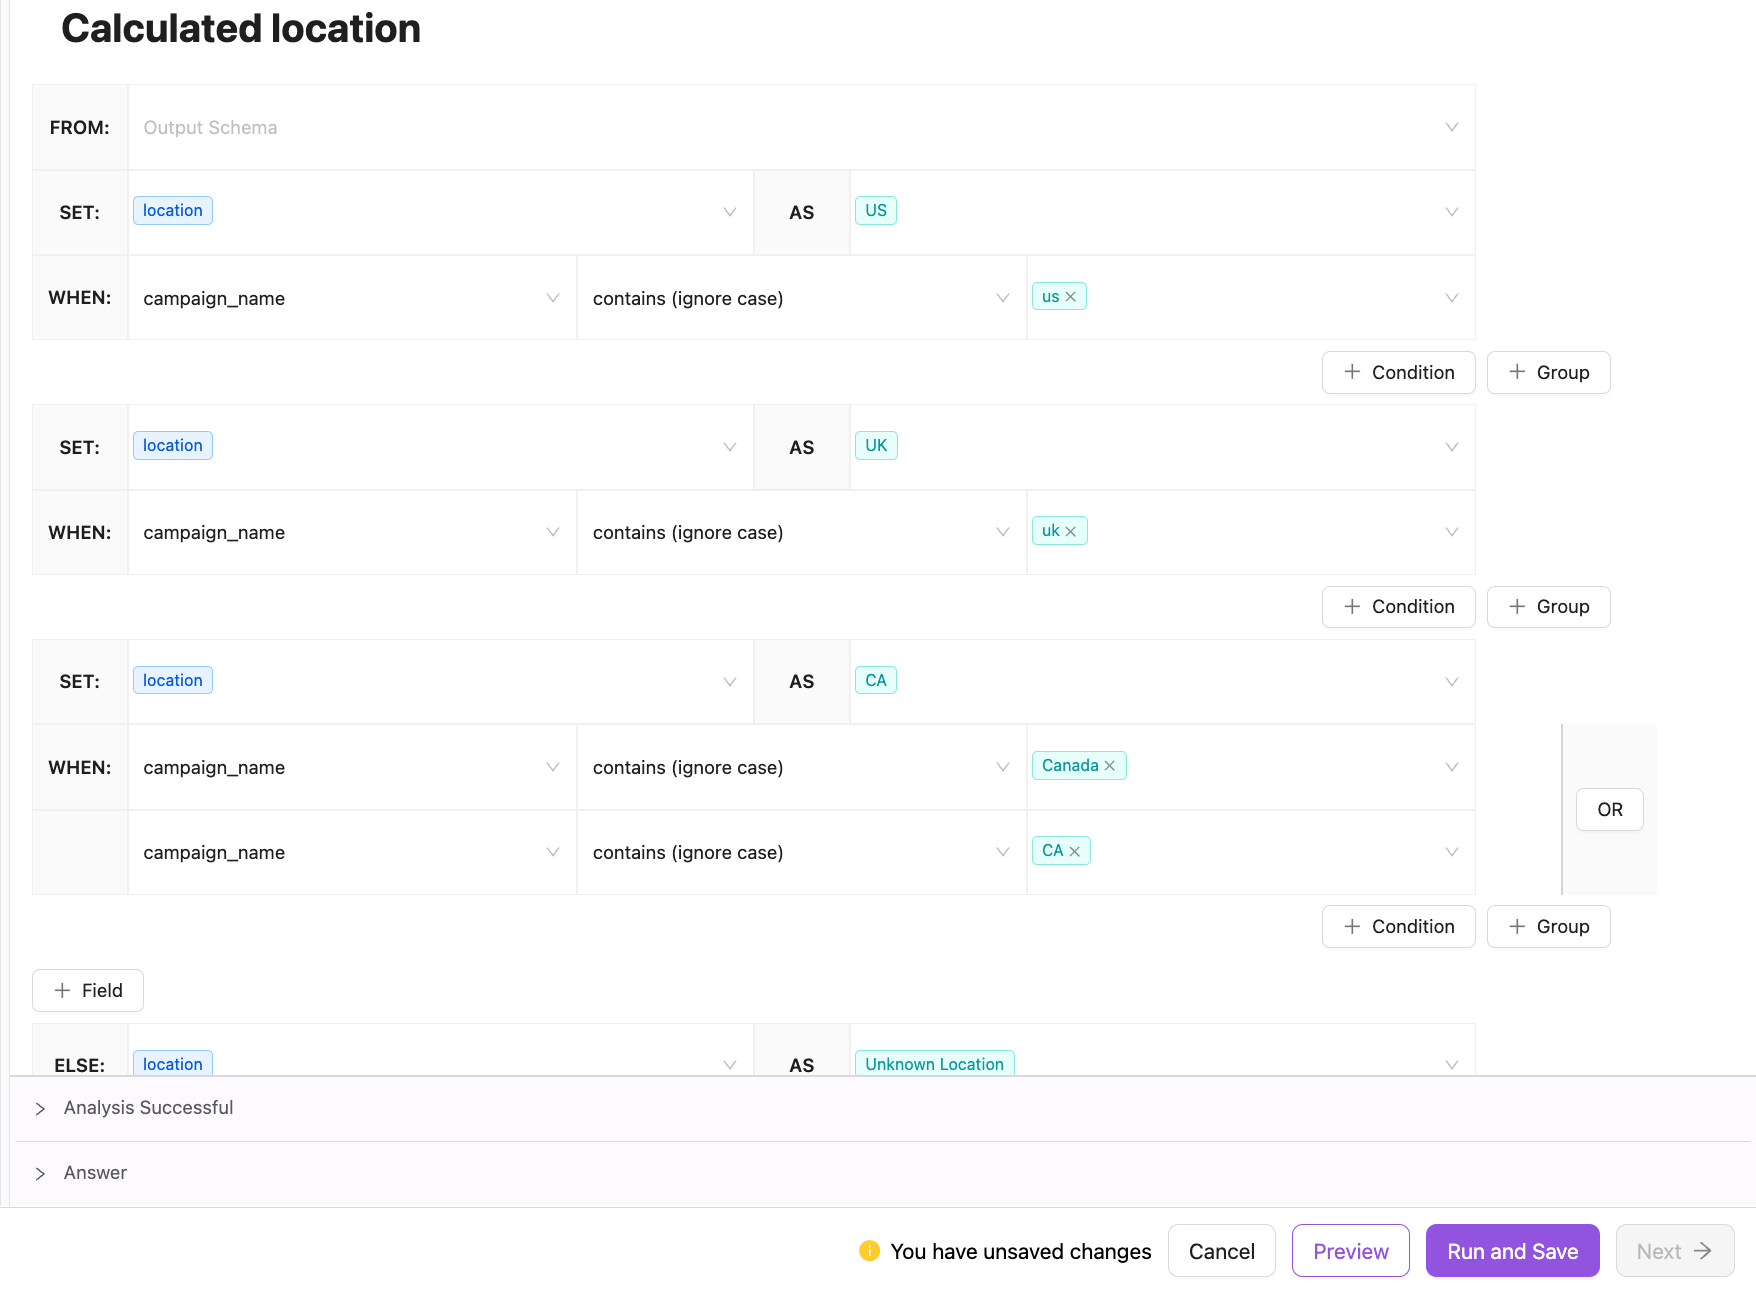
This process allows you to automatically determine the Location based on the campaign name for all data sources at once!
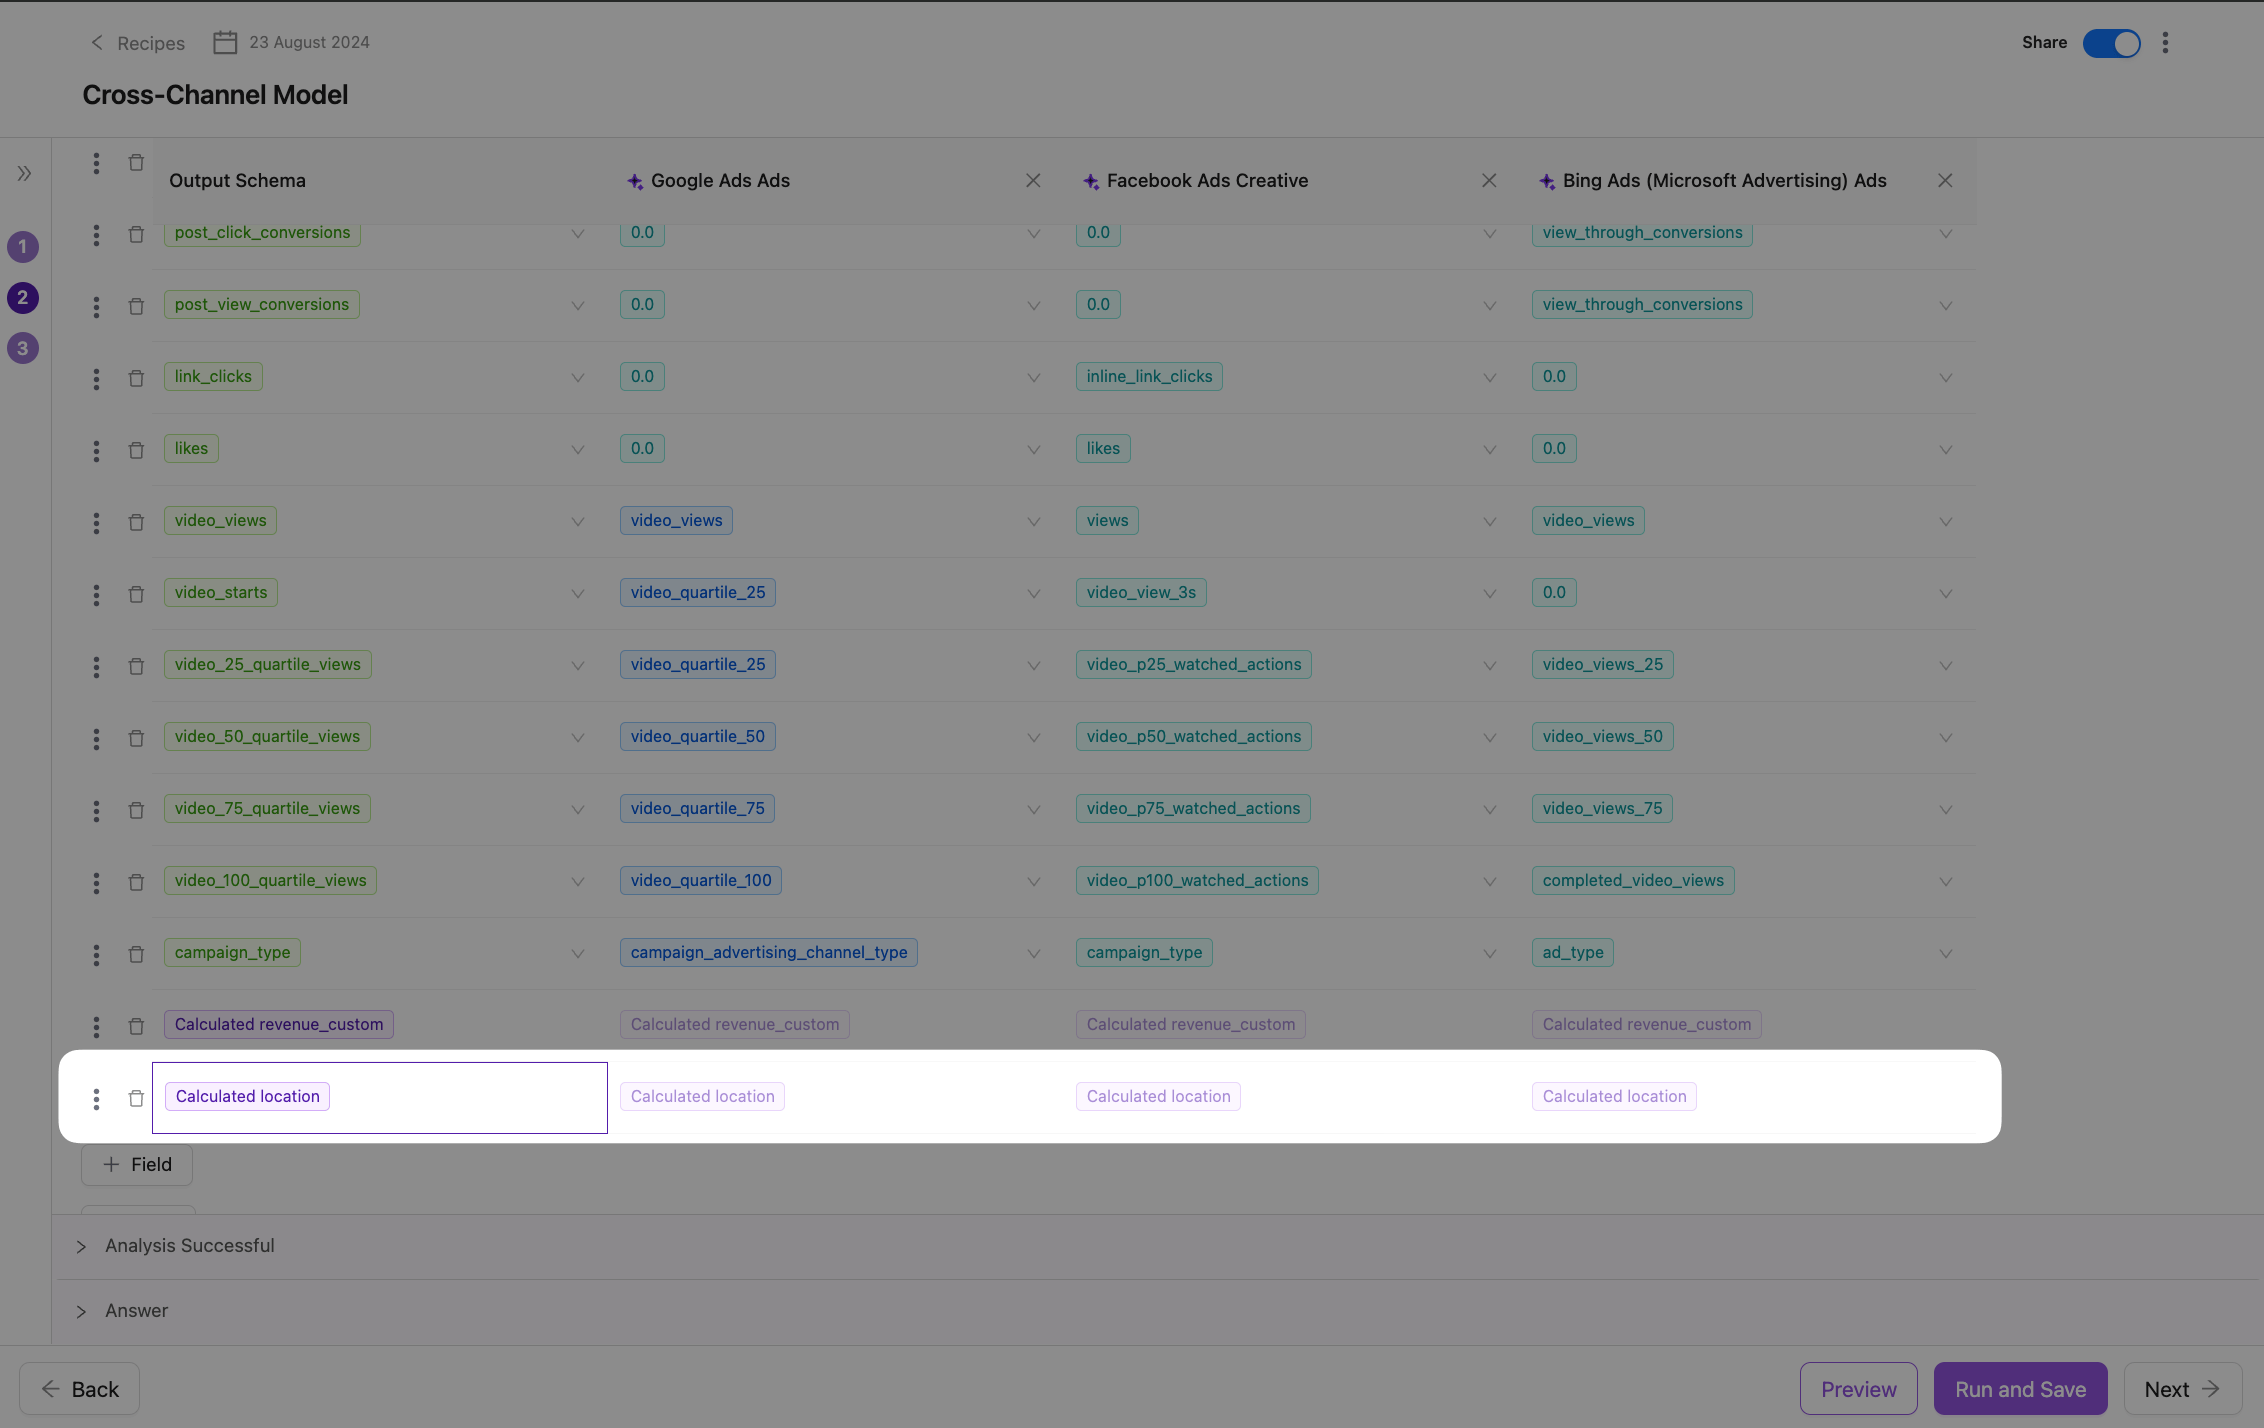
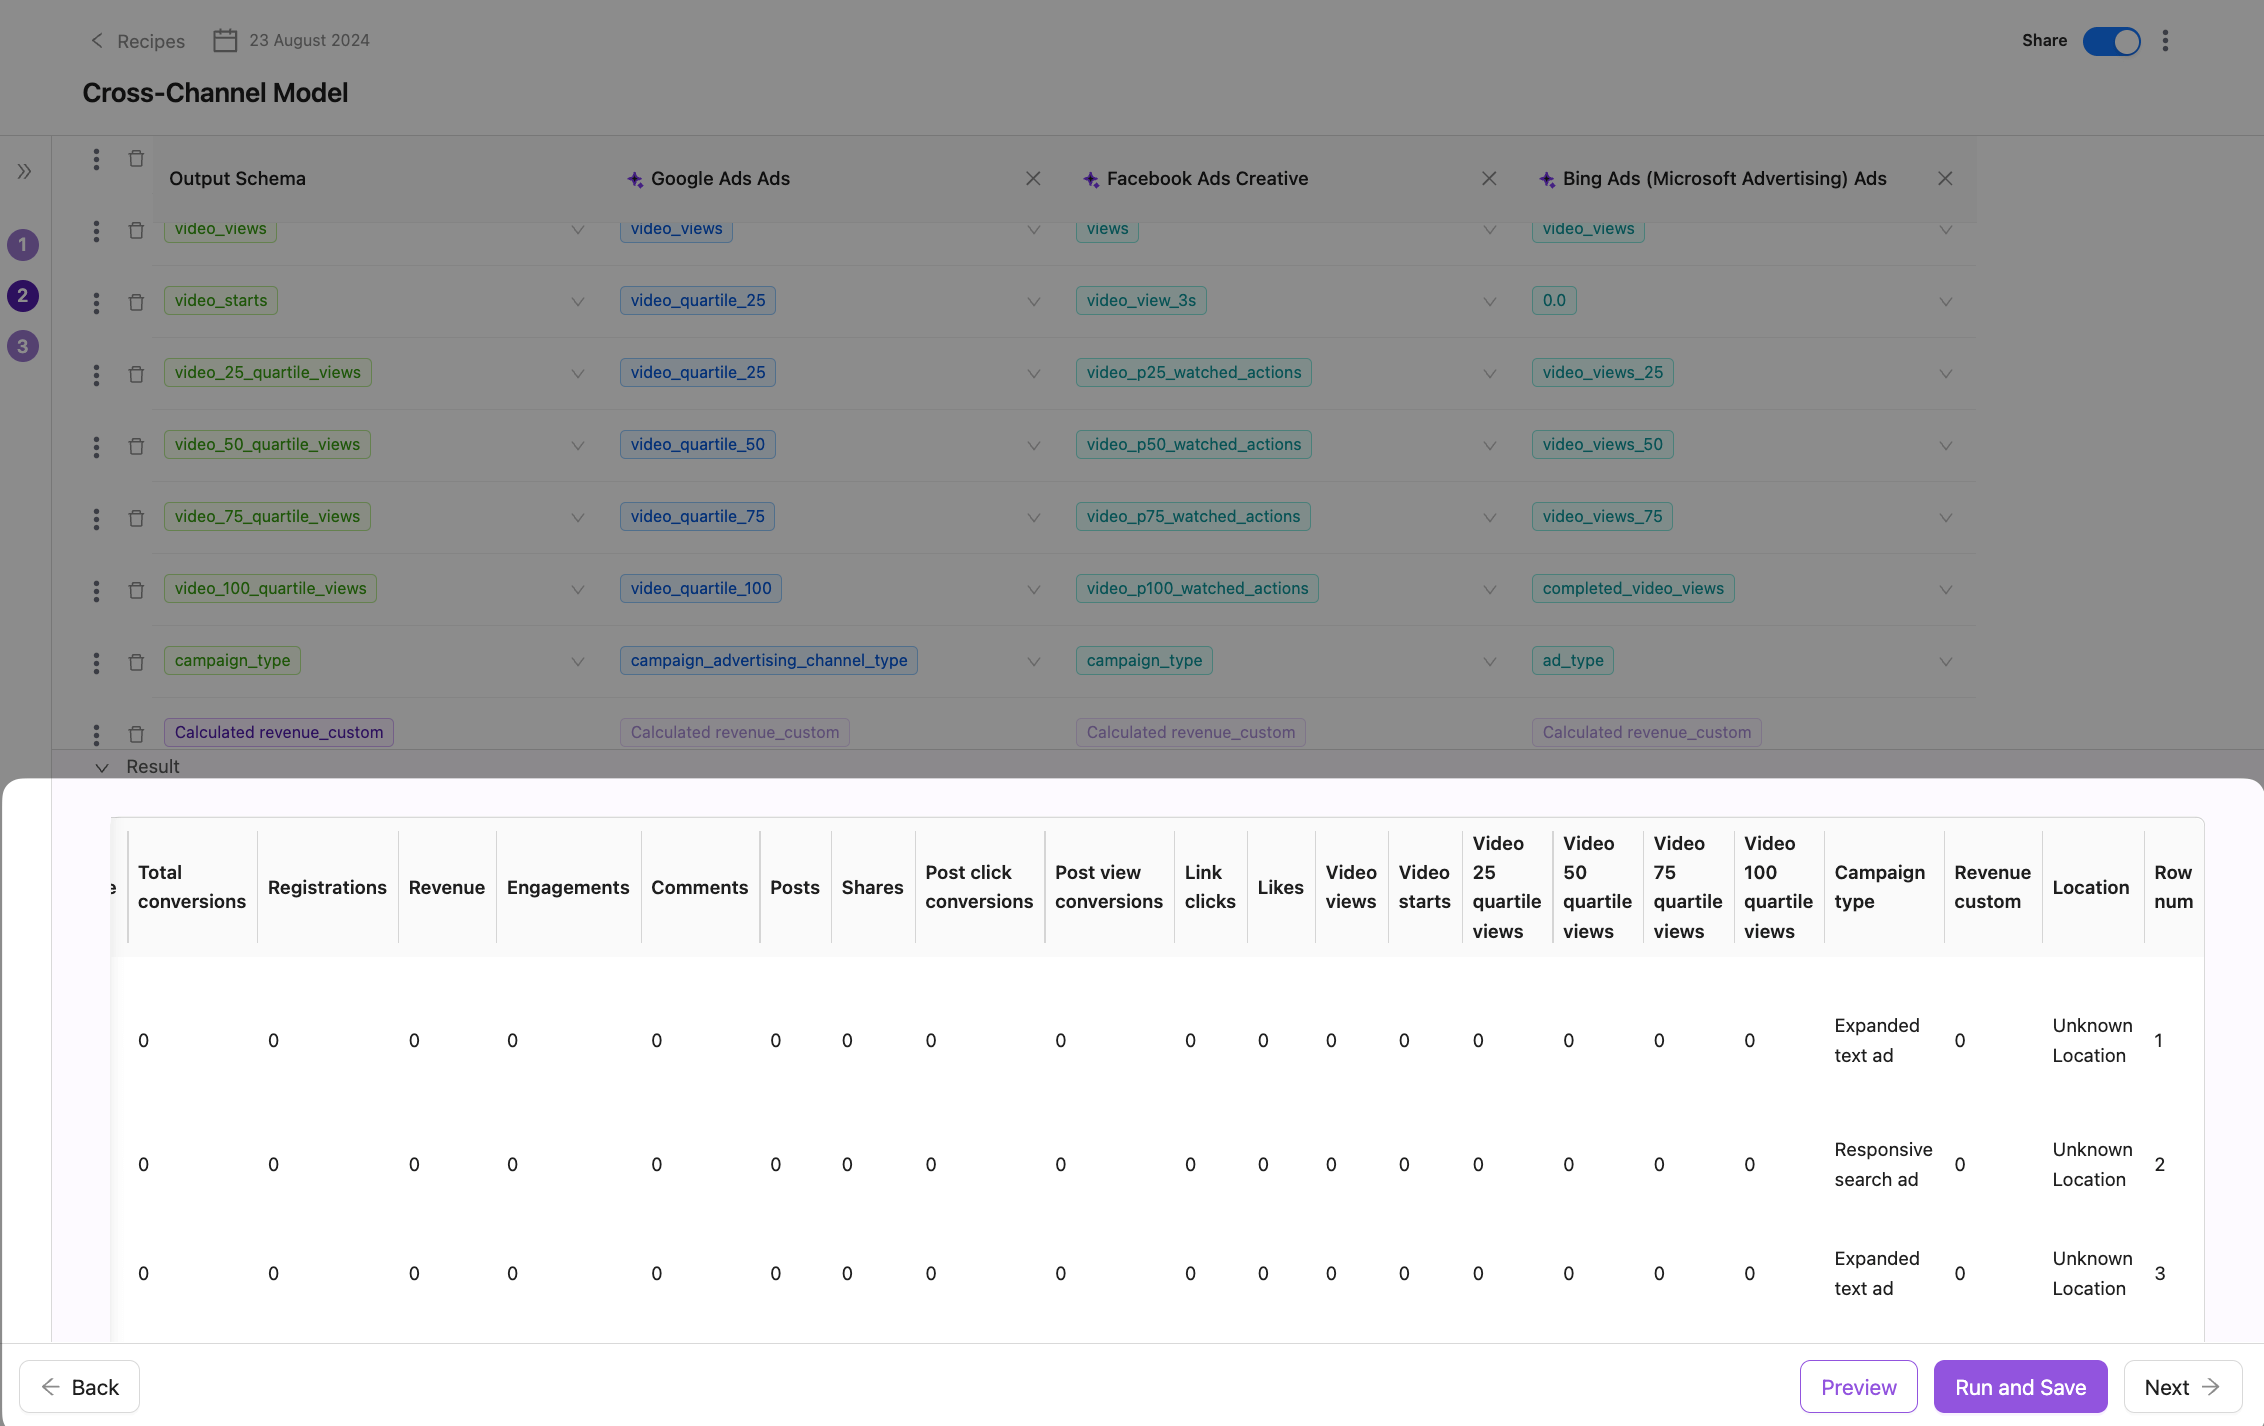
Here’s what it looks like in the data:
All formulas can be easily tested before applying them to the final model. You have a very handy tool — the Preview button.
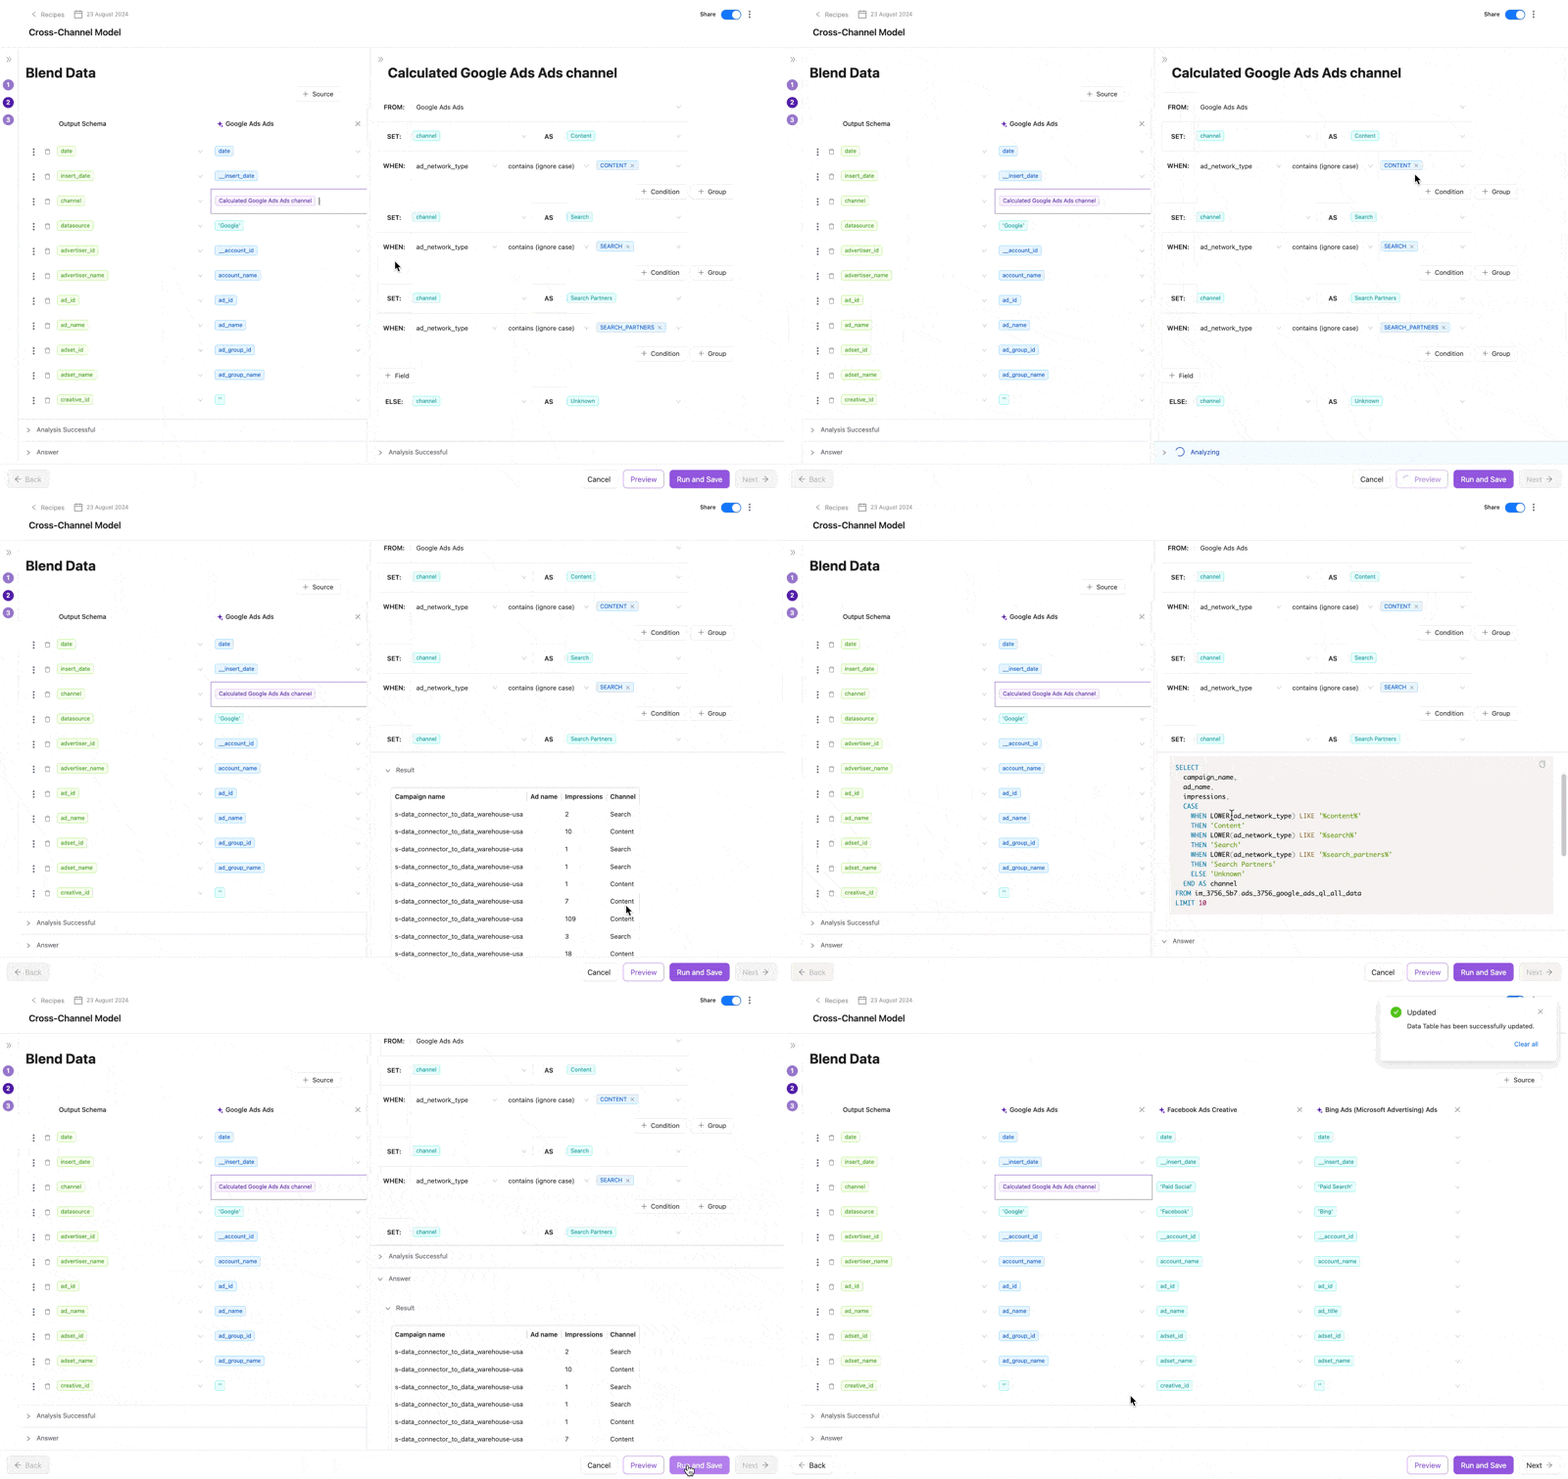
Before applying the formula to the model, you can click on Preview to see how the data will look after the conditions are applied. This allows you to validate the correctness of the formula to ensure everything is set up as intended.
Only after you are confident in the accuracy of the changes, you can click Run and Save, which will update your model and apply all the changes.
For a detailed guide on applying custom functions in this formula, please refer to this document.
Custom Formula is a powerful and flexible tool that simplifies data manipulation and transformation, making it more accessible to users. By enabling no-code calculations and dynamic value assignments, it streamlines workflows and ensures data accuracy across single tables or entire datasets. This feature is an invaluable asset for anyone looking to enhance their data analysis and reporting capabilities.
Improvado team is always happy to help with any other questions you might have! Send us an email.
Contact your Customer Success Manager or raise a request in Improvado Service Desk.