How to import naming data via CSV
If you manage large volumes of naming data (IDs, assets, creatives, or other taxonomy elements), manual editing can be slow. With the Import Data feature, you can bulk update everything by uploading a CSV file.
This process lets you map CSV columns to taxonomy columns, match rows by ID, and quickly refresh existing data in the system.
File Format
Your file must be a .csv file.
- Each column = one attribute of your naming data
- Each row = one record
- The file must include an ID column (for example, id, asset_id, creative_id)
- IDs in your CSV must match existing IDs in the system. Import is strictly an update: if the system has records with IDs 1–50, your CSV must also contain IDs 1–50. Any unknown ID will be skipped, and no new data will be created.
Example:
| id | Type | Location | Channel | Audience | Objective | Metric |
|---|---|---|---|---|---|---|
| 1001 | Prospecting | US | Meta | Lookalike_1% | Conversion | CPA |
| 1002 | Retargeting | CA | Visitors_30d | Traffic | ROAS | |
| 1003 | Awareness | UK | FTV_180d | Engagement | CTR |
How to import naming data?
Step 1: Open Import Dialog
- Navigate to the Taxonomy page
- Open Workbook you want import data to
- Click Actions in the top toolbar
- Select Import Data
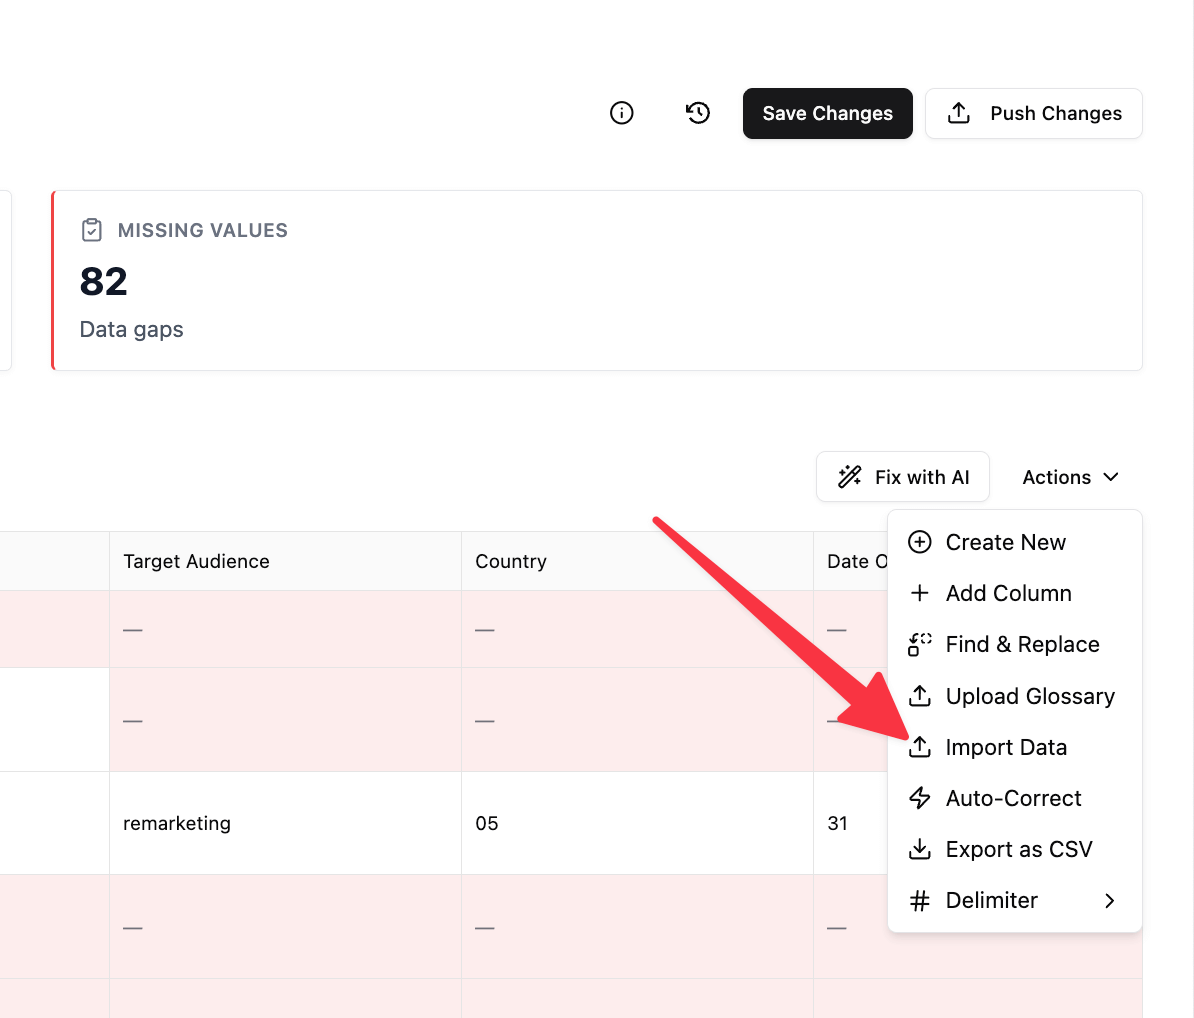
- Import dialog opens showing Step 1 of 2
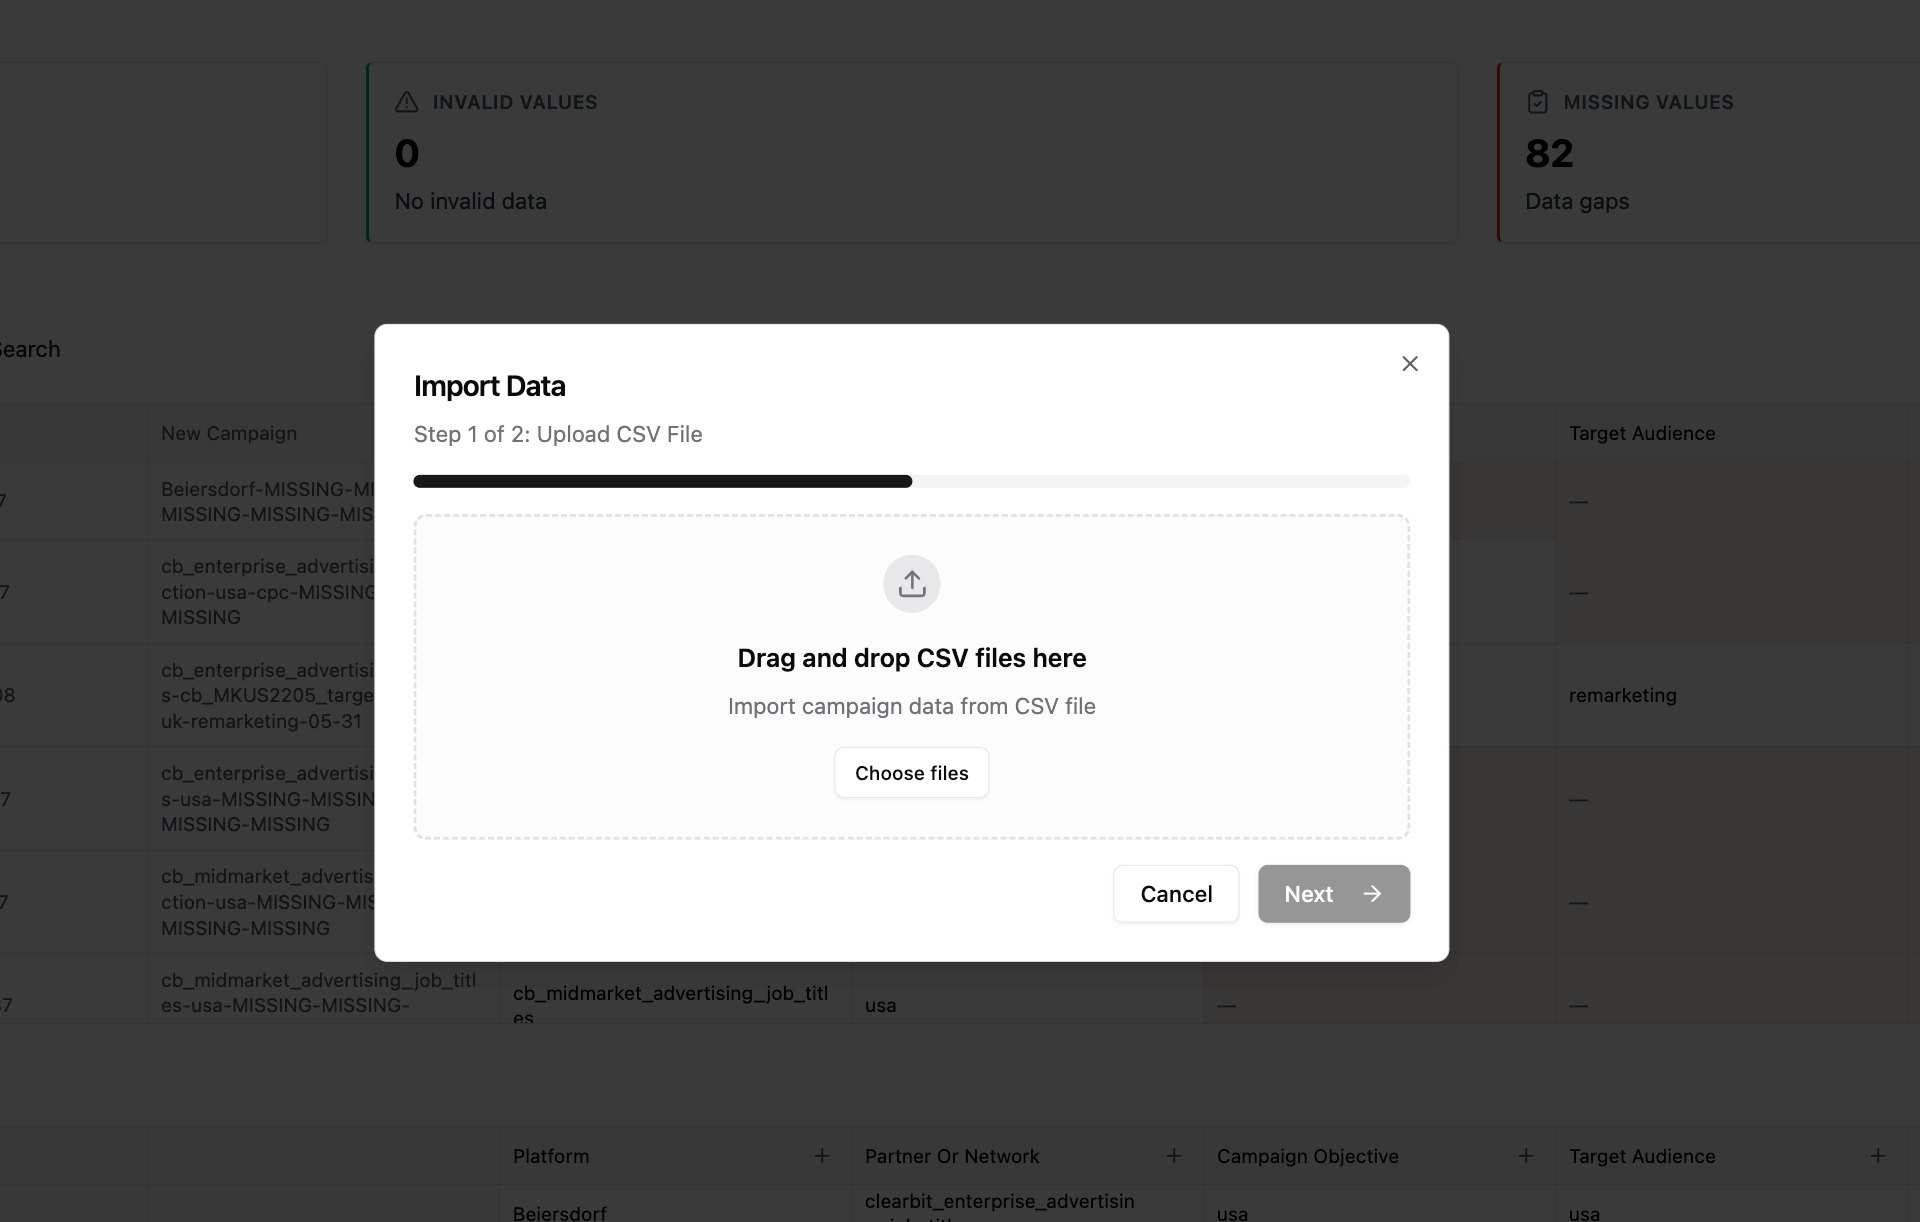
Step 2: Upload CSV File
- Drag and drop your CSV into the upload zone, or click to select a file
- System parses your CSV automatically
- Preview shows:
- Column headers
- First 5–10 rows of data
- Sample values for each column
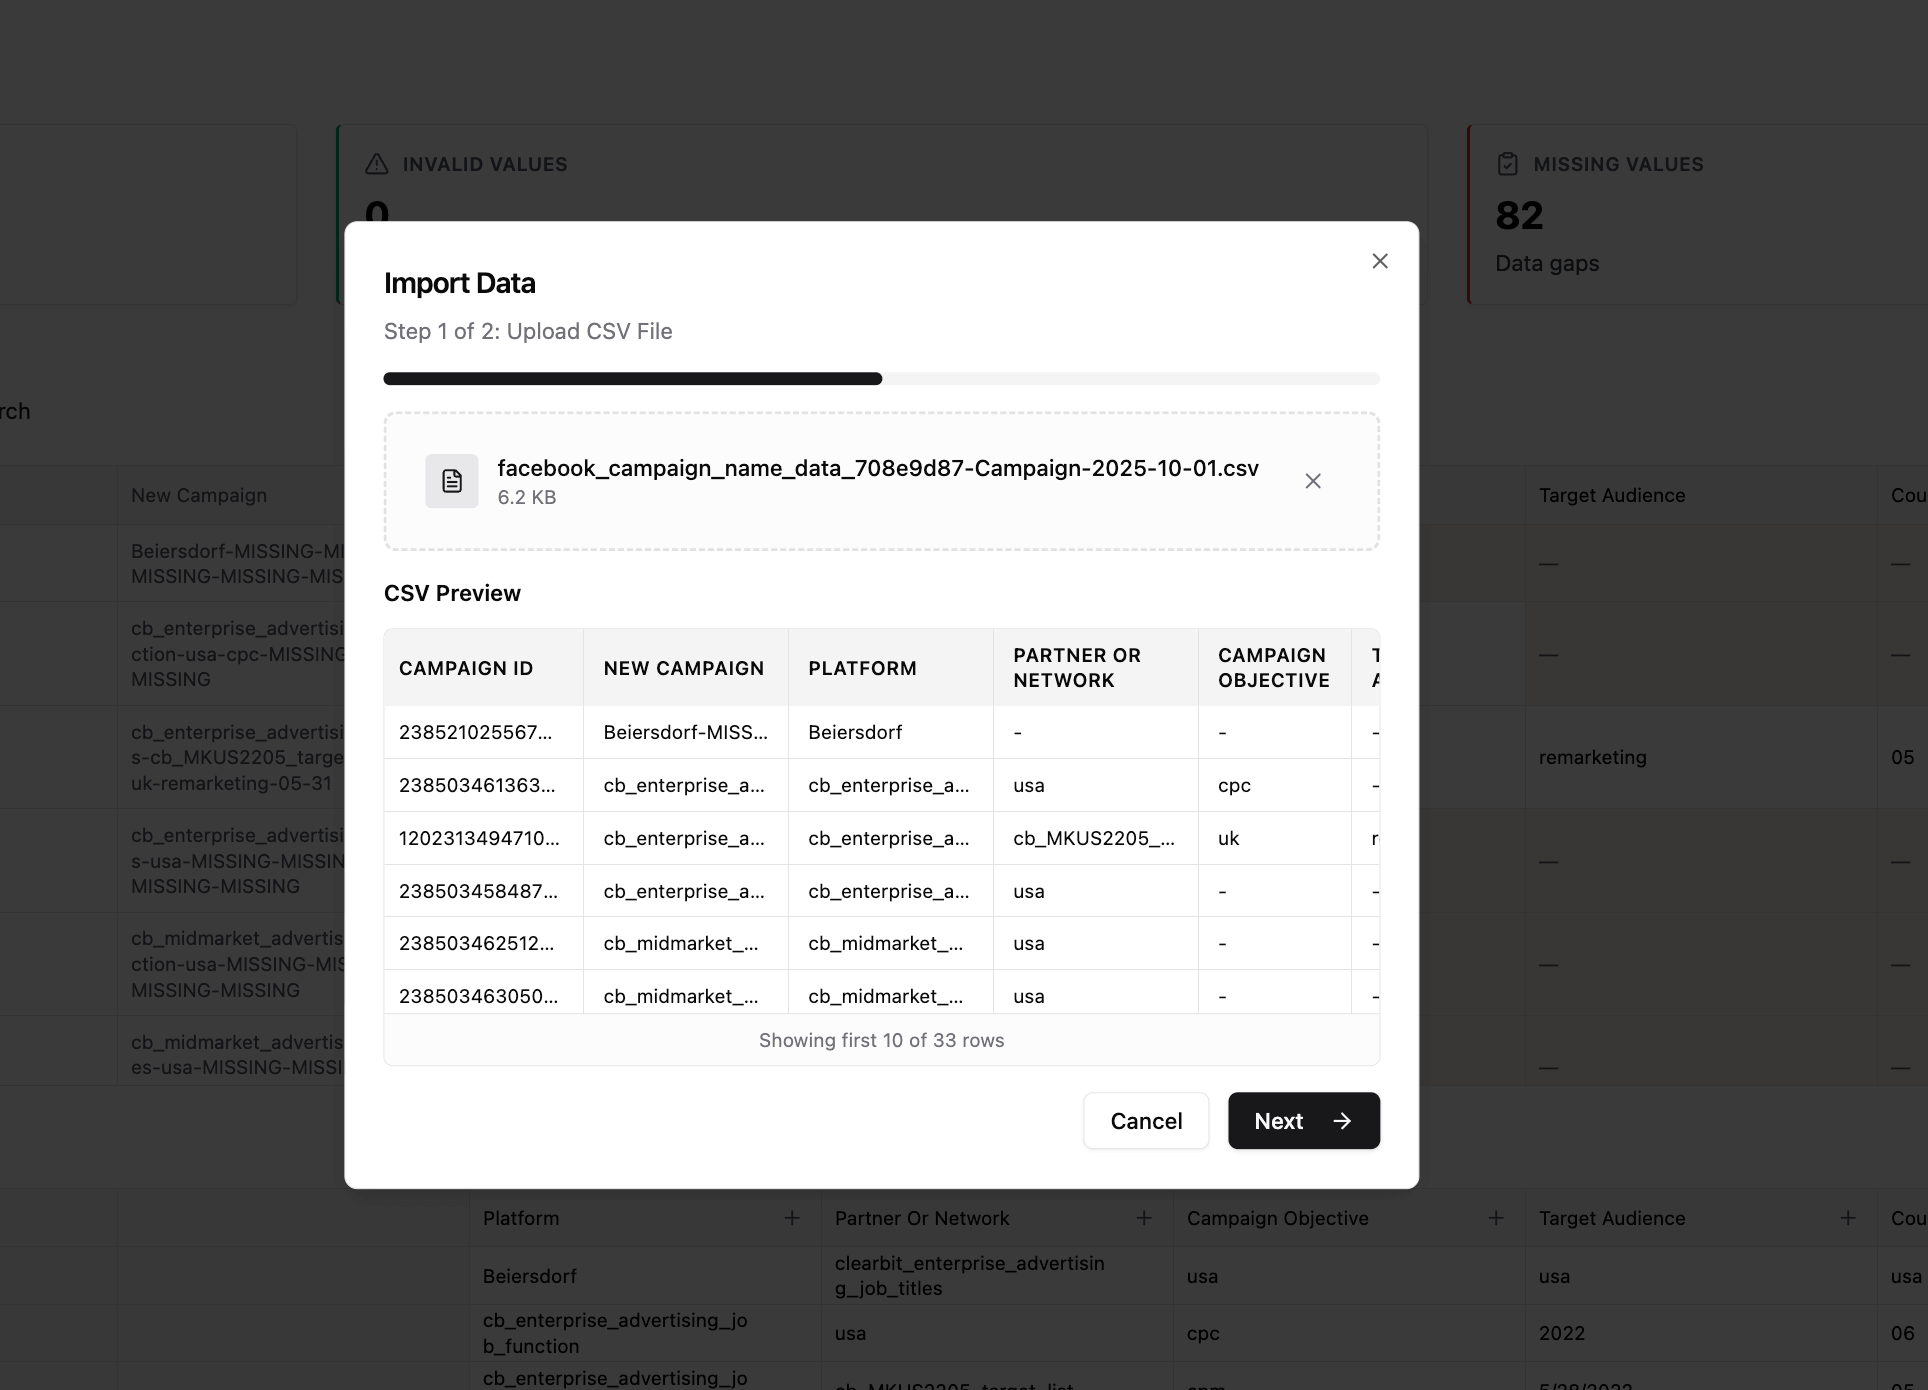
- If it looks correct, click Next
Step 3: Configure Import Settings
Select ID Column
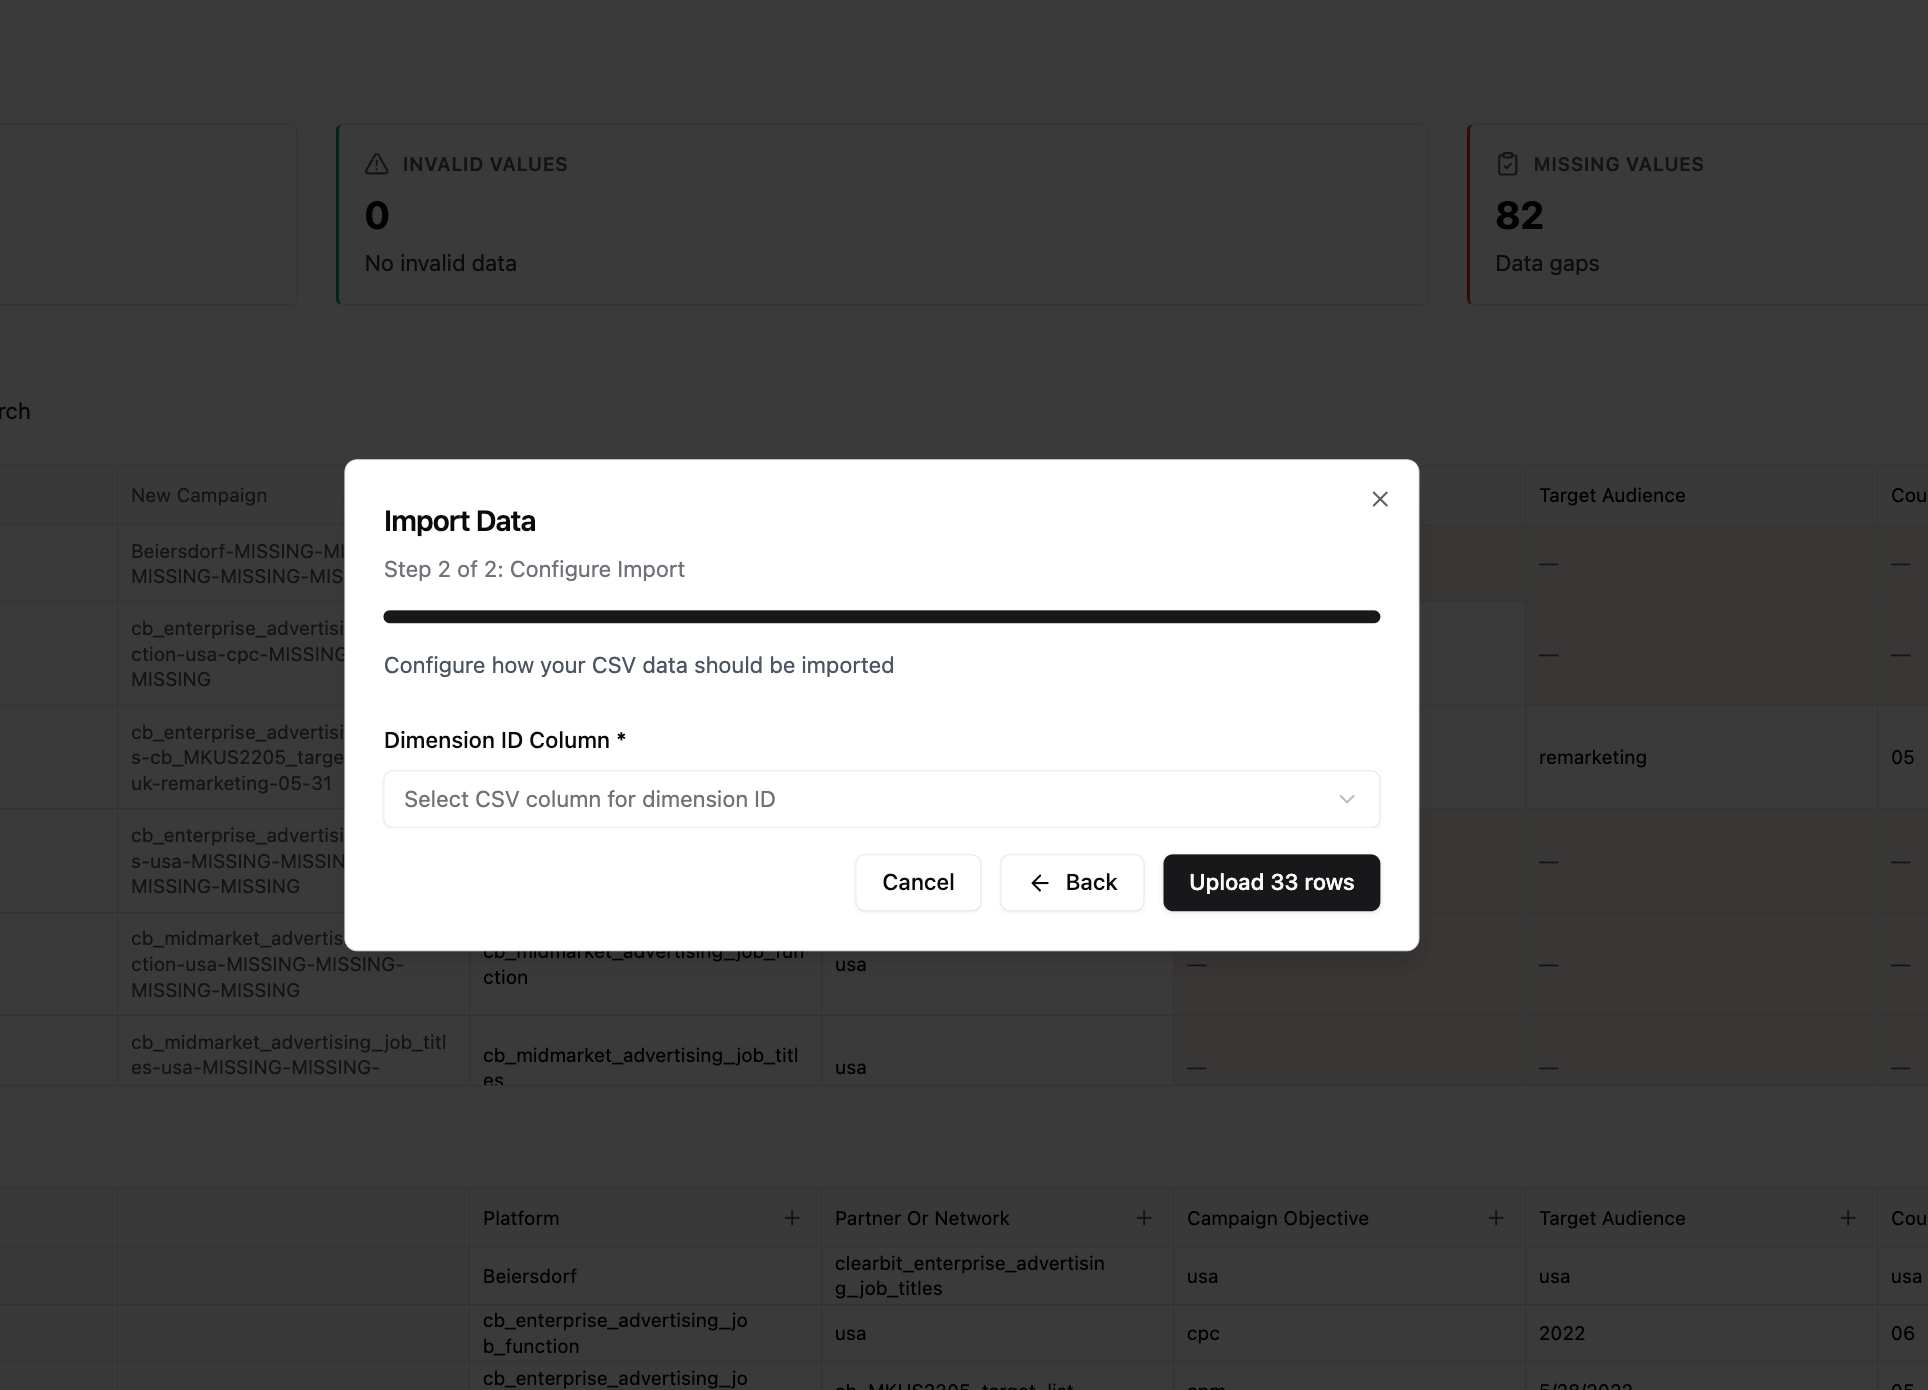
- Choose the column that contains unique IDs (e.g., id, asset_id)
- This tells the system which existing records will be updated
Map CSV Columns
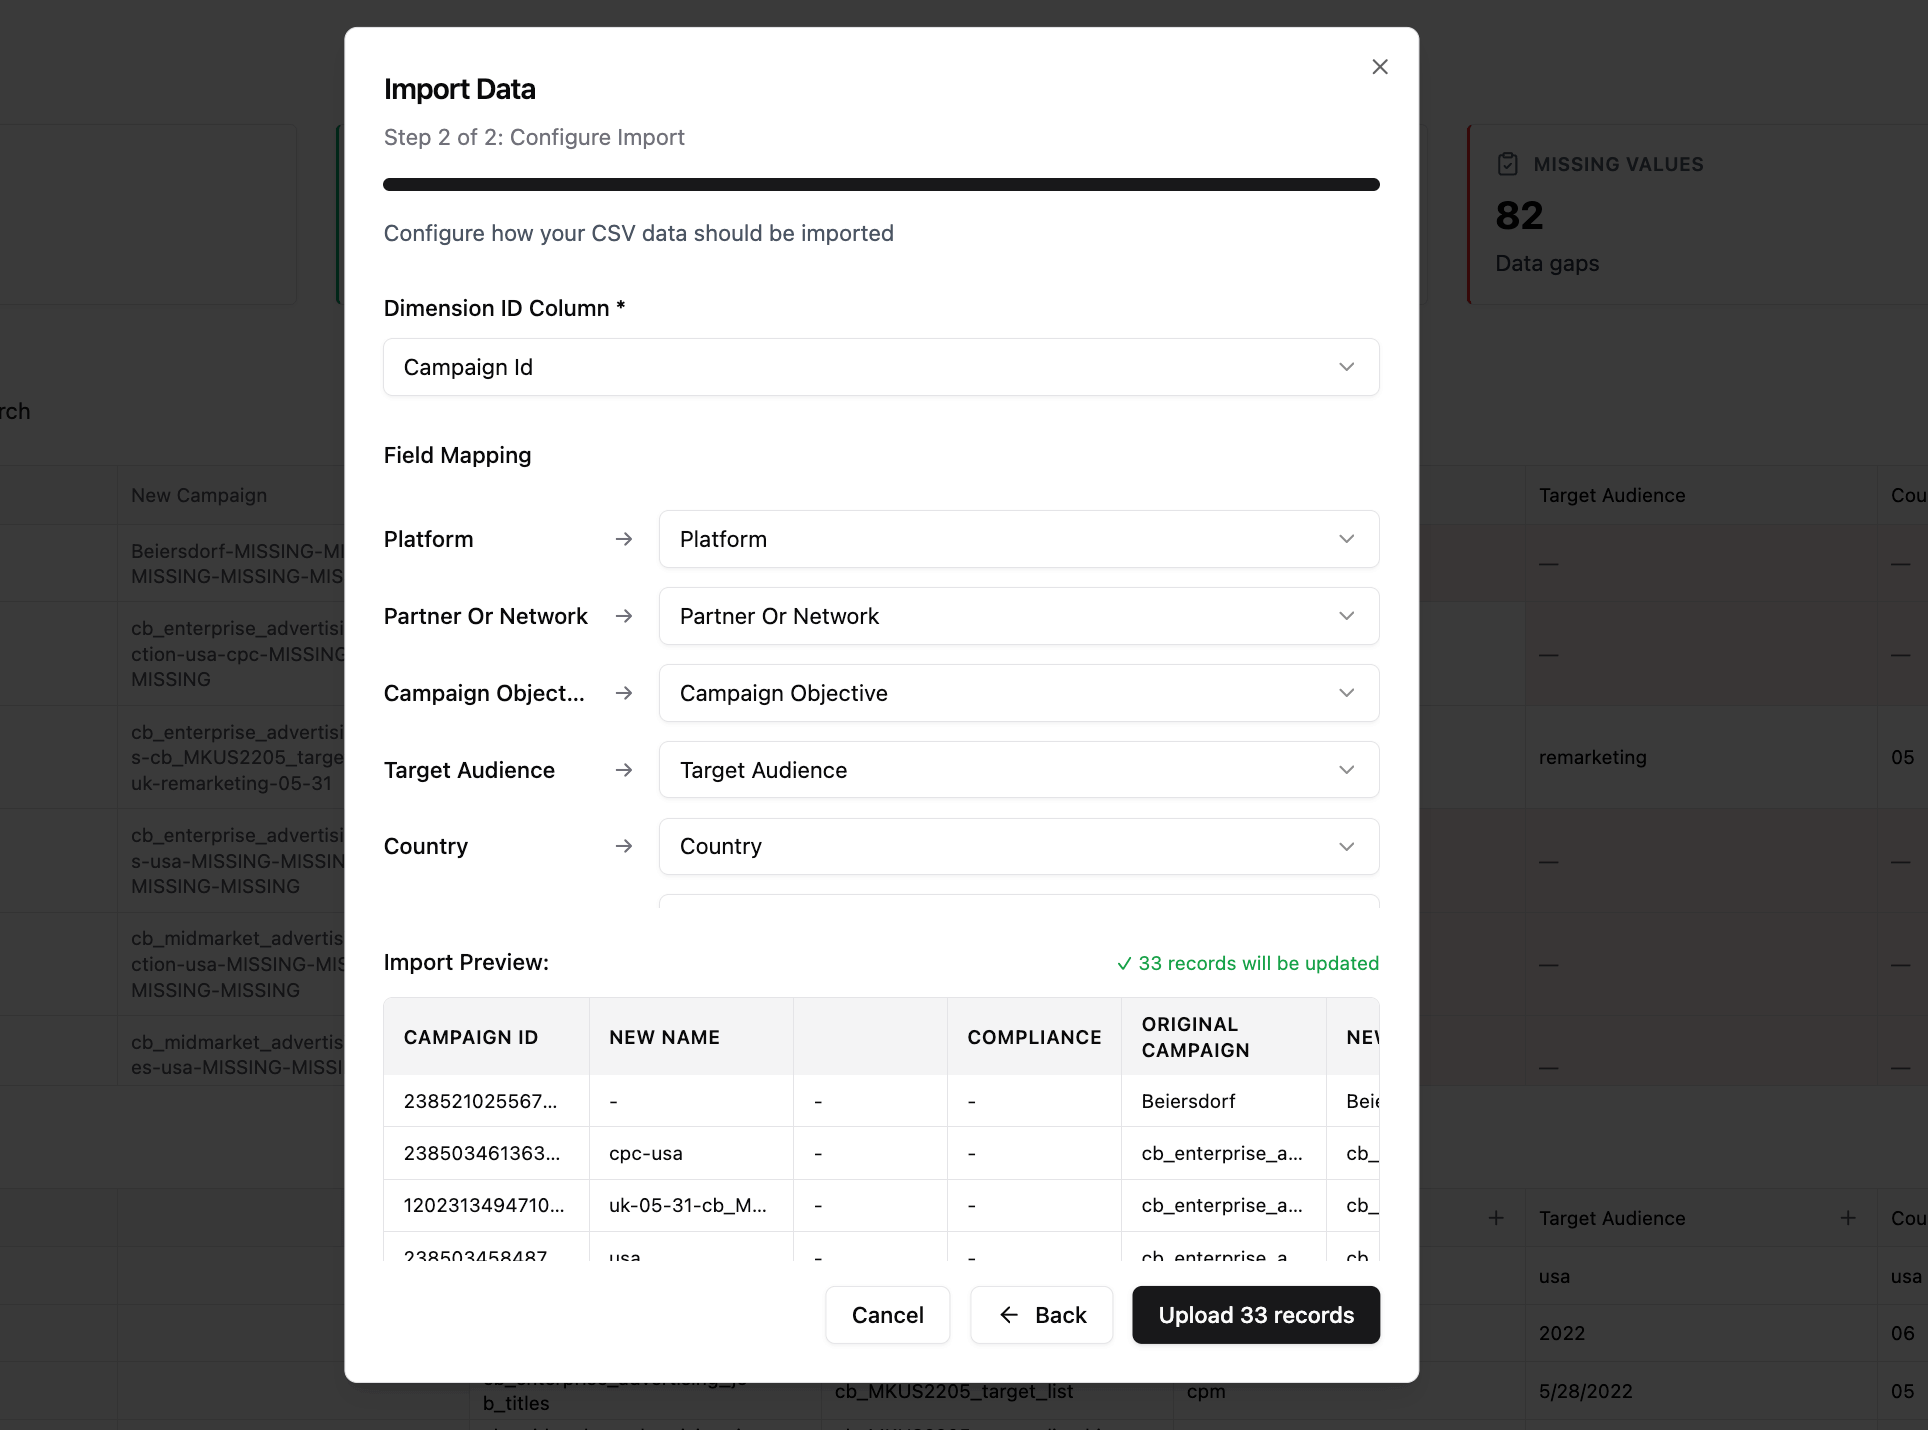
- System auto-maps CSV column names to taxonomy columns
- You can:
- Accept auto-mapping
- Change mapping manually
- Skip column (it won’t be imported)
- Only editable taxonomy columns are available
Review Import Preview
- System shows statistics:
- Will Update: X records
- Will Skip: Y records
- Example rows show:
- ID
- What values will change
- Whether a row updates or is skipped
Step 4: Execute Import
- Click Upload
- System processes the CSV in batches (for large files)
- For each row:
- If ID exists → mapped columns are updated
- If ID does not exist → row is skipped
- Progress bar shows status
- Success message appears: “Data imported! Updated: X, Skipped: Y”
- Updated data appears in the taxonomy table
- “Unsaved Changes” indicator appears
Step 5: Save or Discard Changes
- Review imported data in the taxonomy table
- You can:
- Save Changes → permanently commit updates
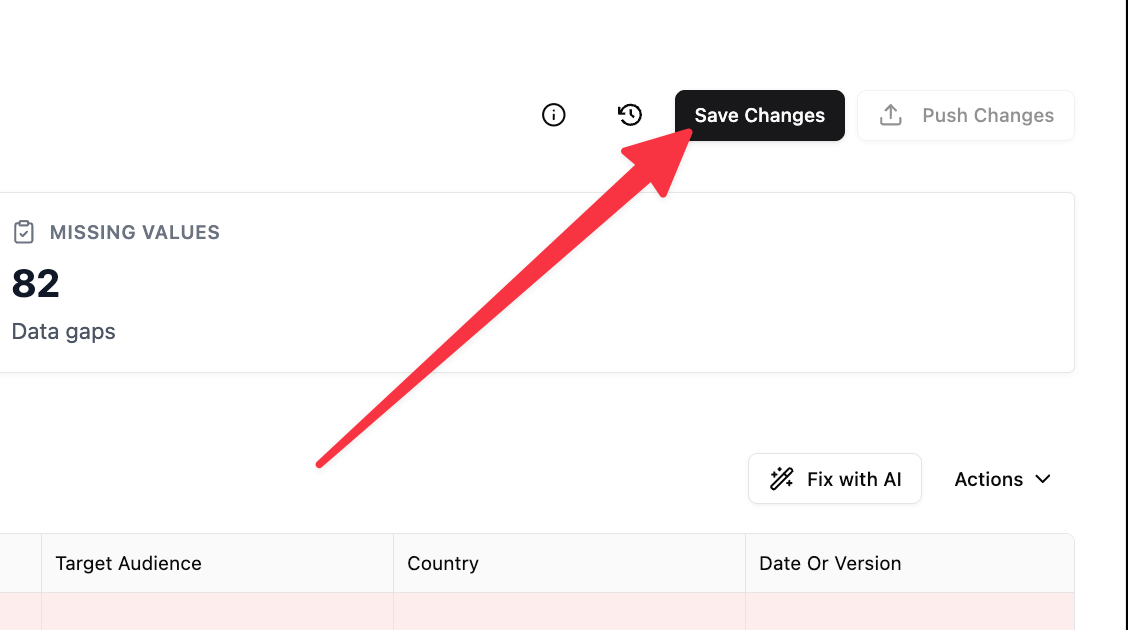
- Continue editing before saving (import + manual edits together)
Conclusions
Import Data is designed to refresh existing naming data, not to create new entries. Every row in your CSV must reference an ID that already exists in the system.
The import substitutes values: if your system has records with IDs 1 to 50, your CSV must also include IDs 1 to 50. When the file is processed, the system overwrites mapped fields for those IDs. Rows with IDs that are not found are skipped, and no new records are created. After the import, the modified data is shown as “Unsaved Changes” until you explicitly save it.
Was this article helpful?
Thanks for the feedback!