How to upload your own glossary
Campaign names get automatically parsed — we split them by delimiters and try to match each part to known values (like Prospecting, Meta, CPA, etc).
But if that’s not enough — or you want full control — you can upload your own Glossary. It becomes the source of truth for all naming validation and taxonomy logic.
File Format
Your file should be a .csv file.
- Each column = 1 naming part.
- Each row = allowed value.
Example:
| Campaign_Type | Location | Channel | Audience | Objective | Primary_Metric |
|---|---|---|---|---|---|
| Prospecting | US | Meta | Lookalike_1% | Conversion | CPA |
| Retargeting | CA | Site_Visitors_30d | Traffic | ROAS | |
| Brand_Awareness | UK | FTV_180d | Engagement | CTR | |
| Lead_Gen | AU | TikTok | Cold_Interest_Sports | Lead | CPL |
How to upload your glossary to an existing list?
Step 1: Upload the file
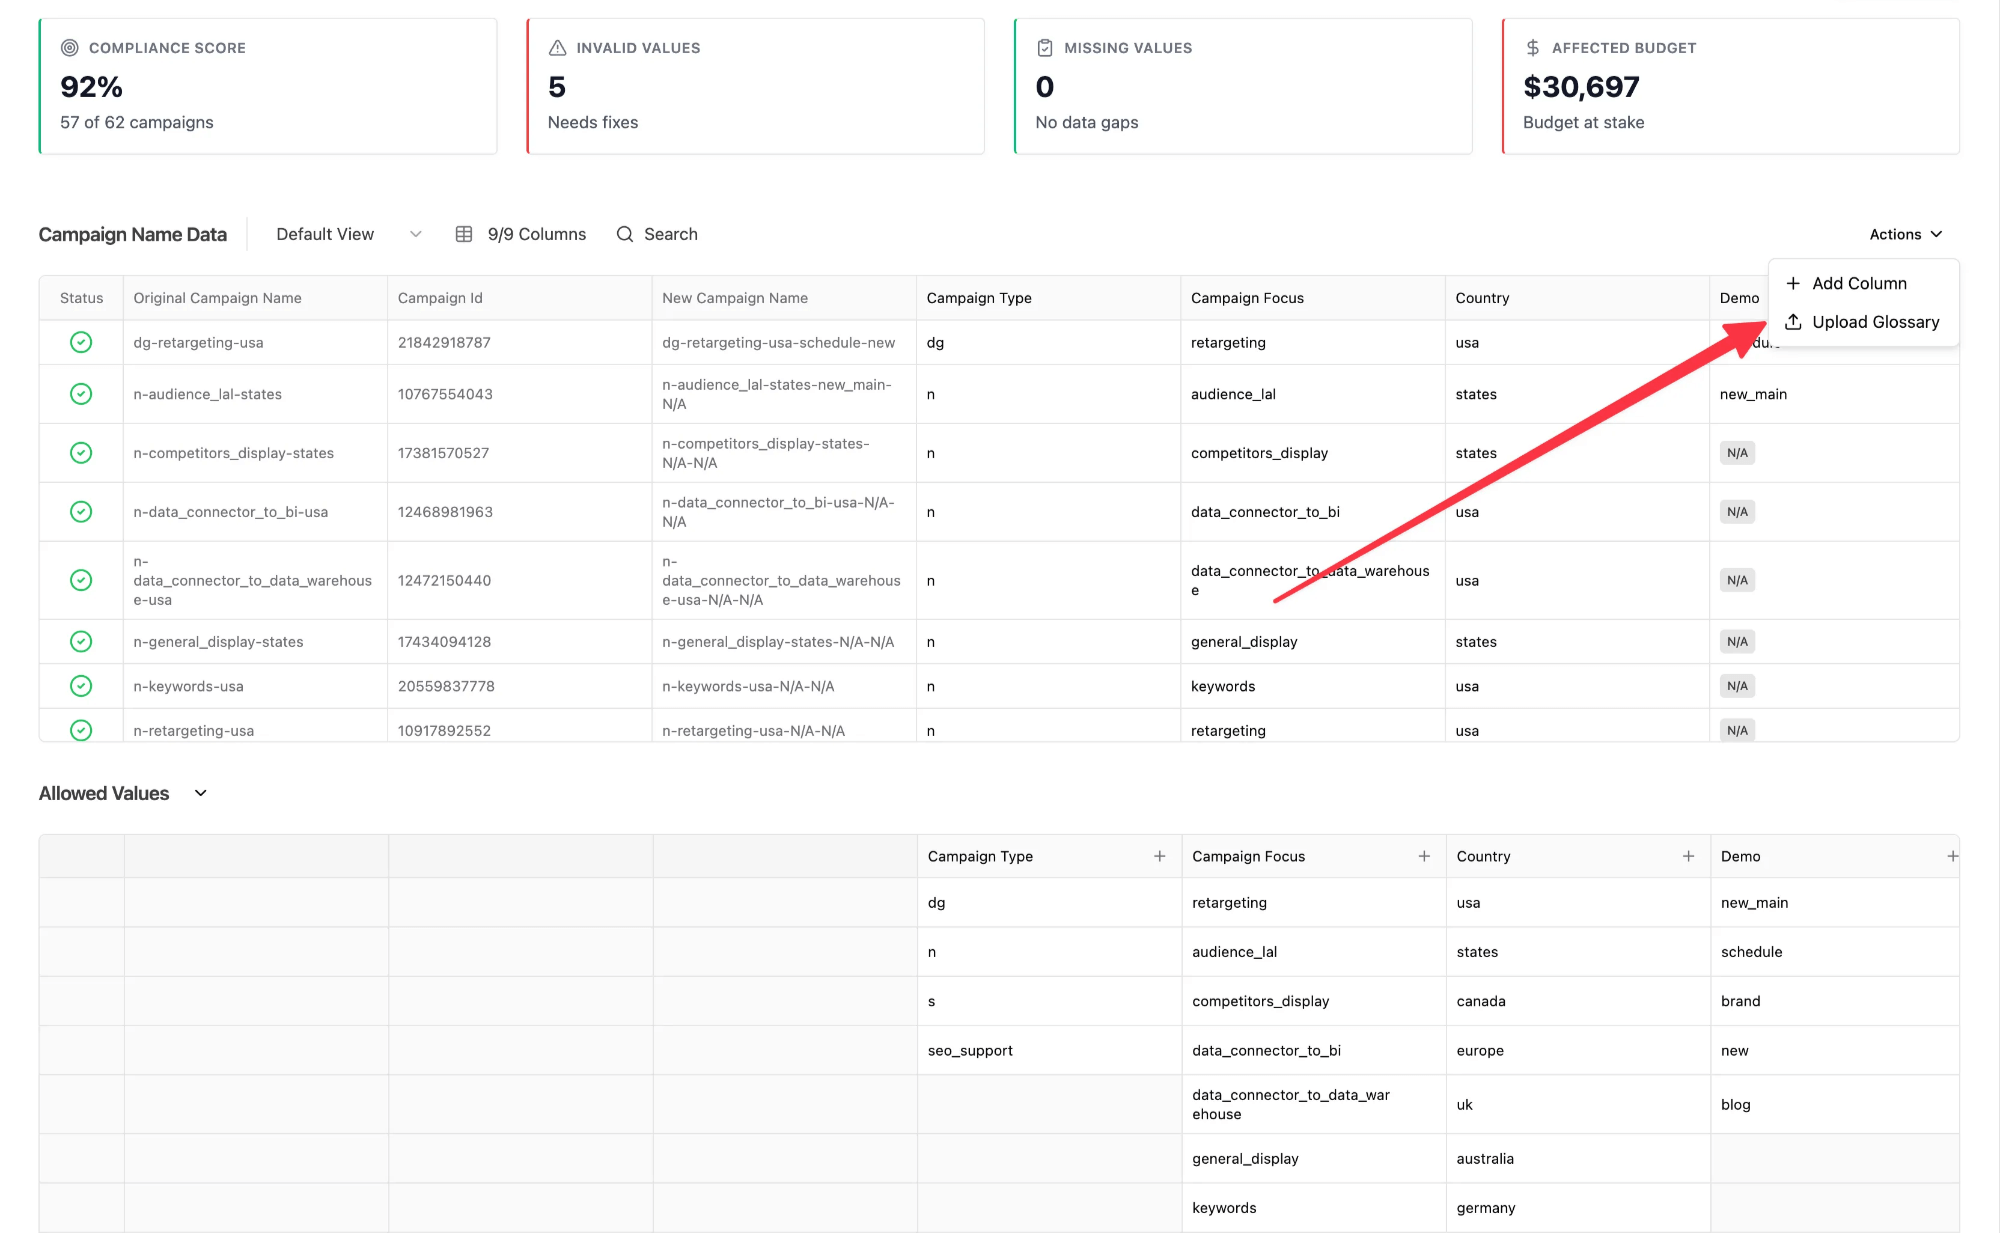
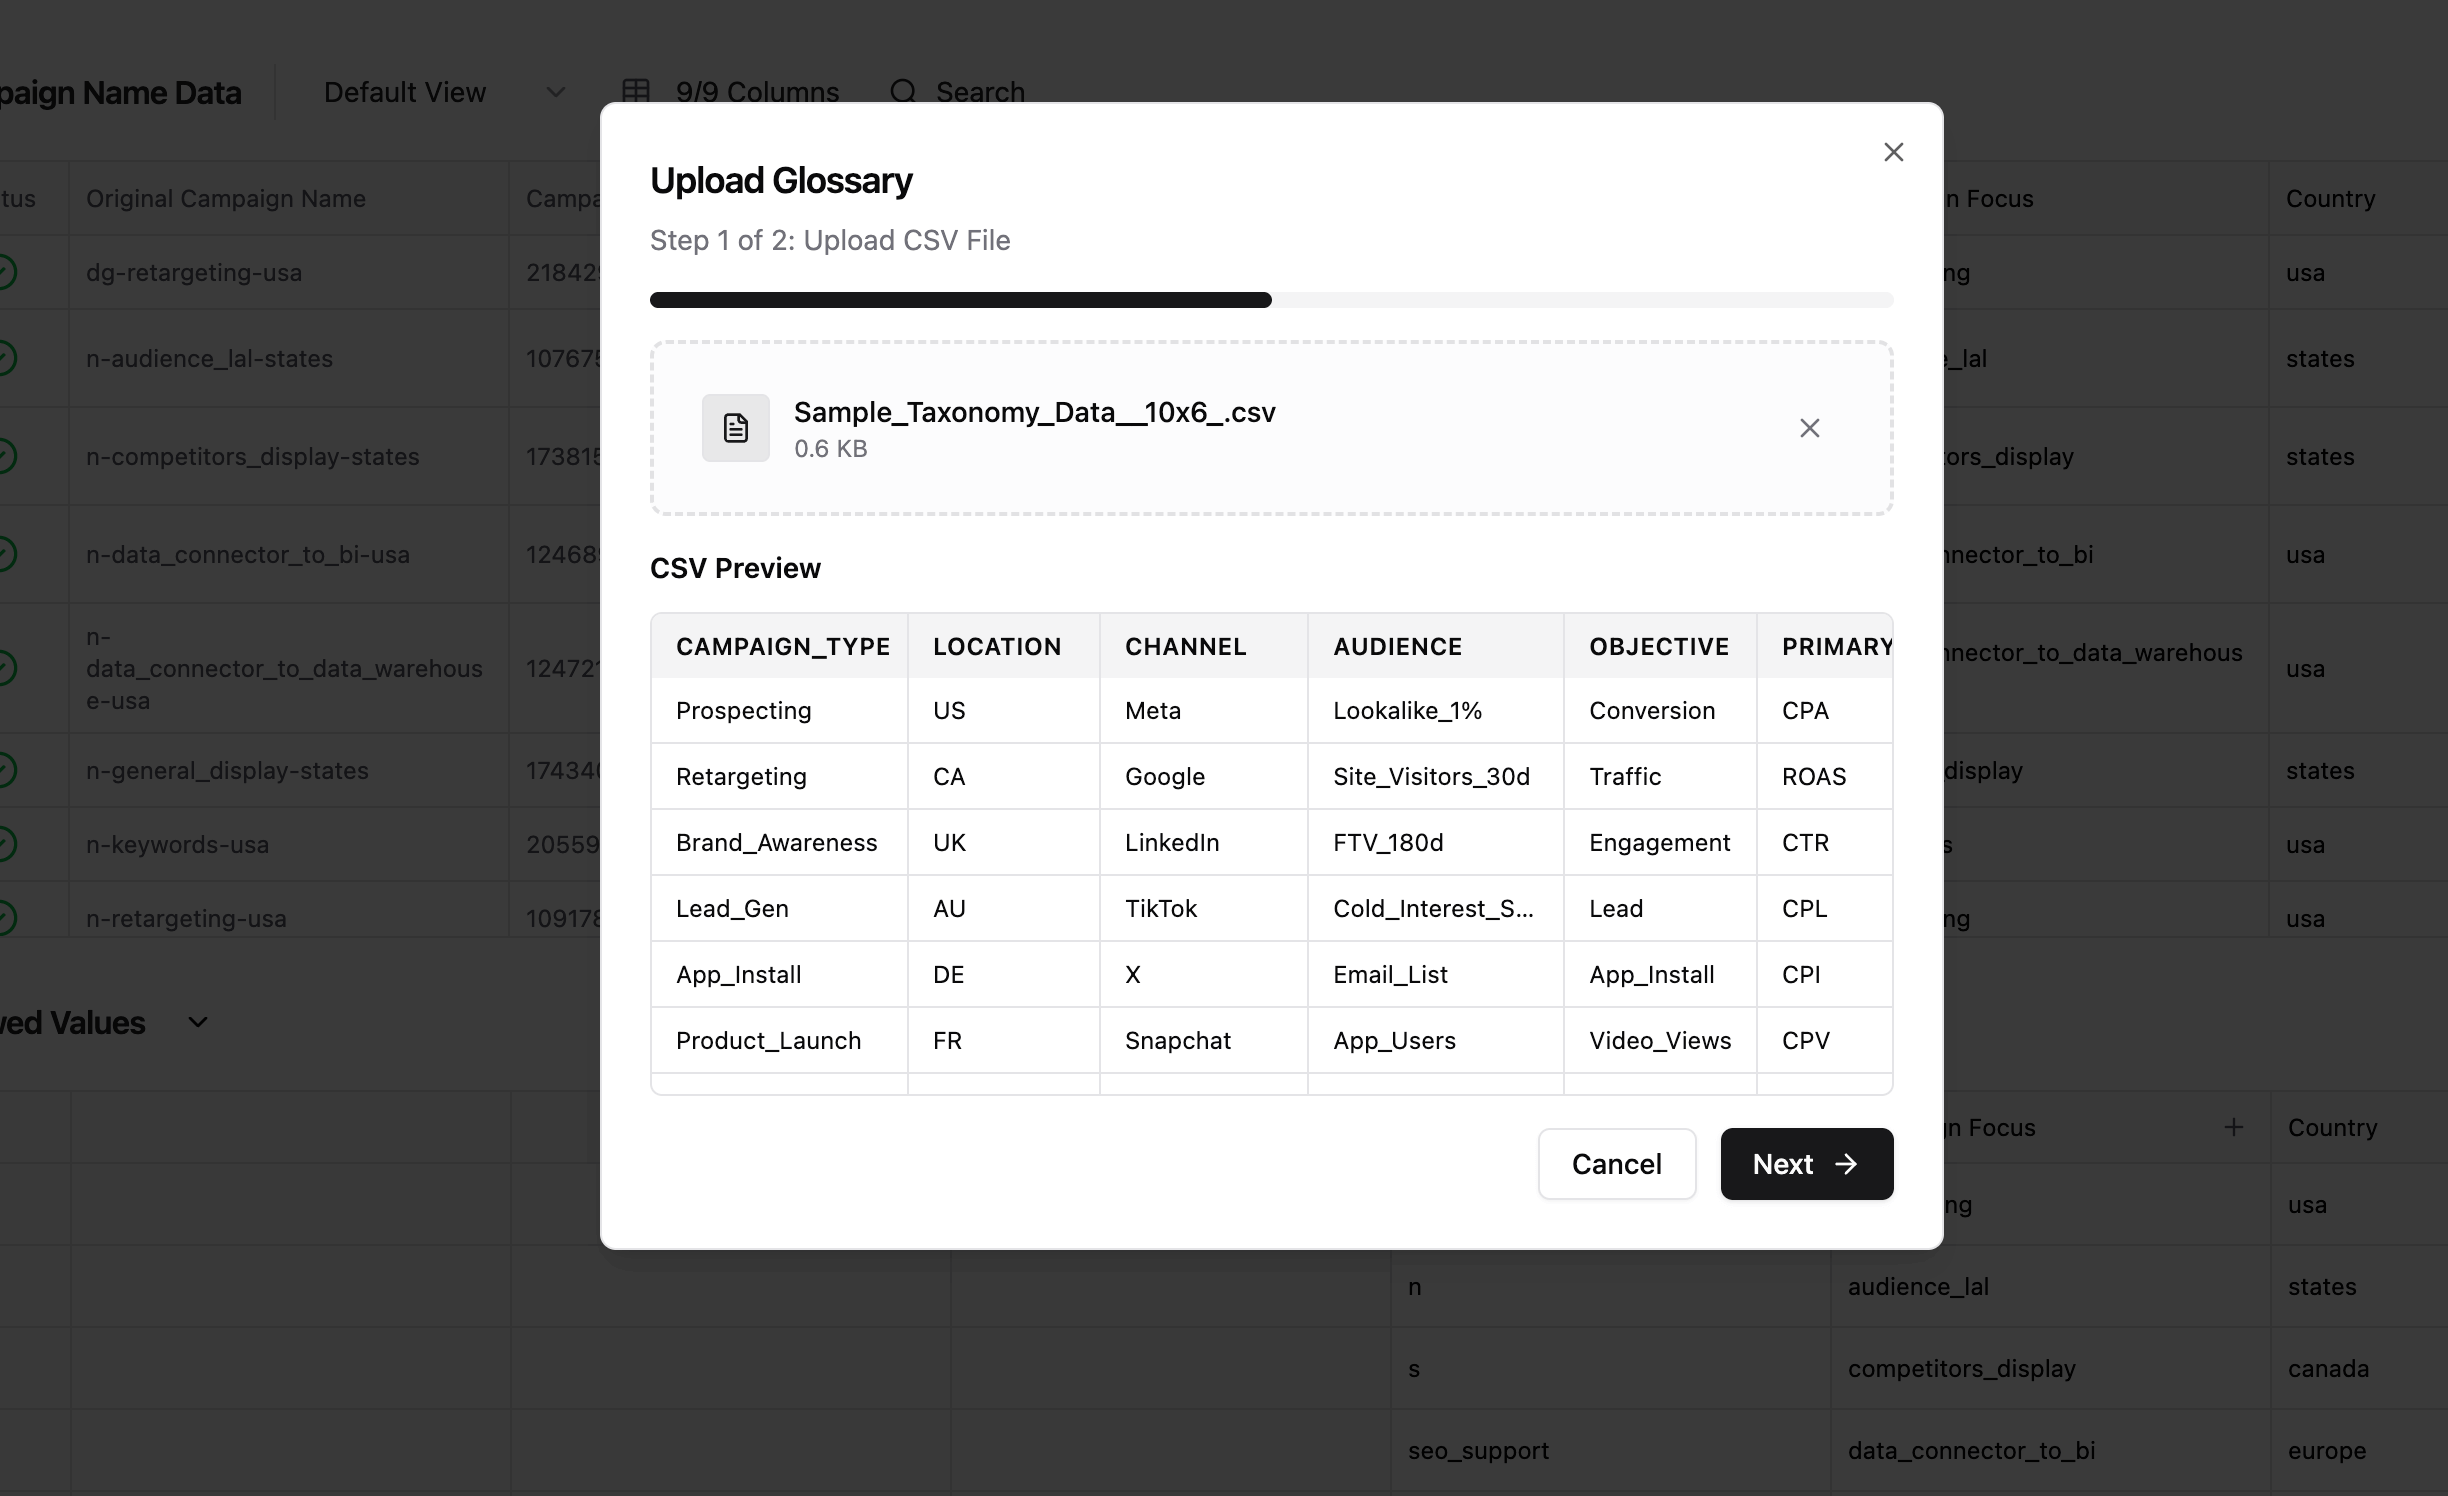
Go to the platform, click Action → Upload Glossary, and drop your file. A preview will open instantly. If it looks correct — hit Next.
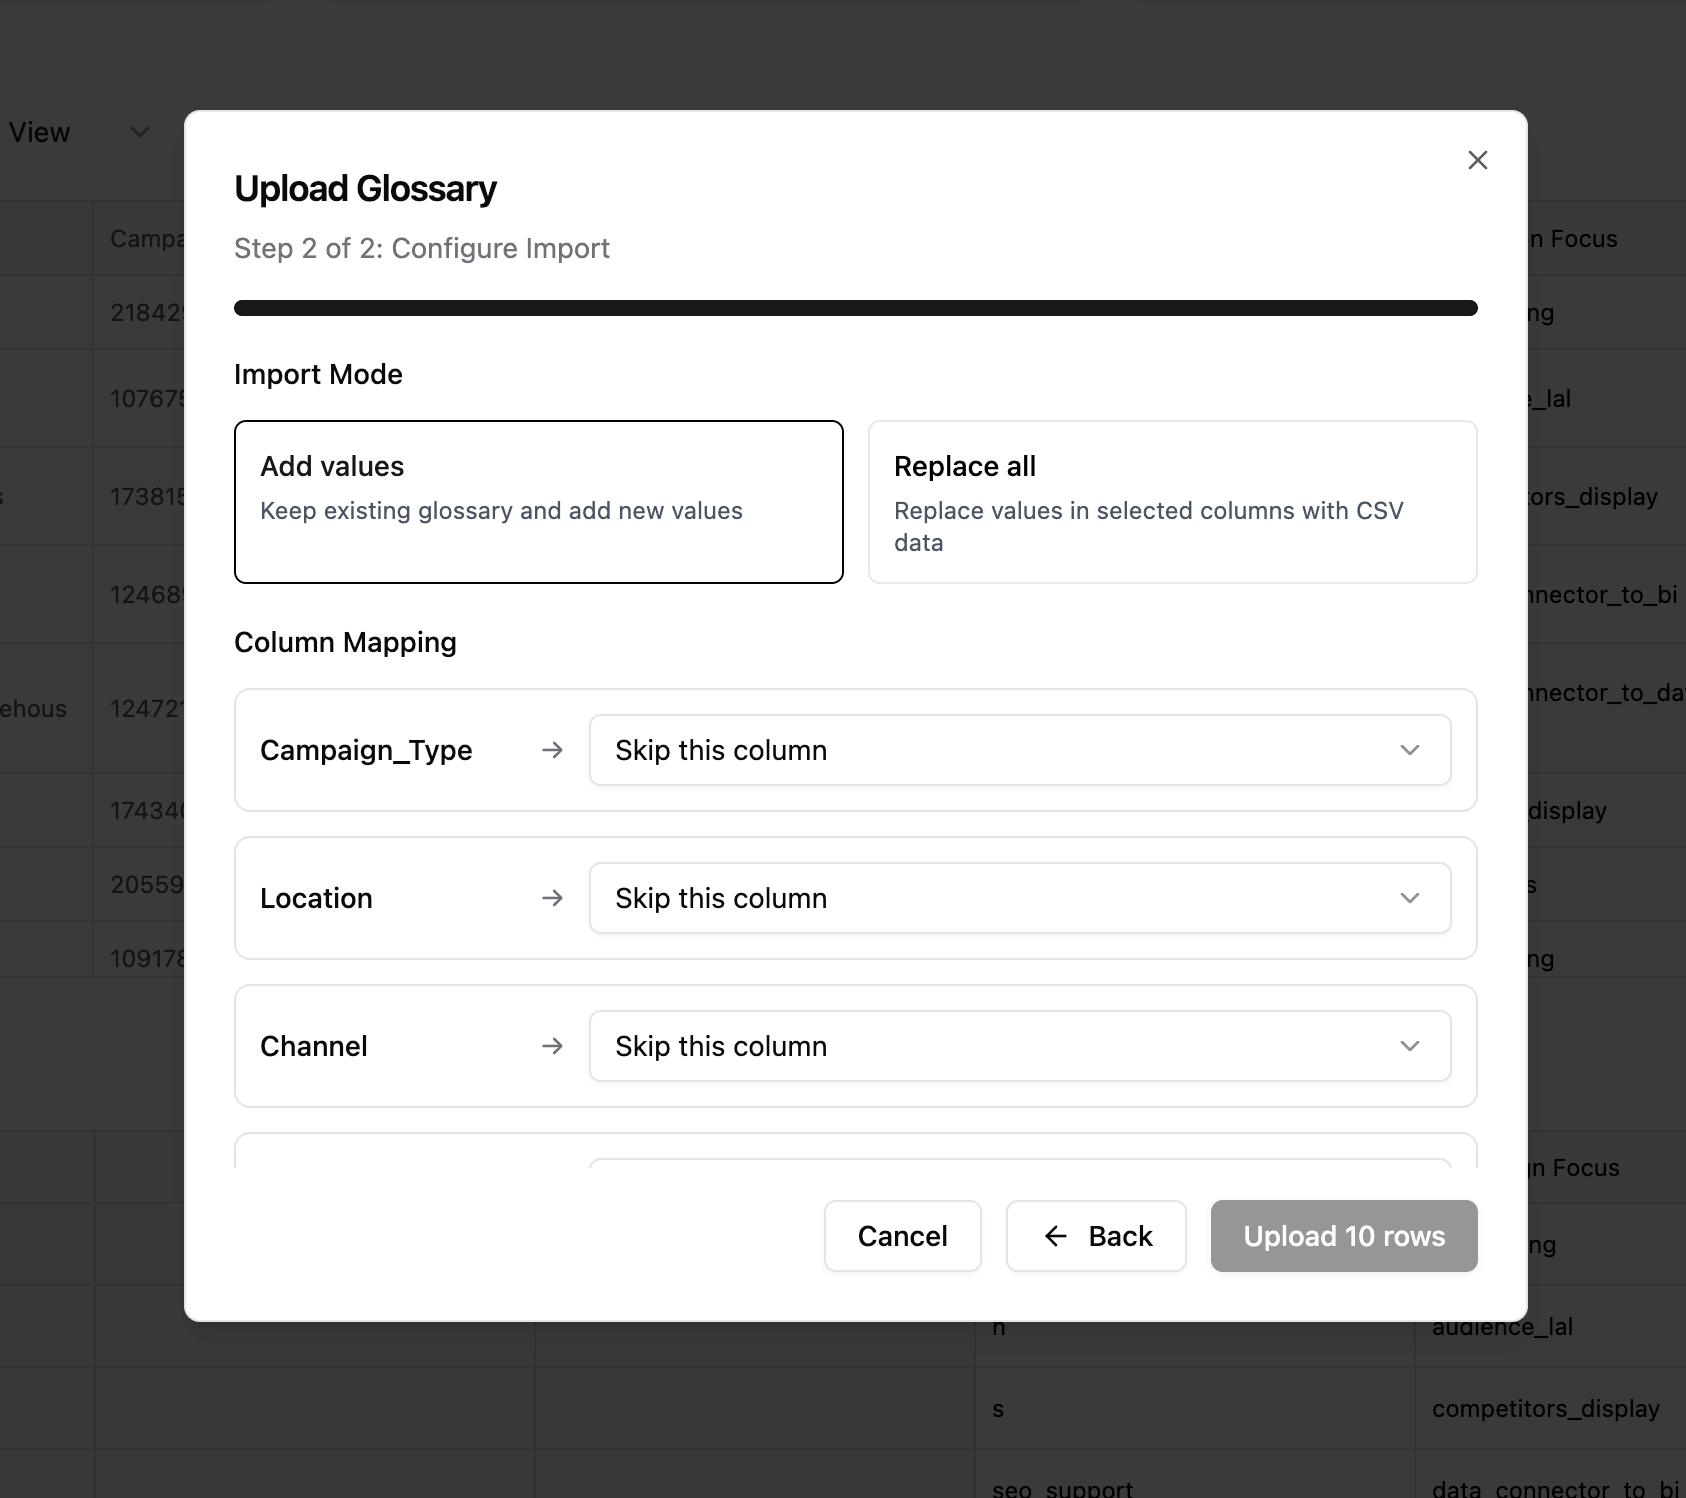
Step 2: Choose import mode
This step determines how each individual column in your file updates the glossary.
You’ve got two global modes:
- Add values — the system will append values to the columns you map.
- Replace — the system will fully overwrite values only in the columns you map.
Here’s the key:
You’re not replacing or appending the entire table — you’re doing it column by column.
You also explicitly choose which columns to map.
For each column, you can:
- Map it to an existing part — and based on the global mode, it’ll either append or replace.
- Create as a new column — to track something new.
- Skip column — nothing happens to that column in the glossary.
Only the columns you explicitly map will be touched. Everything else stays as is.
Step 3: Map your columns
Here, just tell the system what each column in your file means.
For example, if your file says Location but the system expects Country, you can match them manually.
You can also skip a column entirely or create a new part of the naming convention.
Step 4: Upload
Click Upload — done. Your Glossary is now active and powering all validation and naming logic in the system.
Conclusions
Glossary defines the allowed values for each part of your naming convention.Only mapped columns will be affected — either appended or replaced, depending on the selected mode. Once uploaded, it becomes the reference point for validation, parsing, and transformations.
Was this article helpful?
Thanks for the feedback!